游戏逻辑 前后交互
分析
后续游戏必然是对战模式 人vs人 人vs机器 机器vs机器 或许也可以开一个单机模式 本地两边操控玩
既然是对战 就得实现匹配系统
把每个打开该游戏的用户视为client端
点击匹配时 其实是向服务器发送一个请求 进入匹配池 具体的这里不再赘述 thrift中有讲
这里关注一个点 我们的匹配系统与客户端实际是一个异步的过程(匹配时间未知 但一旦有结果就要立刻返回给客户端 并非一问一答) 当我们客户端发送匹配请求时 并不能和之前获取bot列表一样 一发送过去就直接得到结果 我们的客户端需要的东西可能要等到匹配系统里面得到结果才能返回 所以 之前的http协议在这里是不能满足需求的 我们需要换成websocket协议 双向通信
另外 在我们这个游戏中 地图的生成 结果的判定 都应该放在后端来进行 前端只做动画的演示 防止用户作弊
但并非所有的游戏都是后端判定 比如fps游戏 用户的操作比较频繁 如果所有操作都放在后端判定的话 就会非常卡顿 影响游戏体验 所以这类游戏会把一些判定放在客户端 所以吃鸡、cf等游戏的外挂特别多 所以具体把判断放在哪里 得看对体验感和公平性的一个权衡
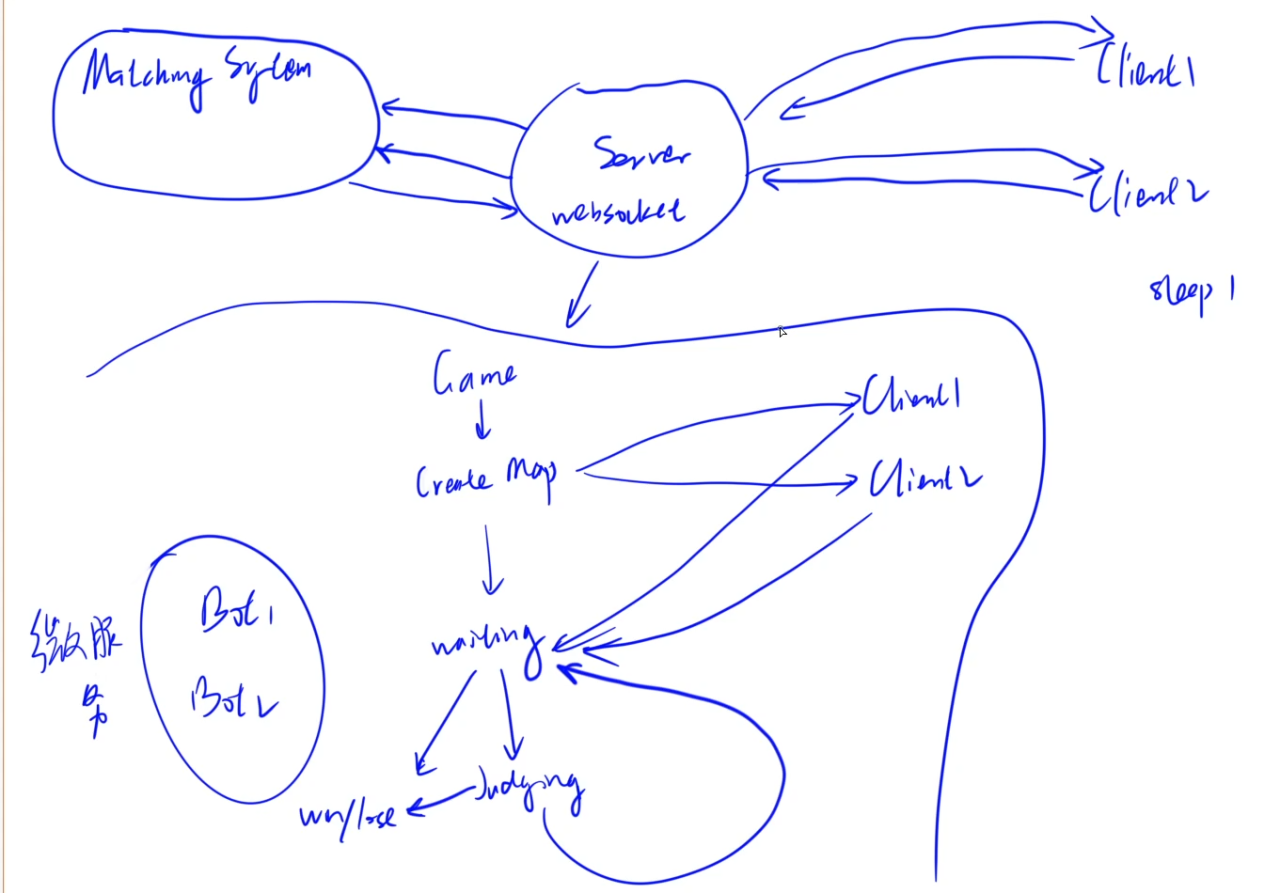
集成websocket
前端每一个连接 会在后端维护起来 都相当于一个类 每来一个连接 就是new一个实例
在pom.xml文件中添加依赖:
- spring-boot-starter-websocket
- fastjson
注意 javax.websocket已弃用 需要换成jakarta
<dependency>
		<groupId>jakarta.websocket</groupId>
		<artifactId>jakarta.websocket-api</artifactId>
		<version>2.1.0</version>
</dependency>

<!-- WebSocket starter for Spring Boot -->
<dependency>
    <groupId>org.springframework.boot</groupId>
    <artifactId>spring-boot-starter-websocket</artifactId>
    <version>3.1.1</version>
</dependency>

<!-- FastJSON for JSON parsing -->
<dependency>
    <groupId>com.alibaba</groupId>
    <artifactId>fastjson</artifactId>
    <version>1.2.83</version> <!-- 推荐版本,兼容性和安全性较好 -->
</dependency>
添加config.WebSocketConfig配置类:
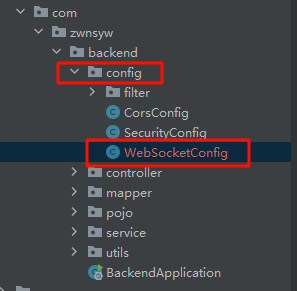
import org.springframework.context.annotation.Bean;
import org.springframework.context.annotation.Configuration;
import org.springframework.web.socket.server.standard.ServerEndpointExporter;

@Configuration
public class WebSocketConfig {

   @Bean
   public ServerEndpointExporter serverEndpointExporter() {

       return new ServerEndpointExporter();
   }
}
添加consumer.WebSocketServer类
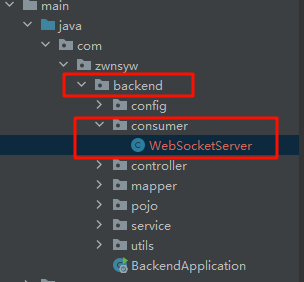
import org.springframework.stereotype.Component;

import javax.websocket.*;
import javax.websocket.server.PathParam;
import javax.websocket.server.ServerEndpoint;

@Component
@ServerEndpoint("/websocket/{token}")  // 注意不要以'/'结尾
public class WebSocketServer {
   @OnOpen
   public void onOpen(Session session, @PathParam("token") String token) {
       // 建立连接
   }

   @OnClose
   public void onClose() {
       // 关闭链接
   }

   @OnMessage
   public void onMessage(String message, Session session) {
       // 从Client接收消息
   }

   @OnError
   public void onError(Session session, Throwable error) {
       error.printStackTrace();
   }
}
听懵了
package com.zwnsyw.backend.consumer;

import com.zwnsyw.backend.mapper.UserMapper;
import com.zwnsyw.backend.pojo.User;
import org.springframework.beans.factory.annotation.Autowired;
import org.springframework.stereotype.Component;

import jakarta.websocket.OnOpen;
import jakarta.websocket.OnClose;
import jakarta.websocket.OnMessage;
import jakarta.websocket.OnError;
import jakarta.websocket.Session;
import jakarta.websocket.server.PathParam;
import jakarta.websocket.server.ServerEndpoint;
import java.io.IOException;
import java.util.concurrent.ConcurrentHashMap;

@Component
@ServerEndpoint("/websocket/{token}")  // 注意不要以'/'结尾
public class WebSocketServer {

    private static ConcurrentHashMap<Integer,WebSocketServer> users = new ConcurrentHashMap<>();

    private User user;

    private Session session = null;

    private static UserMapper userMapper;

    @Autowired
    public void setUserMapper(UserMapper userMapper){
        WebSocketServer.userMapper = userMapper;
    }

    @OnOpen
    public void onOpen(Session session, @PathParam("token") String token) {
        // 建立连接
        this.session = session;
        System.out.println("connection!");
        Integer userId = Integer.parseInt(token);
        this.user = userMapper.selectById(userId);
        users.put(userId,this);
    }

    @OnClose
    public void onClose() {
        // 关闭链接
        System.out.println("disconnection!");
        if(this.user != null){
            users.remove(this.user.getId());
        }
    }

    @OnMessage
    public void onMessage(String message, Session session) {
        // 从Client接收消息
        System.out.println("receive message!");
    }

    @OnError
    public void onError(Session session, Throwable error) {
        error.printStackTrace();
    }

    public void sendMessage(String message){
        synchronized (this.session){
            try {
                this.session.getBasicRemote().sendText(message);
            }catch (IOException e){
                e.printStackTrace();
            }
        }
    }
}
类和注解解析
@Component:标记此类为Spring的组件,使其可以被Spring管理和注入依赖。@ServerEndpoint("/websocket/{token}"):指定WebSocket的连接端点,客户端可以通过ws://服务器地址/websocket/{token}连接到该端点。{token}是一个路径参数,用于标识每个连接的唯一用户。
变量解析
users:静态变量users是一个ConcurrentHashMap,用于存储当前连接的所有WebSocket会话。键为用户的ID,值为WebSocketServer实例。使用ConcurrentHashMap可以支持并发访问。user:当前WebSocket连接对应的用户信息。session:当前连接的WebSocket会话对象,用于管理与客户端的通信。userMapper:静态的UserMapper,用于访问数据库中的用户数据。这里采用静态变量,因为@ServerEndpoint标注的类不是Spring管理的Bean实例,所以需要特殊方式进行注入。
方法解析
setUserMapper(UserMapper userMapper)- 这是一个
@Autowired的方法,用于将UserMapper注入到静态变量userMapper中,以便在WebSocketServer类中使用数据库访问功能。此方式绕过了WebSocket服务器类不能直接使用Spring注入的限制。
- 这是一个
onOpen(Session session, @PathParam("token") String token)@OnOpen注解的方法会在每次新客户端连接时被调用。- 参数:
Session session:当前客户端的WebSocket会话。@PathParam("token") String token:从路径参数中获取的token,通常用于识别用户。
- 逻辑:
- 将
session赋值给当前对象的session字段。 - 根据
token(假设为用户ID)从数据库获取用户信息,并存入user。 - 将当前用户添加到
users映射中,使用userId作为键。
- 将
onClose()@OnClose注解的方法在客户端断开连接时触发。- 逻辑:
- 从
users映射中移除当前用户的连接记录。 - 打印“disconnection!”表示断开连接。
- 从
onMessage(String message, Session session)@OnMessage注解的方法用于接收客户端发来的消息。- 参数:
String message:客户端发送的消息内容。Session session:当前会话。
- 逻辑:
- 打印“receive message!”来表示收到消息。实际业务逻辑可以在这里处理。
onError(Session session, Throwable error)@OnError注解的方法在WebSocket通信过程中发生错误时触发。- 参数:
Session session:当前会话。Throwable error:捕获到的错误。
- 逻辑:
- 打印错误栈以便于调试和日志记录。
sendMessage(String message)- 该方法用于向客户端发送消息。
- 逻辑:
synchronized (this.session)用来保证线程安全。- 使用
session.getBasicRemote().sendText(message)向客户端发送文本消息,捕获IOException并打印错误。
总结
该类的功能主要是实现一个基本的WebSocket服务器,能够:
- 在连接建立和断开时记录用户状态;
- 接收客户端消息并进行响应;
- 在发生错误时进行处理;
- 提供一个
sendMessage方法,用于服务器主动向客户端推送消息。
适用于多人实时在线的场景,比如对战游戏、聊天系统等。
配置config.SecurityConfiG
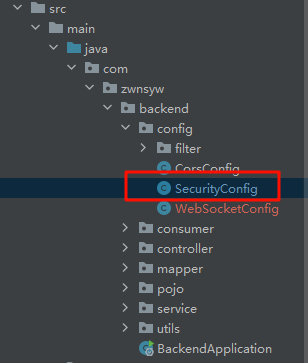
package com.zwnsyw.backend.config;

import com.zwnsyw.backend.config.filter.JwtAuthenticationTokenFilter;
import org.springframework.context.annotation.Bean;
import org.springframework.context.annotation.Configuration;
import org.springframework.http.HttpMethod;
import org.springframework.security.authentication.AuthenticationManager;
import org.springframework.security.config.annotation.authentication.configuration.AuthenticationConfiguration;
import org.springframework.security.config.annotation.web.builders.HttpSecurity;
import org.springframework.security.config.annotation.web.builders.WebSecurity;
import org.springframework.security.config.annotation.web.configuration.EnableWebSecurity;
import org.springframework.security.config.annotation.web.configuration.WebSecurityCustomizer;
import org.springframework.security.config.http.SessionCreationPolicy;
import org.springframework.security.crypto.bcrypt.BCryptPasswordEncoder;
import org.springframework.security.crypto.password.PasswordEncoder;
import org.springframework.security.web.SecurityFilterChain;
import org.springframework.security.web.authentication.UsernamePasswordAuthenticationFilter;

@Configuration
@EnableWebSecurity
public class SecurityConfig {

    private final JwtAuthenticationTokenFilter jwtAuthenticationTokenFilter;

    public SecurityConfig(JwtAuthenticationTokenFilter jwtAuthenticationTokenFilter) {
        this.jwtAuthenticationTokenFilter = jwtAuthenticationTokenFilter;
    }

    @Bean
    public PasswordEncoder passwordEncoder() {
        return new BCryptPasswordEncoder();
    }

    @Bean
    public AuthenticationManager authenticationManager(AuthenticationConfiguration authenticationConfiguration) throws Exception {
        return authenticationConfiguration.getAuthenticationManager();
    }

    @Bean
    public SecurityFilterChain securityFilterChain(HttpSecurity http) throws Exception {
        http
                .csrf(csrf -> csrf.disable())
                .sessionManagement(session -> session.sessionCreationPolicy(SessionCreationPolicy.STATELESS))
                .authorizeHttpRequests(authorize -> authorize
                        .requestMatchers("/user/account/token/", "/user/account/register/").permitAll()
                        .requestMatchers(HttpMethod.OPTIONS).permitAll()
                        .requestMatchers("/websocket/**").permitAll() // 允许访问 WebSocket 路径
                        .anyRequest().authenticated()
                );

        http.addFilterBefore(jwtAuthenticationTokenFilter, UsernamePasswordAuthenticationFilter.class);

        return http.build();
    }

    @Bean
    public WebSecurityCustomizer webSecurityCustomizer() {
        return (web) -> web.ignoring().requestMatchers("/websocket/**");
    }

}
此处使用更新用法
test
PkIndexView.vue
<template>
    <PlayGround> </PlayGround>
</template>


    import PlayGround from '../../components/PlayGround.vue'
    import { onMounted , onUnmounted } from "vue";
    import { useStore } from "vuex";

    export default{
        components:{
            PlayGround
        },
        setup(){
            const store = useStore();
            const socketUrl = `ws://localhost:3000/websocket/${store.state.user.id}/`;

            let socket = null;
            onMounted(()=>{
              socket = new WebSocket(socketUrl);

              socket.onopen = () =>{
                console.log("connected!");
              }

              socket.onmessage = msg => {
                const data = JSON.parse(msg.data);
                console.log(data);
              }

              socket.onclose = () =>{
                console.log("disconnected!");
              }

            });

            onUnmounted(()=>{
              socket.close();
            })
        }
    }
index.js
import { createStore } from 'vuex'
import ModuleUser from './User'
import ModulePK from './pk'

export default createStore({
  state: {
  },
  getters: {
  },
  mutations: {
  },
  actions: {
  },
  modules: {
    user:ModuleUser,
    pk: ModulePK,
  }
})
pk.js
export default {
    state: {
        status: "matching",//matching正在匹配 playing匹配完成 对战界面
        socket:null,
        opponent_username: "",
        opponent_photo:"",
    },
    getters: {},
    mutations: {
        updateSocket(state,socket){
           state.socket = socket;
        },
        updateOpponent(state,opponent){
           state.opponent_username = opponent.username;
           state.opponent_photo = opponent.photo;
        },
        updateStatus(state,status){
           state.status = status;
        }
    },
    actions: {

    },
    modules: {

    }
};
JWT验证
现阶段只是传入一个userId就能简单进行连接 显然不安全 所以还是使用jwt验证 传入一个token
写一个工具类 用于解析token 提取出userId
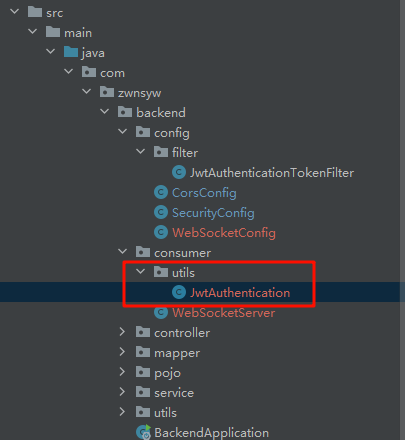
package com.zwnsyw.backend.consumer.utils;

import com.zwnsyw.backend.utils.JwtUtil;
import io.jsonwebtoken.Claims;

public class JwtAuthentication {
    public static Integer getUserId(String token){
        Integer userId = -1;
        try {
            Claims claims = JwtUtil.parseJWT(token);
            userId = Integer.parseInt(claims.getSubject());
        } catch (Exception e) {
            throw new RuntimeException(e);
        }
        return userId;
    }
}
在WebSocketServer中更改验证方式
@OnOpen
    public void onOpen(Session session, @PathParam("token") String token) throws IOException {
        // 建立连接
        this.session = session;
        System.out.println("connected!");
        Integer userId = JwtAuthentication.getUserId(token);
        this.user = userMapper.selectById(userId);

        if(this.user != null){
            users.put(userId,this);
        }else {
            this.session.close();
        }

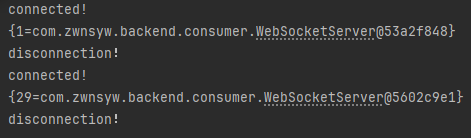
        System.out.println(users);
    }
前端部分改成用token连接
const socketUrl = `ws://localhost:3000/websocket/${store.state.user.token}/`;
实现匹配
前端匹配页面
在PkIndexView页中 应该显示两种页面 刚打开时为匹配页面 点击匹配 且匹配成功后 切换到游戏页面(后续会在前面加一层 打开时为游戏菜单供选择 选择进入游戏后 才为匹配 再是游戏)
以现在的逻辑来看 显然需要使用v-if设置状态 匹配页面在matching时显示 pk页面在playing时显示
pk.js
export default {
    state: {
        status: "matching",//matching正在匹配 playing匹配完成 对战界面
        socket:null,
        opponent_username: "",
        opponent_photo:"",
    },
    getters: {},
    mutations: {
        updateSocket(state,socket){
           state.socket = socket;
        },
        updateOpponent(state,opponent){
           state.opponent_username = opponent.username;
           state.opponent_photo = opponent.photo;
        },
        updateStatus(state,status){
           state.status = status;
        }
    },
    actions: {

    },
    modules: {

    }
};
在PkIndexView中 加上v-if
以及对手的默认头像
<template>
    <PlayGround v-if="$store.state.pk.status === 'playing'">    </PlayGround>
    <MatchGround v-if="$store.state.pk.status === 'matching'">  </MatchGround>
</template>


    import PlayGround from "@/components/PlayGround.vue";
    import MatchGround from "@/components/MatchGround.vue";
    import { onMounted , onUnmounted } from "vue";
    import { useStore } from "vuex";

    export default{
        components:{
          MatchGround,
          PlayGround
        },
        setup(){
            const store = useStore();
            const socketUrl = `ws://localhost:3000/websocket/${store.state.user.token}/`;

            let socket = null;
            onMounted(()=>{
              store.commit("updateOpponent",{
                username:"我的对手",
                photo: "https://cdn.acwing.com/media/article/image/2023/03/11/36510_1fd01b93bf-16gl-questionMark.png",
              })

              socket = new WebSocket(socketUrl);

              socket.onopen = () =>{
                console.log("connected!");
              }

              socket.onmessage = msg => {
                const data = JSON.parse(msg.data);
                console.log(data);
              }

              socket.onclose = () =>{
                console.log("disconnected!");
              }

            });

            onUnmounted(()=>{
              socket.close();
            })
        }
    }
另新建组件 MatchGround.vue
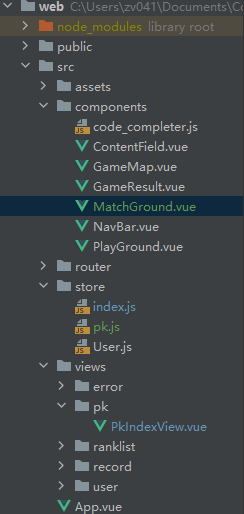
<template>
  <div class="matchground">
    <div class="row">
      <div class="col-12 timer">
        <div v-if="match_btn_info === '取消'">{{ waiting_time }}s</div>
      </div>
      <div class="col-5">
        <div class="user-photo">
          <img :src="api/images/OkhTlhybG87q/$store.state.user.photo" alt="" />
        </div>
        <div class="user-name">{{ $store.state.user.username }}</div>
      </div>
      <div class="col-2">
        <div class="user-select-bot">
          <select
              v-model="select_bot"
              class="form-select"
              aria-label="Default select example"
          >
            <option selected value="-1">亲自出马</option>
            <option :value="bot.id" v-for="bot in bots" :key="bot.id">
              {{ bot.title }}
            </option>
          </select>
        </div>
      </div>
      <div class="col-5">
        <div class="user-photo">
          <img class="opponent_photo" :src="api/images/RhA0zt1ySLWu/$store.state.pk.opponent_photo" alt="" />
        </div>
        <div class="user-name">
          {{ $store.state.pk.opponent_username }}
        </div>
      </div>
      <div class="col-12" style="text-align: center">
        <button
            type="button"
            class="btn btn-matching"
            @click="click_match_btn()"
        >
          {{ match_btn_info }}
        </button>
      </div>
    </div>
  </div>
</template>


import { ref, onBeforeMount } from 'vue'
import { useStore } from 'vuex'
import $ from "jquery";
import {BASE_URL} from "@/constants";

export default {
  setup() {
    const store = useStore();
    let timer = null;
    let match_btn_info = ref('play');
    let waiting_time = ref(0);
    let select_bot = ref("-1");
    let opponent_photo = ref("");
    let opponent_username = ref("");
    let bots = ref([]);

    const refresh_bots = () => {
      $.ajax({
        url: `${BASE_URL}/user/bot/getlist/`,
        type: "get",
        headers: {
          Authorization: "Bearer " + store.state.user.token,
        },
        success(resp) {
          if (resp && Array.isArray(resp)) {
            bots.value = resp;
          } else {
            console.error("Unexpected response format:", resp);
          }
        },
        error(resp) {
          console.error("Failed to fetch bots:", resp);
        }
      });
    };

    refresh_bots();

    const set_waiting_time = () => {
      timer = setInterval(() => {
        waiting_time.value++;
      }, 1000)
    }
    const back_waiting_time = () => {
      waiting_time.value = 0;
      clearInterval(timer)
    }

    onBeforeMount(() => {
      back_waiting_time();
    })

    const click_match_btn = () => {
      if (match_btn_info.value === "play") {
        set_waiting_time();
        match_btn_info.value = "取消";
      }else{
        match_btn_info.value = "play";
        back_waiting_time();
      }
    }

    return {
      match_btn_info,
      click_match_btn,
      waiting_time,
      bots,
      select_bot,
      opponent_photo,
      opponent_username,
    }
  }
}


div.matchground {
  width: 60vw;
  height: 70vh;
  margin: auto;
  margin-top: 100px;
  border-radius: 1vh;
  background-color: rgba(50, 50, 50, 0.5);
}

div.user-photo {
  text-align: center;
}

div.user-photo > img {
  width: 20vh;
  margin-top: 12vh;
  border-radius: 50%;
  border: 1px solid rgb(102, 47, 47);
}

div.user-name {
  text-align: center;
  color: pink;
  font-size: 24px;
  font-weight: bold;
  margin-top: 3vh;
}

.btn-matching {
  background-color: rgb(199, 130, 92);
  margin-top: 12vh;
  color: white;
  font-size: 20px;
  width: 15vh;
  border: none;
}

.btn-matching:hover {
  scale: 1.1;
}

.timer {
  position: absolute;
  font-size: 24px;
  font-weight: bold;
  text-align: center;
  color: white;
  margin-top: 2vh;
  width: 15vh;

  left: 50%;
  transform: translateX(-50%);
}

.user-select-bot {
  margin-top: 20vh;
}

.user-select-bot > select {
  width: 120%;
  margin: 0 auto;
}
实现基本匹配
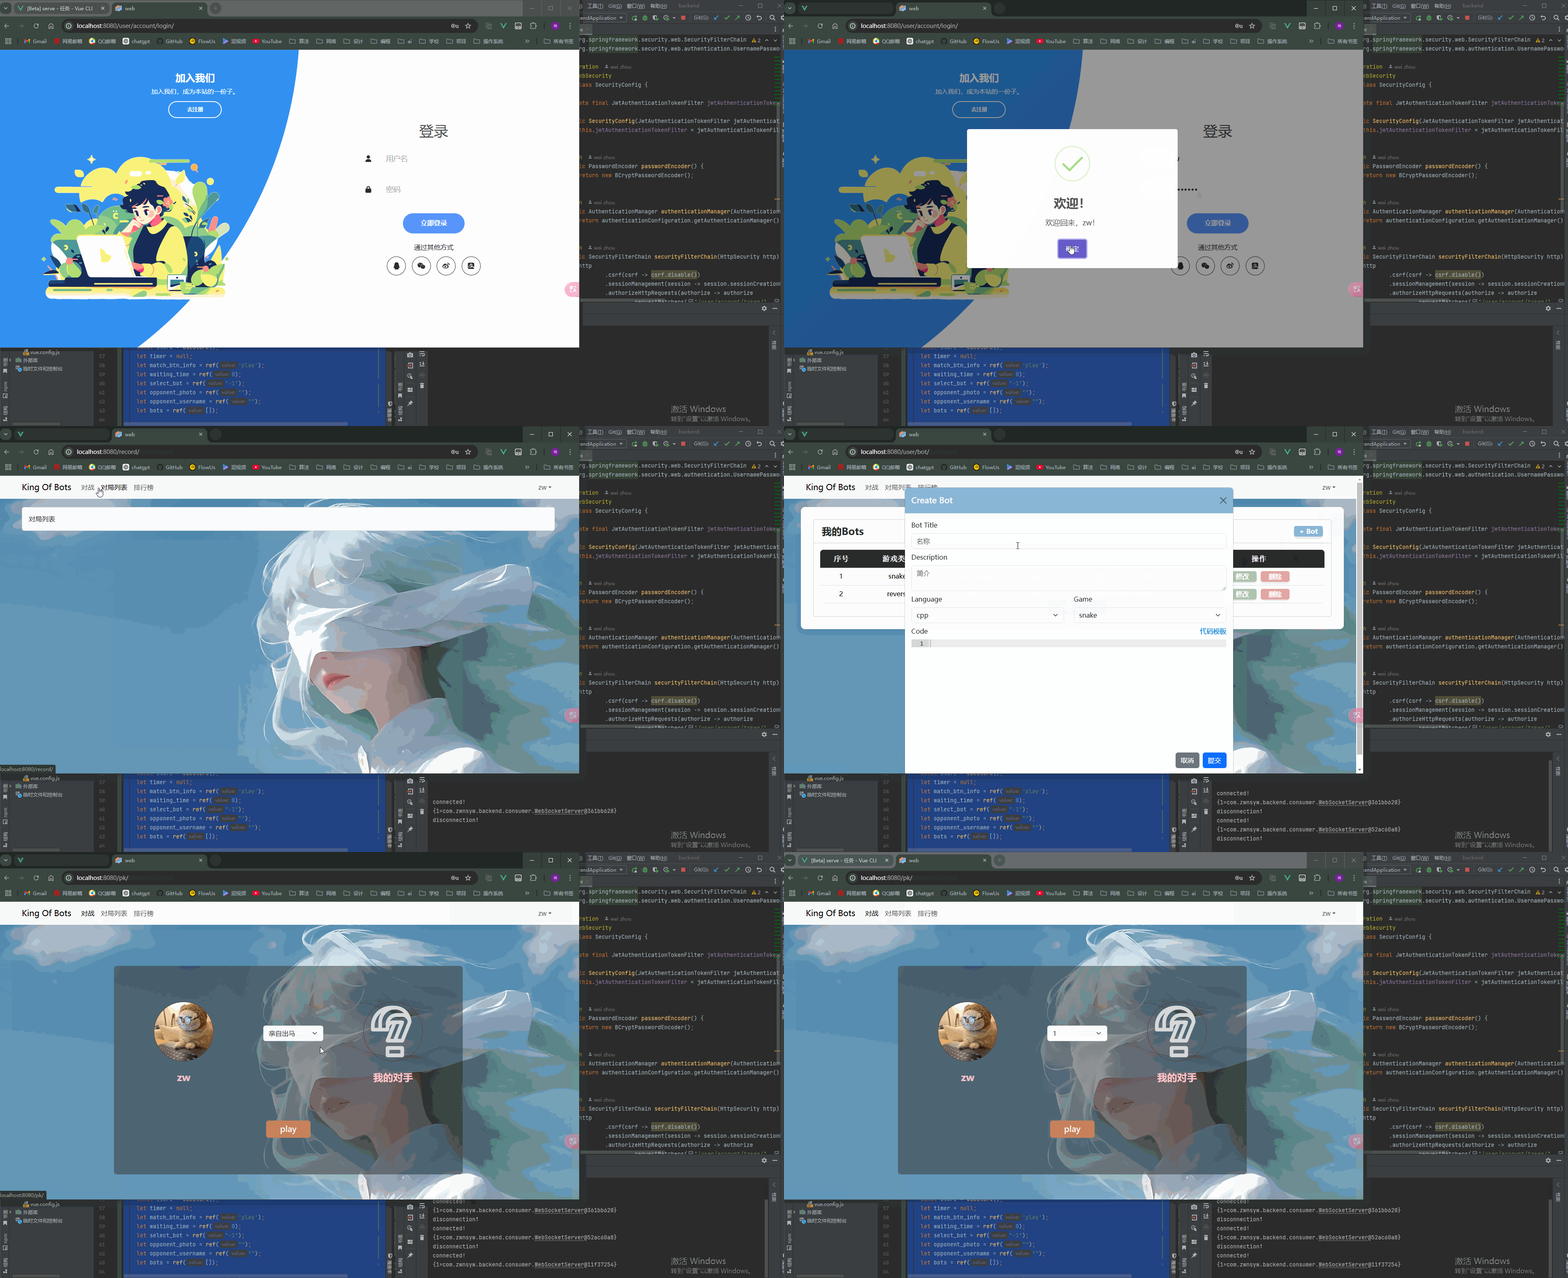
点击/取消匹配时 向后端发送请求
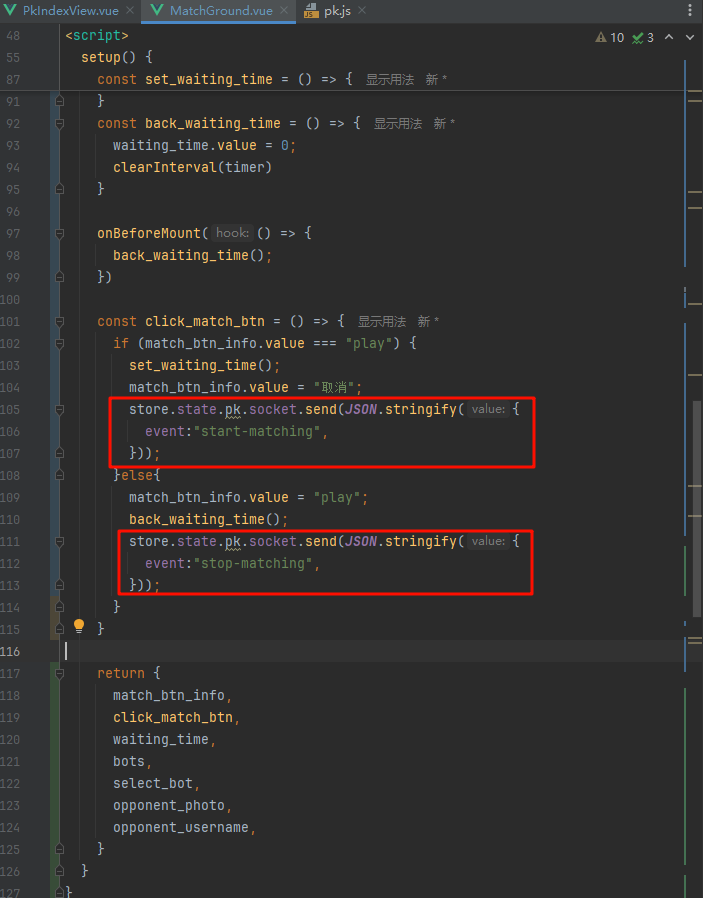
后端WebSocketServer中 接收到请求
把OnMessage当作路由来用 根据接收到什么 分配给不同的函数来处理
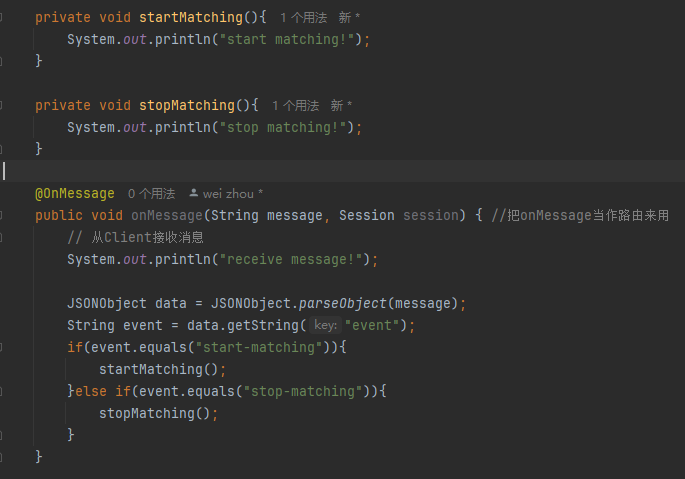
开一个匹配池 作为调试 就实现只要有两个人就排一起 之后匹配逻辑移动到微服务中
匹配结果以json形式 分别发给两边
WebSocketServer.java
package com.zwnsyw.backend.consumer;

import com.alibaba.fastjson.JSONObject;
import com.zwnsyw.backend.consumer.utils.JwtAuthentication;
import com.zwnsyw.backend.mapper.UserMapper;
import com.zwnsyw.backend.pojo.User;
import org.springframework.beans.factory.annotation.Autowired;
import org.springframework.stereotype.Component;

import jakarta.websocket.OnOpen;
import jakarta.websocket.OnClose;
import jakarta.websocket.OnMessage;
import jakarta.websocket.OnError;
import jakarta.websocket.Session;
import jakarta.websocket.server.PathParam;
import jakarta.websocket.server.ServerEndpoint;
import java.io.IOException;
import java.util.Iterator;
import java.util.concurrent.ConcurrentHashMap;
import java.util.concurrent.CopyOnWriteArraySet;

@Component
@ServerEndpoint("/websocket/{token}")  // 注意不要以'/'结尾
public class WebSocketServer {

    final private static ConcurrentHashMap<Integer,WebSocketServer> users = new ConcurrentHashMap<>();
    final private static CopyOnWriteArraySet<User> matchpool = new CopyOnWriteArraySet<>(); //开一个匹配池

    private User user;

    private Session session = null;

    private static UserMapper userMapper;

    @Autowired
    public void setUserMapper(UserMapper userMapper){
        WebSocketServer.userMapper = userMapper;
    }

    @OnOpen
    public void onOpen(Session session, @PathParam("token") String token) throws IOException {
        // 建立连接
        this.session = session;
        System.out.println("connected!");
        Integer userId = JwtAuthentication.getUserId(token); //用token连
        this.user = userMapper.selectById(userId);

        if(this.user != null){
            users.put(userId,this);
        }else {
            this.session.close();
        }

        System.out.println(users);
    }

    @OnClose
    public void onClose() {
        // 关闭链接
        System.out.println("disconnection!");
        if(this.user != null){
            users.remove(this.user.getId());
            matchpool.remove(this.user);
        }
    }

    private void startMatching(){
        System.out.println("start matching!");
        matchpool.add(this.user);

        //有俩人就直接排一起 作为调试 后续把该匹配放在微服务
        while(matchpool.size()>=2){
            Iterator<User> iterator = matchpool.iterator();
            User a =iterator.next(),b =iterator.next();
            matchpool.remove(a);
            matchpool.remove(b);

            //把配对信息分别发给两边
            JSONObject respA = new JSONObject();
            respA.put("event","start-matching");
            respA.put("opponent_username",b.getUsername());
            respA.put("opponent_photo",b.getPhoto());
            users.get(a.getId()).sendMessage(respA.toJSONString());

            JSONObject respB = new JSONObject();
            respB.put("event","start-matching");
            respB.put("opponent_username",a.getUsername());
            respB.put("opponent_photo",a.getPhoto());
            users.get(b.getId()).sendMessage(respB.toJSONString());
        }
    }

    private void stopMatching(){
        System.out.println("stop matching!");
        matchpool.remove(this.user);
    }

    @OnMessage
    public void onMessage(String message, Session session) { //把onMessage当作路由来用
        // 从Client接收消息
        System.out.println("receive message!");

        JSONObject data = JSONObject.parseObject(message);
        String event = data.getString("event");
        if(event.equals("start-matching")){
            startMatching();
        }else if(event.equals("stop-matching")){
            stopMatching();
        }
    }

    @OnError
    public void onError(Session session, Throwable error) {
        error.printStackTrace();
    }

    public void sendMessage(String message){
        synchronized (this.session){
            try {
                this.session.getBasicRemote().sendText(message);
            }catch (IOException e){
                e.printStackTrace();
            }
        }
    }
}
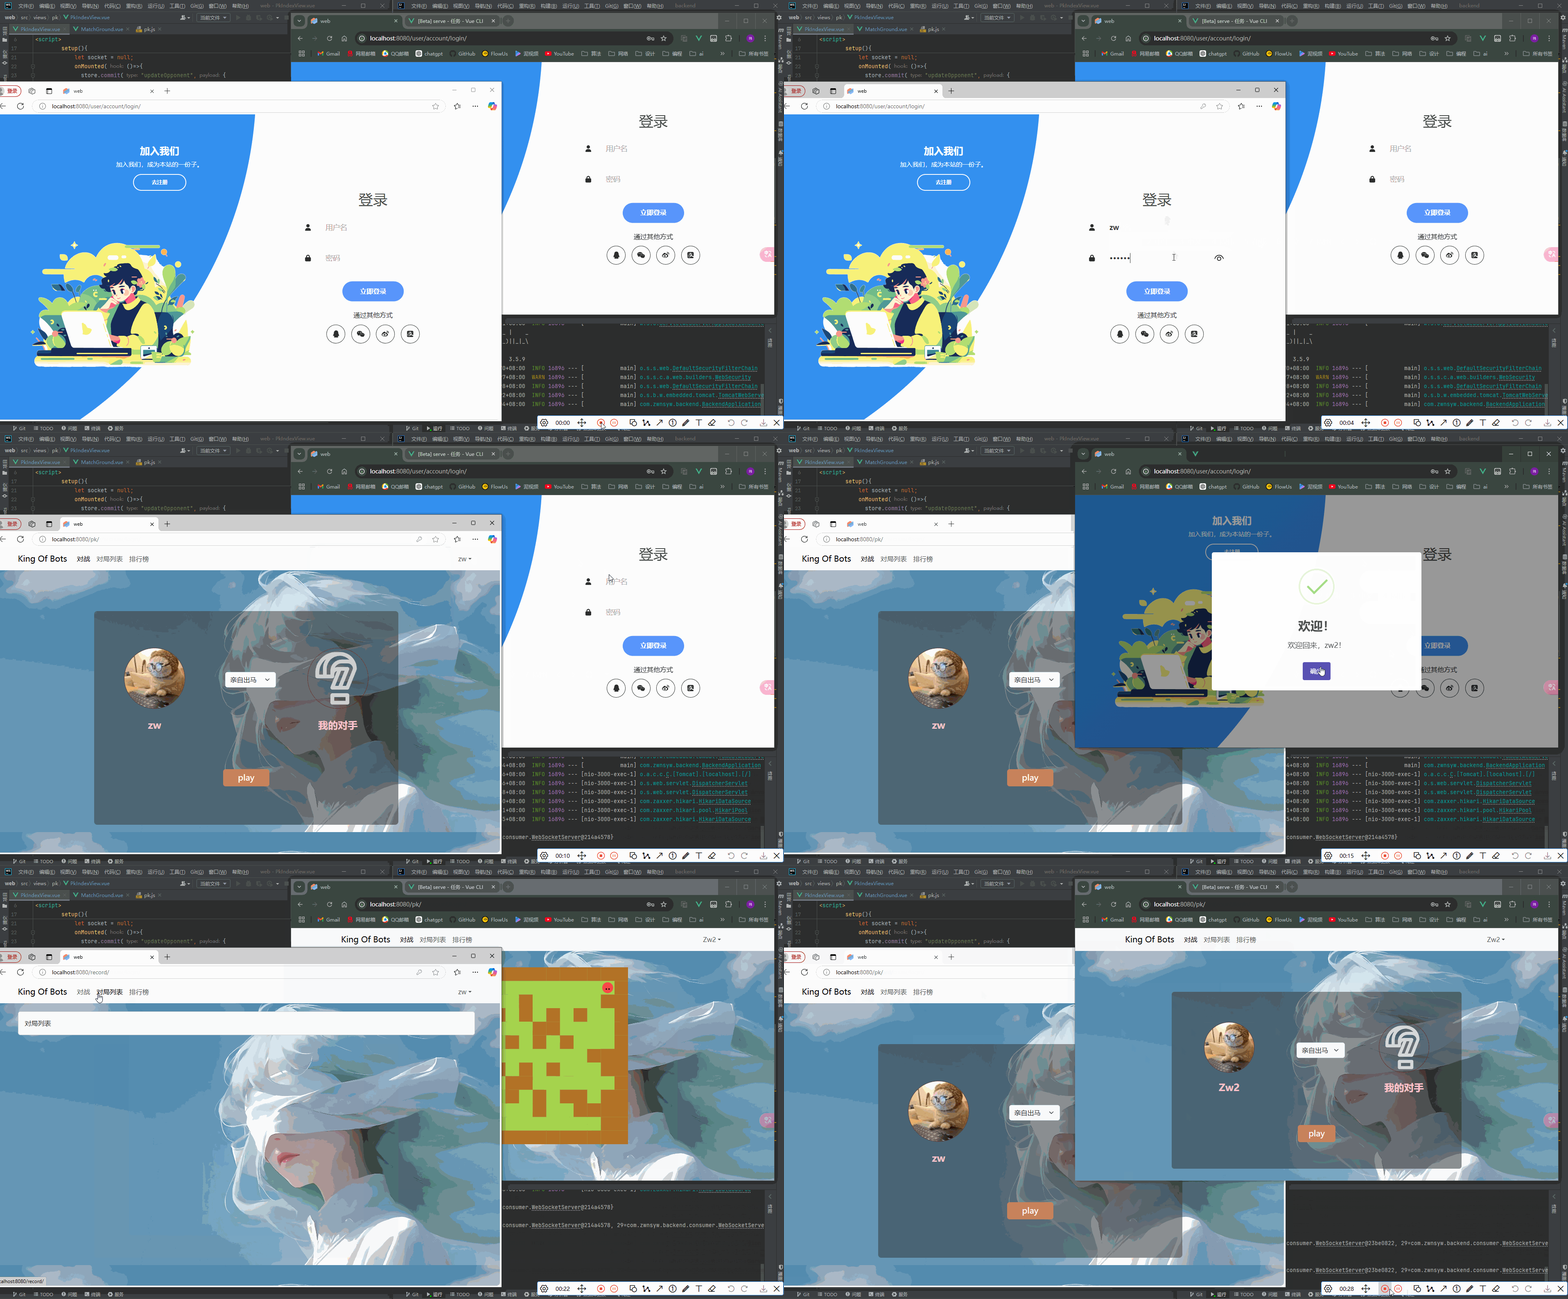
PkIndexView中 接受到后端传来的结果后 更新到页面中去 并切换成游戏界面
游戏逻辑后移
可以发现匹配到了 但是地图不一样 所以地图是需要后端生成传回前端的 因此需要把游戏逻辑移到后端
https://git.acwing.com/Zwww/kob/-/commit/53ac1ef484eb14828d1e0a9eac1eeffbe8c6a508
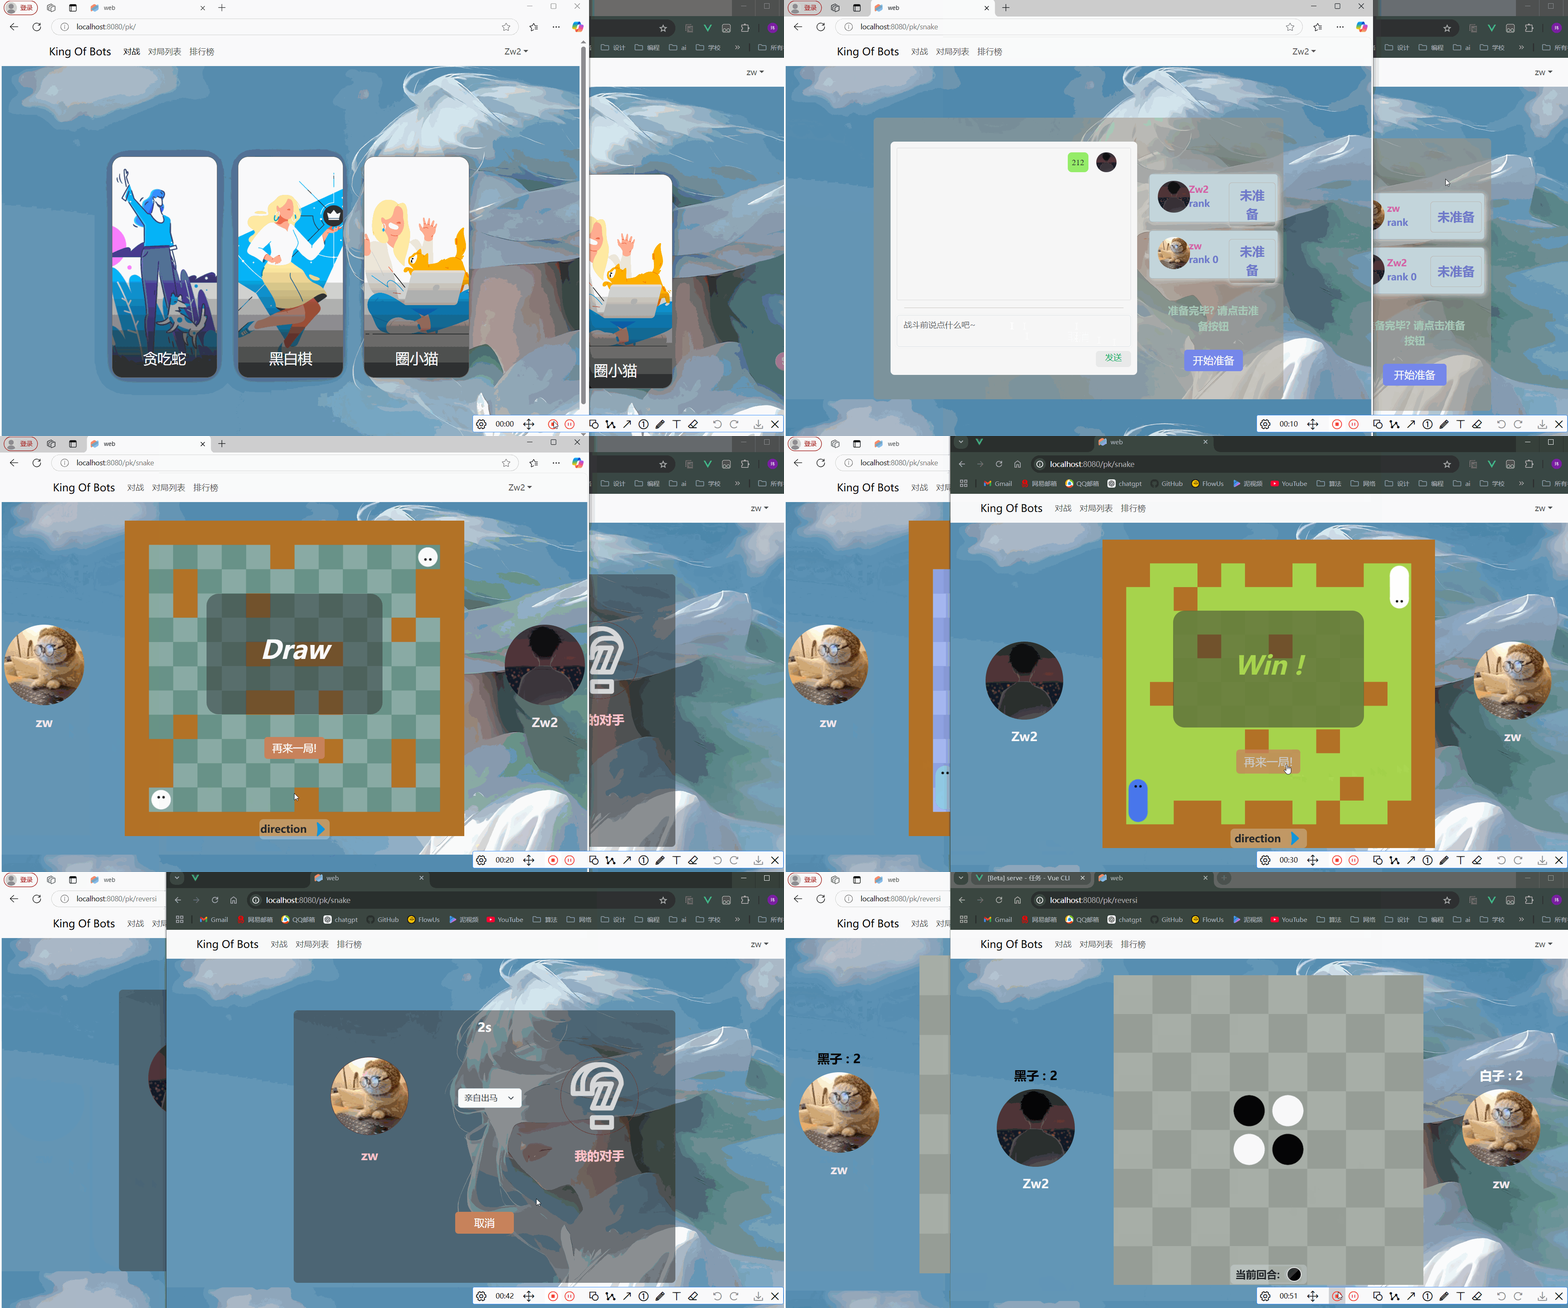
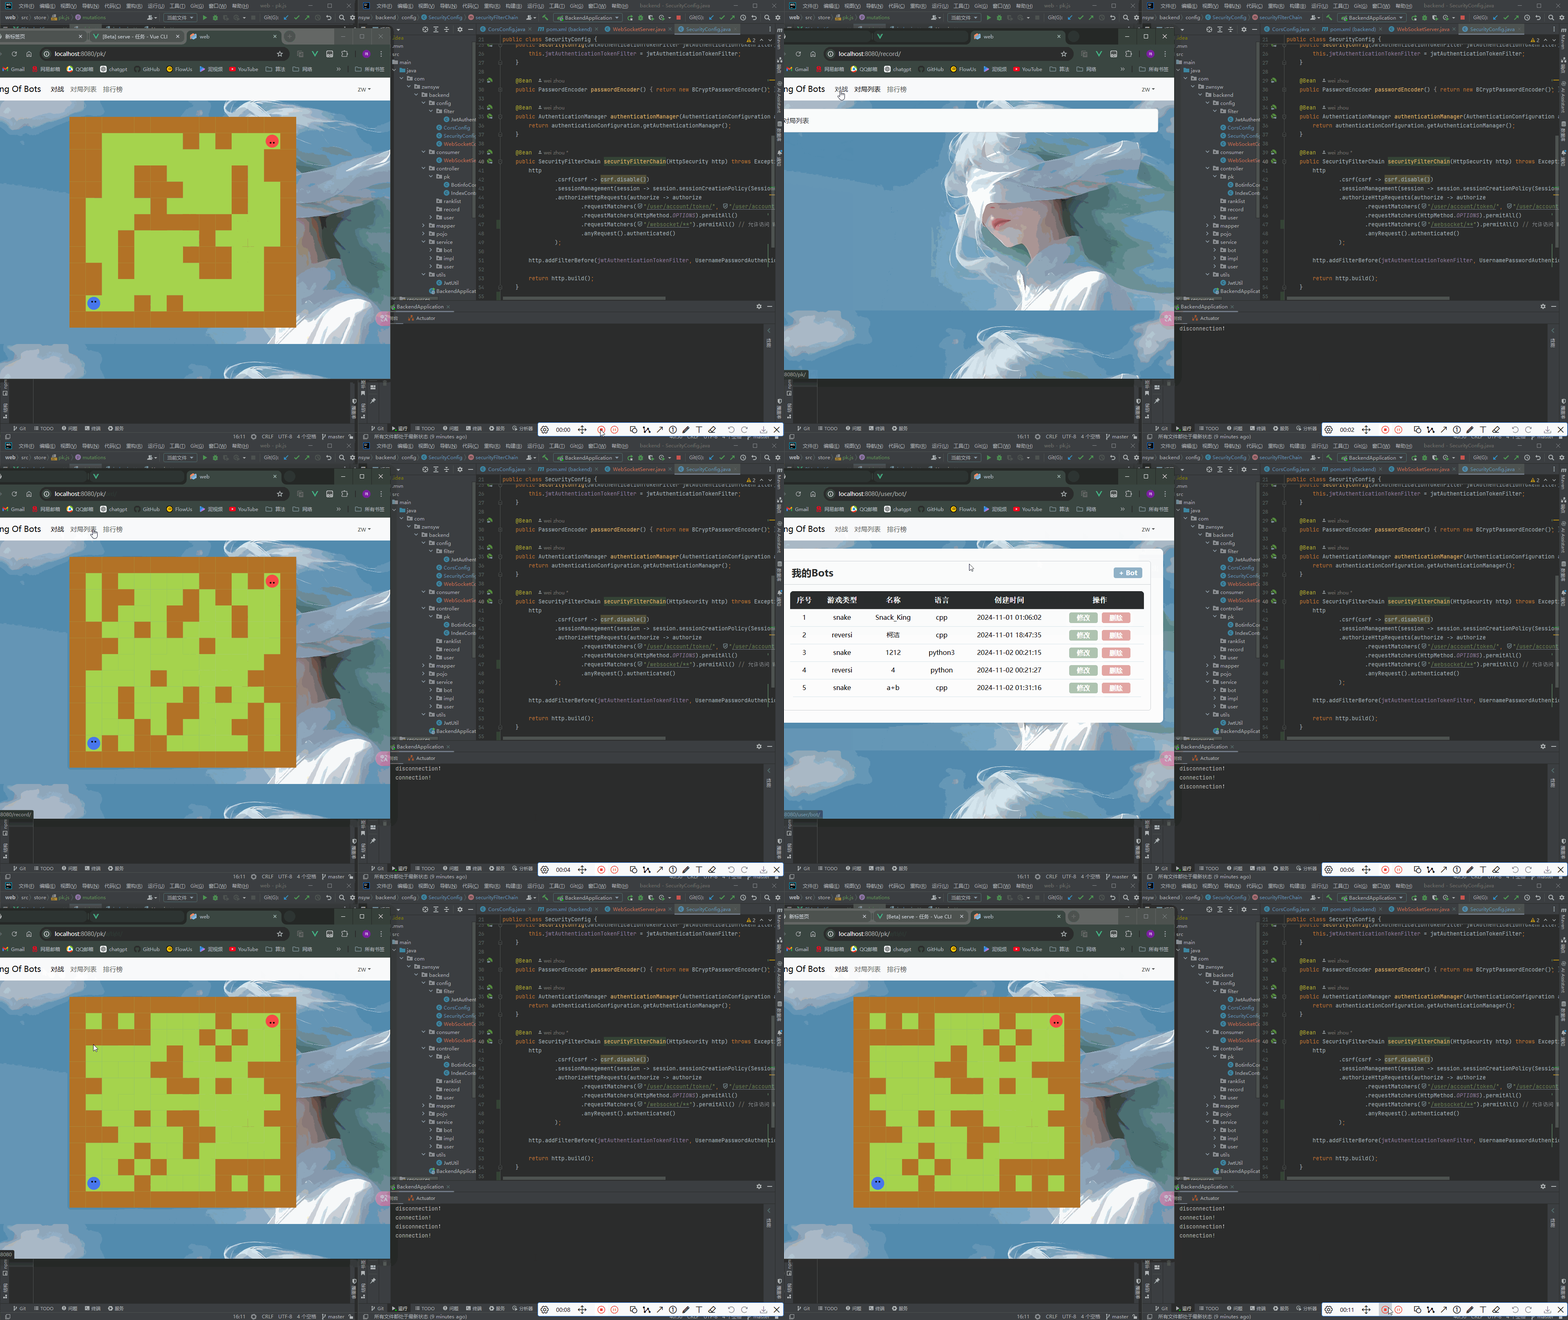
SnakeGame没问题 从匹配到准备到游戏到结算 都测试成功
ReversiGame貌似后端接收不到前端传来的点击落子信号 显示一直在等待输入 最后因为超时判输
后续再来修补 现往后走
本质是发送json 传命令类型event 以及一串键值对 通过onmessage(类似路由)来选择执行的函数 前端通过socket.send向后端发送数据 用socket.onmessage接收后端传来的数据
后端通过senMessage 向前端发送json数据 使用OnMessage注解 接收前端传来的数据 并在onMessage函数内部实现类似路由的功能 根据event的值分配给不同的函数进行处理
如何实现的通信? 用户端1把操作/数据发给服务器 用户端2把操作/数据发给服务器 服务器处理完后 再把结果分别发送回去 实现用户端1和用户端2的游戏、聊天功能
对局记录 回放查看
分页查询
添加配置类
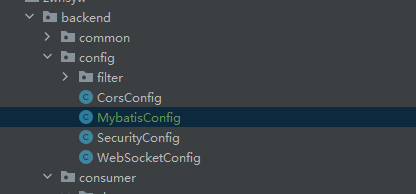
package com.zwnsyw.backend.config;

import com.baomidou.mybatisplus.annotation.DbType;
import com.baomidou.mybatisplus.extension.plugins.MybatisPlusInterceptor;
import com.baomidou.mybatisplus.extension.plugins.inner.PaginationInnerInterceptor;
import org.springframework.context.annotation.Bean;
import org.springframework.context.annotation.Configuration;

@Configuration
public class MybatisConfig {
    @Bean
    public MybatisPlusInterceptor mybatisPlusInterceptor() {
        MybatisPlusInterceptor interceptor = new MybatisPlusInterceptor();
        interceptor.addInnerInterceptor(new PaginationInnerInterceptor(DbType.MYSQL));
        return interceptor;
    }
}
pojo、mapper、controller、service、serviceImpl
RecordServiceImpl
package com.zwnsyw.backend.service.impl.record;

import com.alibaba.fastjson.JSONObject;
import com.baomidou.mybatisplus.core.conditions.query.QueryWrapper;
import com.baomidou.mybatisplus.core.metadata.IPage;
import com.baomidou.mybatisplus.extension.plugins.pagination.Page;
import com.zwnsyw.backend.common.api.R;
import com.zwnsyw.backend.pojo.Record;
import com.zwnsyw.backend.pojo.User;
import com.zwnsyw.backend.mapper.RecordMapper;
import com.zwnsyw.backend.mapper.UserMapper;
import com.zwnsyw.backend.service.record.RecordService;
import lombok.AllArgsConstructor;
import org.springframework.stereotype.Service;

import java.util.LinkedList;
import java.util.List;

/**
 * 实现 RecordService 接口的服务类,用于处理记录(Record)相关的业务逻辑
 */
@Service
@AllArgsConstructor
public class RecordServiceImpl implements RecordService {
    // RecordMapper 用于访问数据库中的记录数据
    private final RecordMapper mapper;
    // UserMapper 用于访问数据库中的用户数据
    private final UserMapper userMapper;

    /**
     * 分页获取记录信息,并将相关用户信息添加到响应中。
     *
     * @param page 页码
     * @return 包含记录信息的响应对象
     */
    public R page(Integer page) {
        // 创建分页对象,每页显示10条记录
        IPage<Record> recordIPage = new Page<>(page, 10);

        // 创建查询条件,按 id 倒序排列
        QueryWrapper<Record> query = new QueryWrapper<>();
        query.orderByDesc("id");

        // 从数据库中查询分页记录
        List<Record> records = mapper.selectPage(recordIPage, query).getRecords();

        // 构造 JSON 响应对象
        JSONObject resp = new JSONObject();
        List<JSONObject> items = new LinkedList<>();

        // 遍历每条记录,获取对应的用户信息并封装为 JSON
        for (Record record : records) {
            // 获取对战双方的用户信息
            User userA = userMapper.selectById(record.getAId());
            User userB = userMapper.selectById(record.getBId());

            // 创建 JSON 对象来存储单条记录和用户信息
            JSONObject item = new JSONObject();
            item.put("a_photo", userA.getPhoto());      // 用户A的头像
            item.put("a_username", userA.getUsername()); // 用户A的用户名
            item.put("b_photo", userB.getPhoto());       // 用户B的头像
            item.put("b_username", userB.getUsername()); // 用户B的用户名
            item.put("record", record);                  // 当前记录对象

            // 根据记录中的输赢字段生成比赛结果描述
            String result = "平局"; // 默认平局
            if ("A".equals(record.getLoser())) {
                result = userB.getUsername() + " 胜";
            } else if ("B".equals(record.getLoser())) {
                result = userA.getUsername() + " 胜";
            }
            item.put("result", result); // 比赛结果

            // 将单条记录和用户信息添加到列表中
            items.add(item);
        }

        // 将记录列表和总记录数添加到响应对象
        resp.put("records", items);                 // 所有记录信息
        resp.put("recordsCount", mapper.selectCount(null)); // 记录总数

        // 返回包含响应数据的 R 对象
        return R.data(resp);
    }
}
R.java
R.java 类的作用是定义一个统一的 API 响应格式,用于在 Spring Boot 后端项目中返回数据。它通过封装响应的数据、状态码、消息等信息,提供一种标准化的方式来构建
API 响应,以便前端更容易解析和处理。
具体来说,这个类主要功能包括:
- 封装响应结果:
R<T>类通过泛型T来支持任意类型的数据返回,data字段可以承载任意数据类型。 - 提供响应状态信息:
code字段存储状态码,success字段标记操作是否成功,msg字段提供相关的消息,便于前端了解操作结果。 - 统一的响应构建方法:通过静态方法提供了便捷的响应构建方式,包括成功、失败、带自定义消息的响应等。这些方法提高了代码的可读性和一致性,使得开发人员可以方便地在各个业务层使用统一的返回结构。
R.java 的主要组成部分
- 字段:
code:用于存储响应的状态码(如 200 表示成功,400 表示失败)。success:布尔类型,指示操作是否成功。data:泛型T,用于存储响应的具体数据。msg:存储响应的消息,通常是操作的描述或错误提示。
- 构造函数:构造方法用于初始化
R对象,并根据不同的场景提供多种构造方式。 - 静态方法:
data方法:用于创建带有数据的成功响应。success方法:用于创建操作成功的响应。fail方法:用于创建失败的响应。status方法:通过布尔值flag返回成功或失败的响应。
- 判断方法:
isSuccess:用于判断响应是否成功。isNotSuccess:用于判断响应是否失败。
package com.zwnsyw.backend.common.api;

import org.springframework.lang.Nullable;
import org.springframework.util.ObjectUtils;

import java.io.Serializable;
import java.util.Optional;

public class R<T> implements Serializable {
    private static final long serialVersionUID = 1L;

    private int code; // 状态码
    private boolean success; // 是否成功
    private T data; // 数据
    private String msg; // 消息

    // 私有构造函数,用于创建成功或失败的响应
    private R(int code, T data, String msg, boolean success) {
        this.code = code;
        this.data = data;
        this.msg = msg;
        this.success = success;
    }

    // 静态方法创建成功响应
    public static <T> R<T> success() {
        return new R<>(ResultCode.SUCCESS.code, null, ResultCode.SUCCESS.message, true);
    }

    public static <T> R<T> success(T data) {
        return new R<>(ResultCode.SUCCESS.code, data, ResultCode.SUCCESS.message, true);
    }

    public static <T> R<T> success(String msg) {
        return new R<>(ResultCode.SUCCESS.code, null, msg, true);
    }

    public static <T> R<T> success(T data, String msg) {
        return new R<>(ResultCode.SUCCESS.code, data, msg, true);
    }

    // 静态方法创建失败响应
    public static <T> R<T> fail() {
        return new R<>(ResultCode.FAILURE.code, null, ResultCode.FAILURE.message, false);
    }

    public static <T> R<T> fail(String msg) {
        return new R<>(ResultCode.FAILURE.code, null, msg, false);
    }

    public static <T> R<T> fail(int code, String msg) {
        return new R<>(code, null, msg, false);
    }

    public static <T> R<T> fail(int code, T data, String msg) {
        return new R<>(code, data, msg, false);
    }

    // 判断响应是否成功
    public static boolean isSuccess(@Nullable R<?> result) {
        return Optional.ofNullable(result)
                .map(res -> ObjectUtils.nullSafeEquals(ResultCode.SUCCESS.code, res.code))
                .orElse(false);
    }

    // 判断响应是否失败
    public static boolean isNotSuccess(@Nullable R<?> result) {
        return !isSuccess(result);
    }

    // 链式调用设置数据
    public R<T> data(T data) {
        this.data = data;
        return this;
    }

    // 链式调用设置消息
    public R<T> msg(String msg) {
        this.msg = msg;
        return this;
    }

    // 链式调用设置状态码
    public R<T> code(int code) {
        this.code = code;
        this.success = (code == ResultCode.SUCCESS.code);
        return this;
    }

    // Getter and Setter
    public int getCode() {
        return code;
    }

    public boolean isSuccess() {
        return success;
    }

    public T getData() {
        return data;
    }

    public String getMsg() {
        return msg;
    }

    public void setCode(final int code) {
        this.code = code;
        this.success = (code == ResultCode.SUCCESS.code);
    }

    public void setSuccess(final boolean success) {
        this.success = success;
    }

    public void setData(final T data) {
        this.data = data;
    }

    public void setMsg(final String msg) {
        this.msg = msg;
    }

    @Override
    public String toString() {
        return "R(code=" + code + ", success=" + success + ", data=" + data + ", msg=" + msg + ")";
    }
}
灵活的成功和失败构造:现在你可以灵活地创建成功和失败响应,并自定义状态码、消息和数据内容链式调用支持:链式调用使代码更具可读性,例如,R.success().data(data).msg("操作成功")。
更加通用的成功/失败判定: isSuccess 和 isNotSuccess 方法使判断更加简洁。
适用性:此类封装了常用的响应格式,适用于多种类型的项目,从简单的 CRUD 项目到复杂的业务系统。
- 通用性强:适合大多数项目,能够覆盖成功、失败、自定义状态码等常见需求。
- 可扩展性:可以在
ResultCode枚举类中扩展其他自定义的状态码,以满足特定项目的需求。 - 可读性和易用性:链式调用和直观的方法名,使用起来更方便直观。
用户中心 更换头像等
https://git.acwing.com/Zwww/kob/-/commit/2c5db6c83ff75dc1de722e758ce3862313b7dd51
项目分区导航: 前后端10种鉴权方案 ⬅️ | 00-游戏逻辑 前后交互 | ➡️ http协议-websocket协议
💬 评论