前端万用模板开发教程
初始化
本前端初始模板使用 Ant Design Pro。
官方地址:开箱即用的中台前端/设计解决方案 - Ant Design Pro
Vue 版本官方地址:Ant Design Pro of Vue (antdv.com)
初始化命令:
npm i @ant-design/pro-cli -g

pro create yuzi-generator-web-frontend
注意:一定要选择 umi@4!
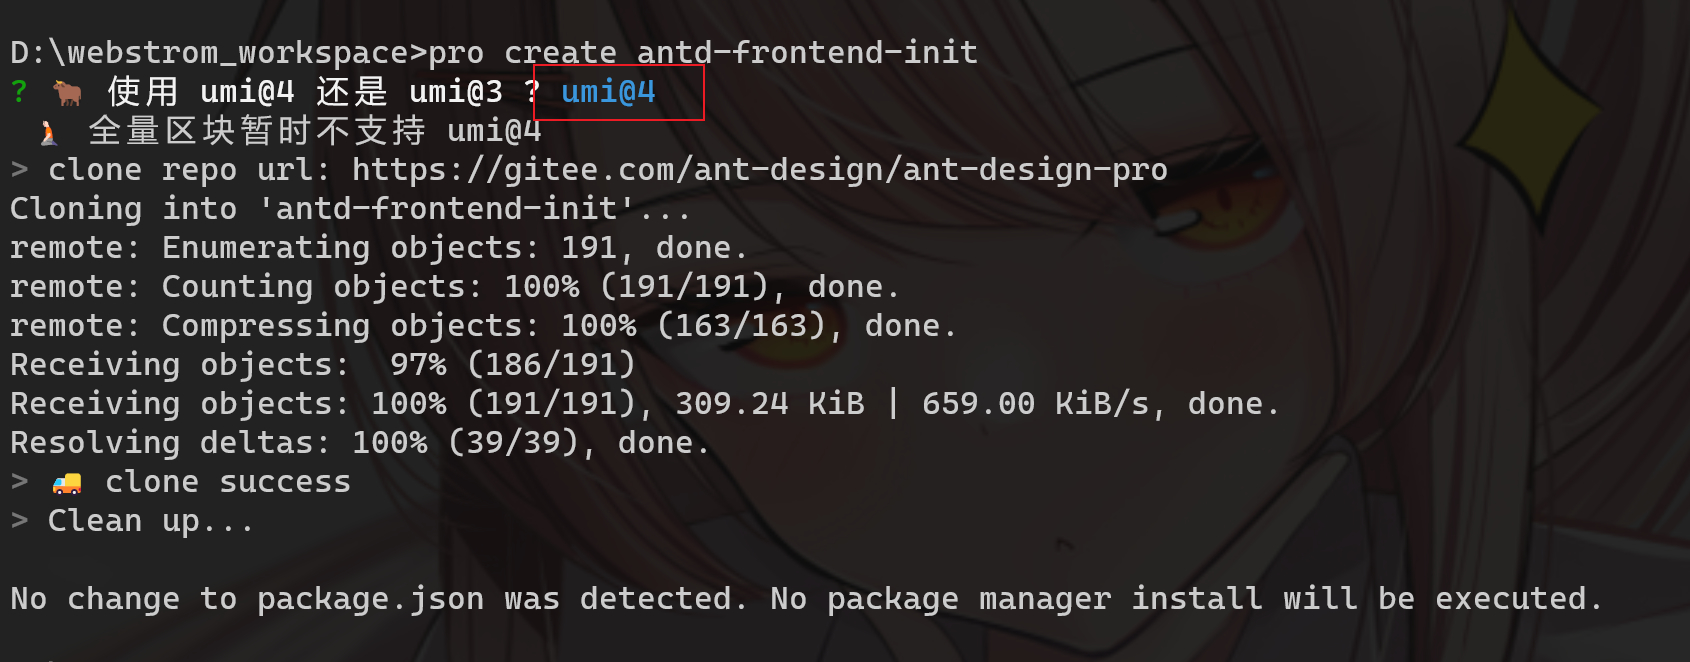
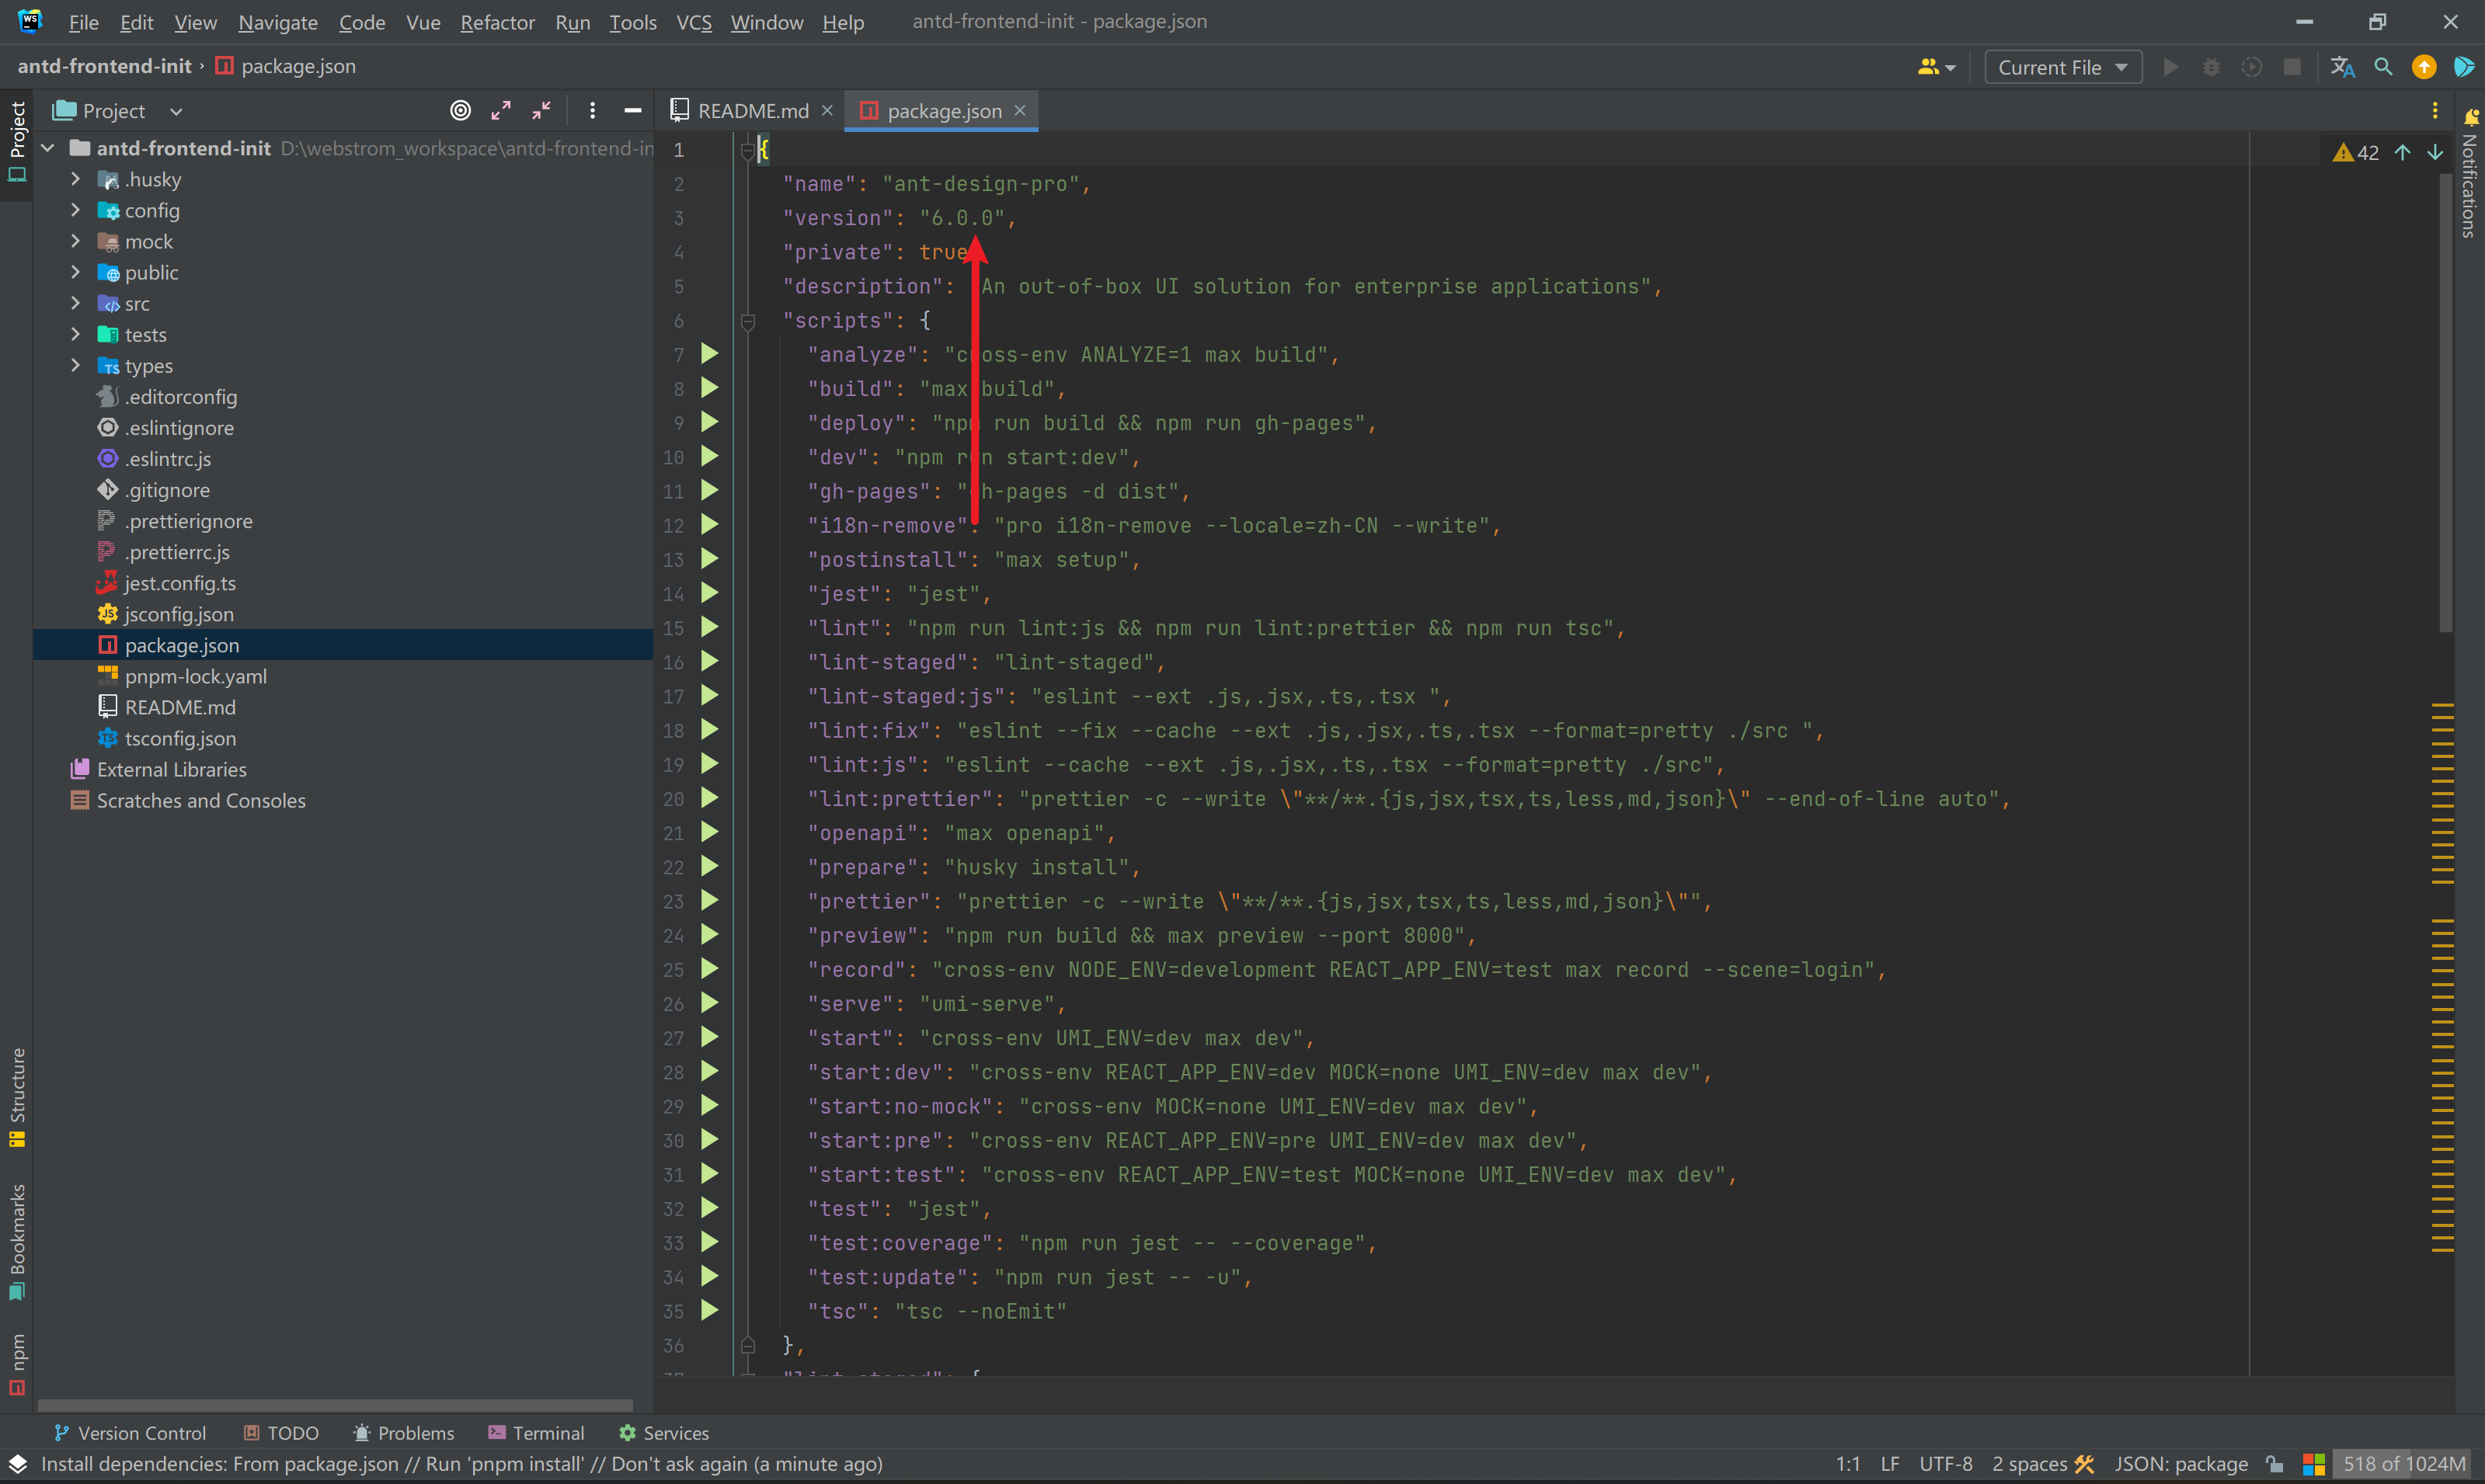
项目版本最好一致:6.0.0
可以使用 npm、yarn、pnpm、cnpm 下载依赖,建议版本不要过低,也就是 node 版本最好在 16 及以上。
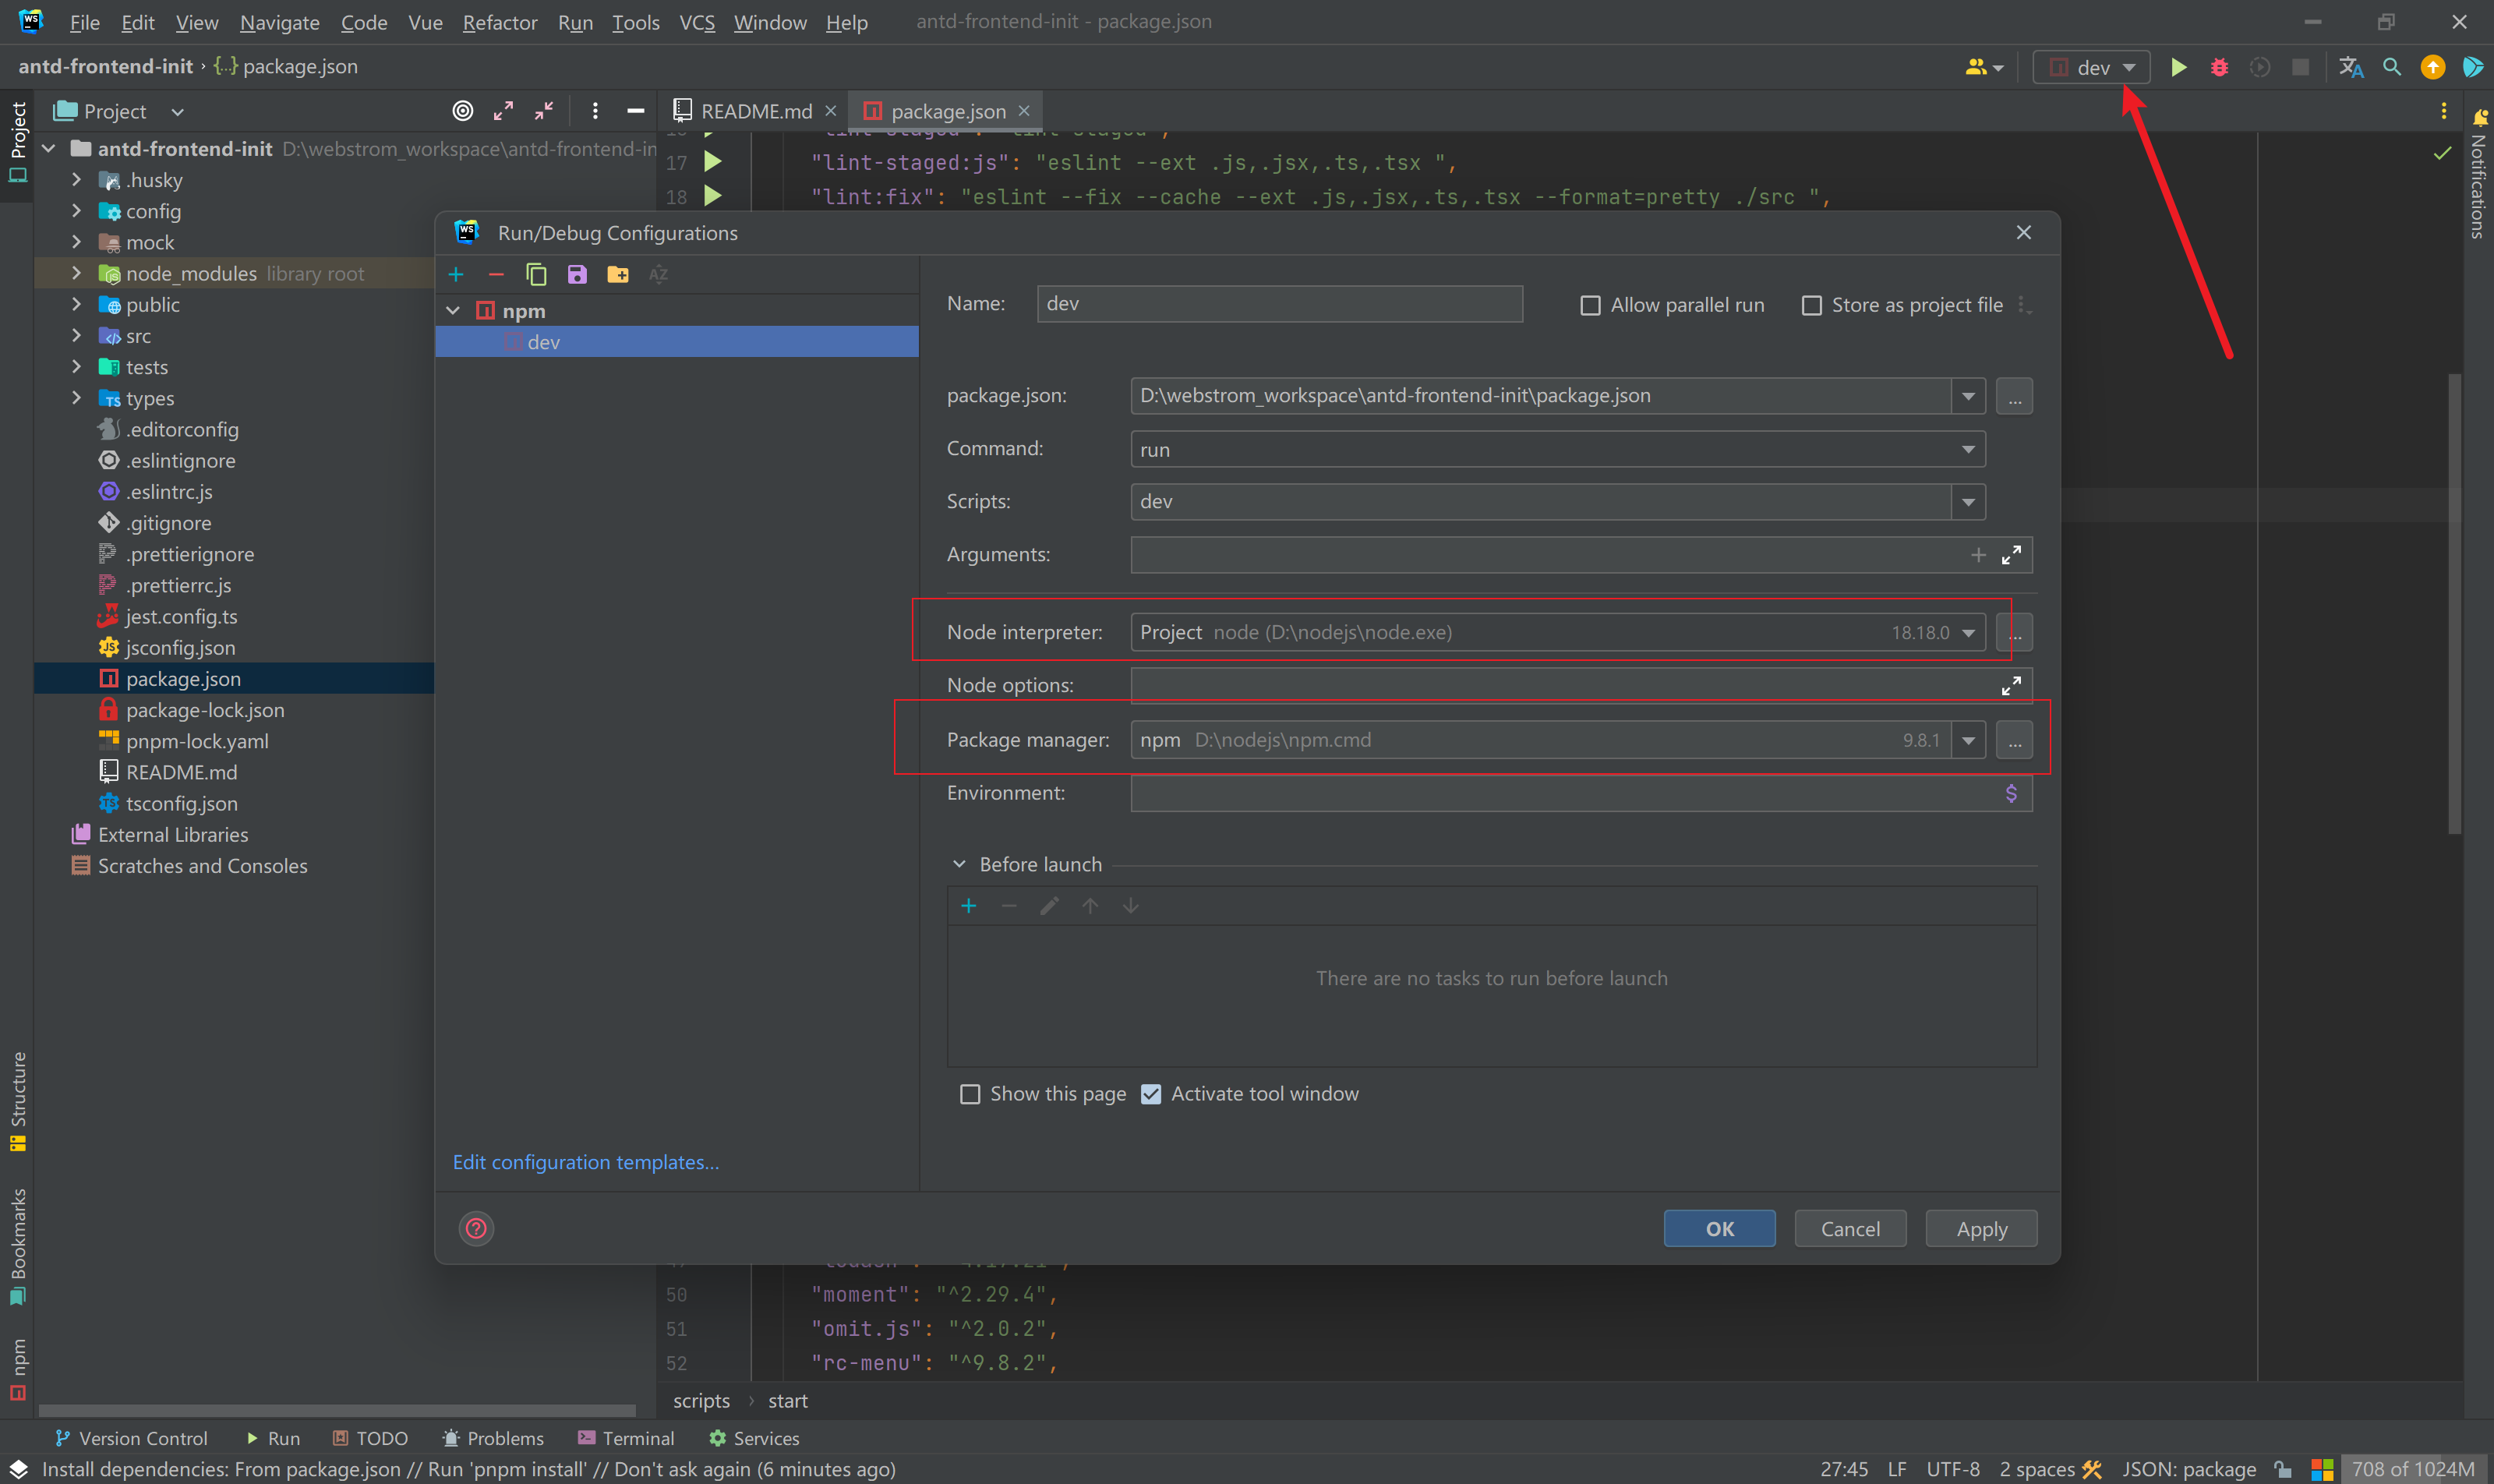
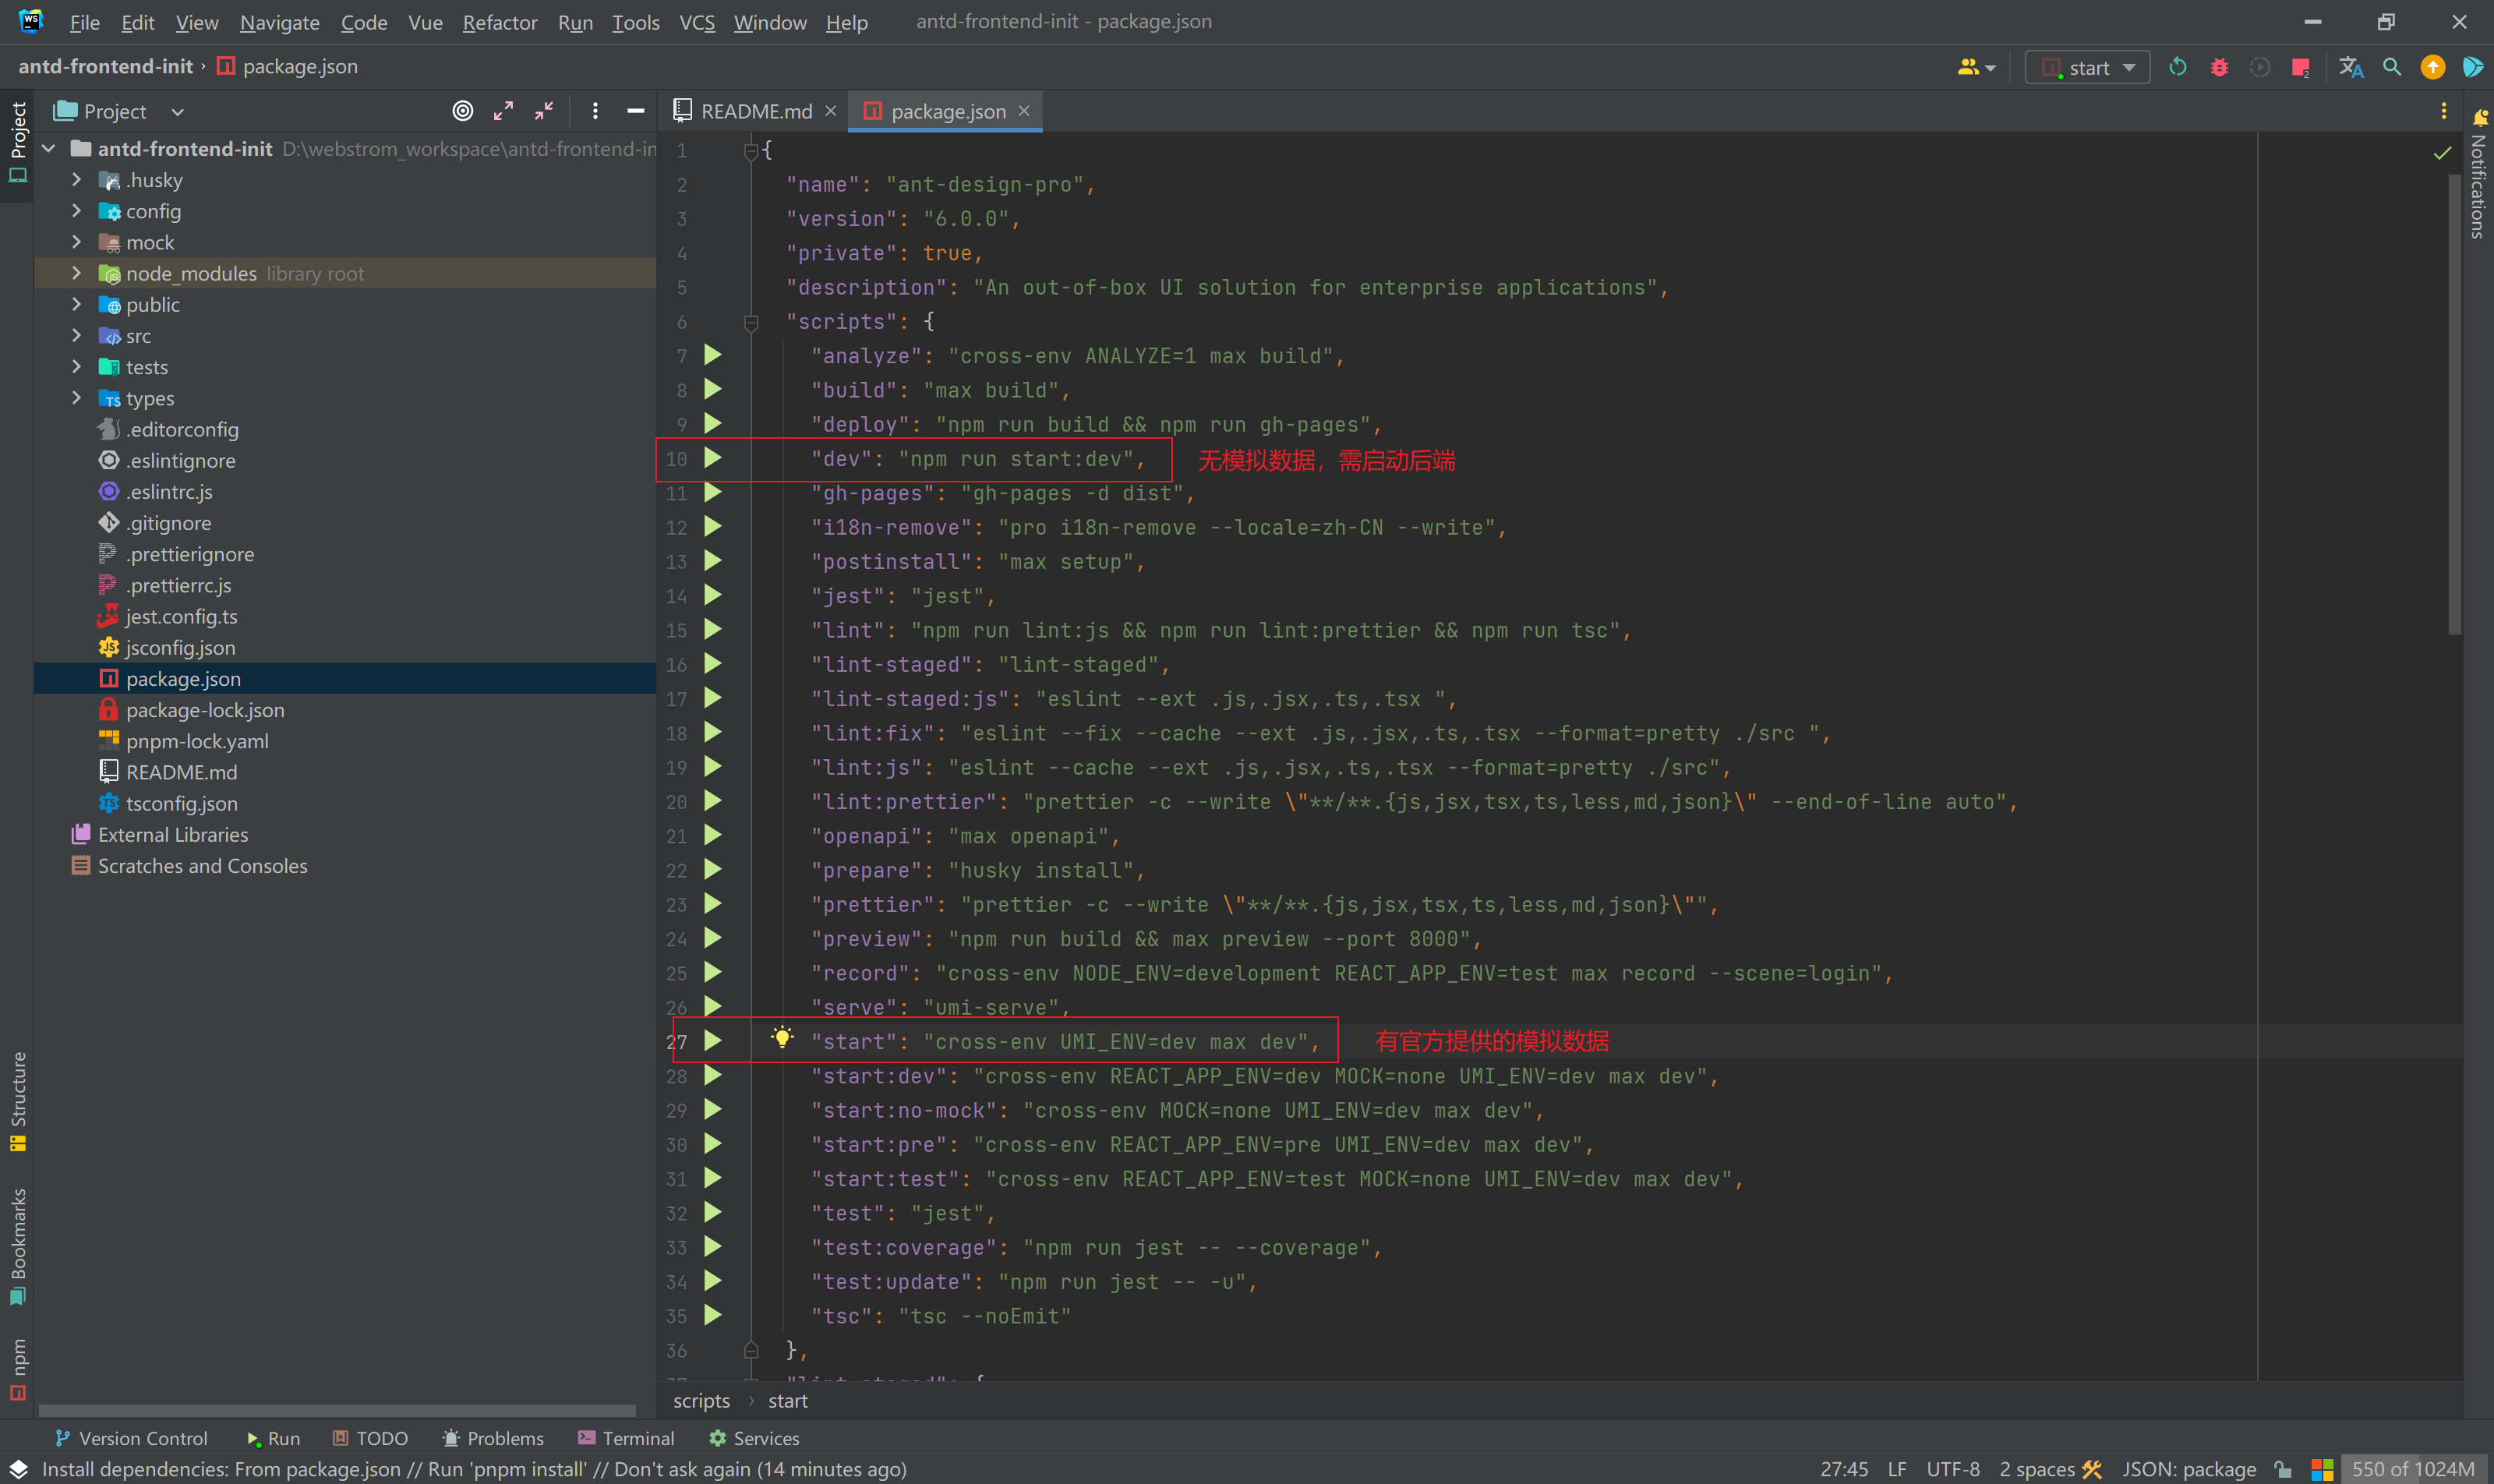
运行 npm dev 测试执行,运行 npm start 可以开启 Mock 数据。
初始化可能遇到的问题
1)可能会因为缺少 .git 文件导致 husky 执行报错,忽略即可。
开发规范
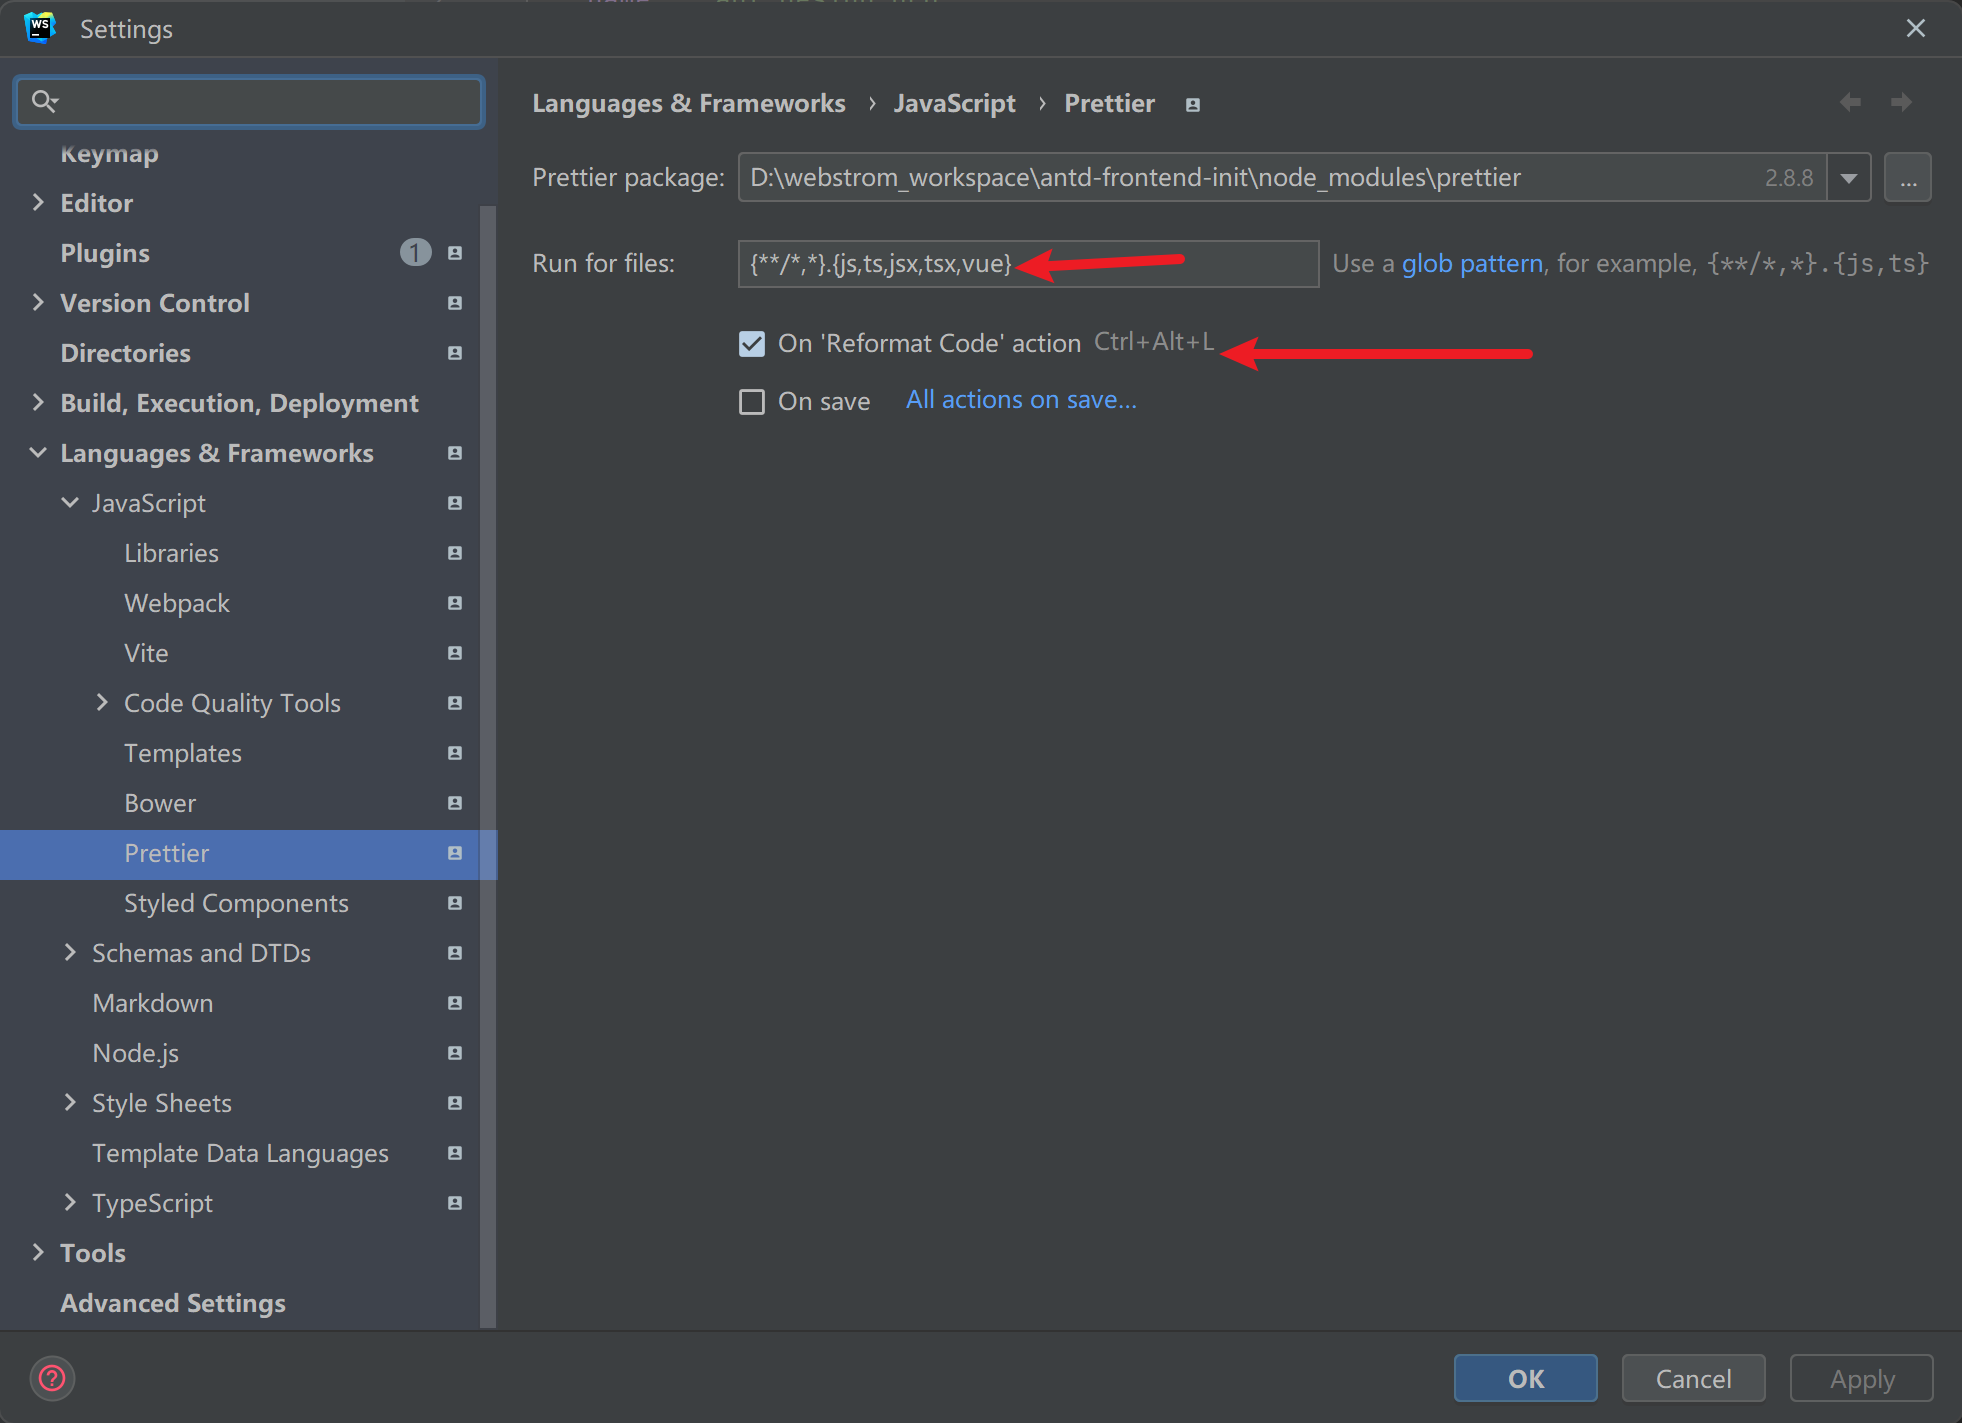
Prettier 格式化工具,用来统一代码格式
格式化快捷键建议勾选,Vue 技术栈同学建议手动加 .Vue 后缀
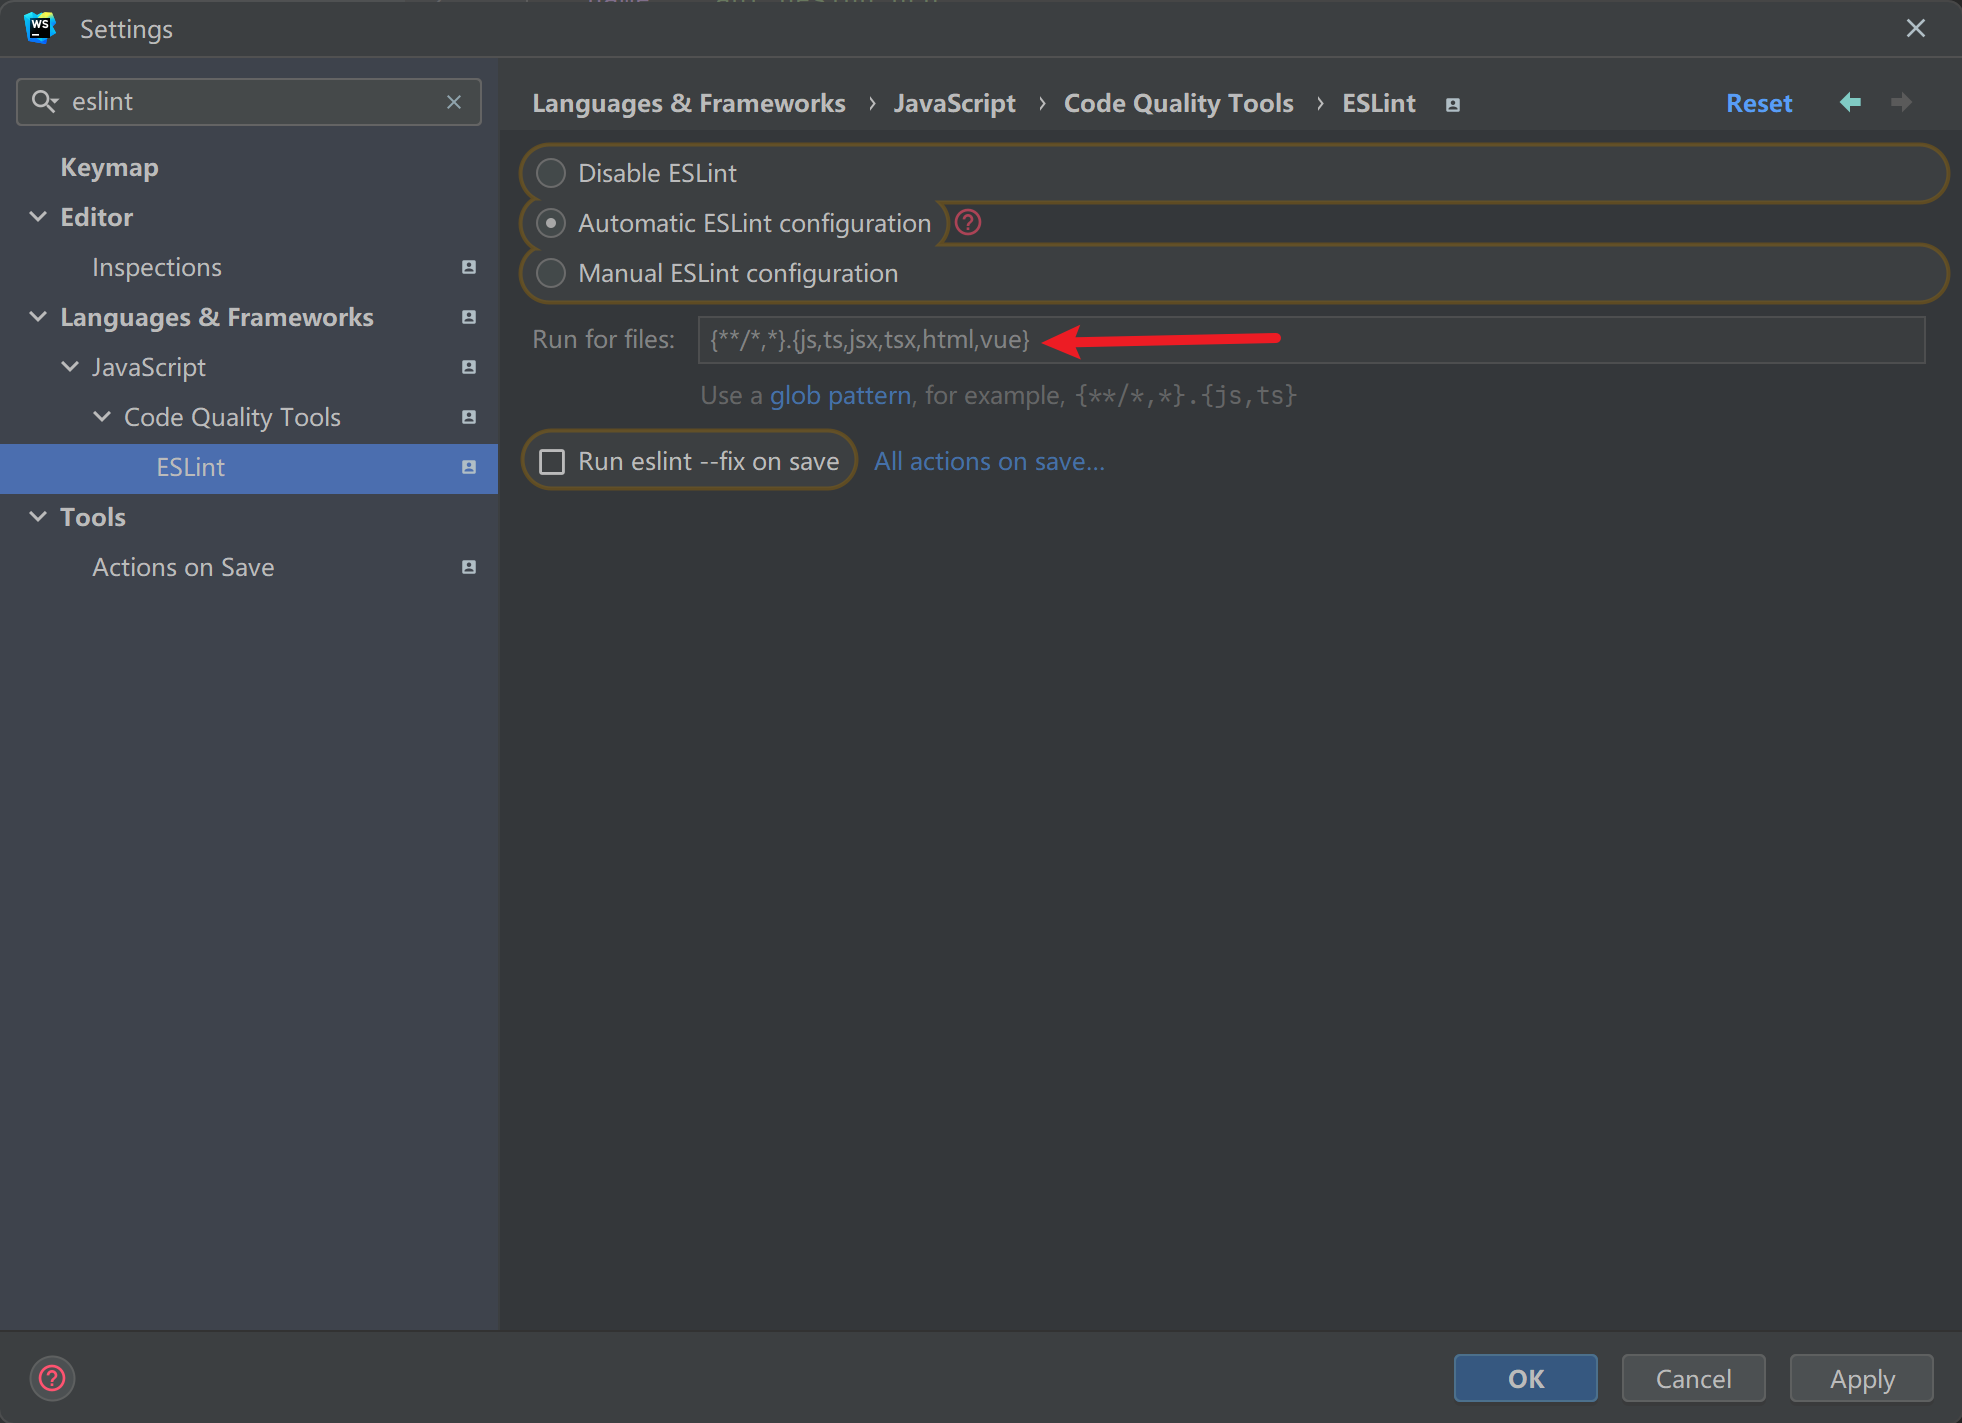
Eslint 保持代码风格,减少代码出错。
同样的,Vue 技术栈手动加上即可
模板瘦身
移除模块
注意事项(重点)
一次移除后,去重启一下项目,看看能否正常运行,控制变量法,如果不行,直接回滚一下就可以了,一次性删除太多,容易找不到源头。
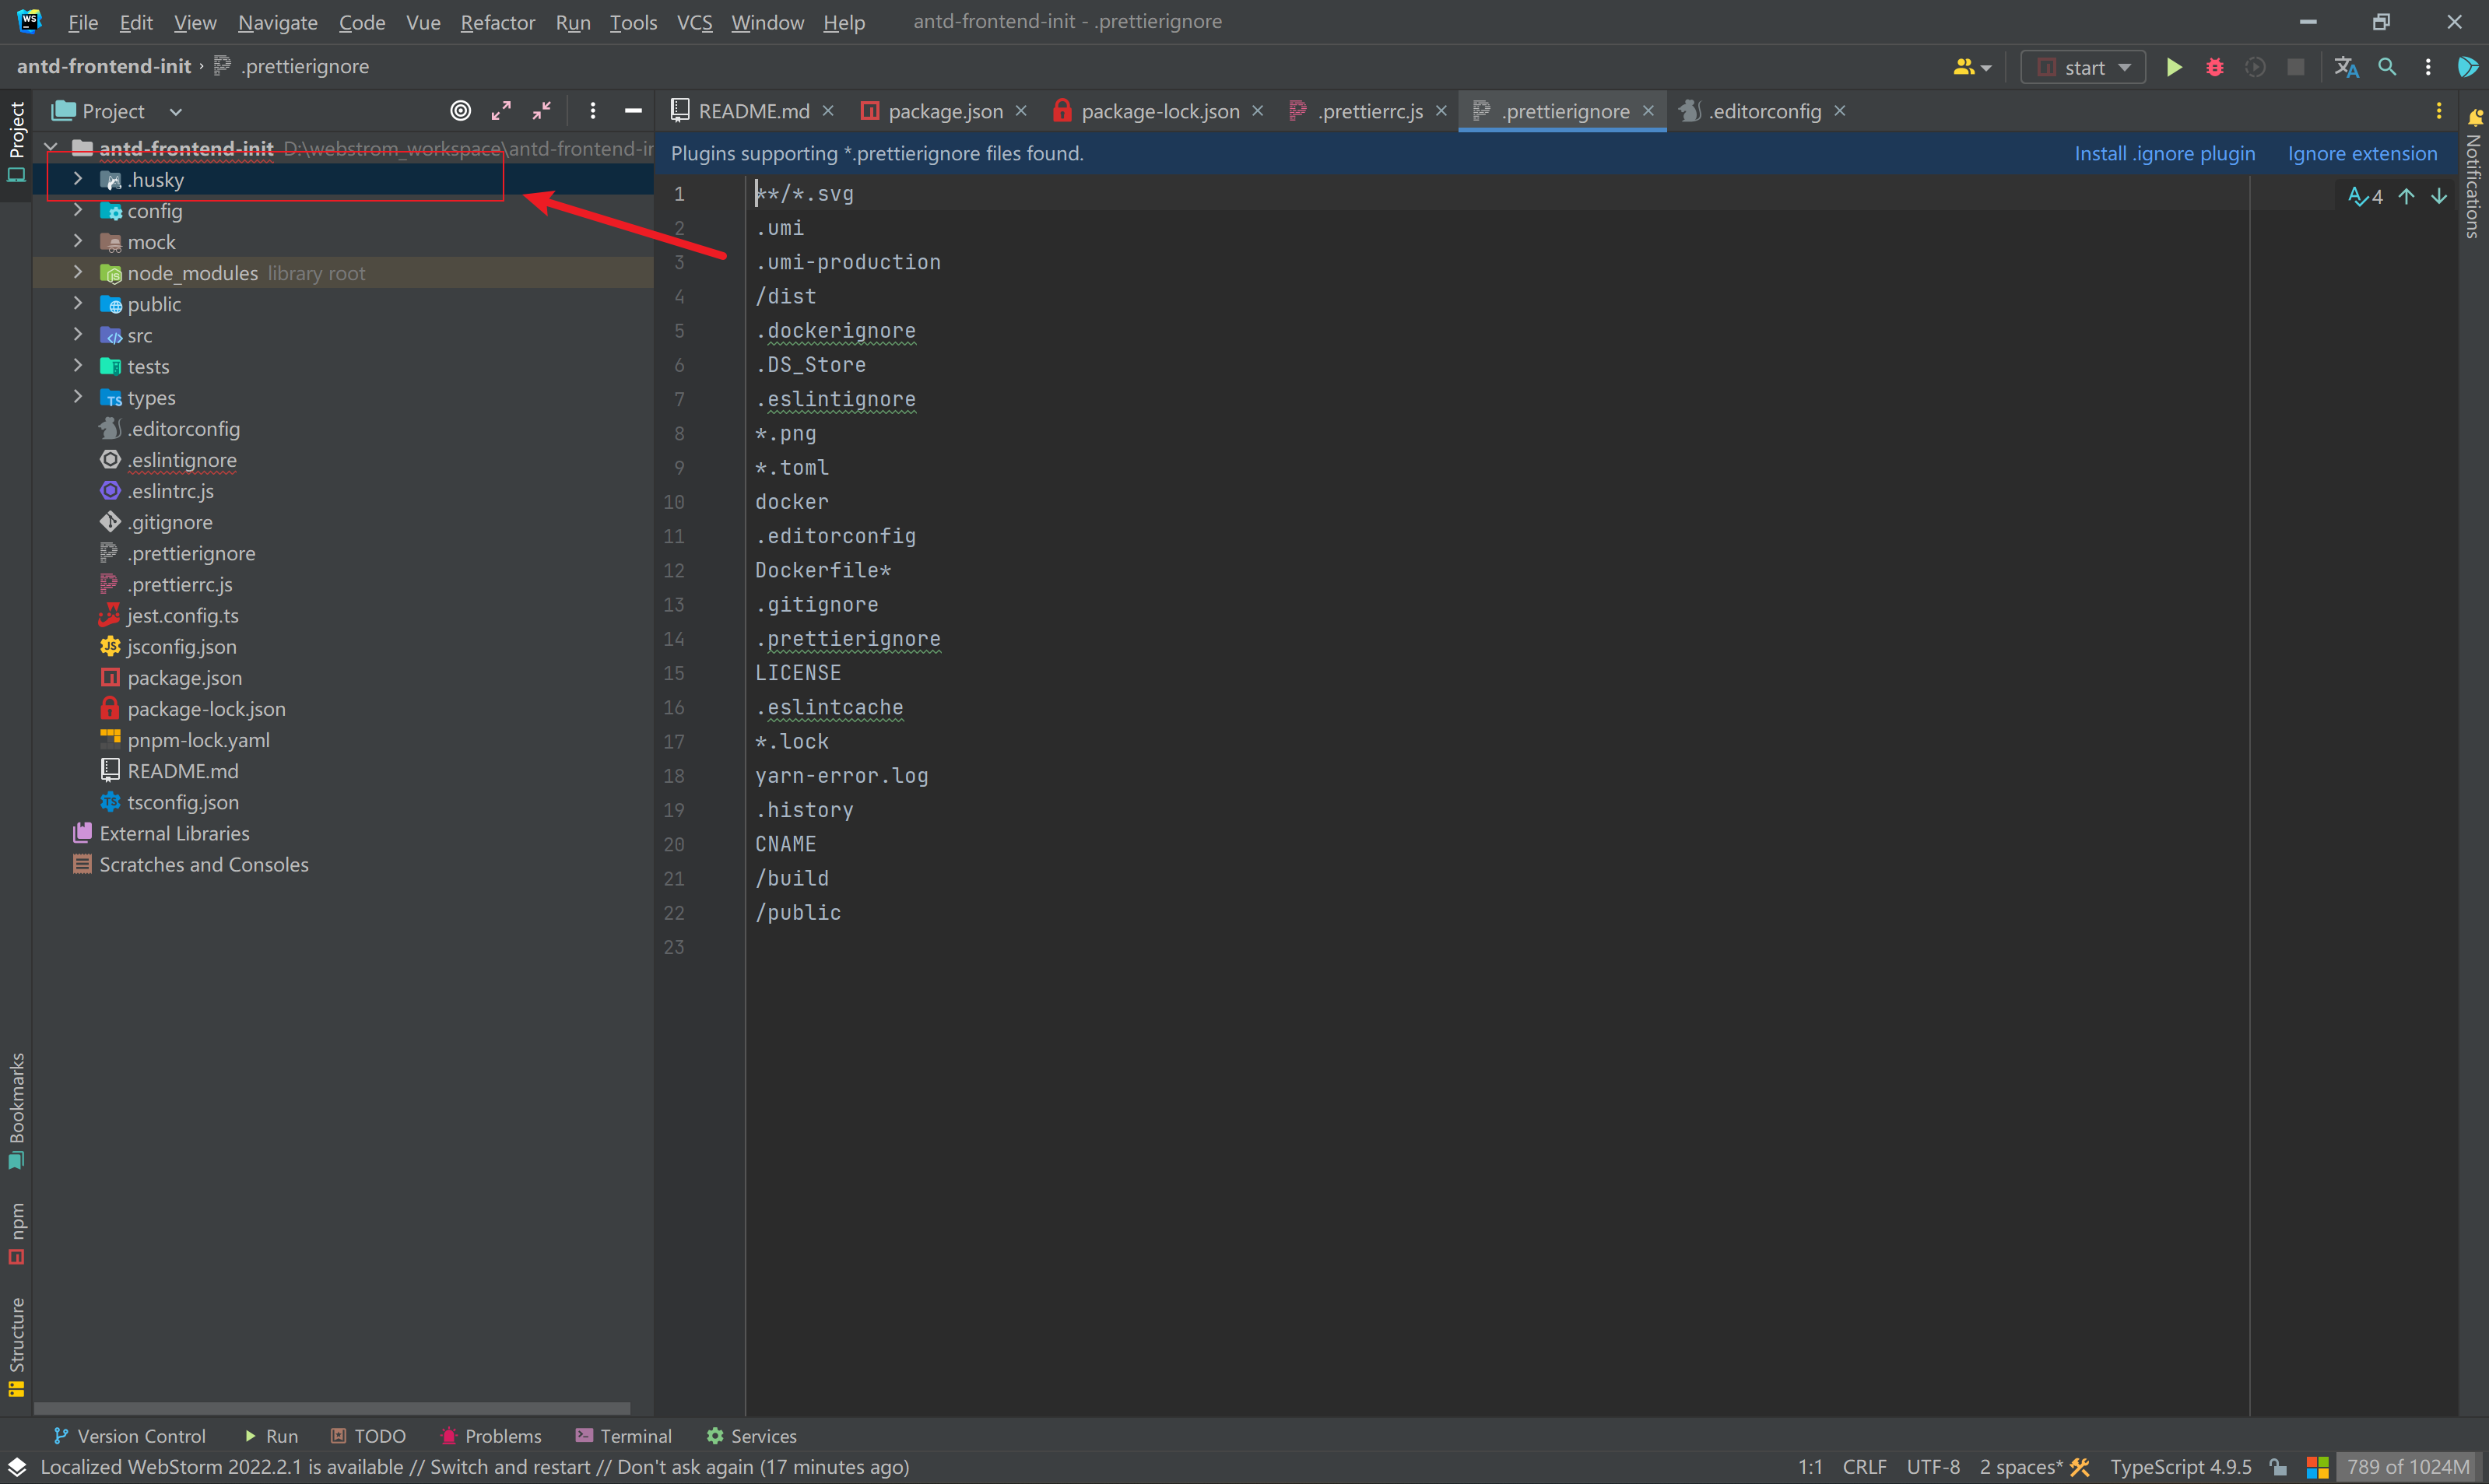
移除 husky
一个用来提交前检查代码的规范,保证代码的一致性,一般用于团体协作,个人没有必要。
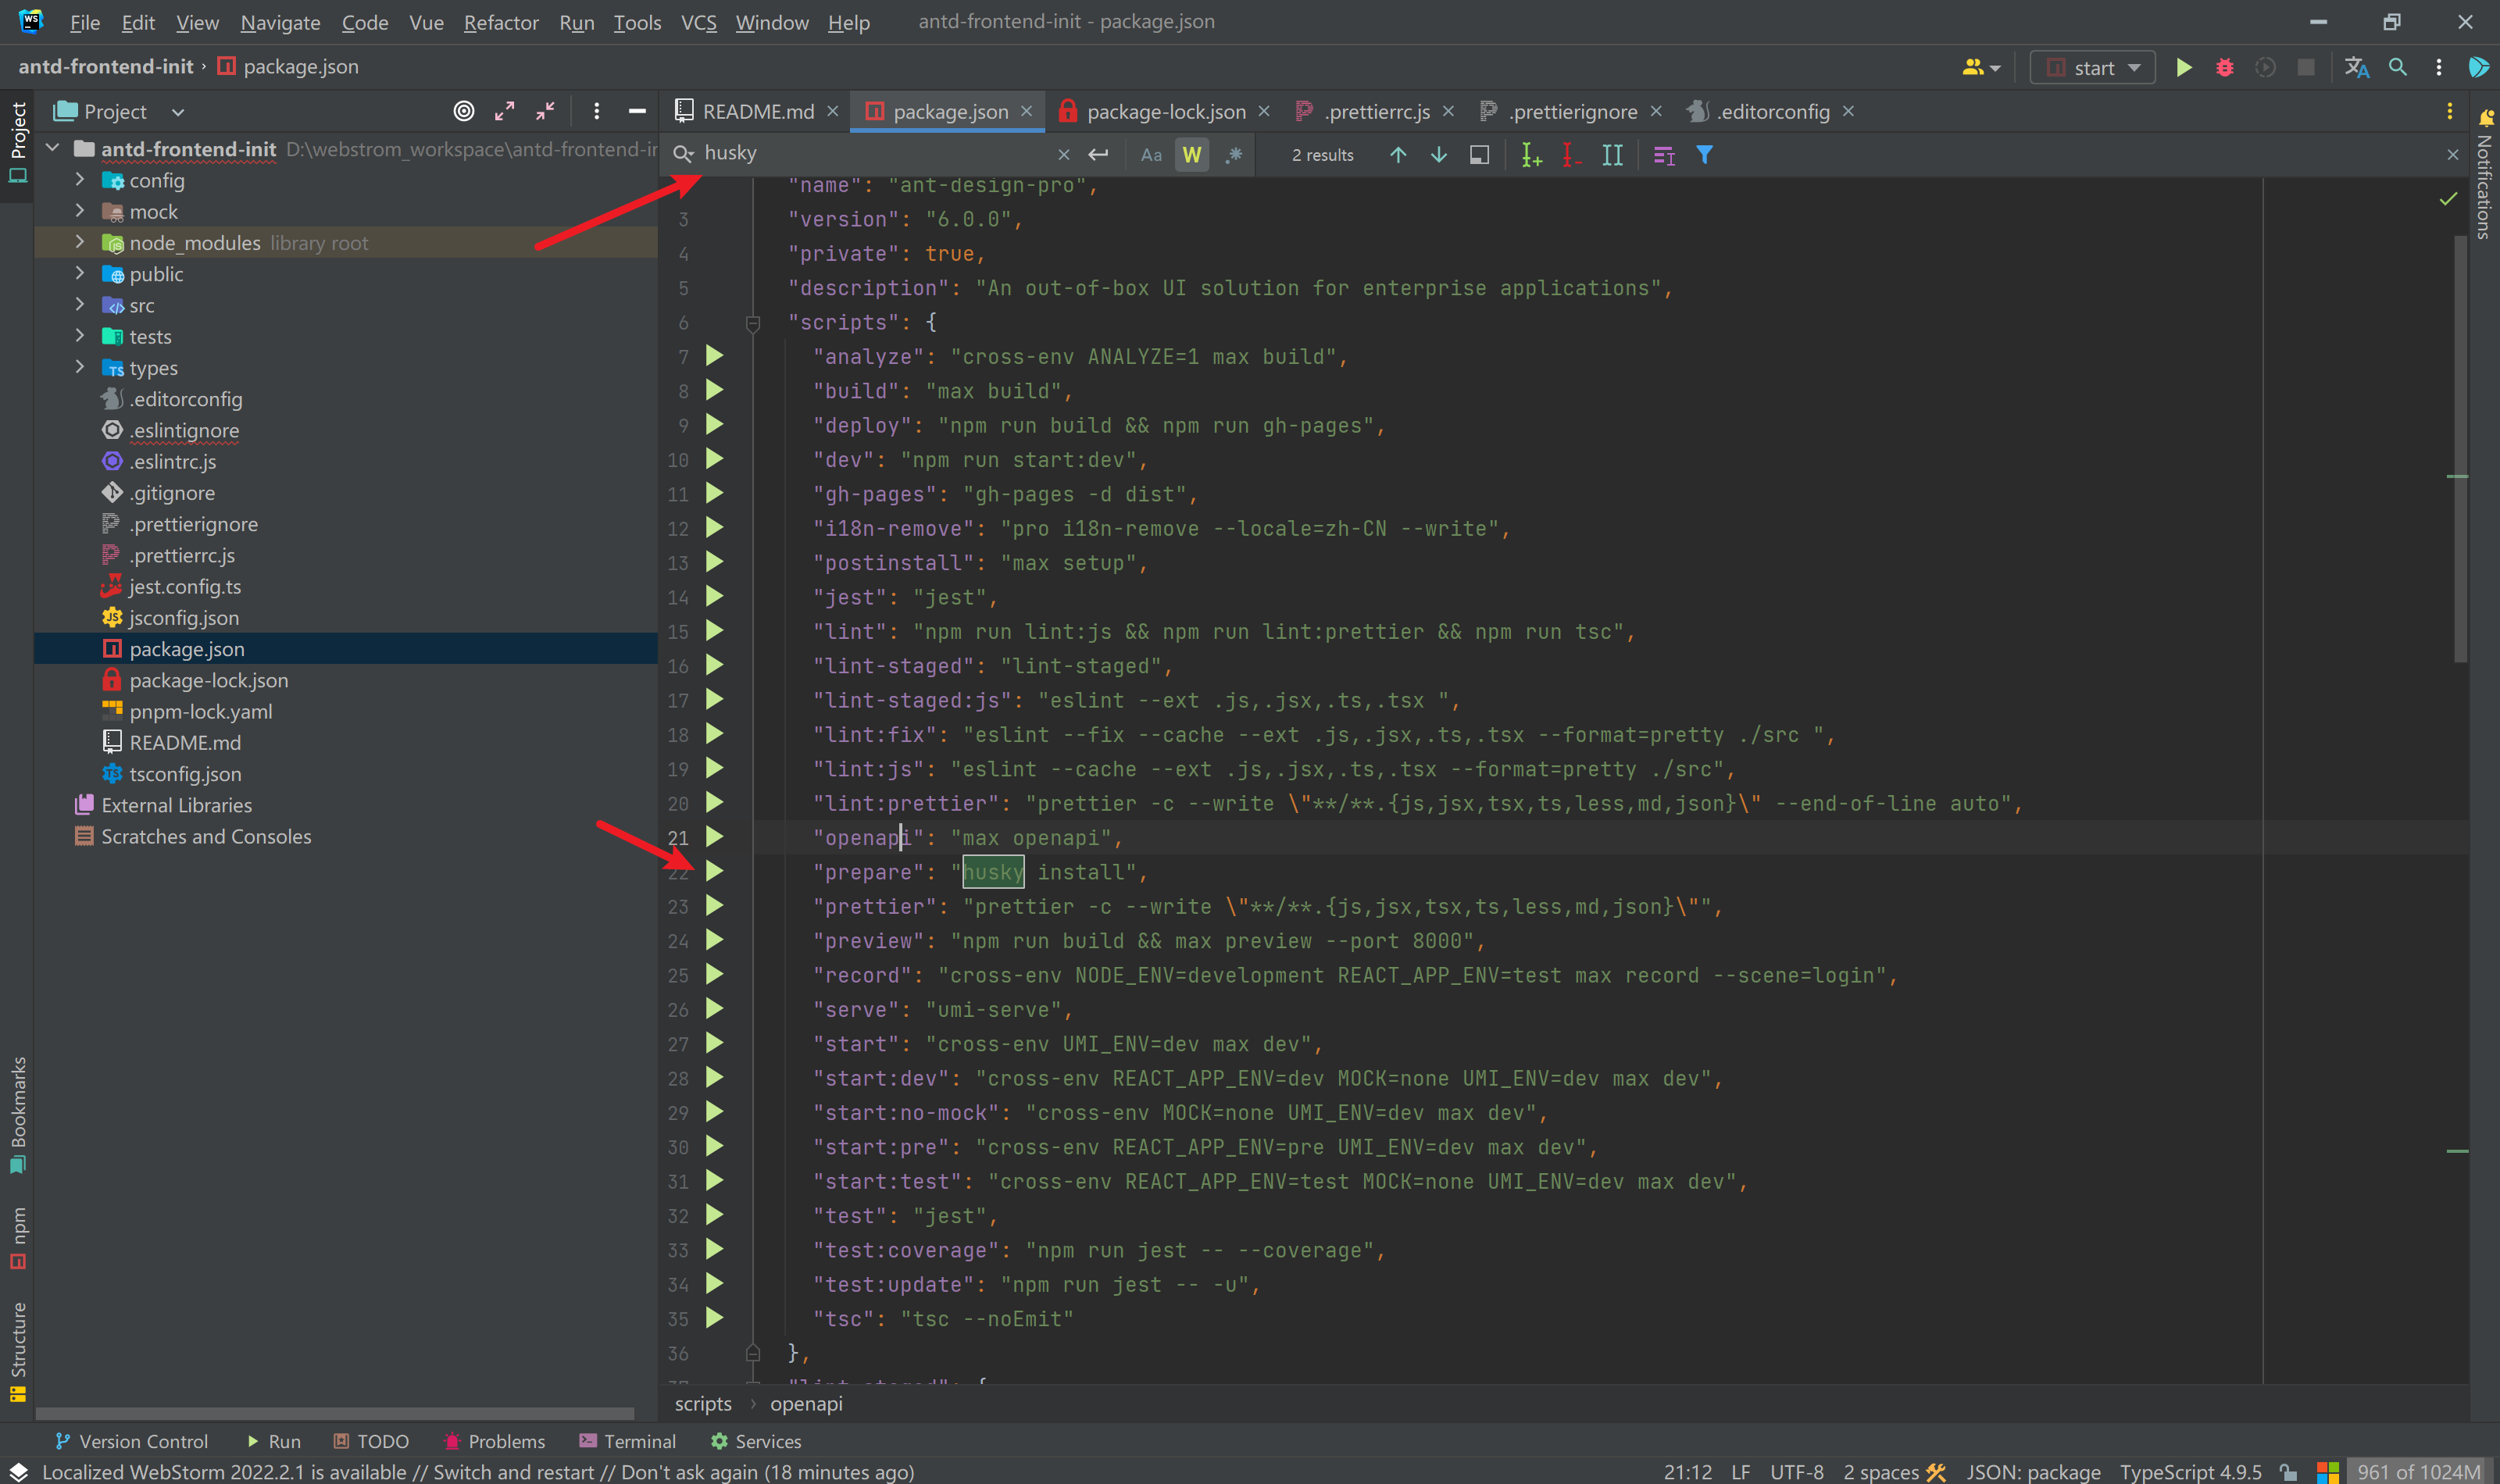
移除相关的命令
移除 mock
mock 是官方提供的模拟数据,而我们自己是有真实的后端接口要对接的,因此移除。
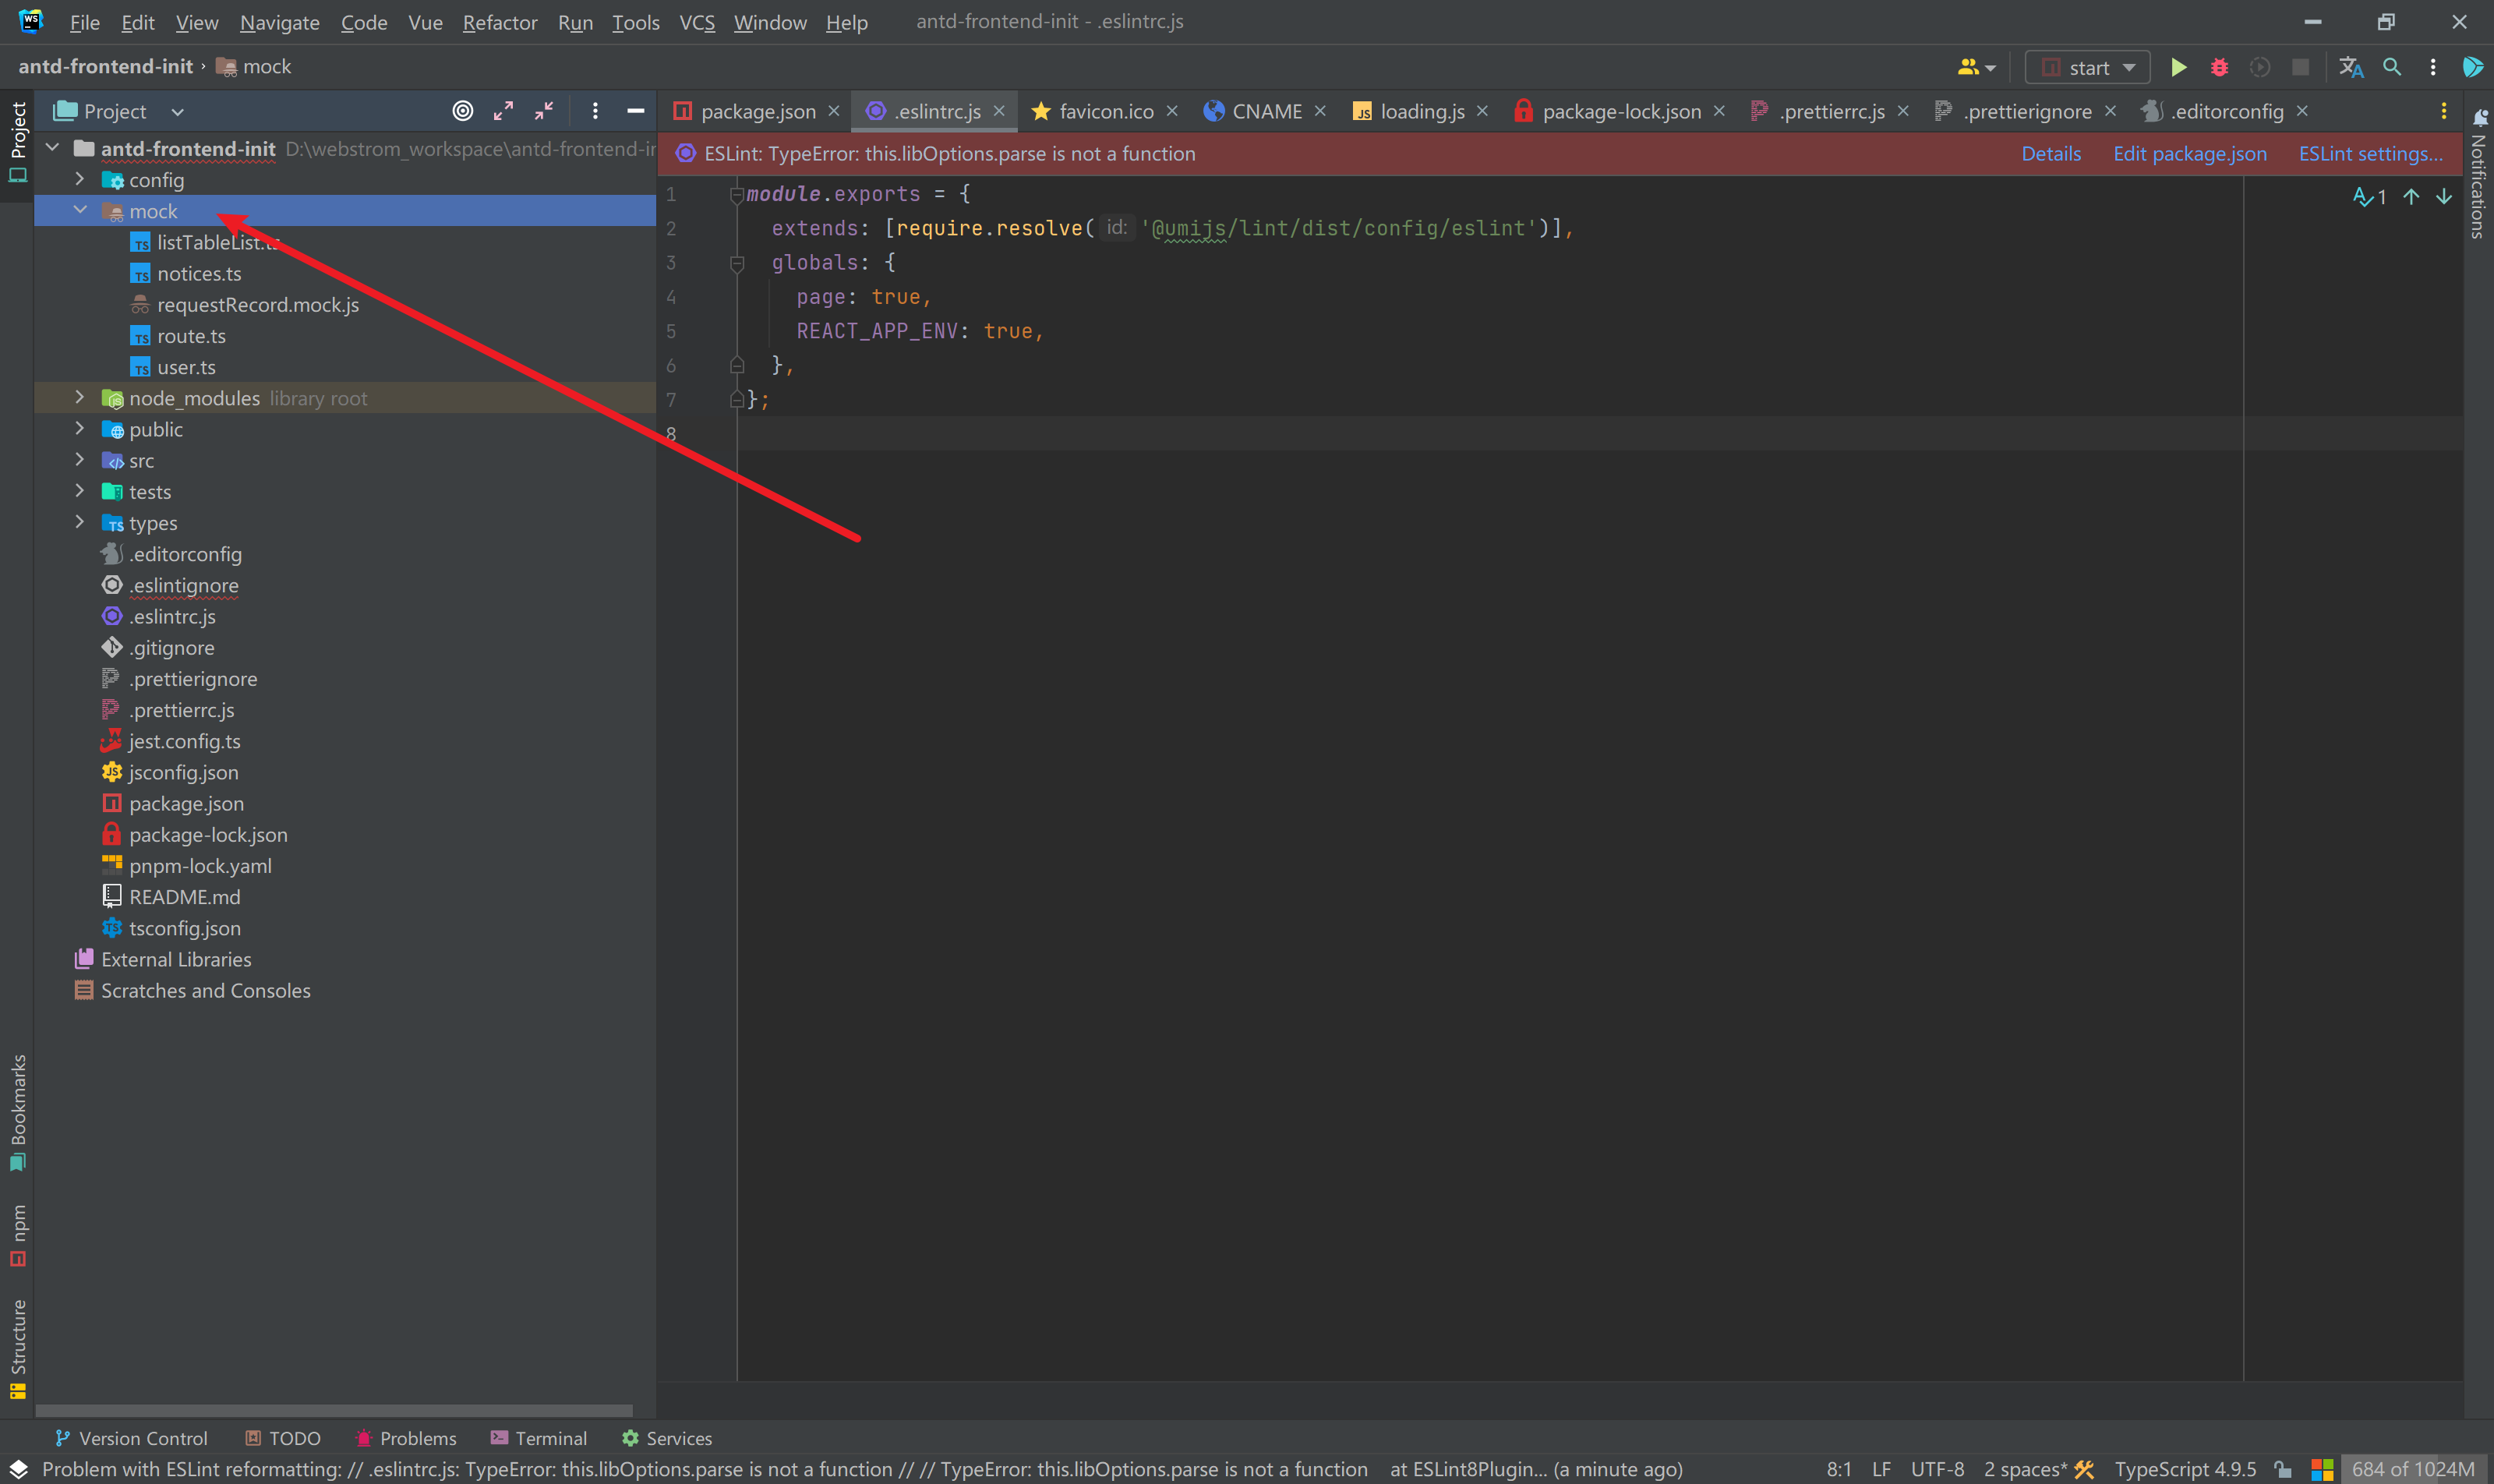
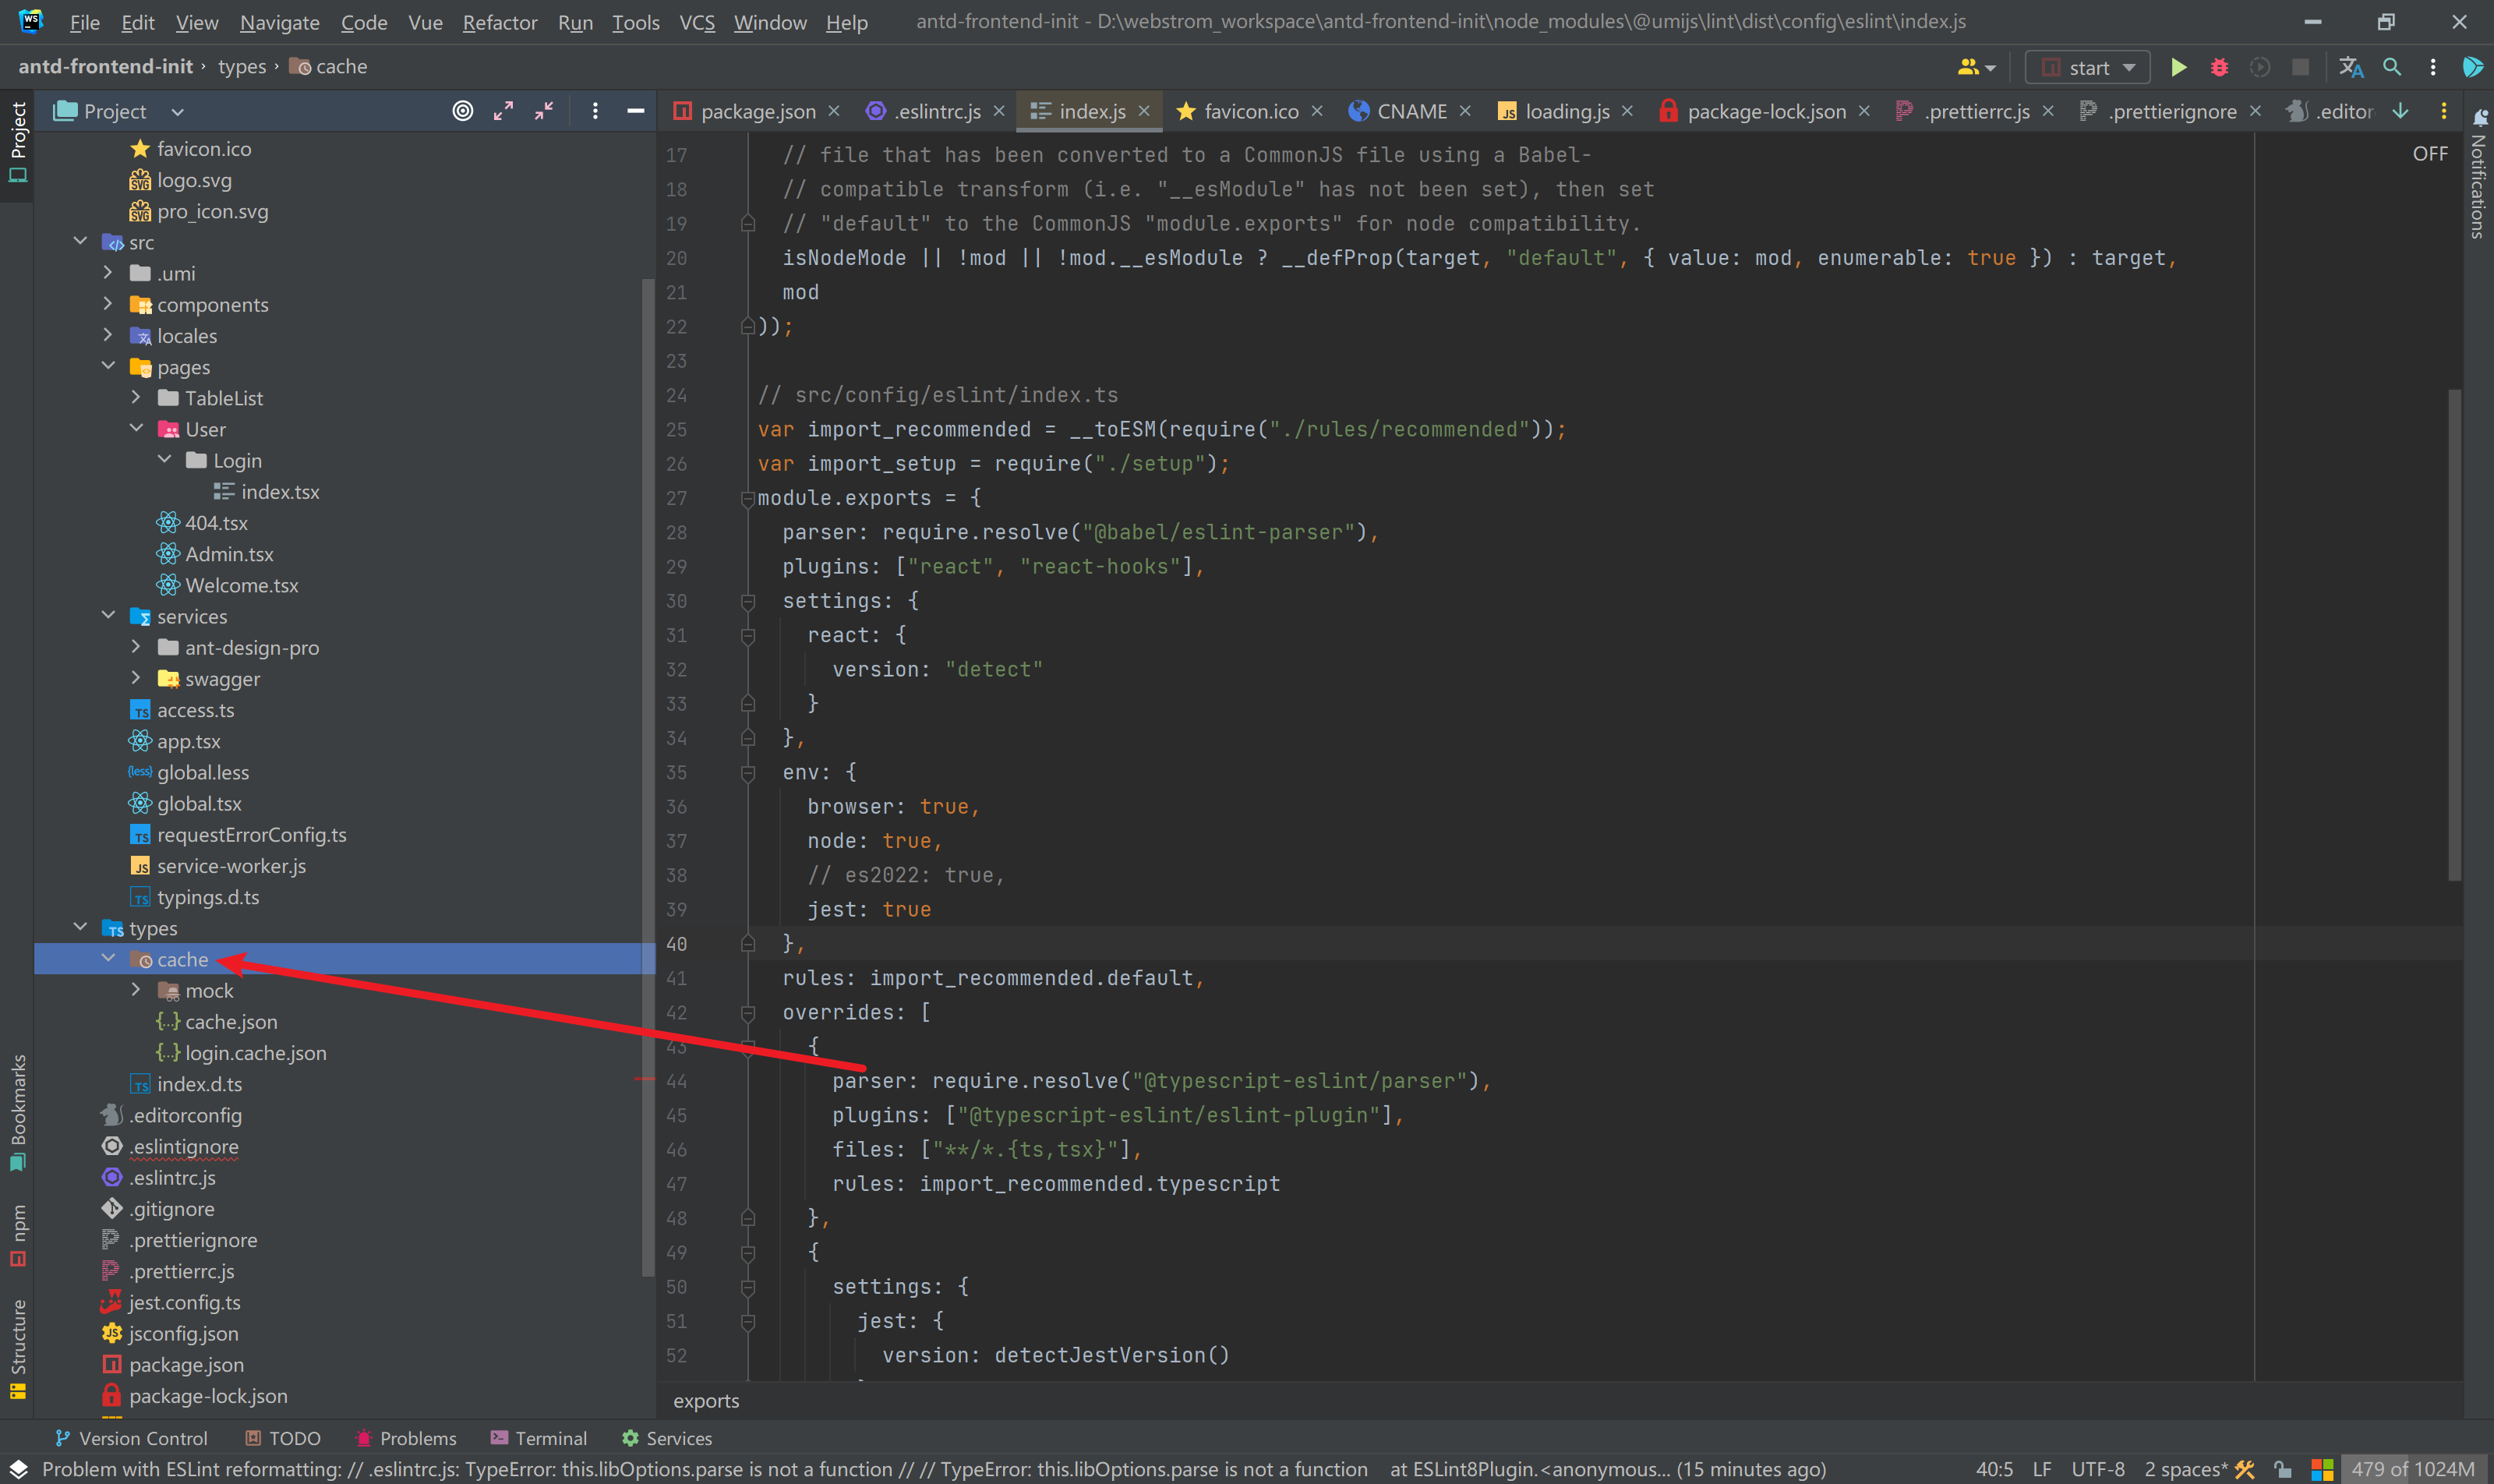
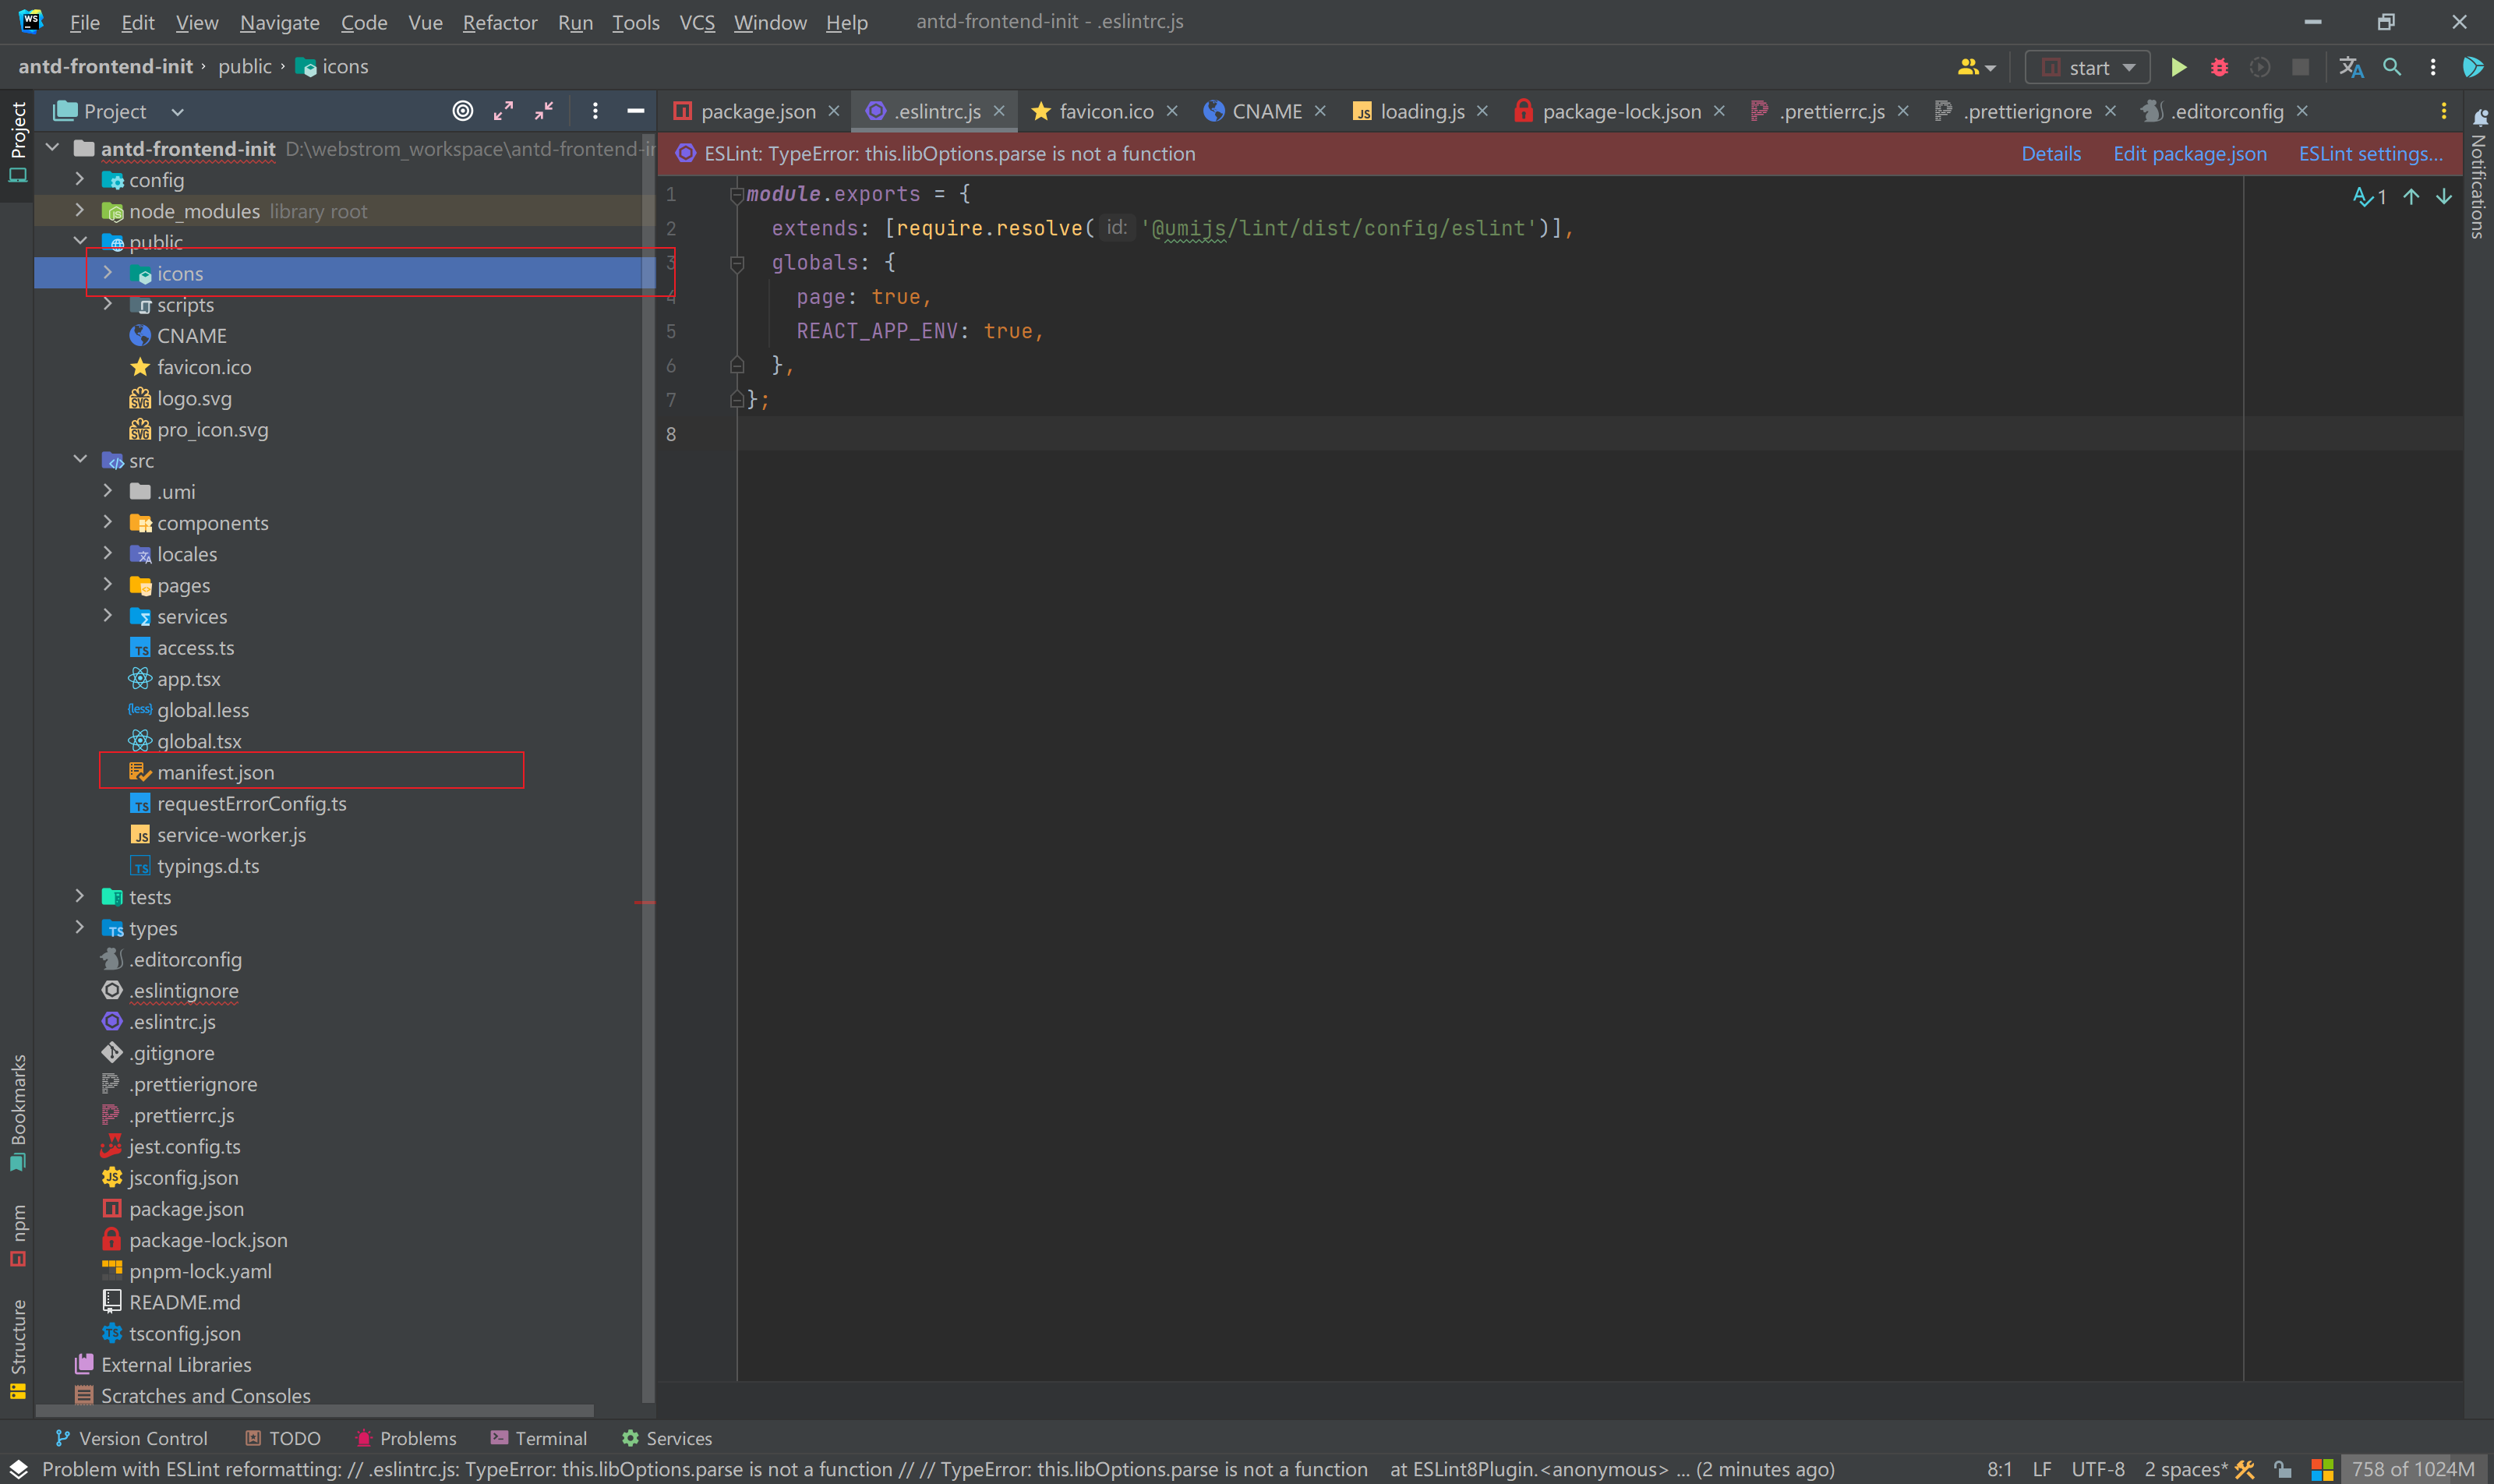
移除 icons 和 manifest.json
图标和适配移动端所需要的 Json,直接删除即可。
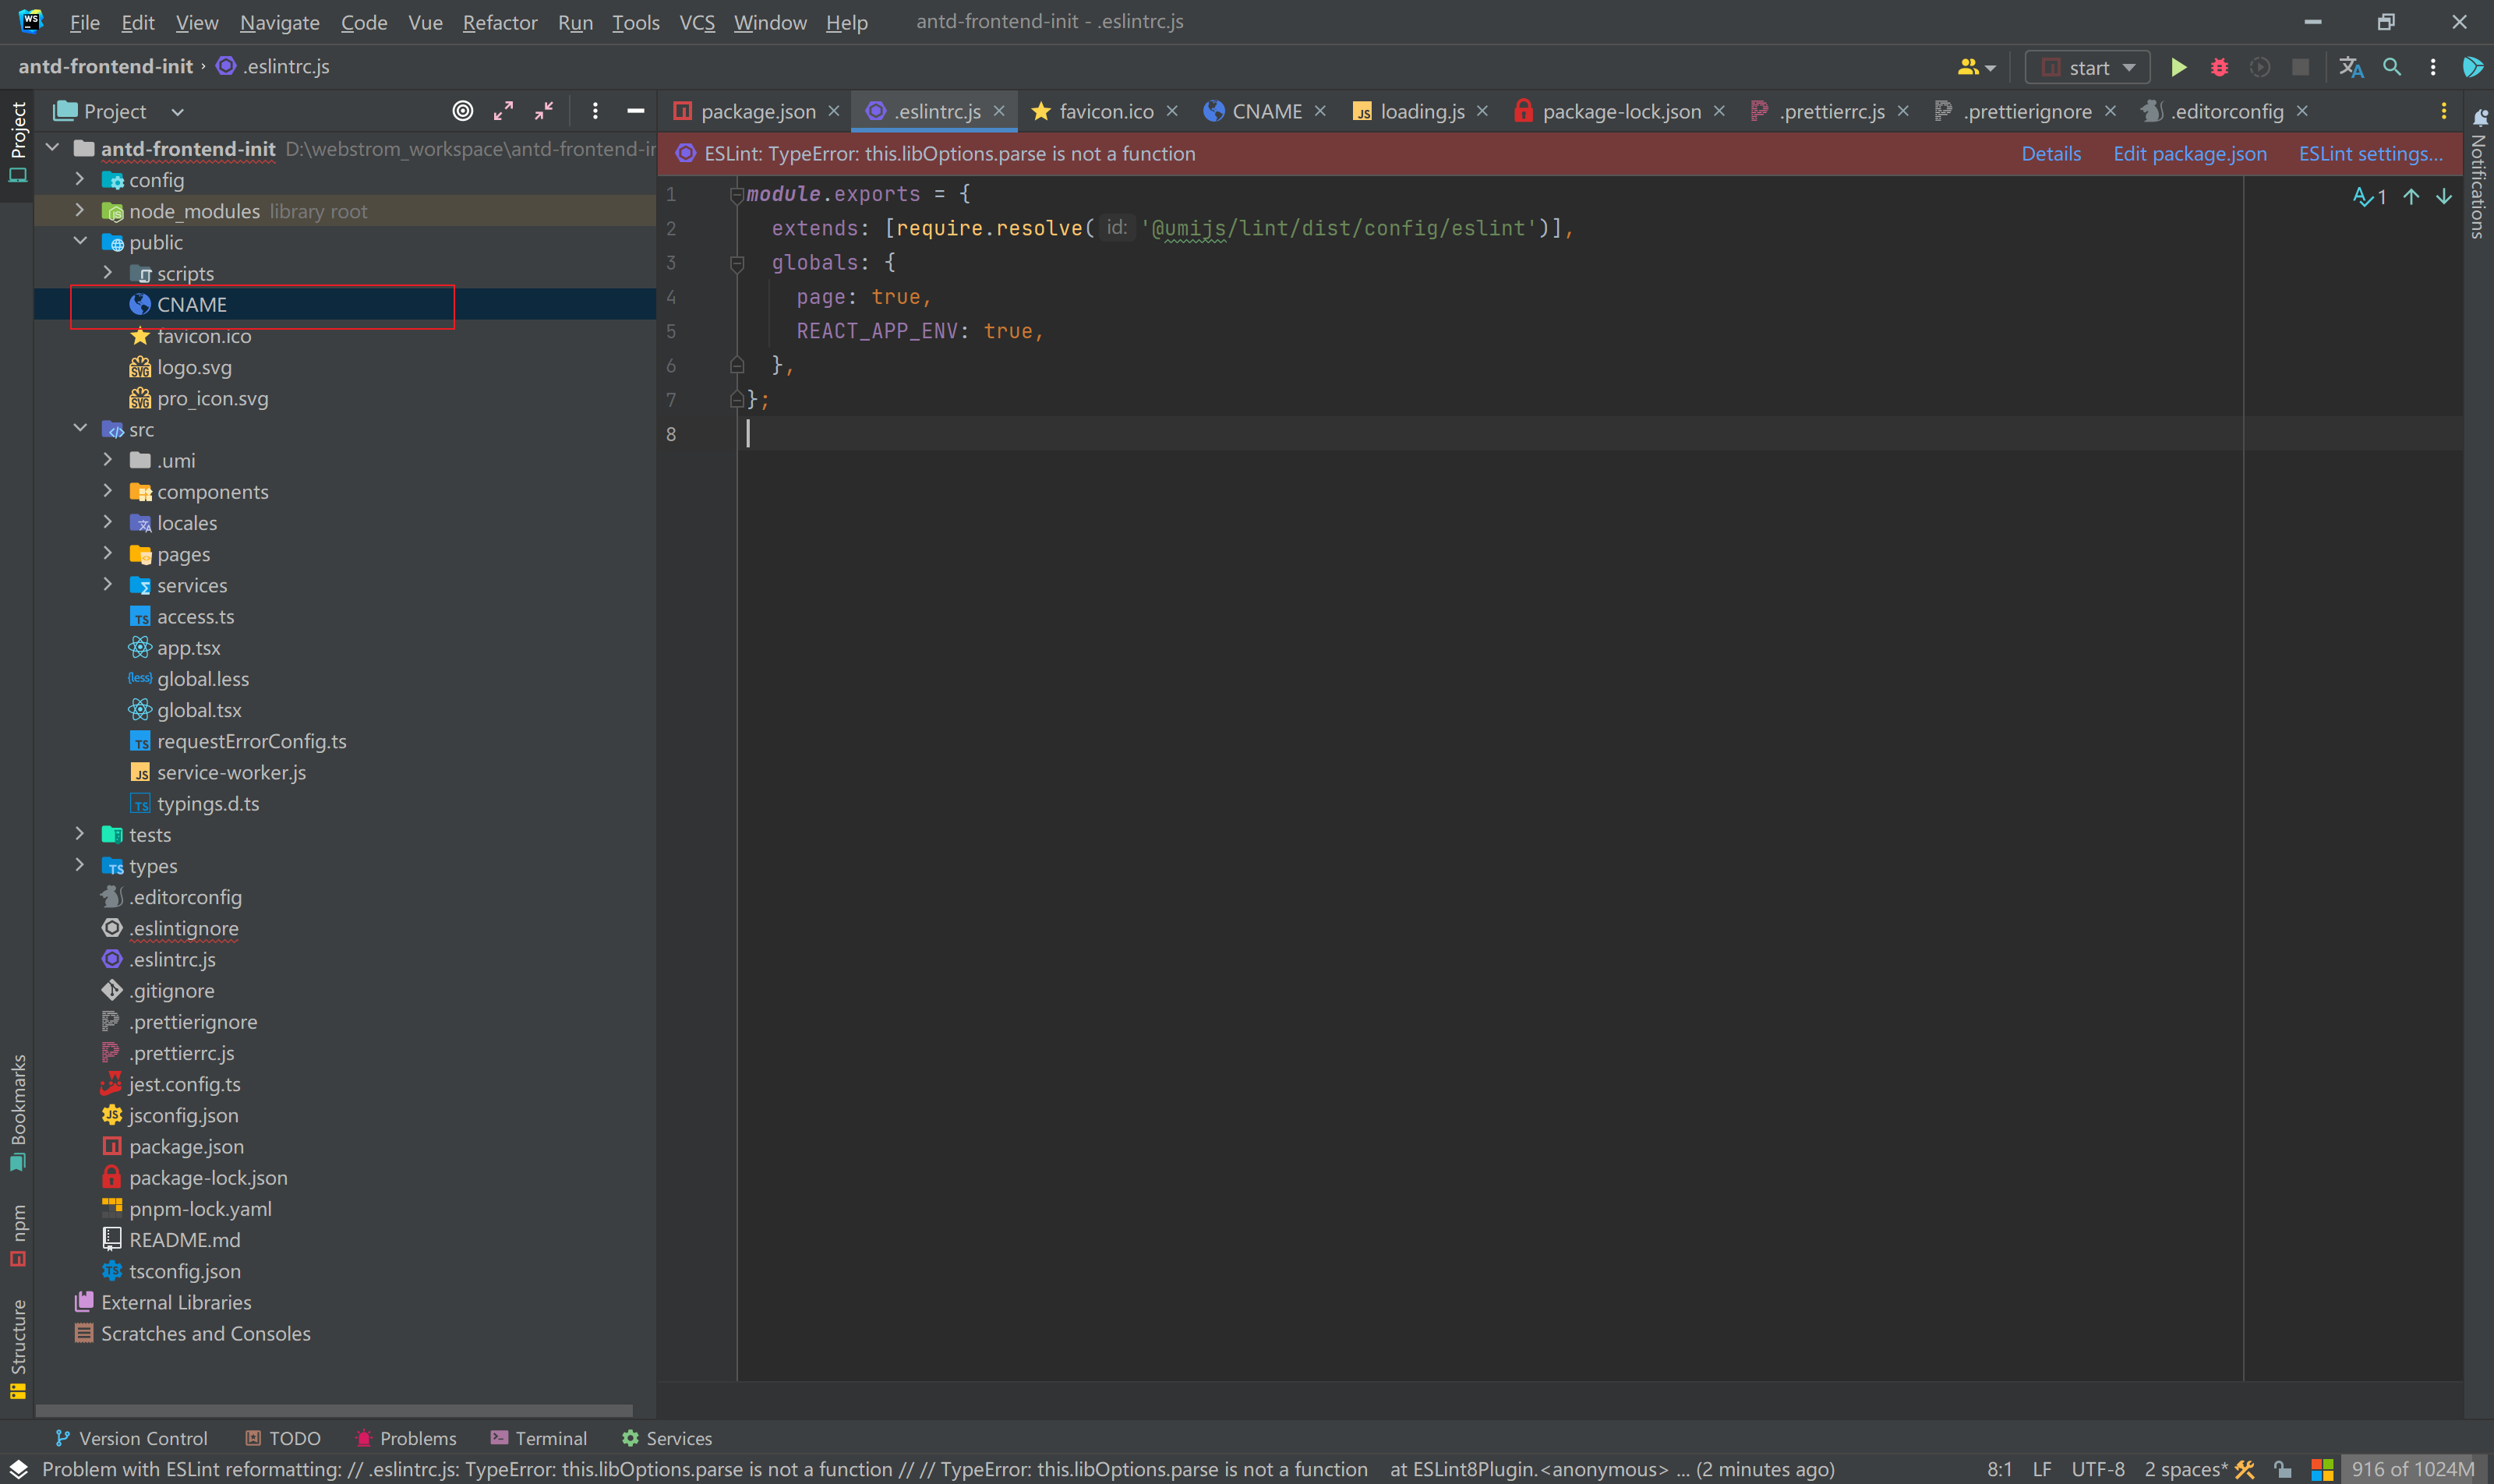
移除 cname
域名映射,官方提供的,和我们自己的域名无关。
移除国际化
一般我们自己的上线的项目只对本国用户去开放,而且访问人数也较少,没有必要去用国际化,会增加打包体积,而且页面加载速度也会变慢。
步骤:
1)前端本地执行:
yarn add eslint-config-prettier --dev yarn add eslint-plugin-unicorn --dev
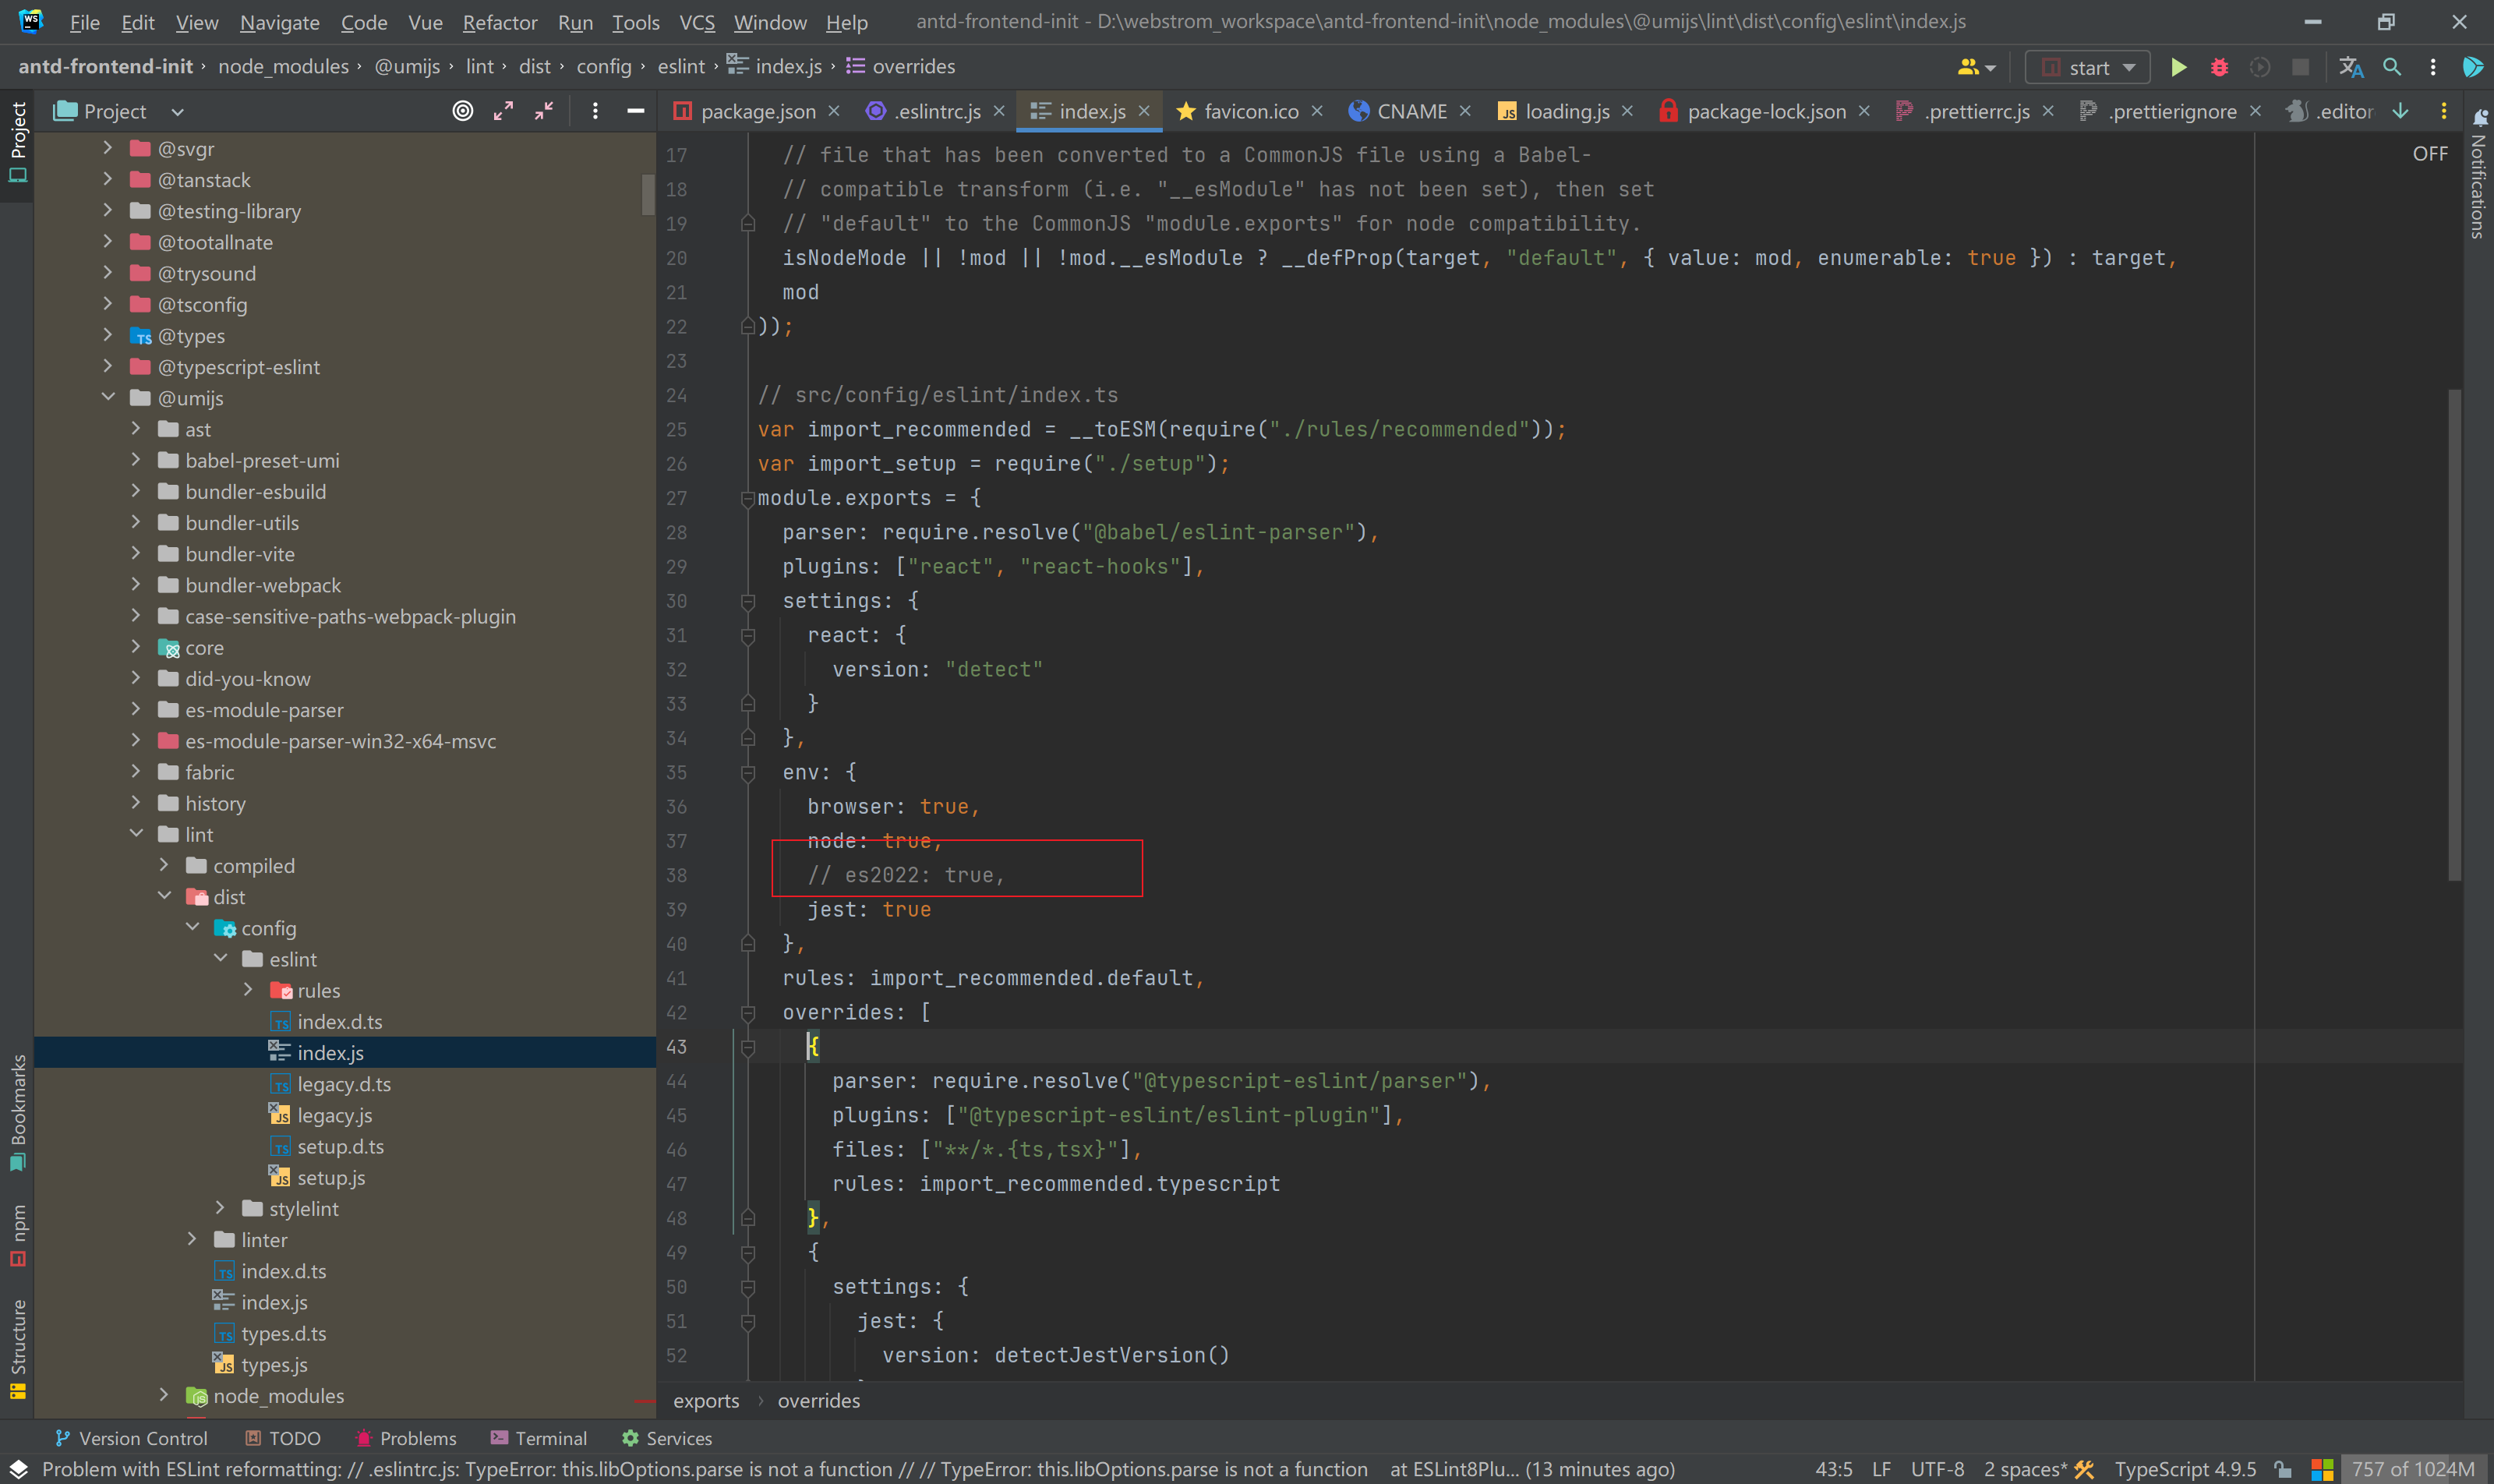
2)注释 es2022
找到 node_modules / @umijs/lint/dist/config/eslint/index.js, 注释掉 es2022 那行
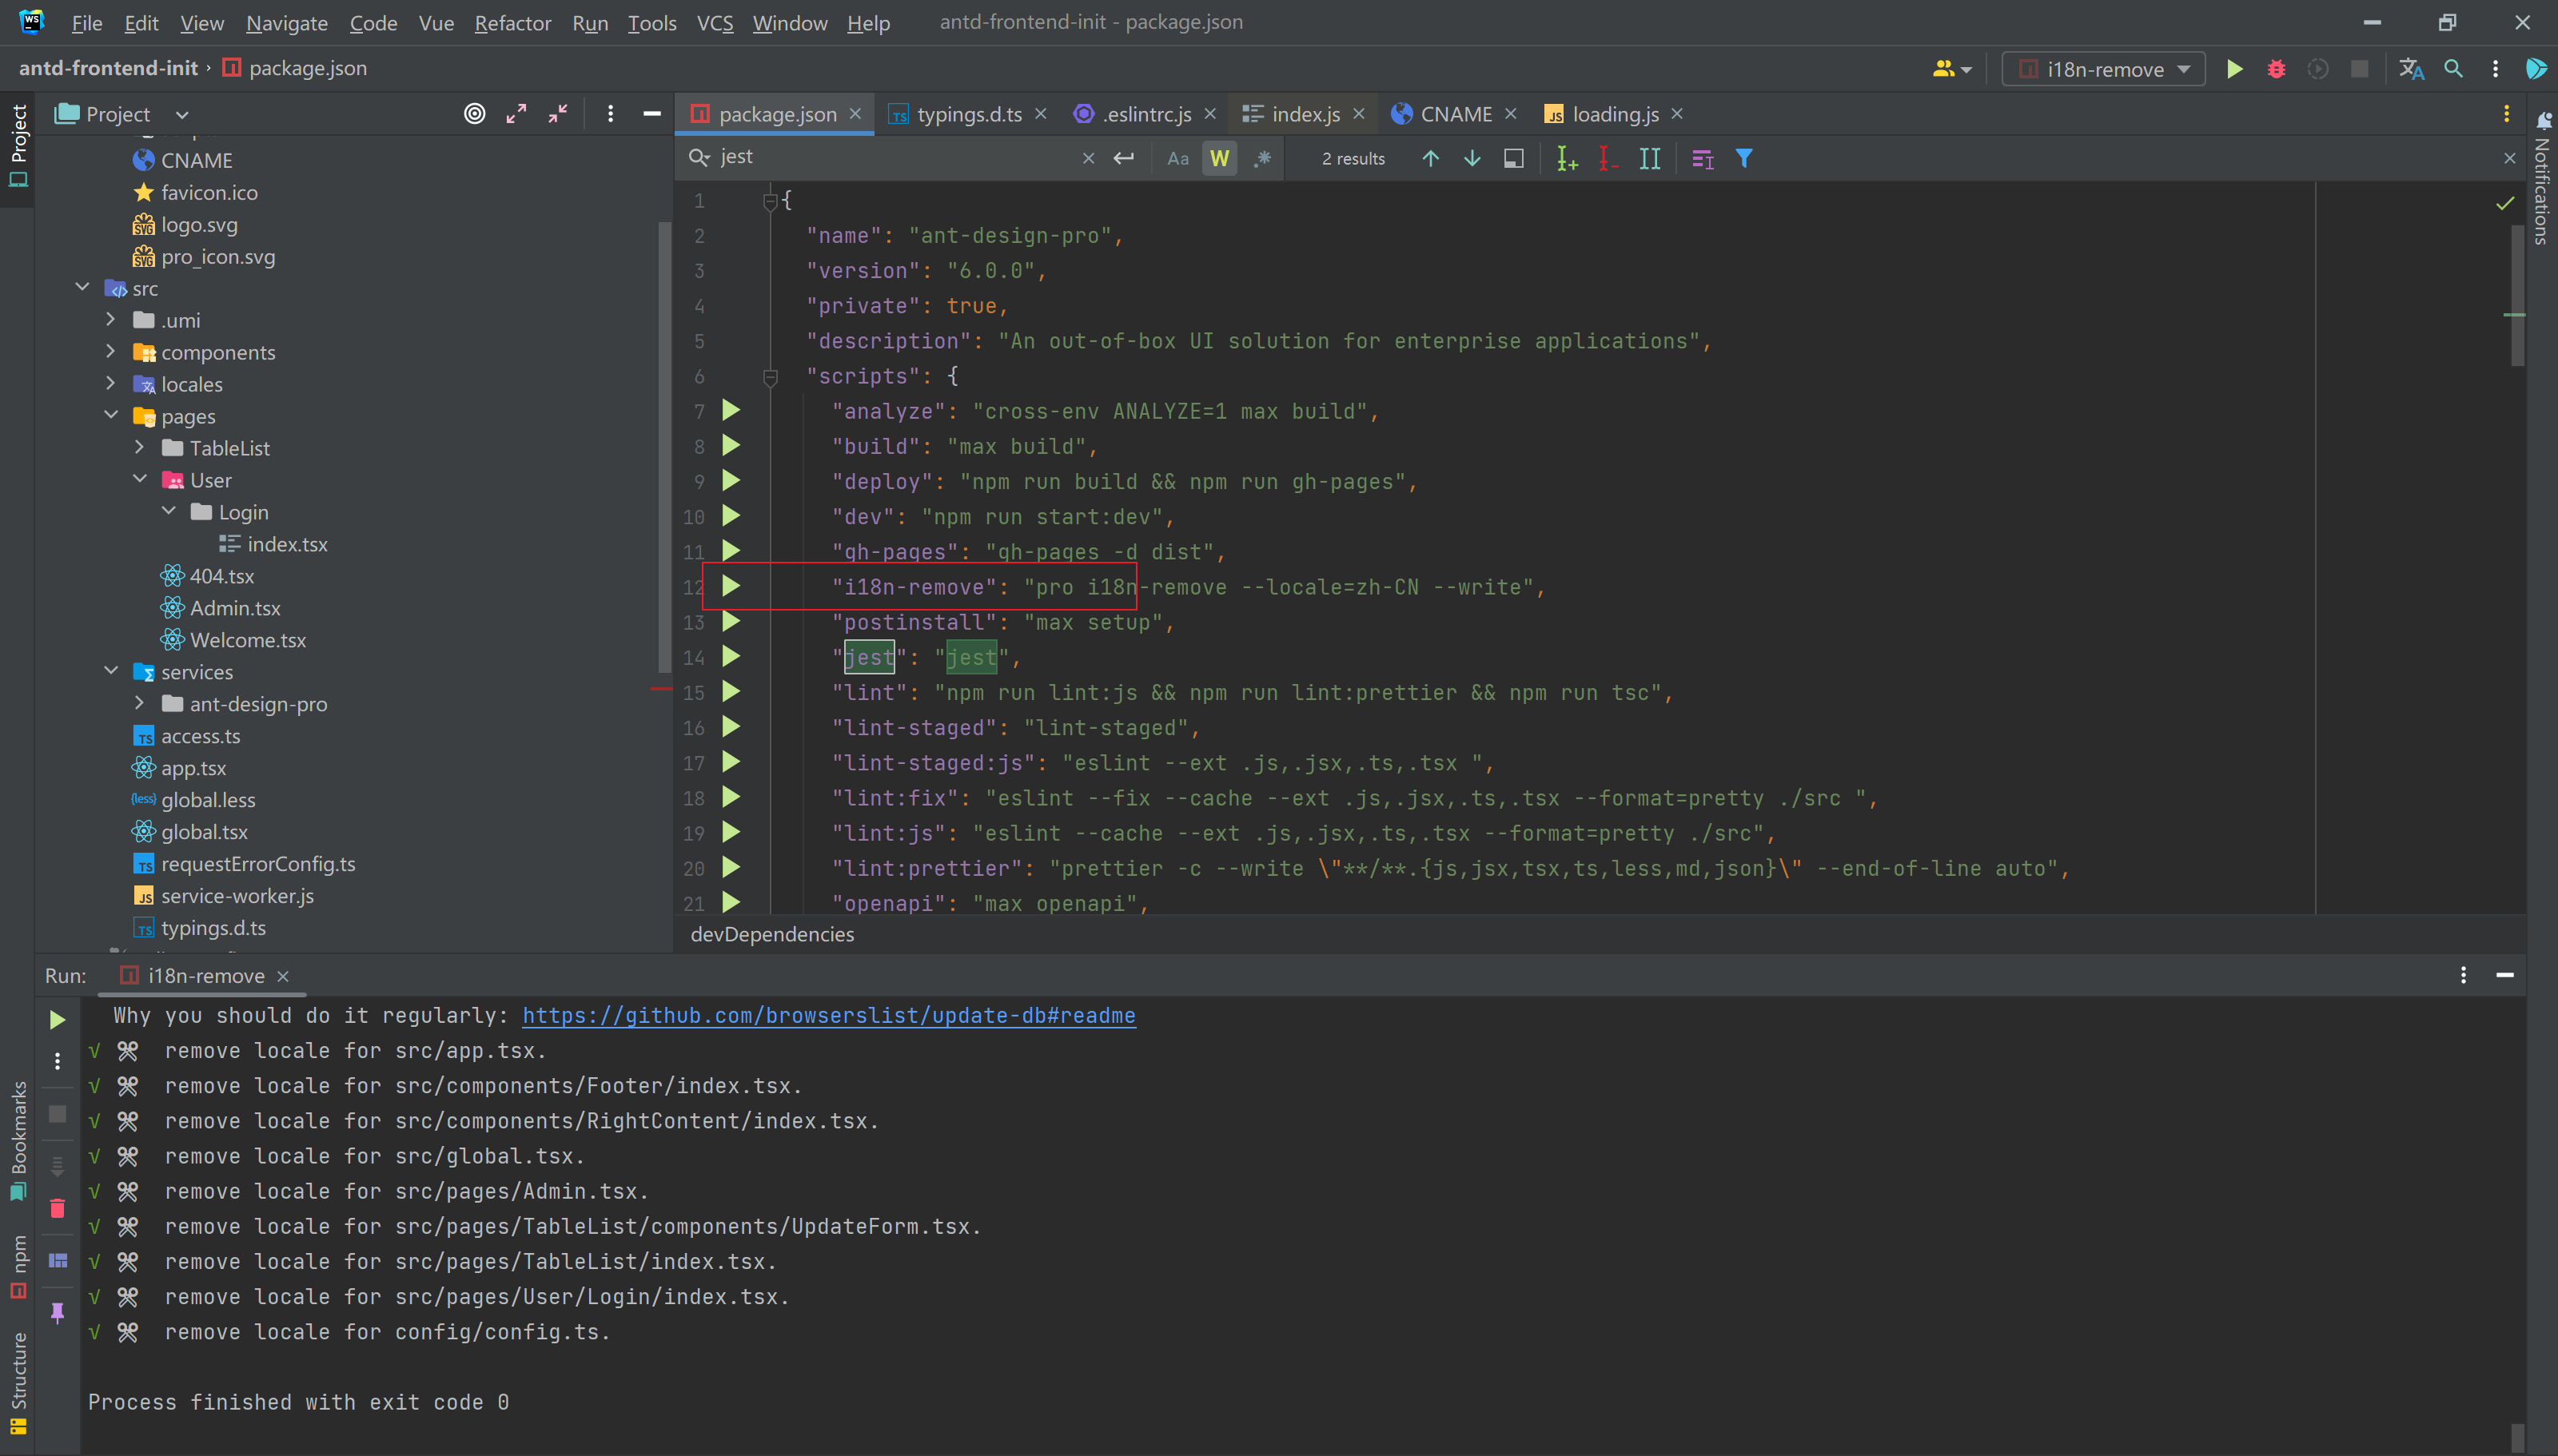
3)执行 i18n-remove 命令
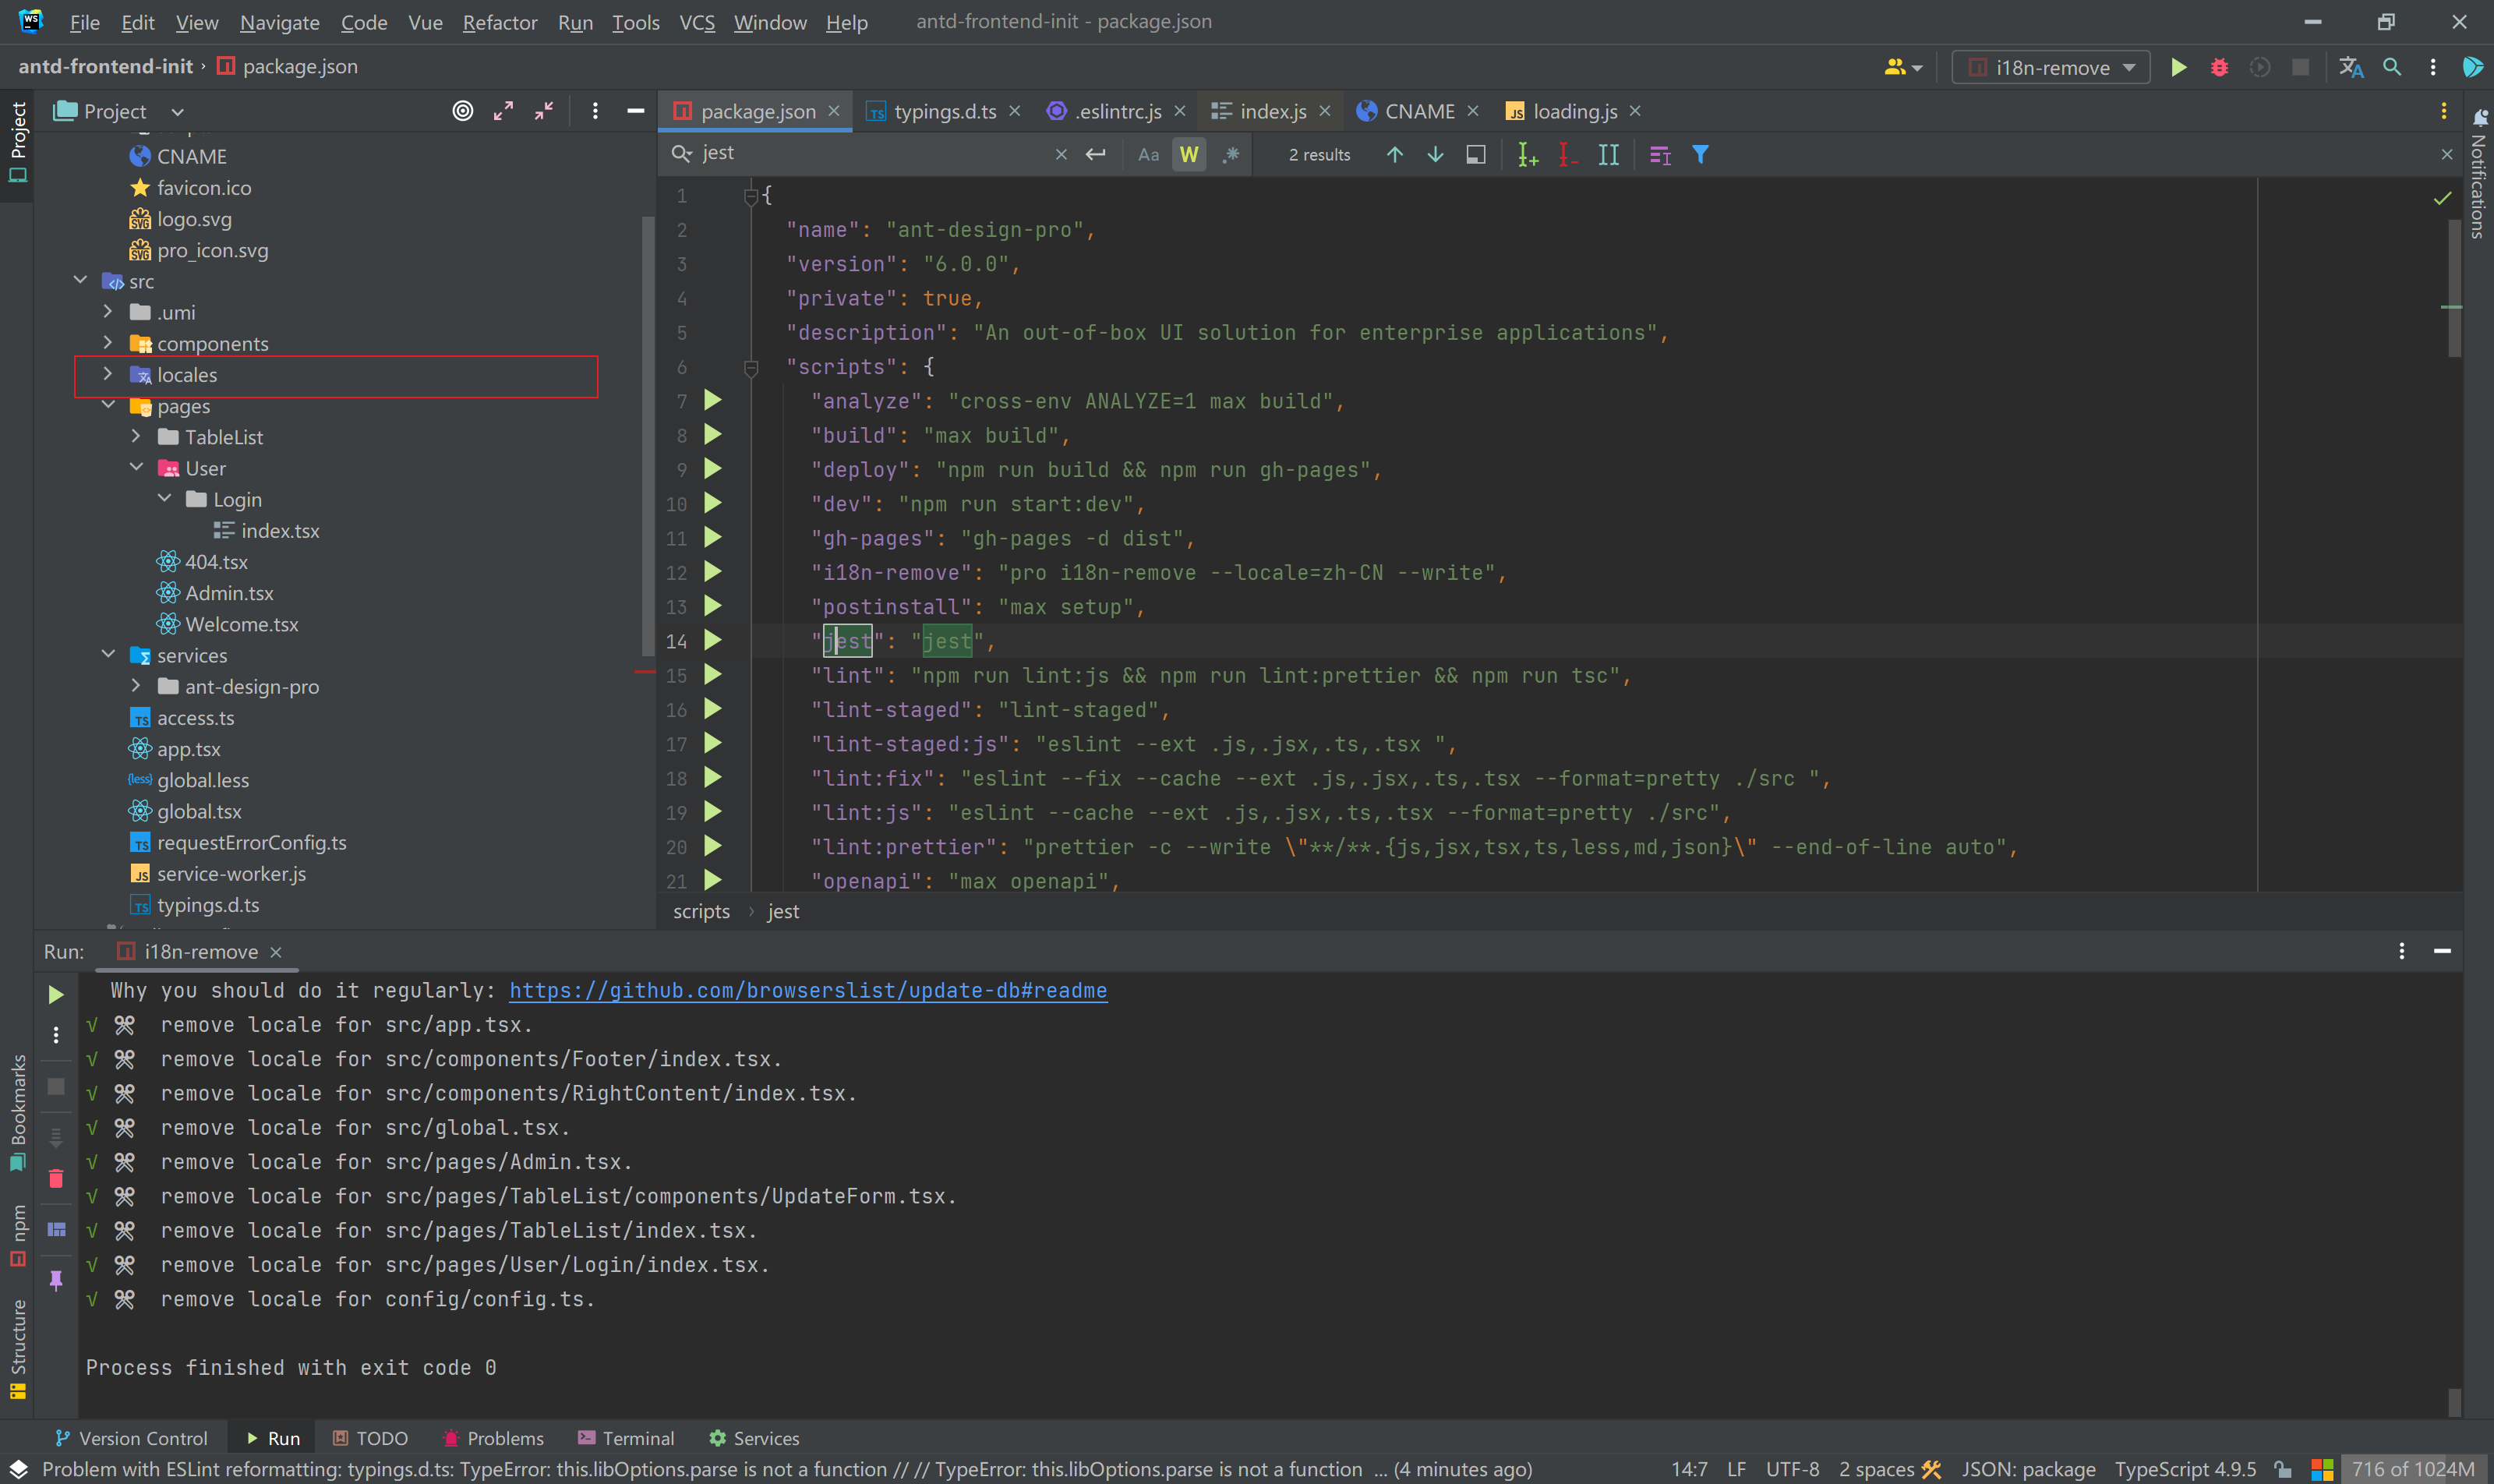
4)删除对应的文件夹 locales
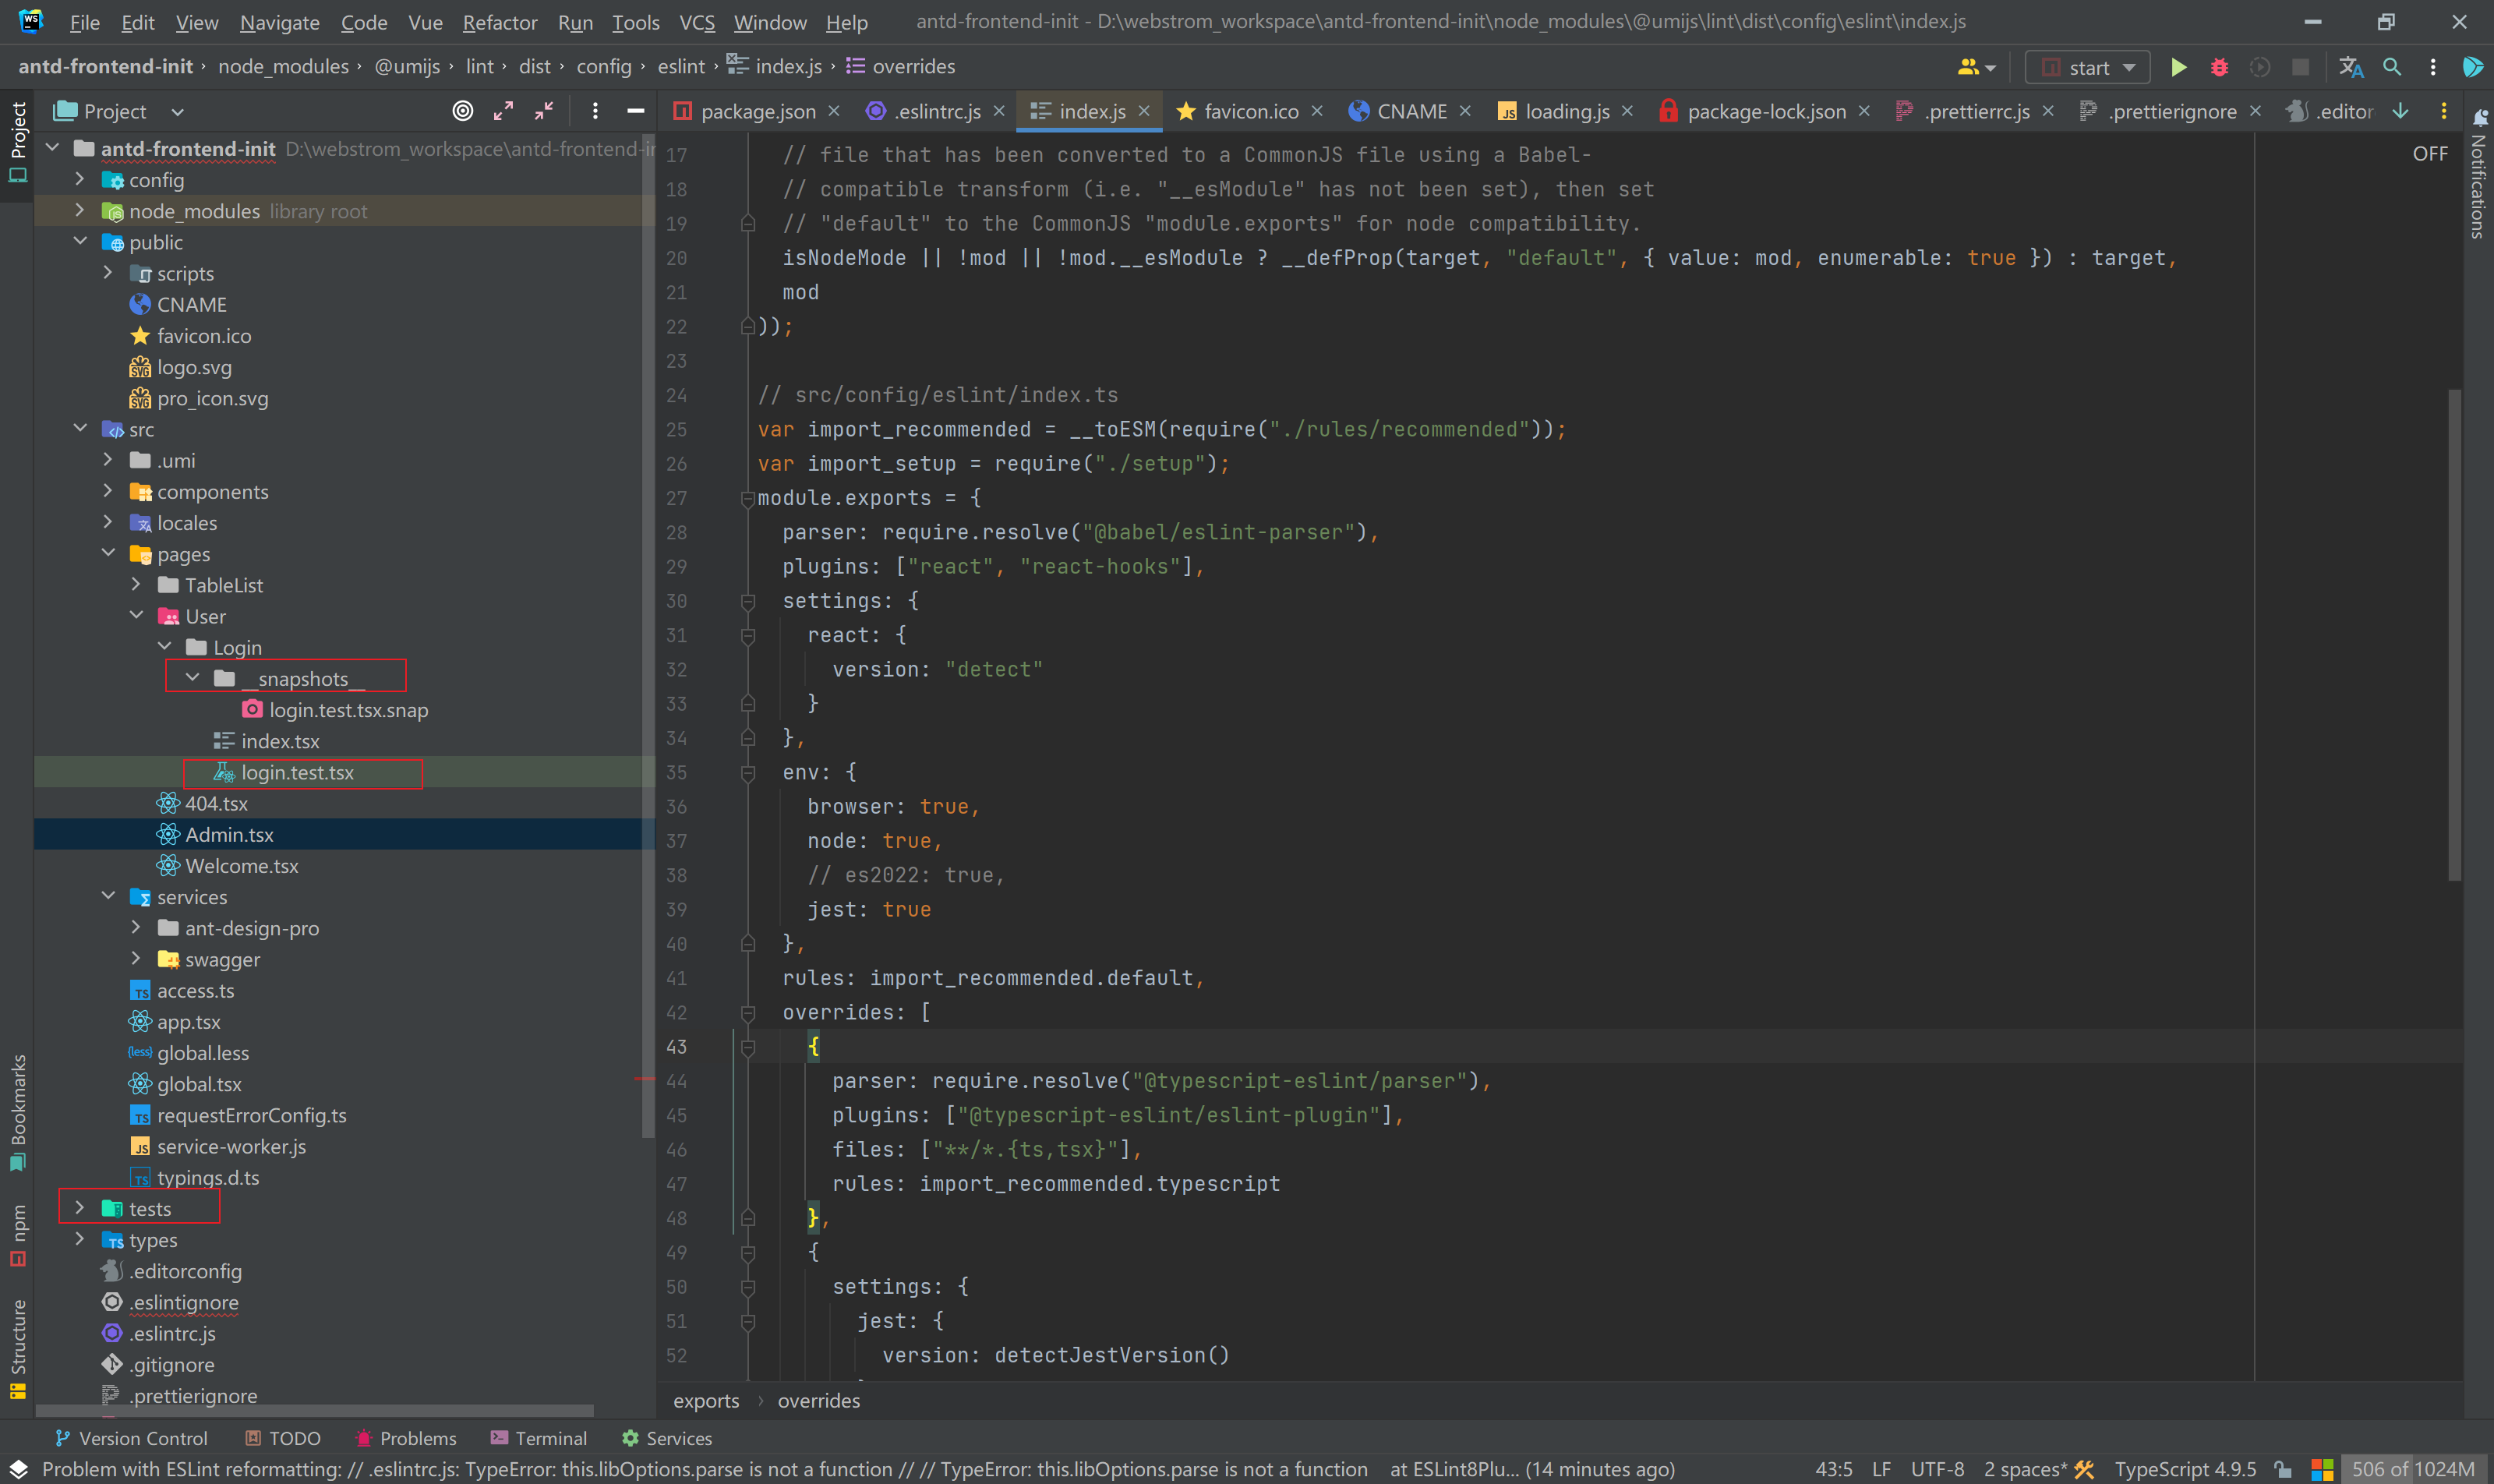
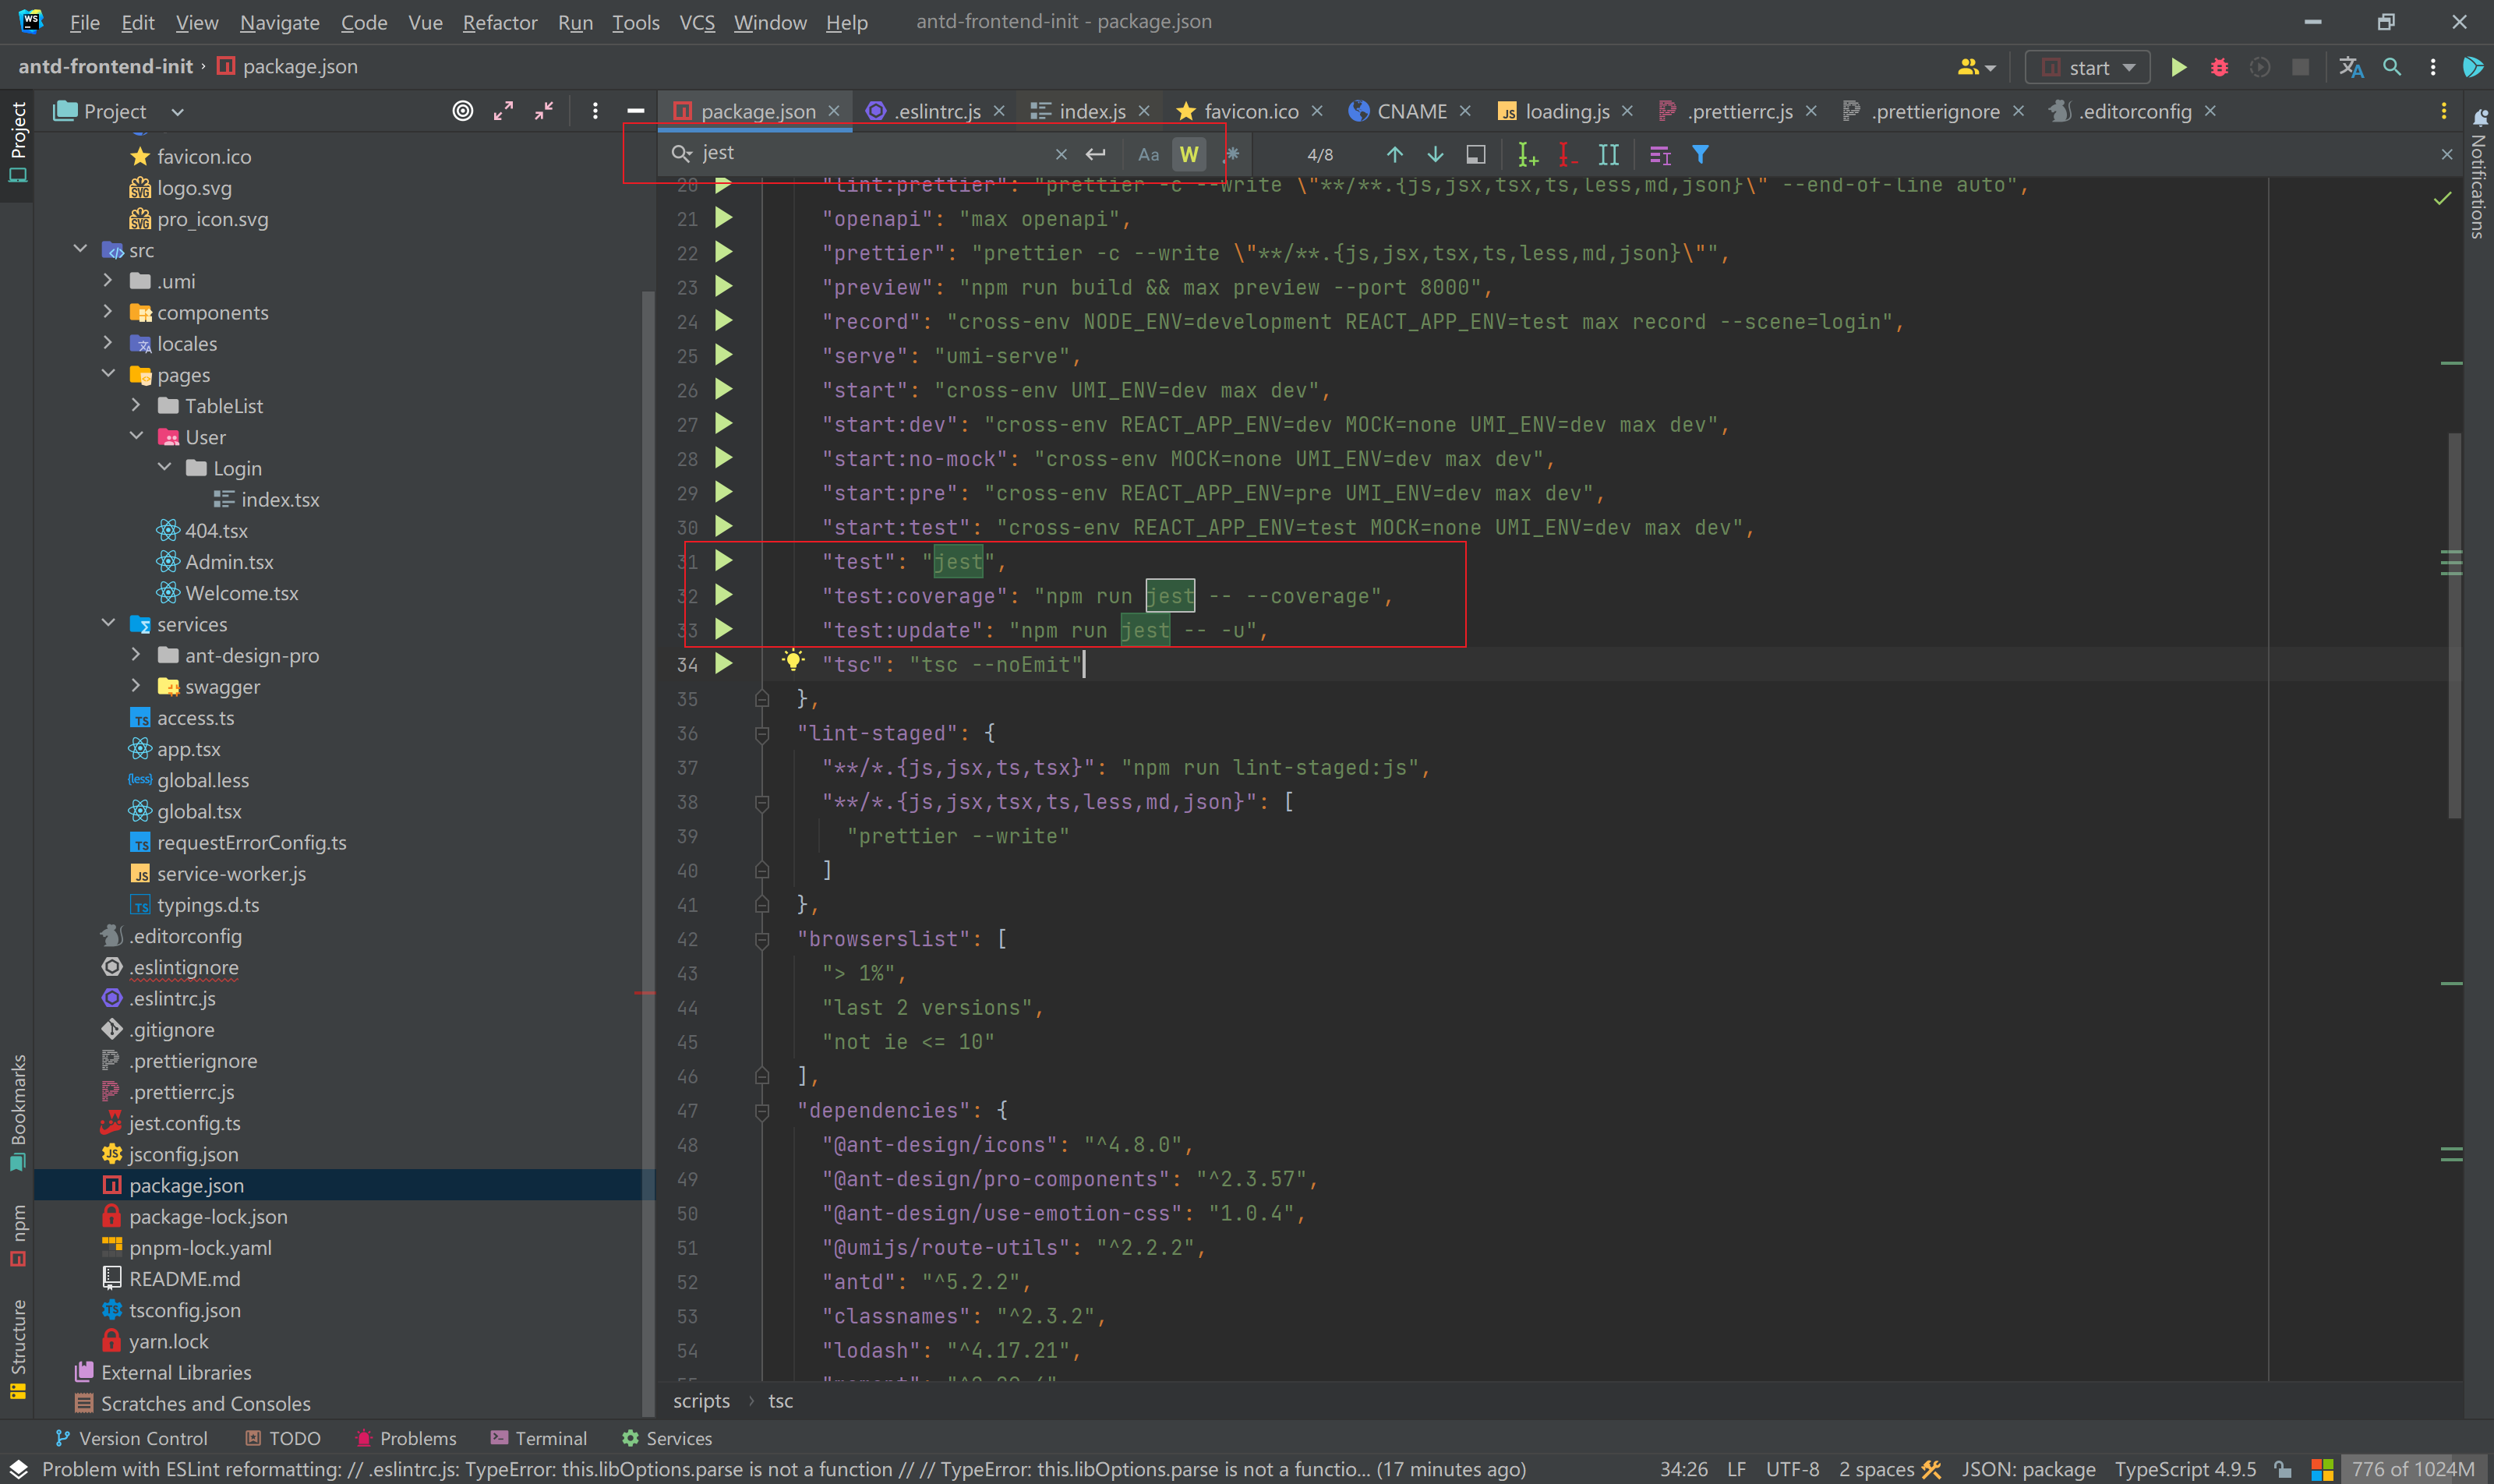
移除单元测试( Jest 相关的全部移除 )
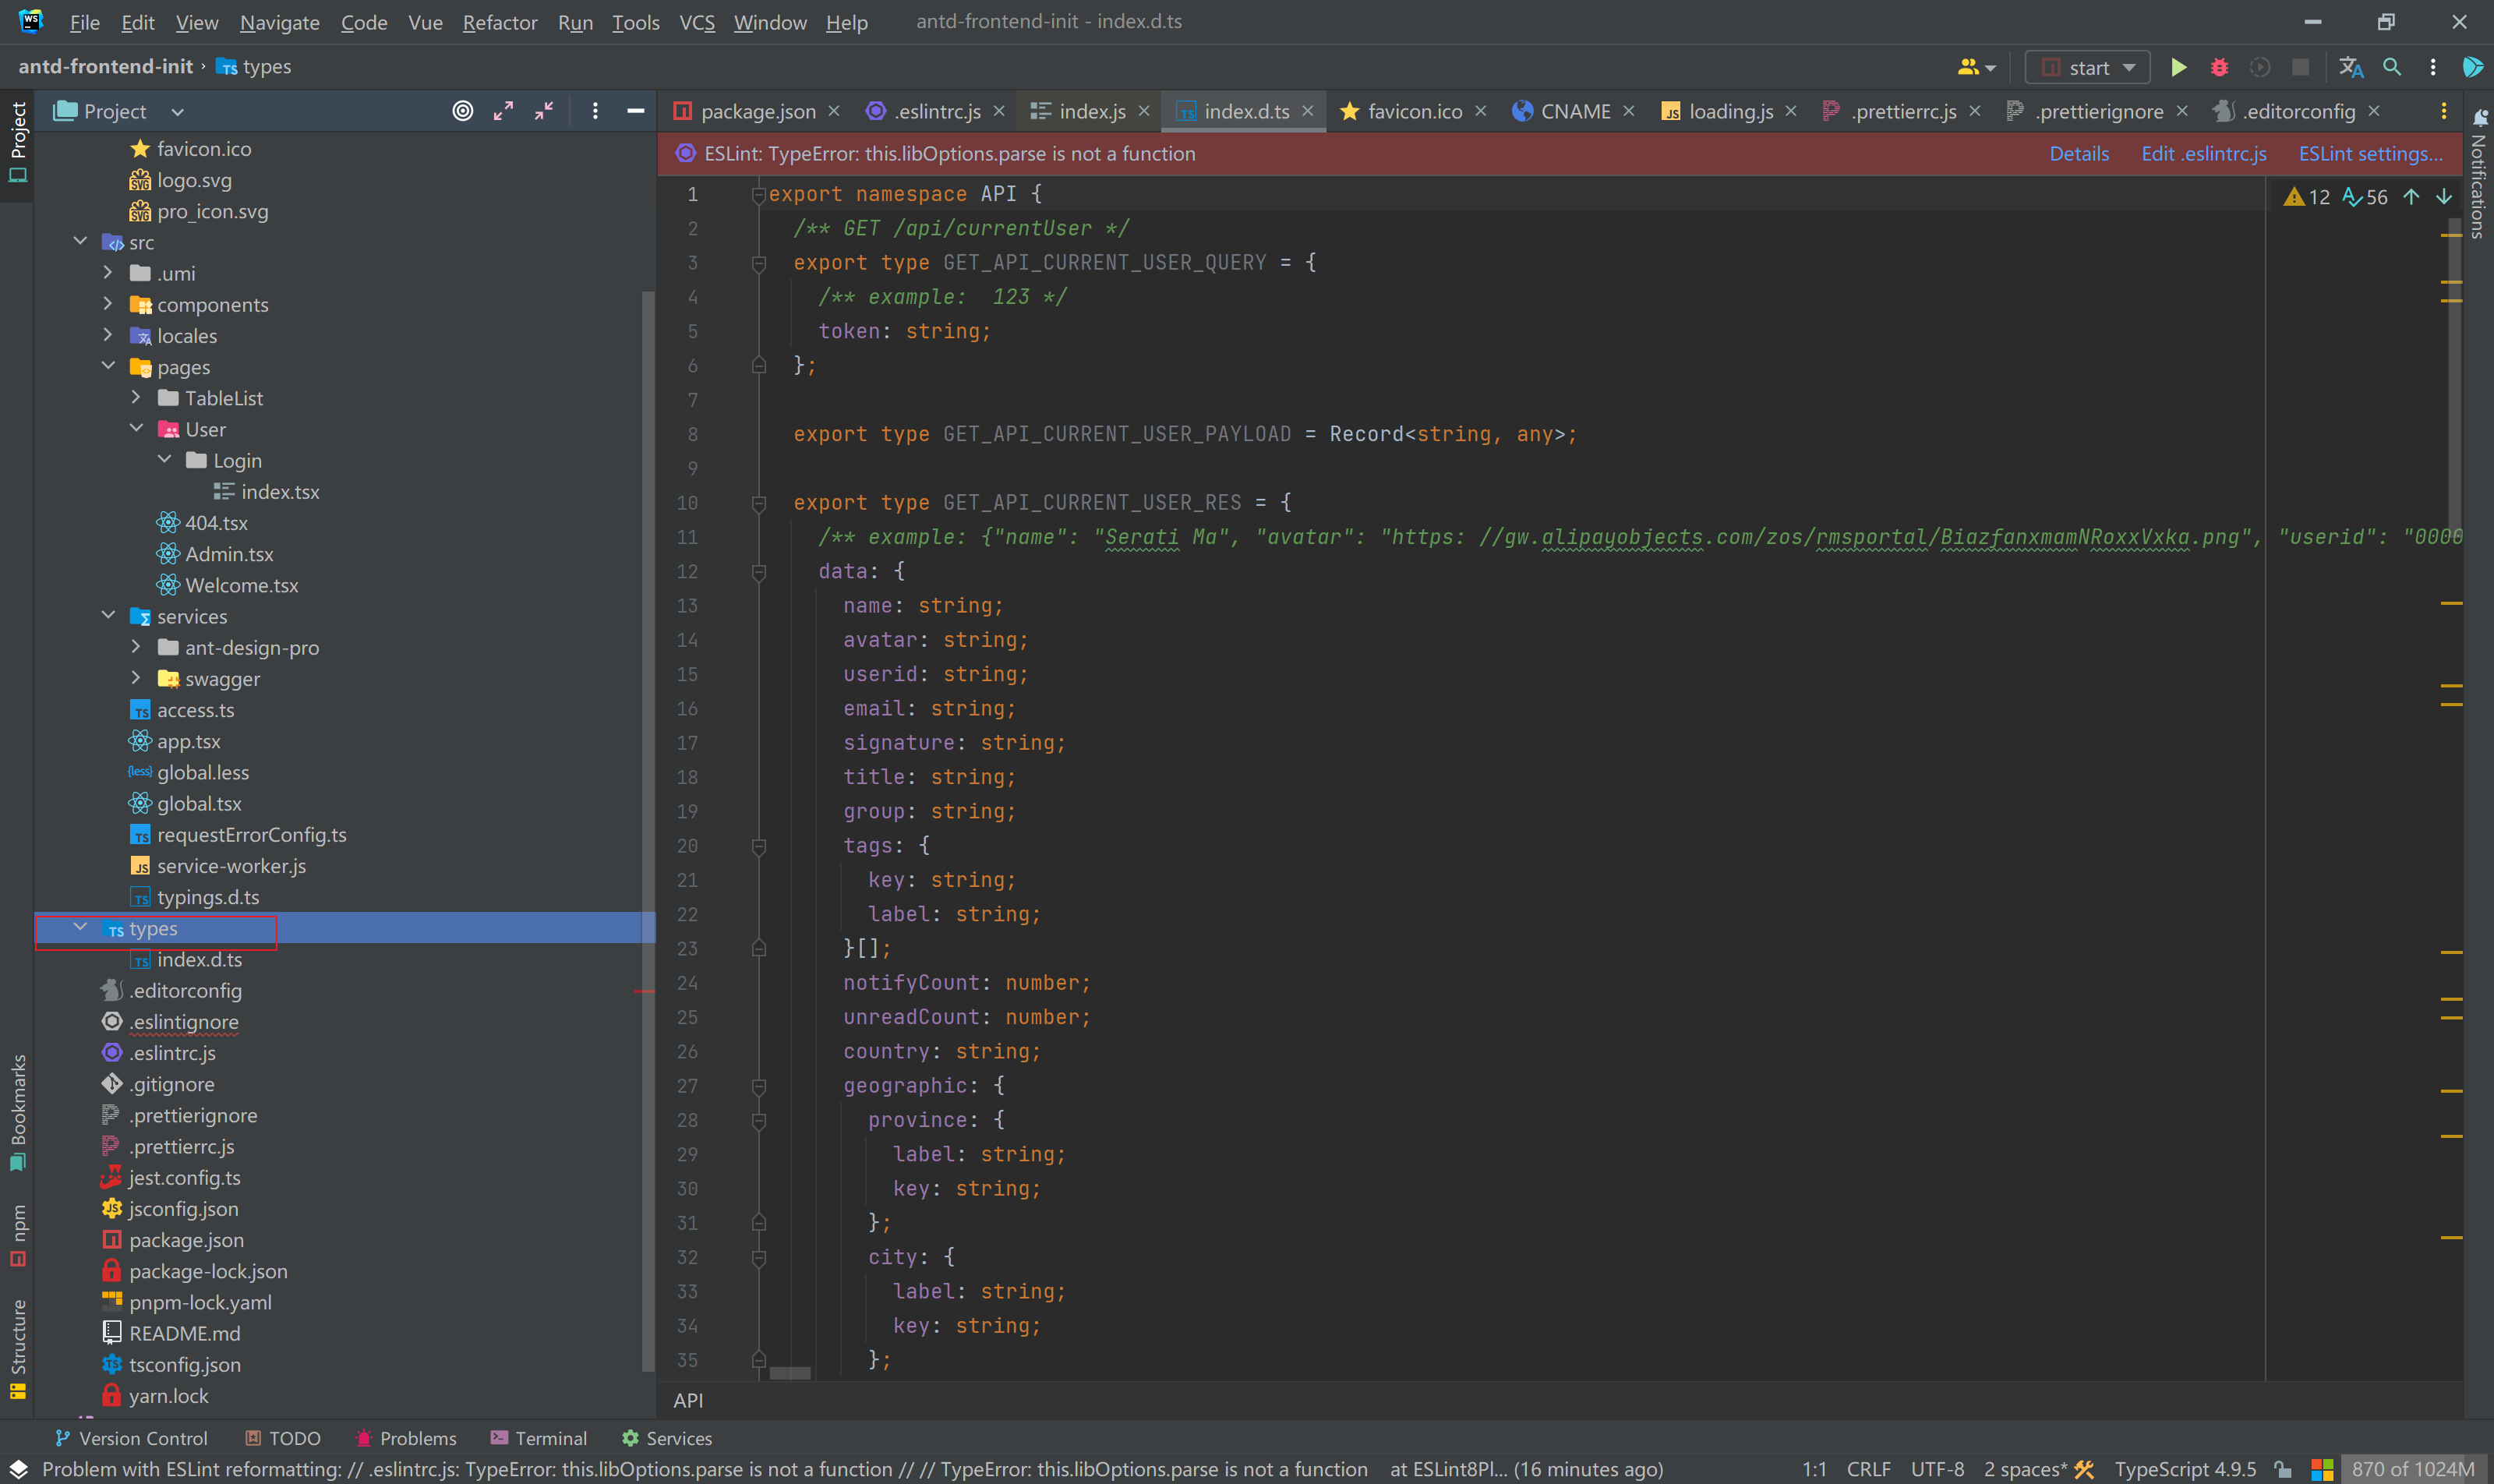
移除 types
我们自己会用 OpenAPI 规划去生成接口和类型。
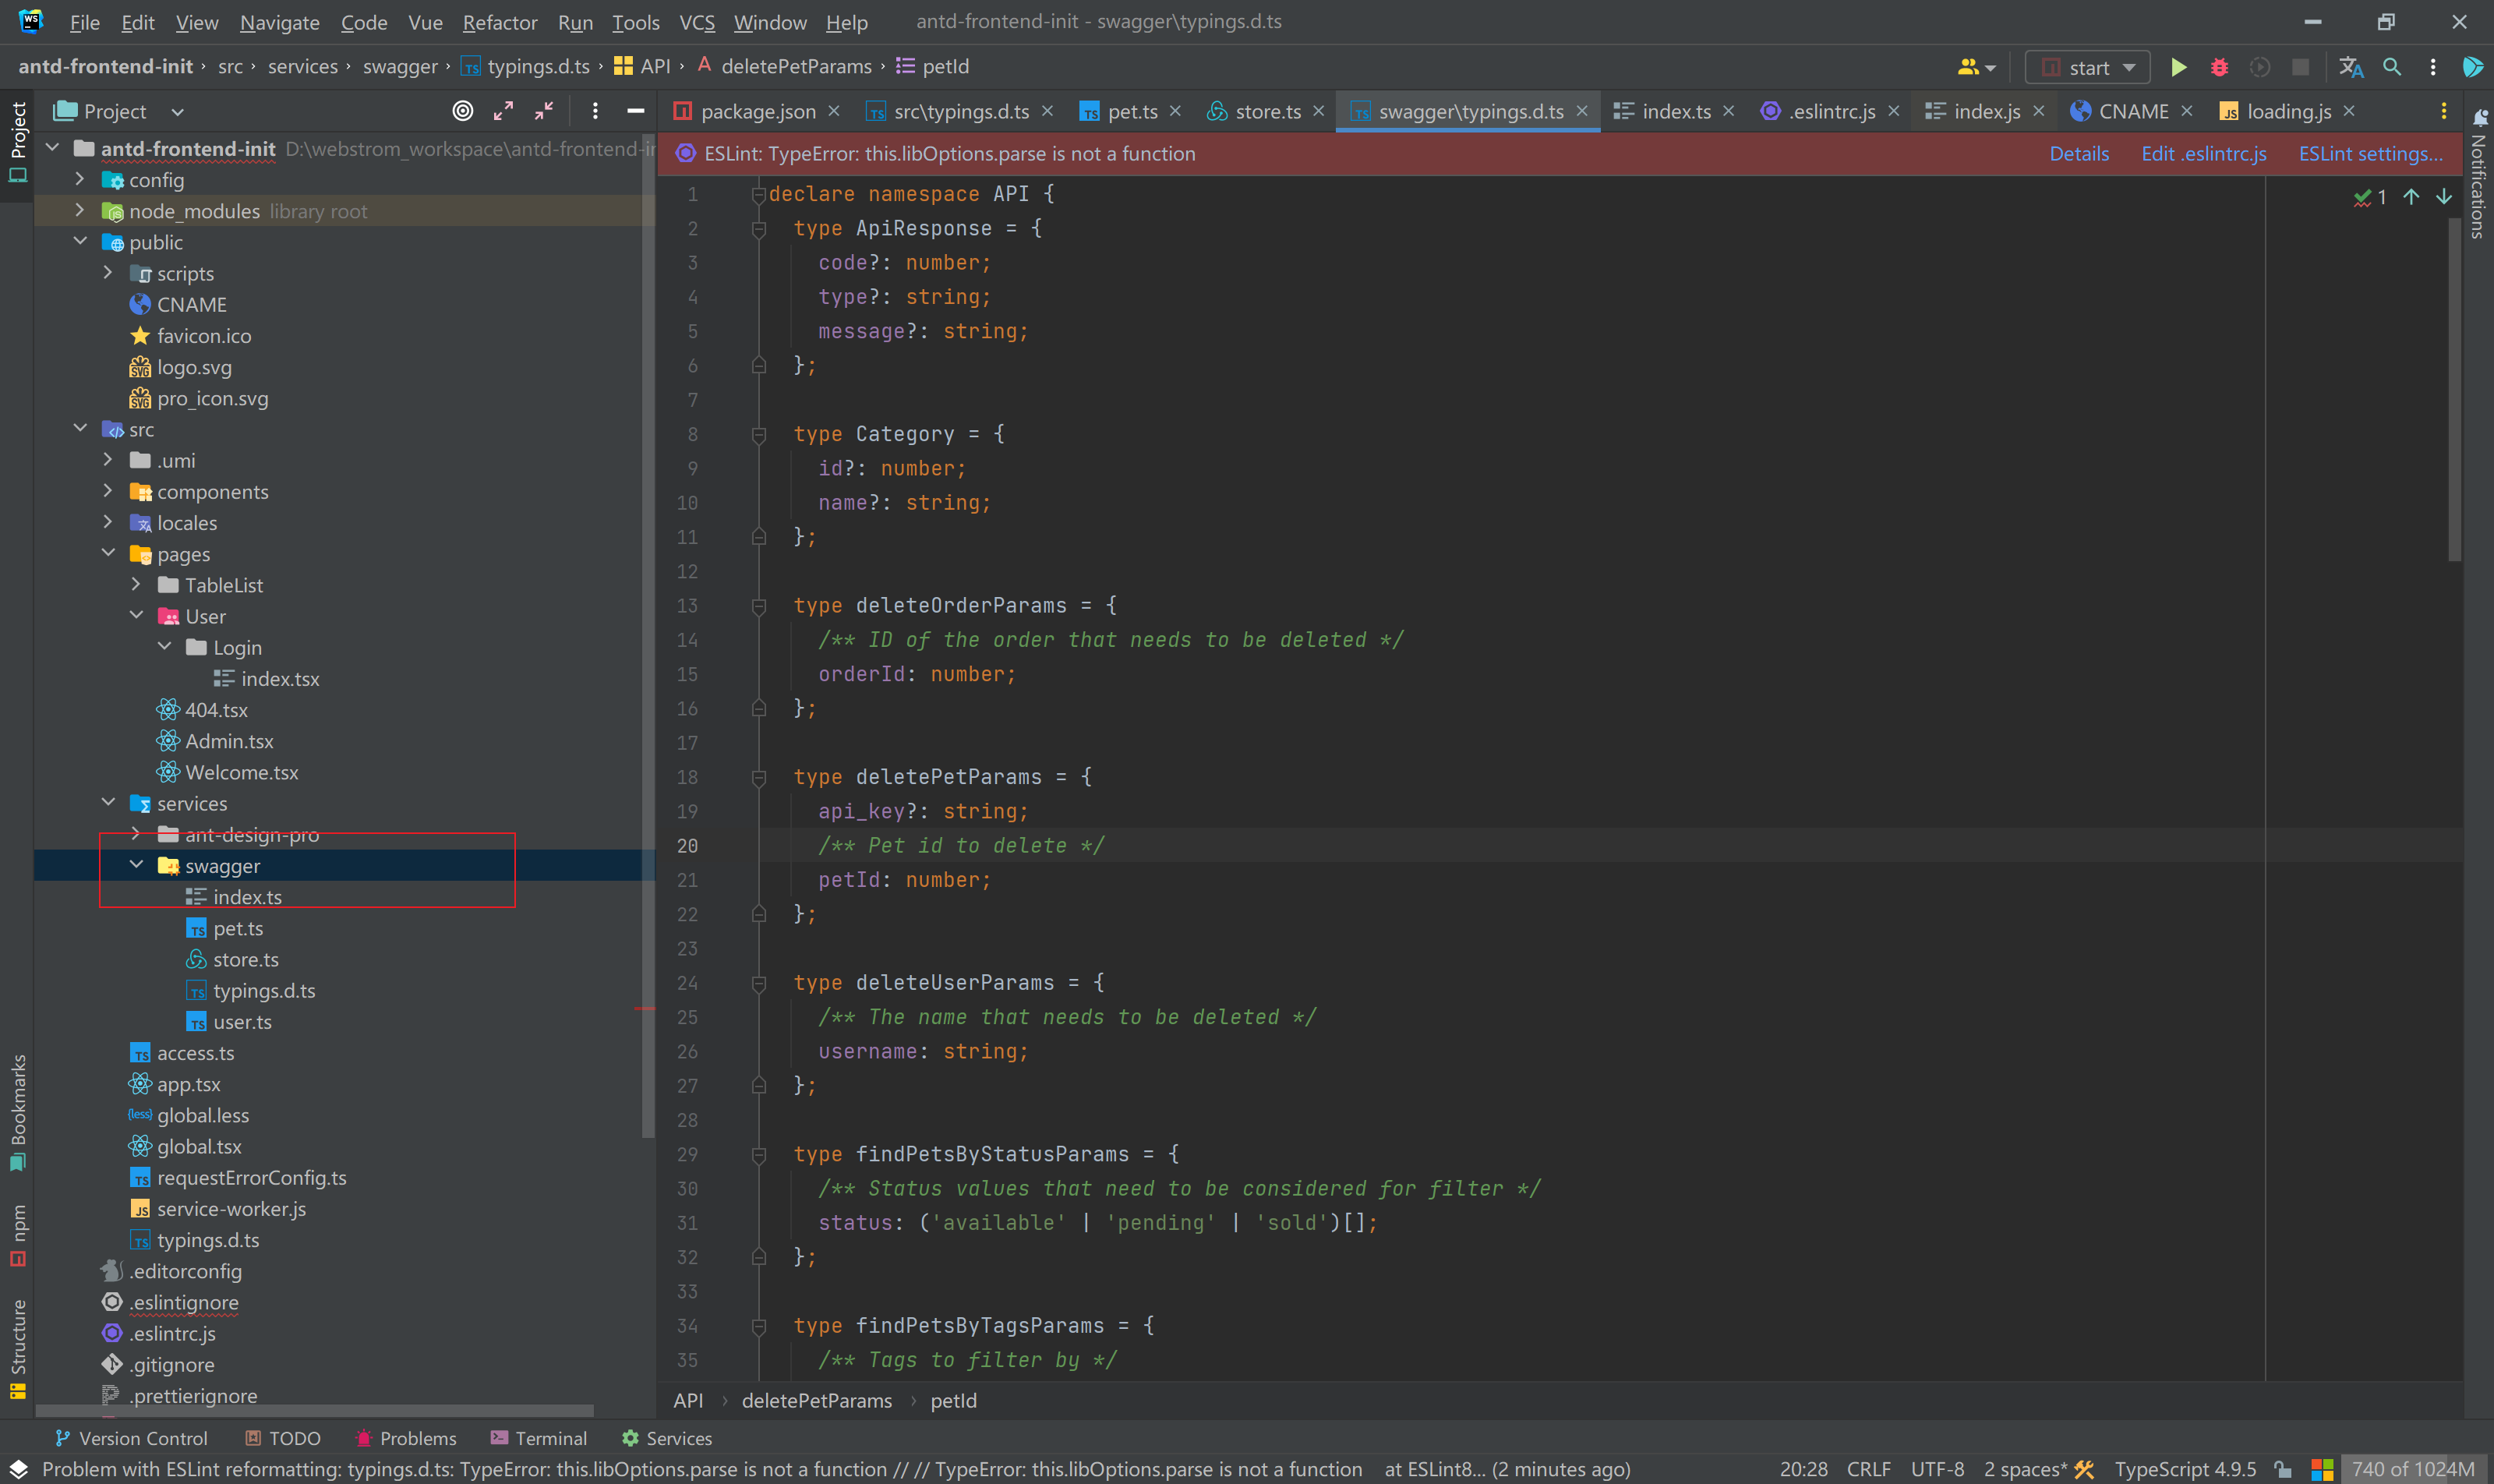
移除 swagger
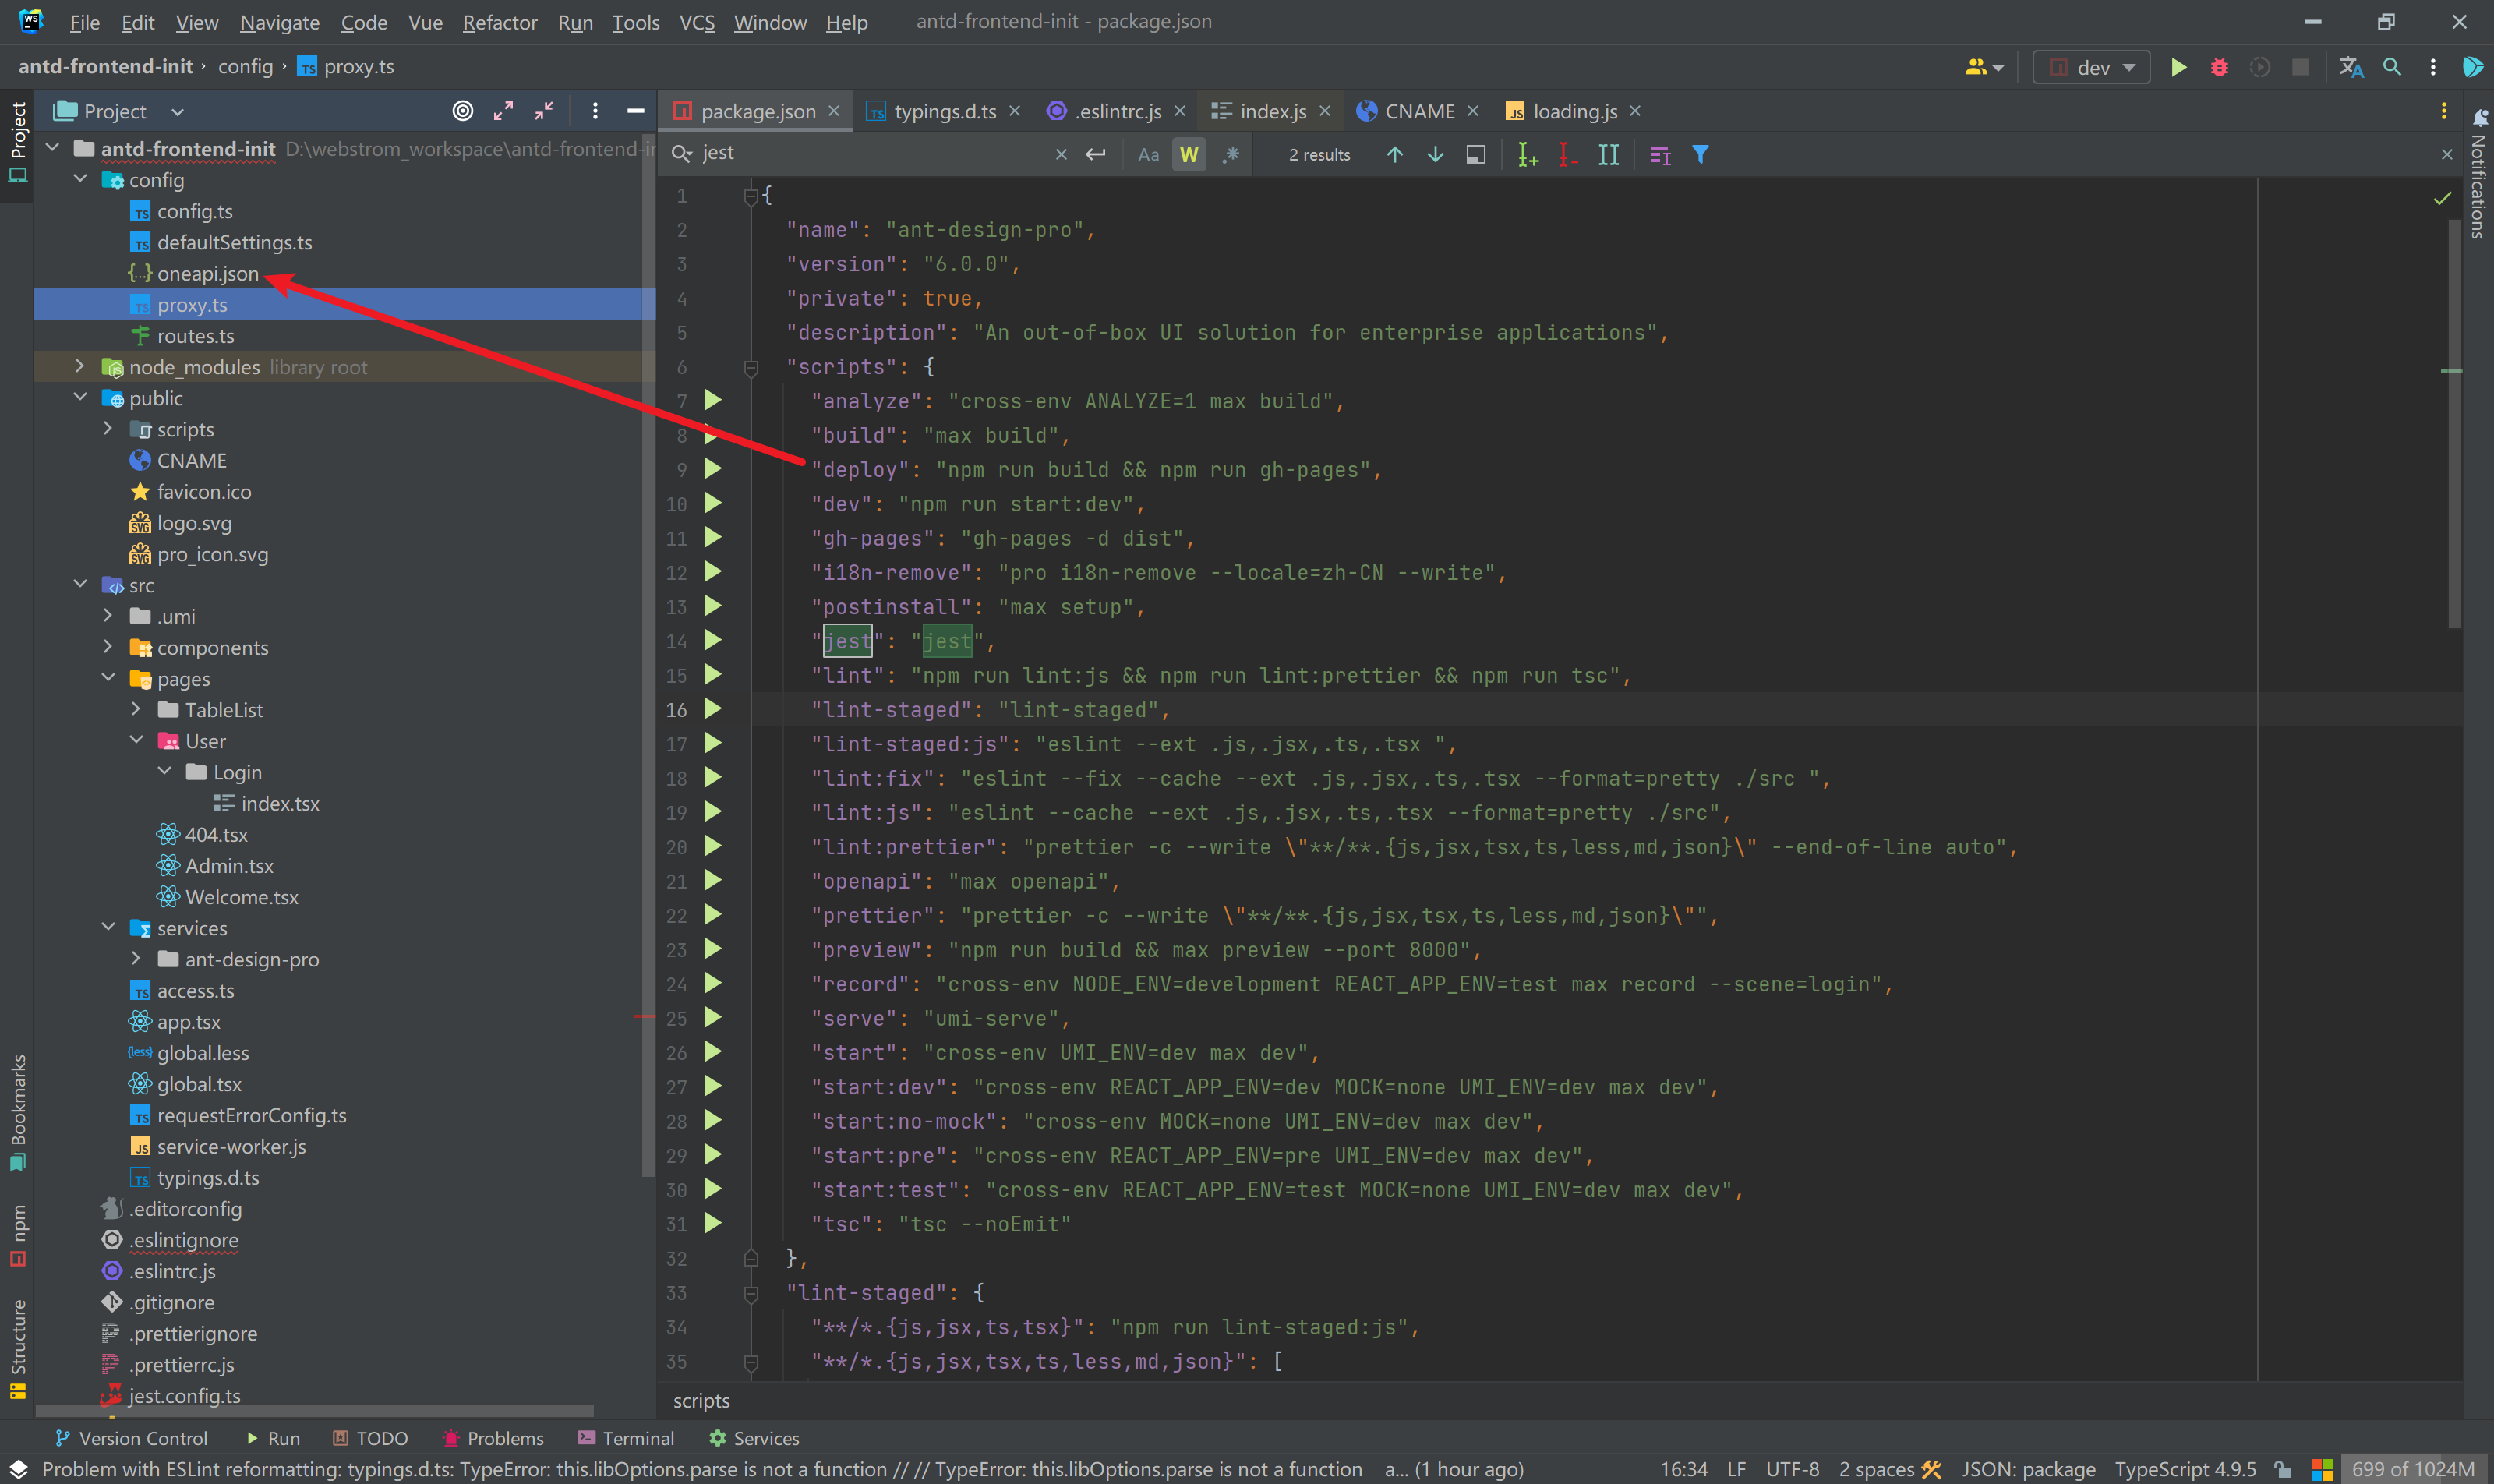
移除 openapi.json
我们有自己的后端接口地址,不需要官方提供。
基本类型
修改 typings.d.ts
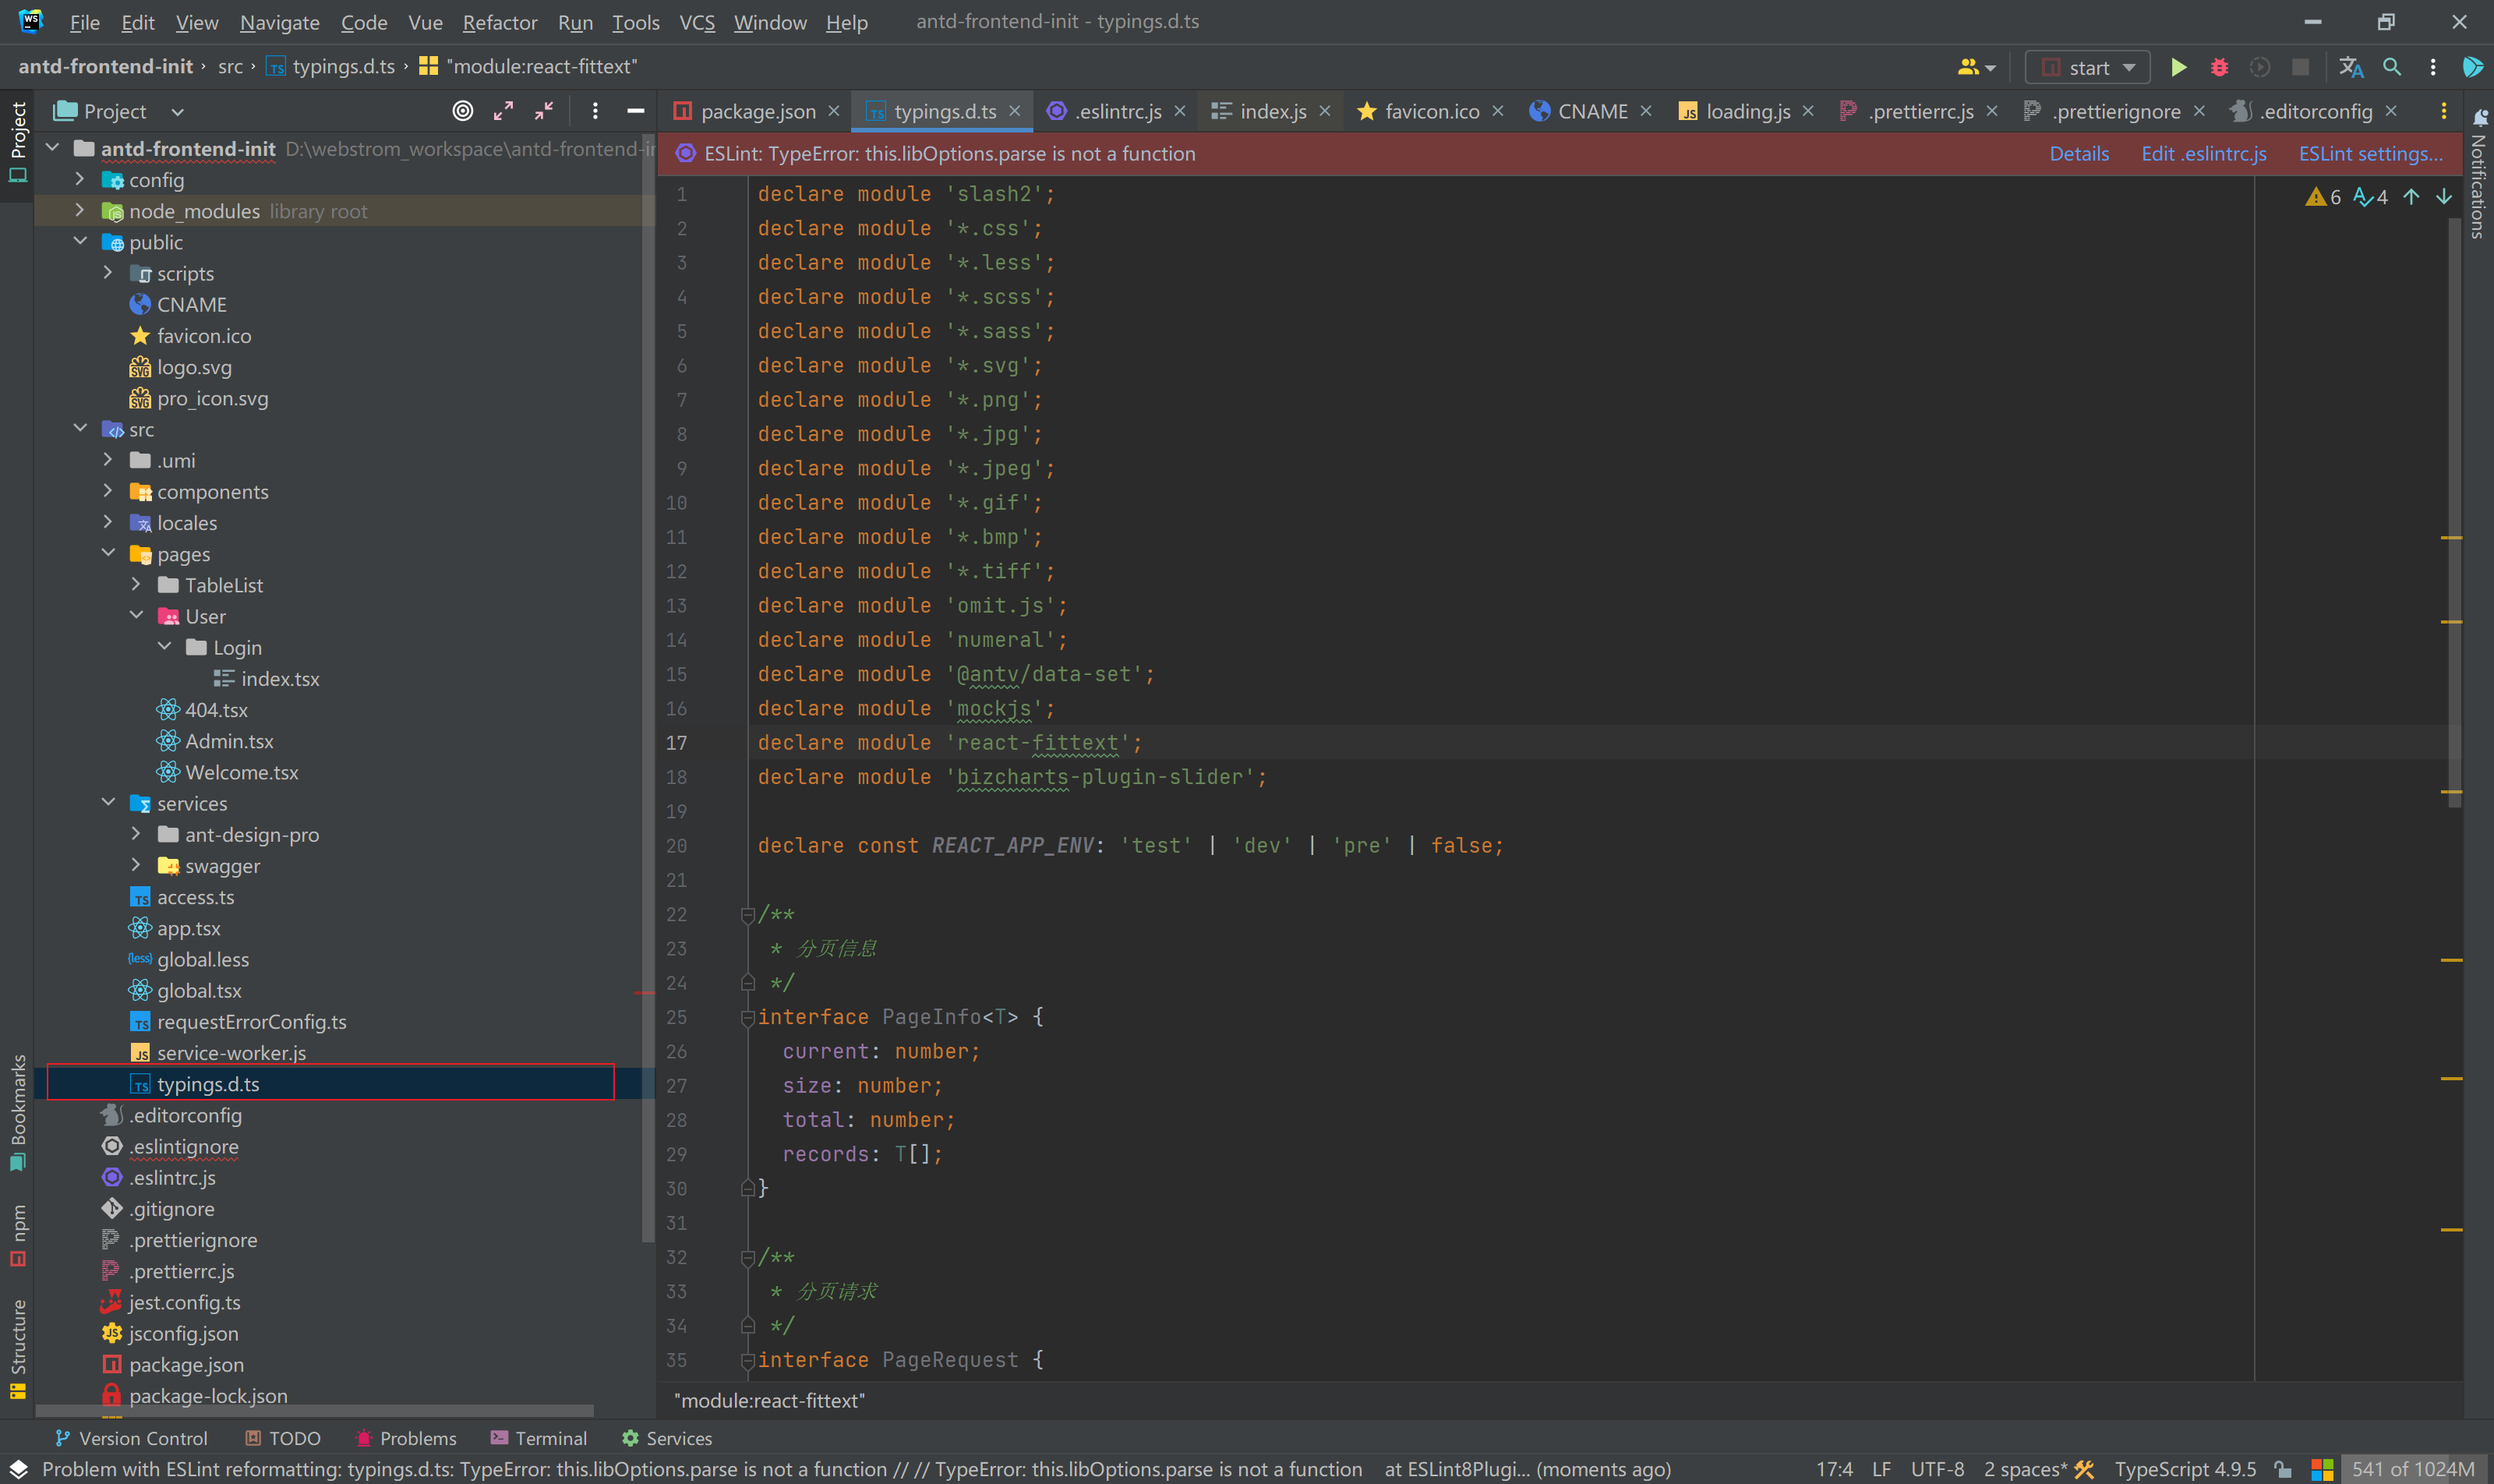 ```tsx declare module 'slash2'; declare module '*.css'; declare module
'\*.less'; declare module '\*.scss'; declare module '\*.sass'; declare module
'\*.svg'; declare module '\*.png'; declare module '\*.jpg'; declare module
'\*.jpeg'; declare module '\*.gif'; declare module '\*.bmp'; declare module
'\*.tiff'; declare module 'omit.js'; declare module 'numeral'; declare module
'@antv/data-set'; declare module 'mockjs'; declare module 'react-fittext';
declare module 'bizcharts-plugin-slider';

declare const REACT\_APP\_ENV: 'test' | 'dev' | 'pre' | false;1806613115223461889\_0.291683599058729

/**

- 分页信息 \*/ interface PageInfo { current: number; size: number; total: number;
  records: T[]; }

/**1806613115223461889\_0.4592083904443922

- 分页请求 \*/ interface PageRequest { current?: number; pageSize?: number; sortField?:
  string; sortOrder?: 'ascend' | 'descend'; }

/**

- 删除请求 \*/ interface DeleteRequest { id: number; } 1806613115223461889\_0.4279687789570217

/**

- 返回封装 \*/ interface BaseResponse { code: number; data: T; message?: string;
  }

/**1806613115223461889\_0.7157203774996626

- 全局初始化状态 \*/ interface InitialState { currentUser?: API.LoginUserVO; }
请求
请求代码生成
注意项:由于 Swagger V3 版本文件上传请求有 BUG,还是推荐用 Swagger 2 版本。
接口文档地址:http://localhost:8101/api/v2/api-docs
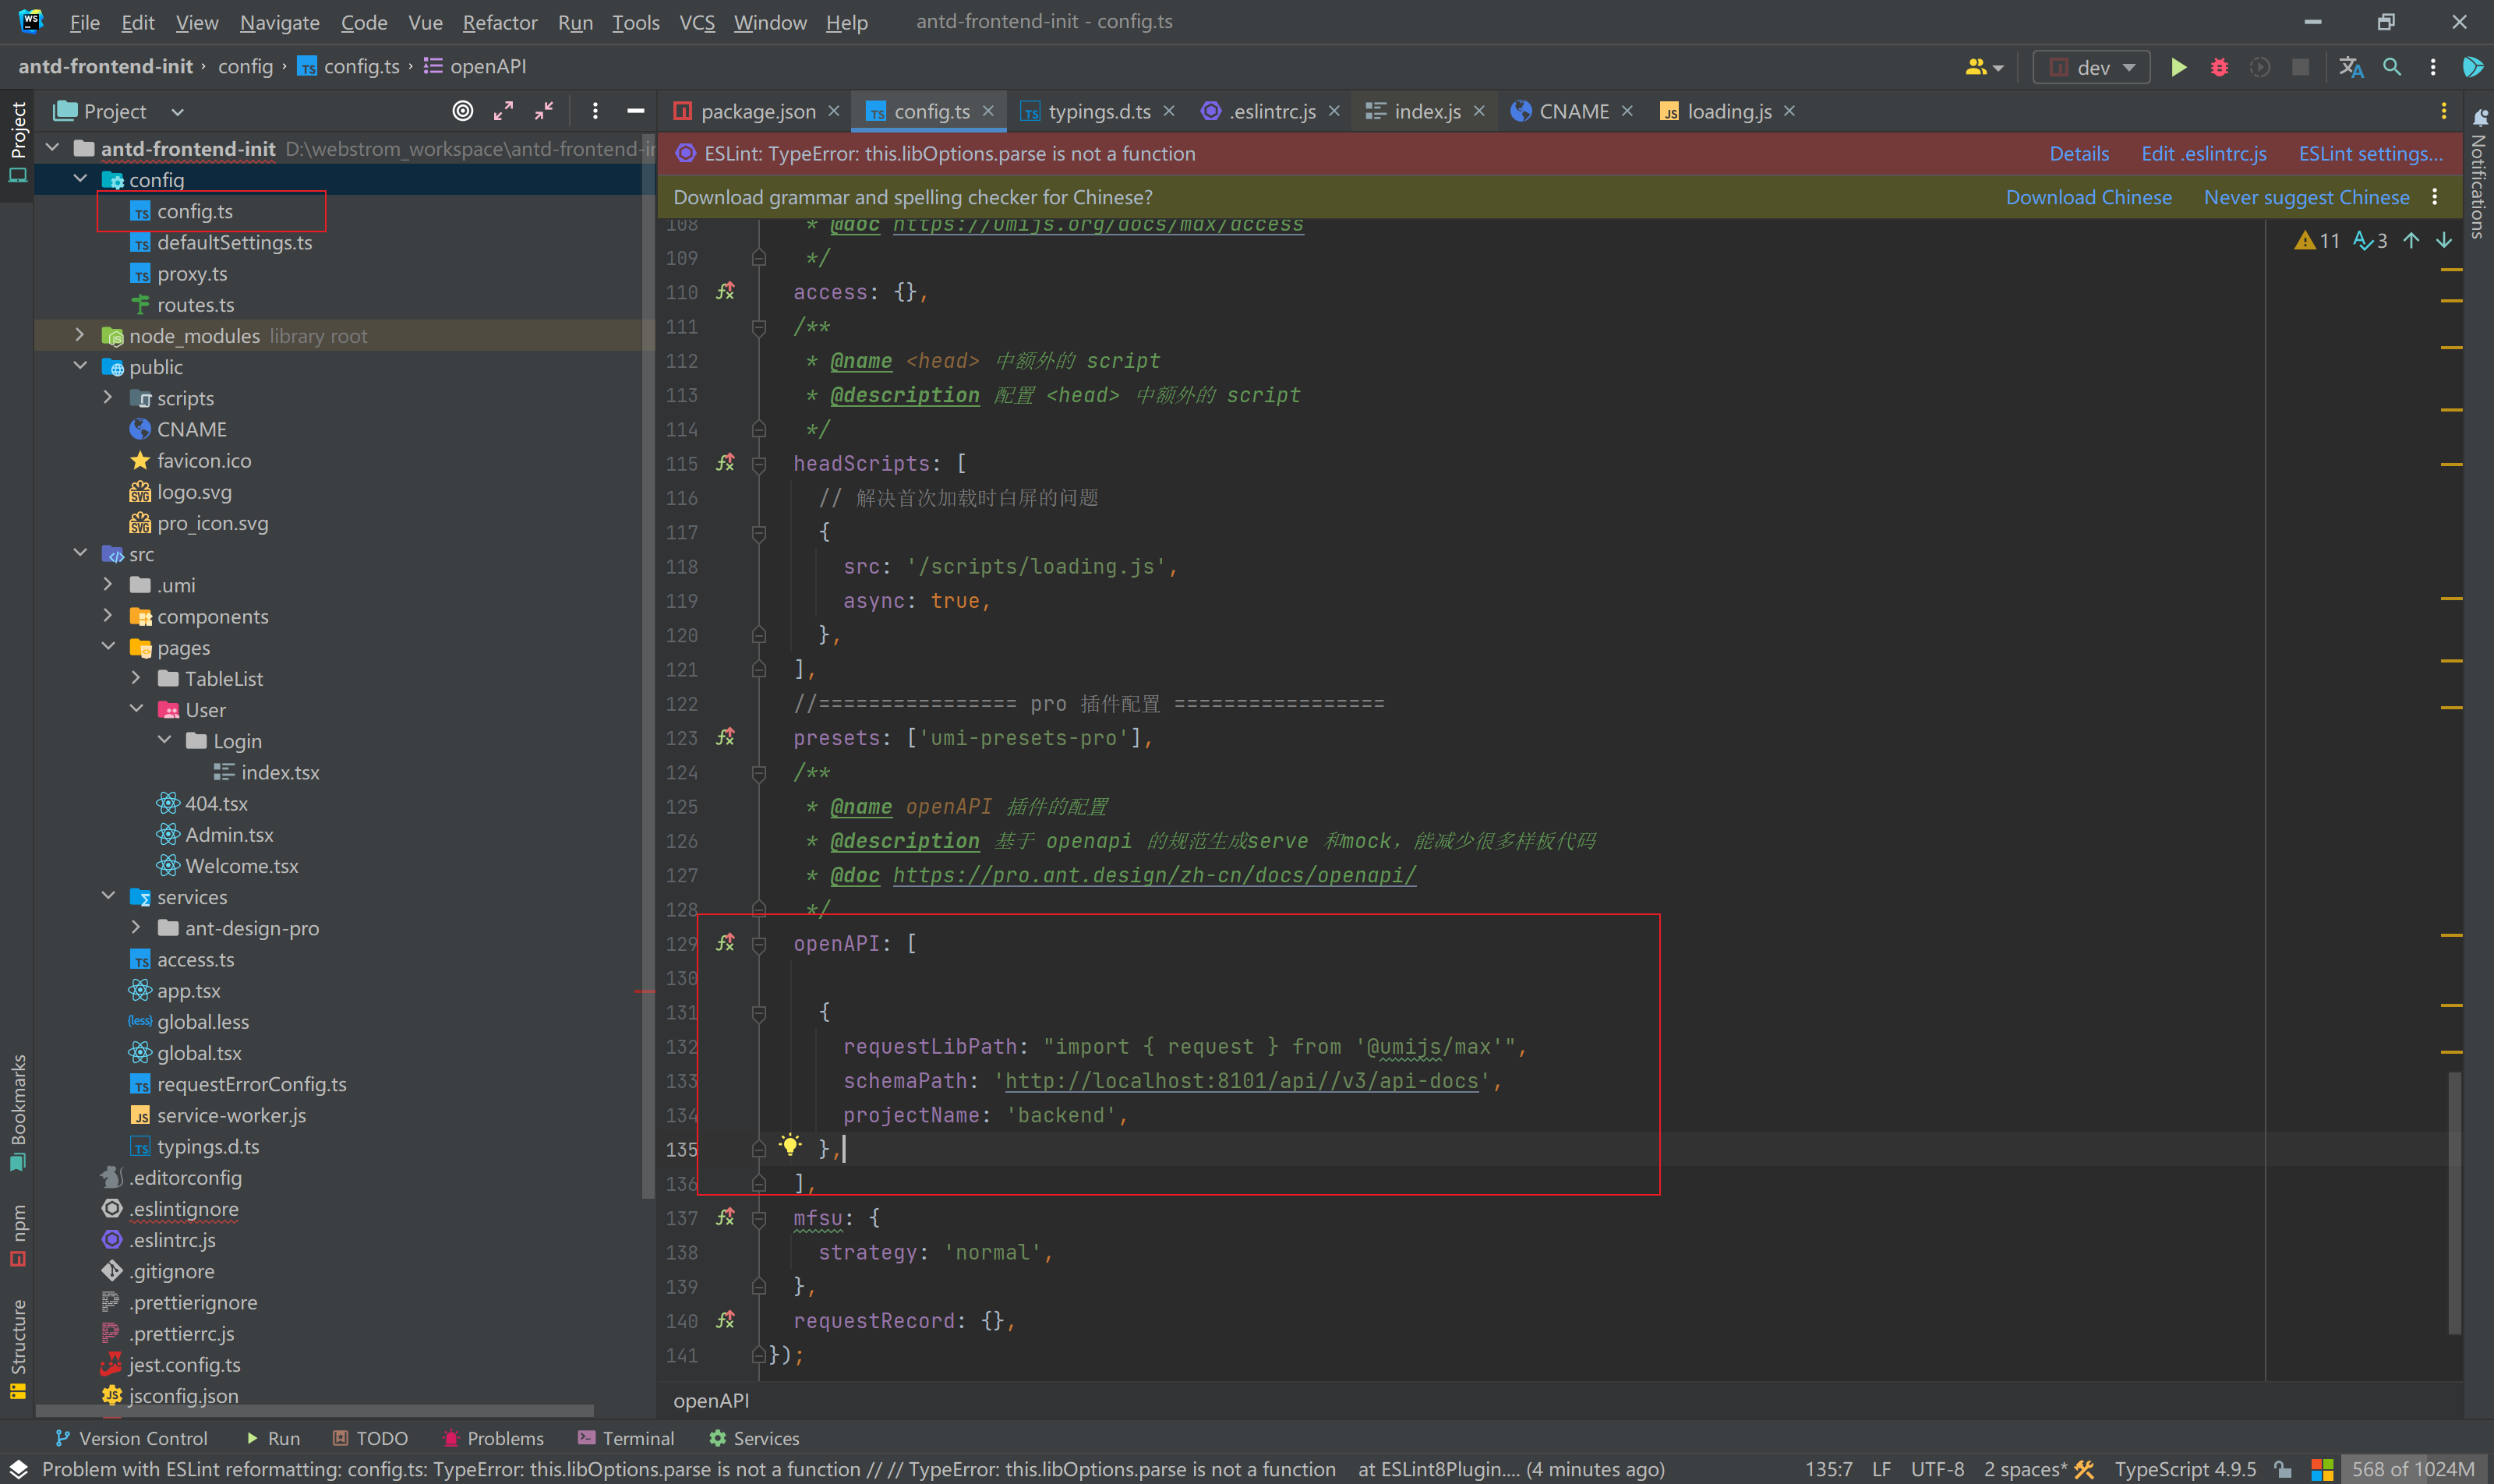
修改配置:
openAPI: [

  {

    requestLibPath: "import { request } from '@umijs/max'",

    schemaPath: "http://localhost:8101/api/v2/api-docs",

    projectName: 'yuzi-generator-web-backend',

  },

],
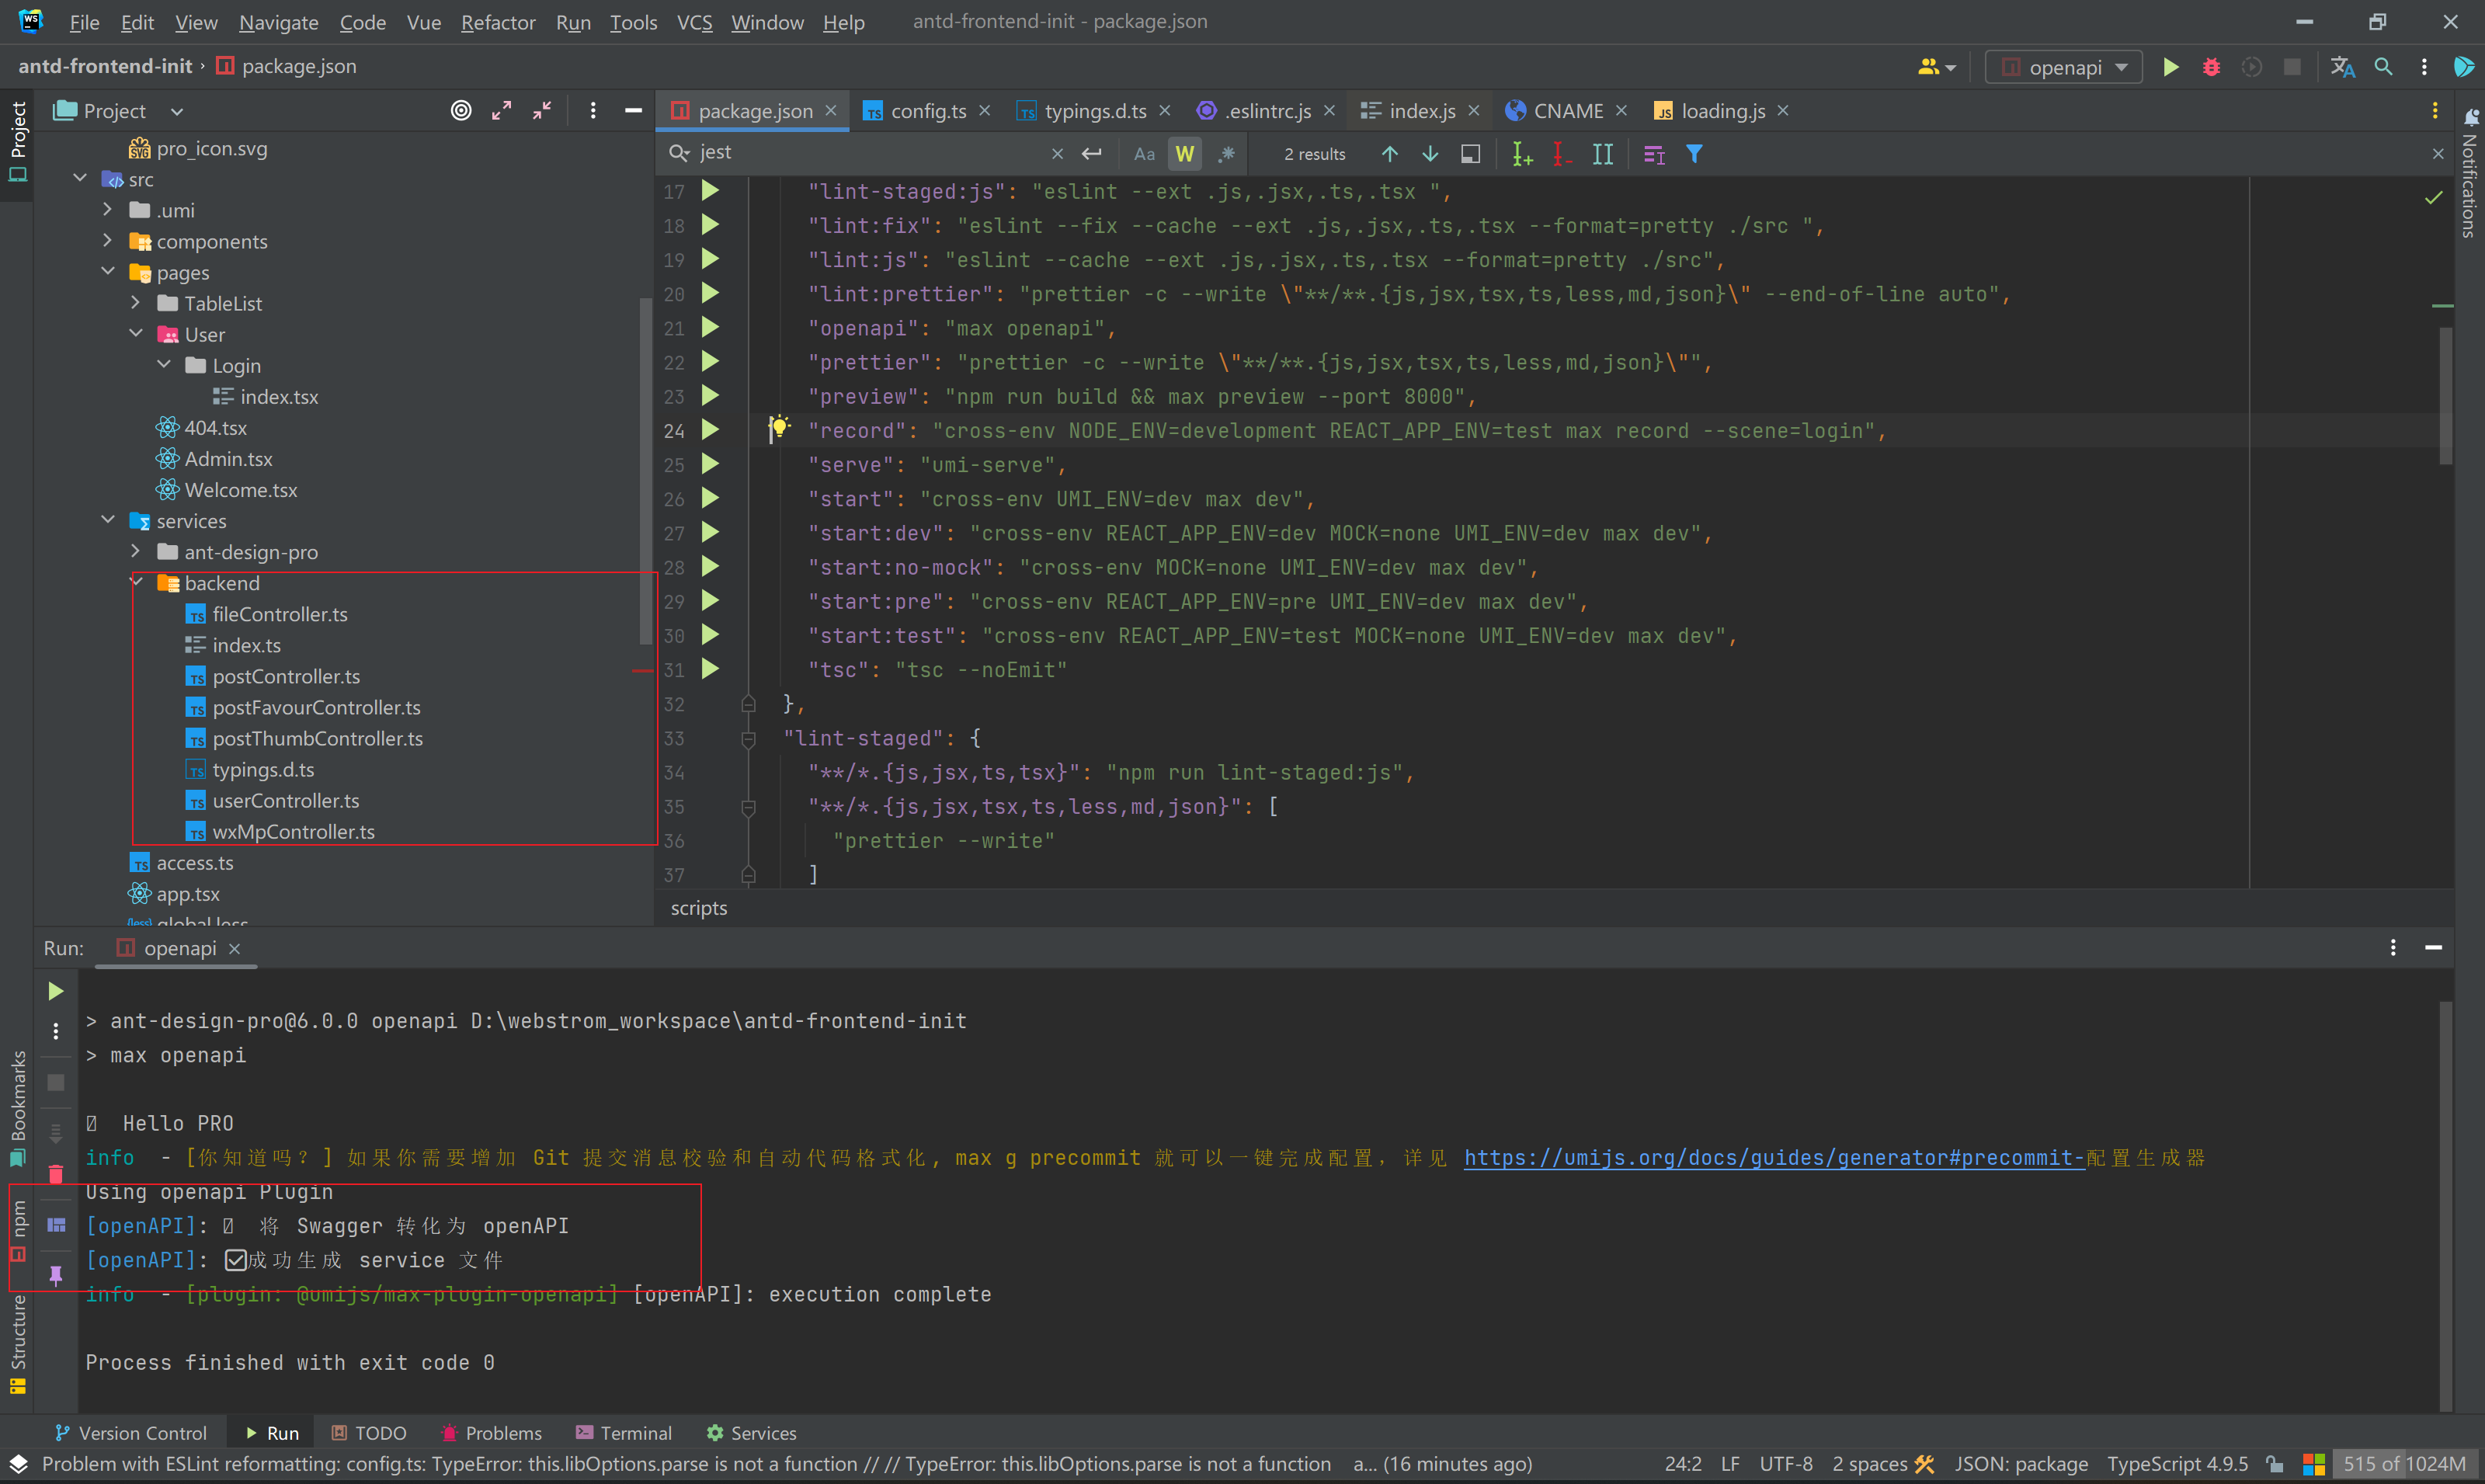
生成结果:
全局请求处理
1)修改 requestErrorConfig.ts 的名称为 requestConfig.ts
2)修改昵称至 requestConfig
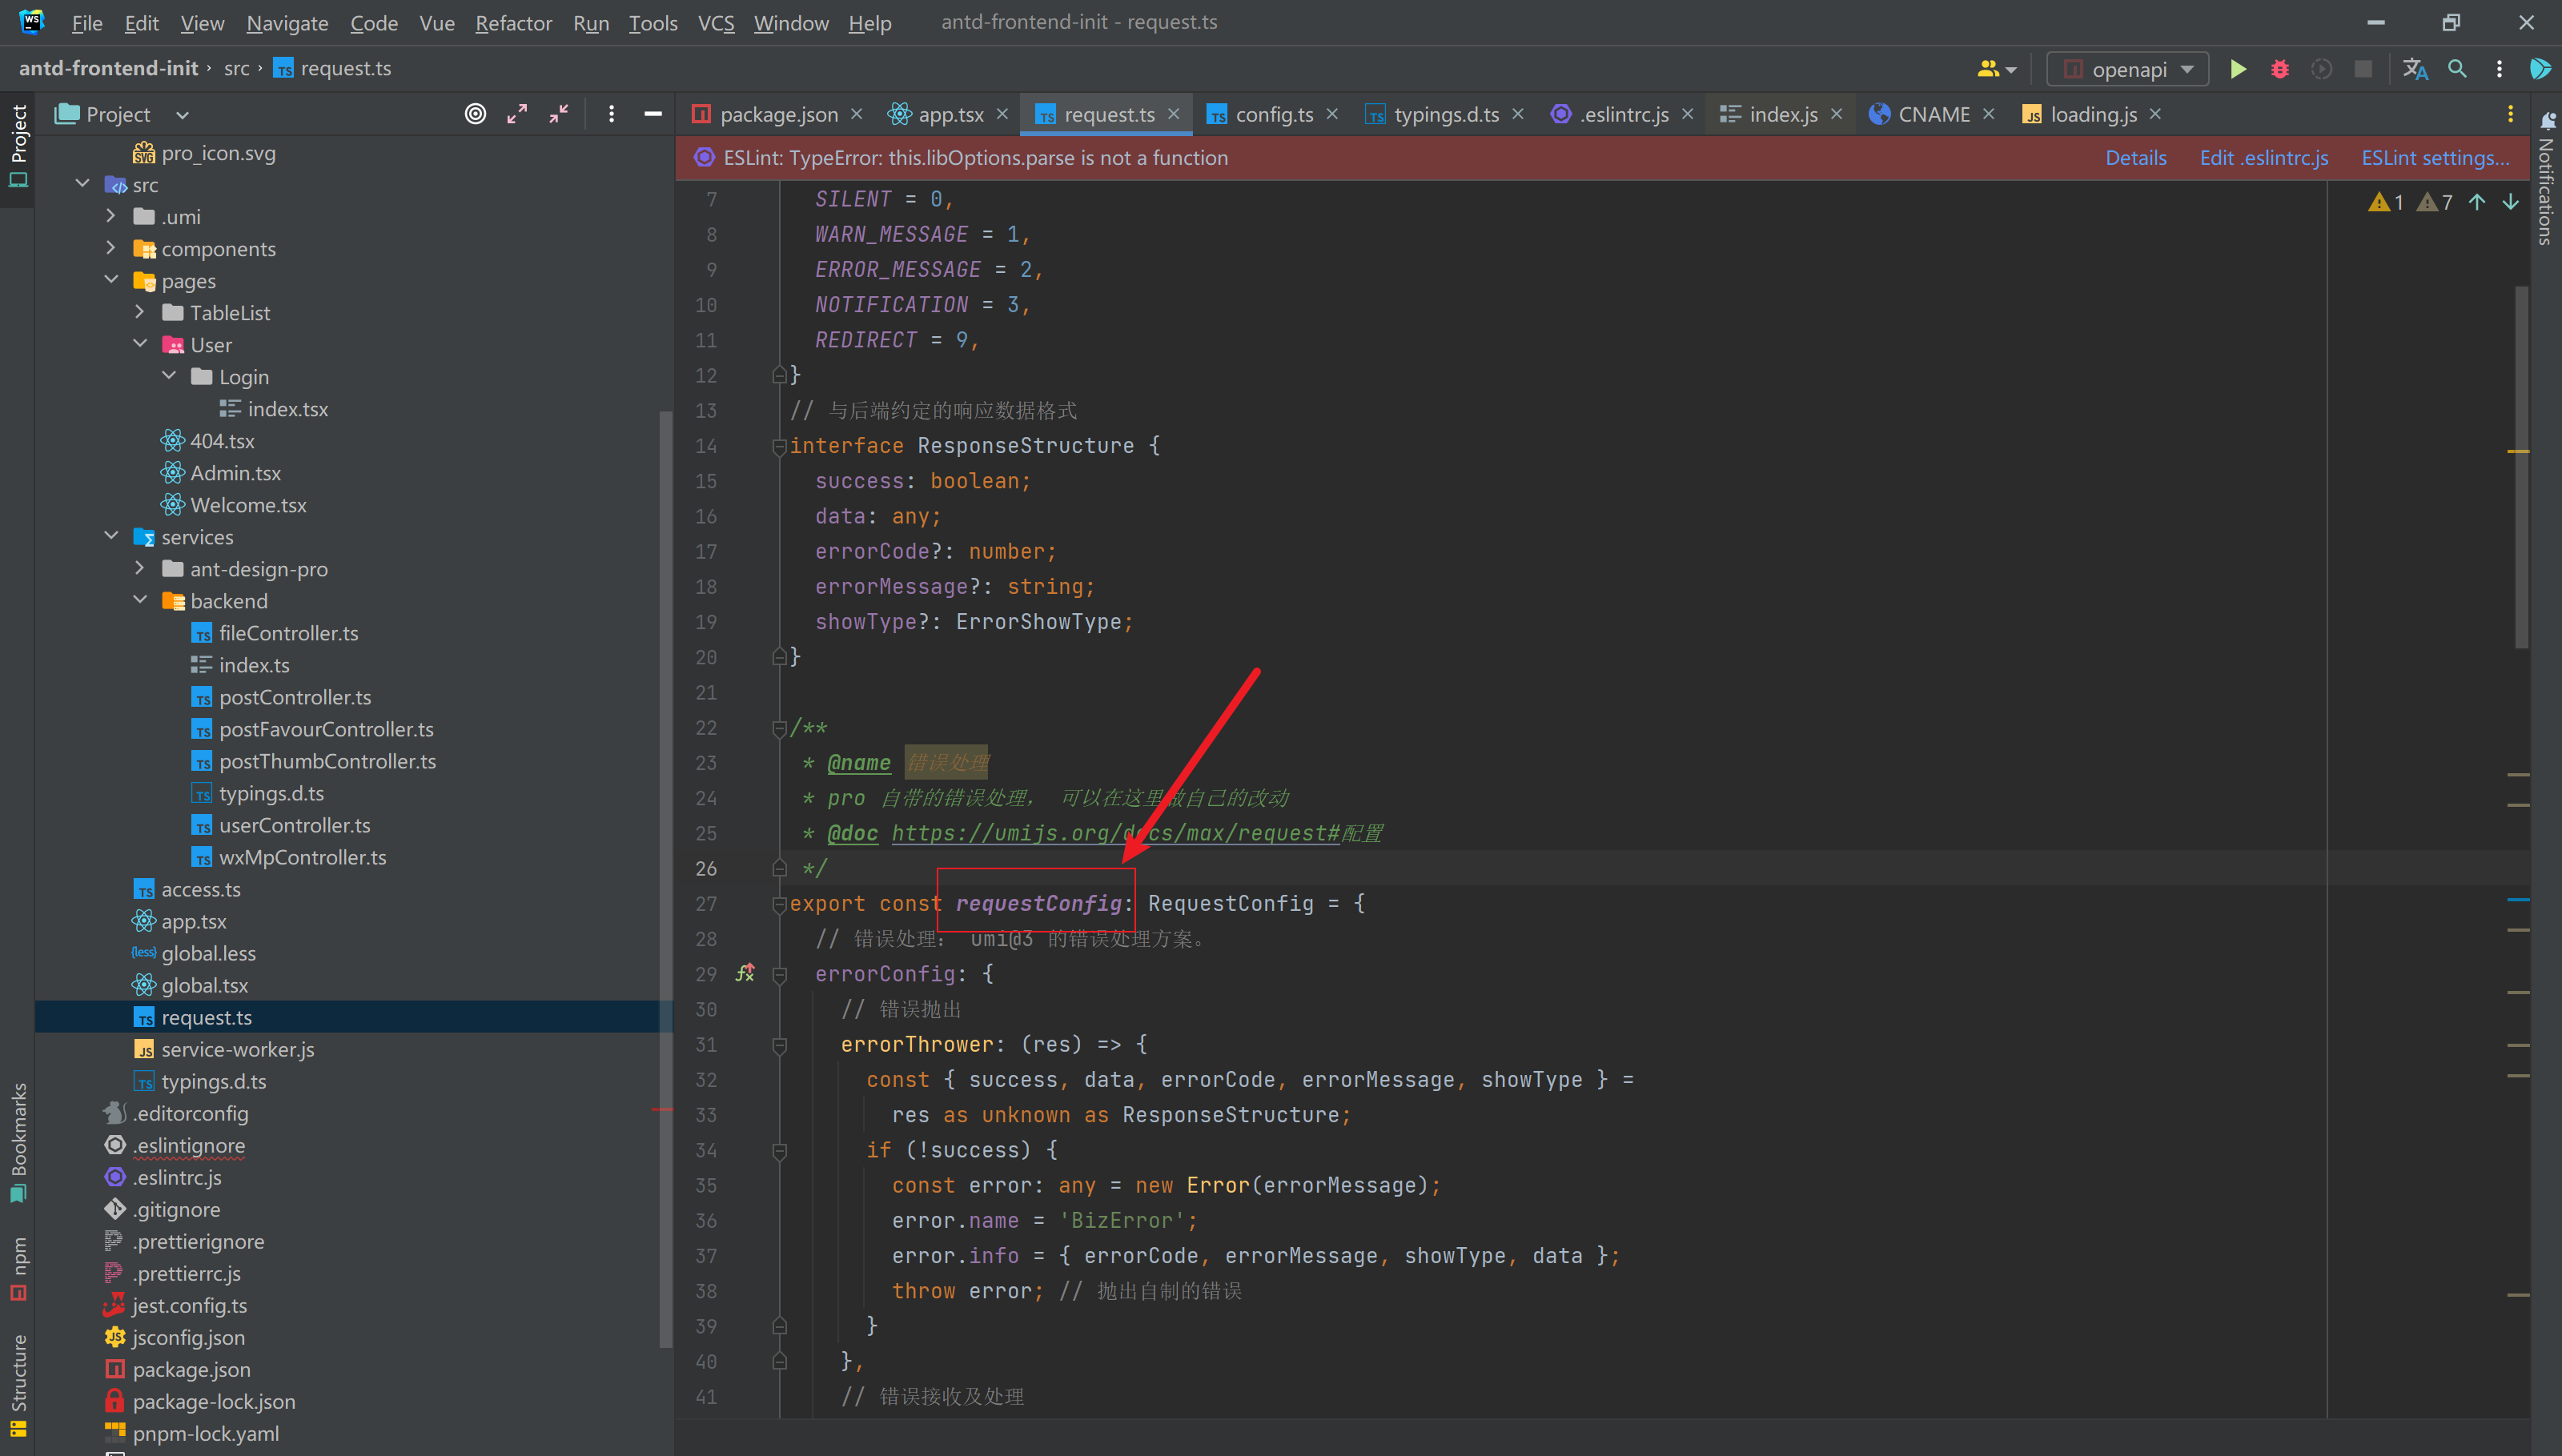
3)app.tsx 中引入
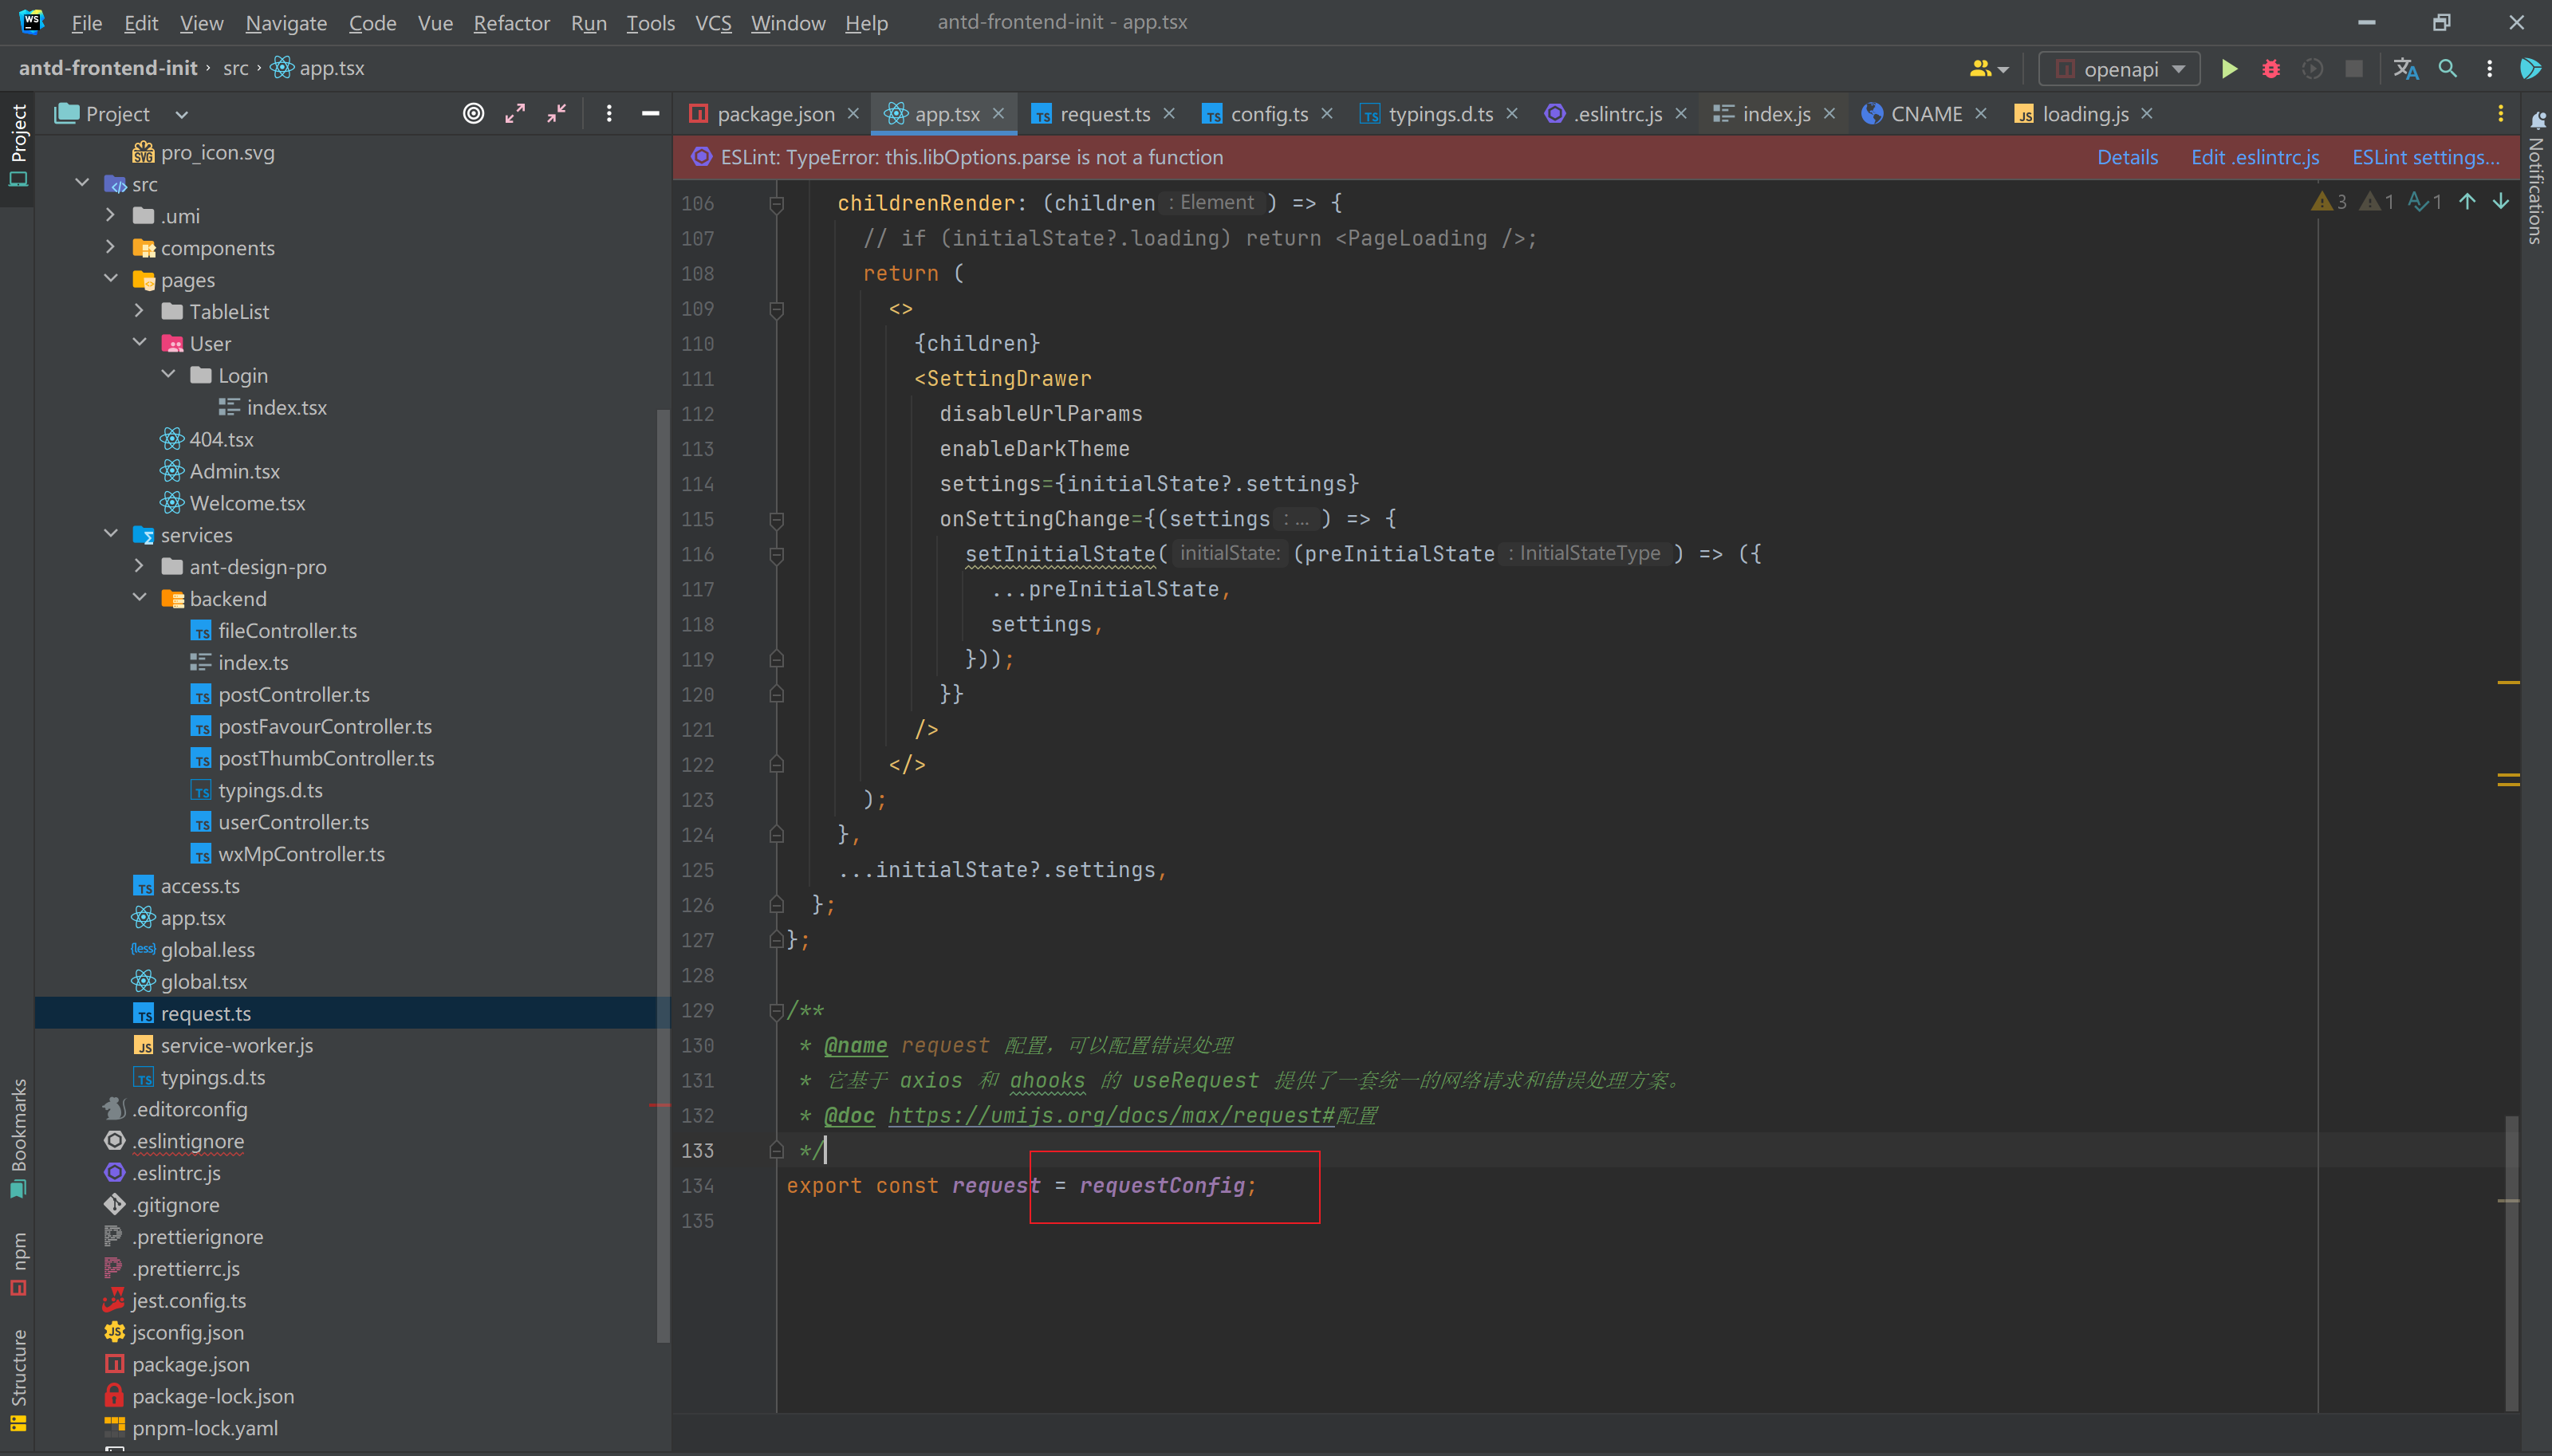
4)创建 index.ts 常量区别开发环境和部署环境1806613115223461889_0.5625128030034061
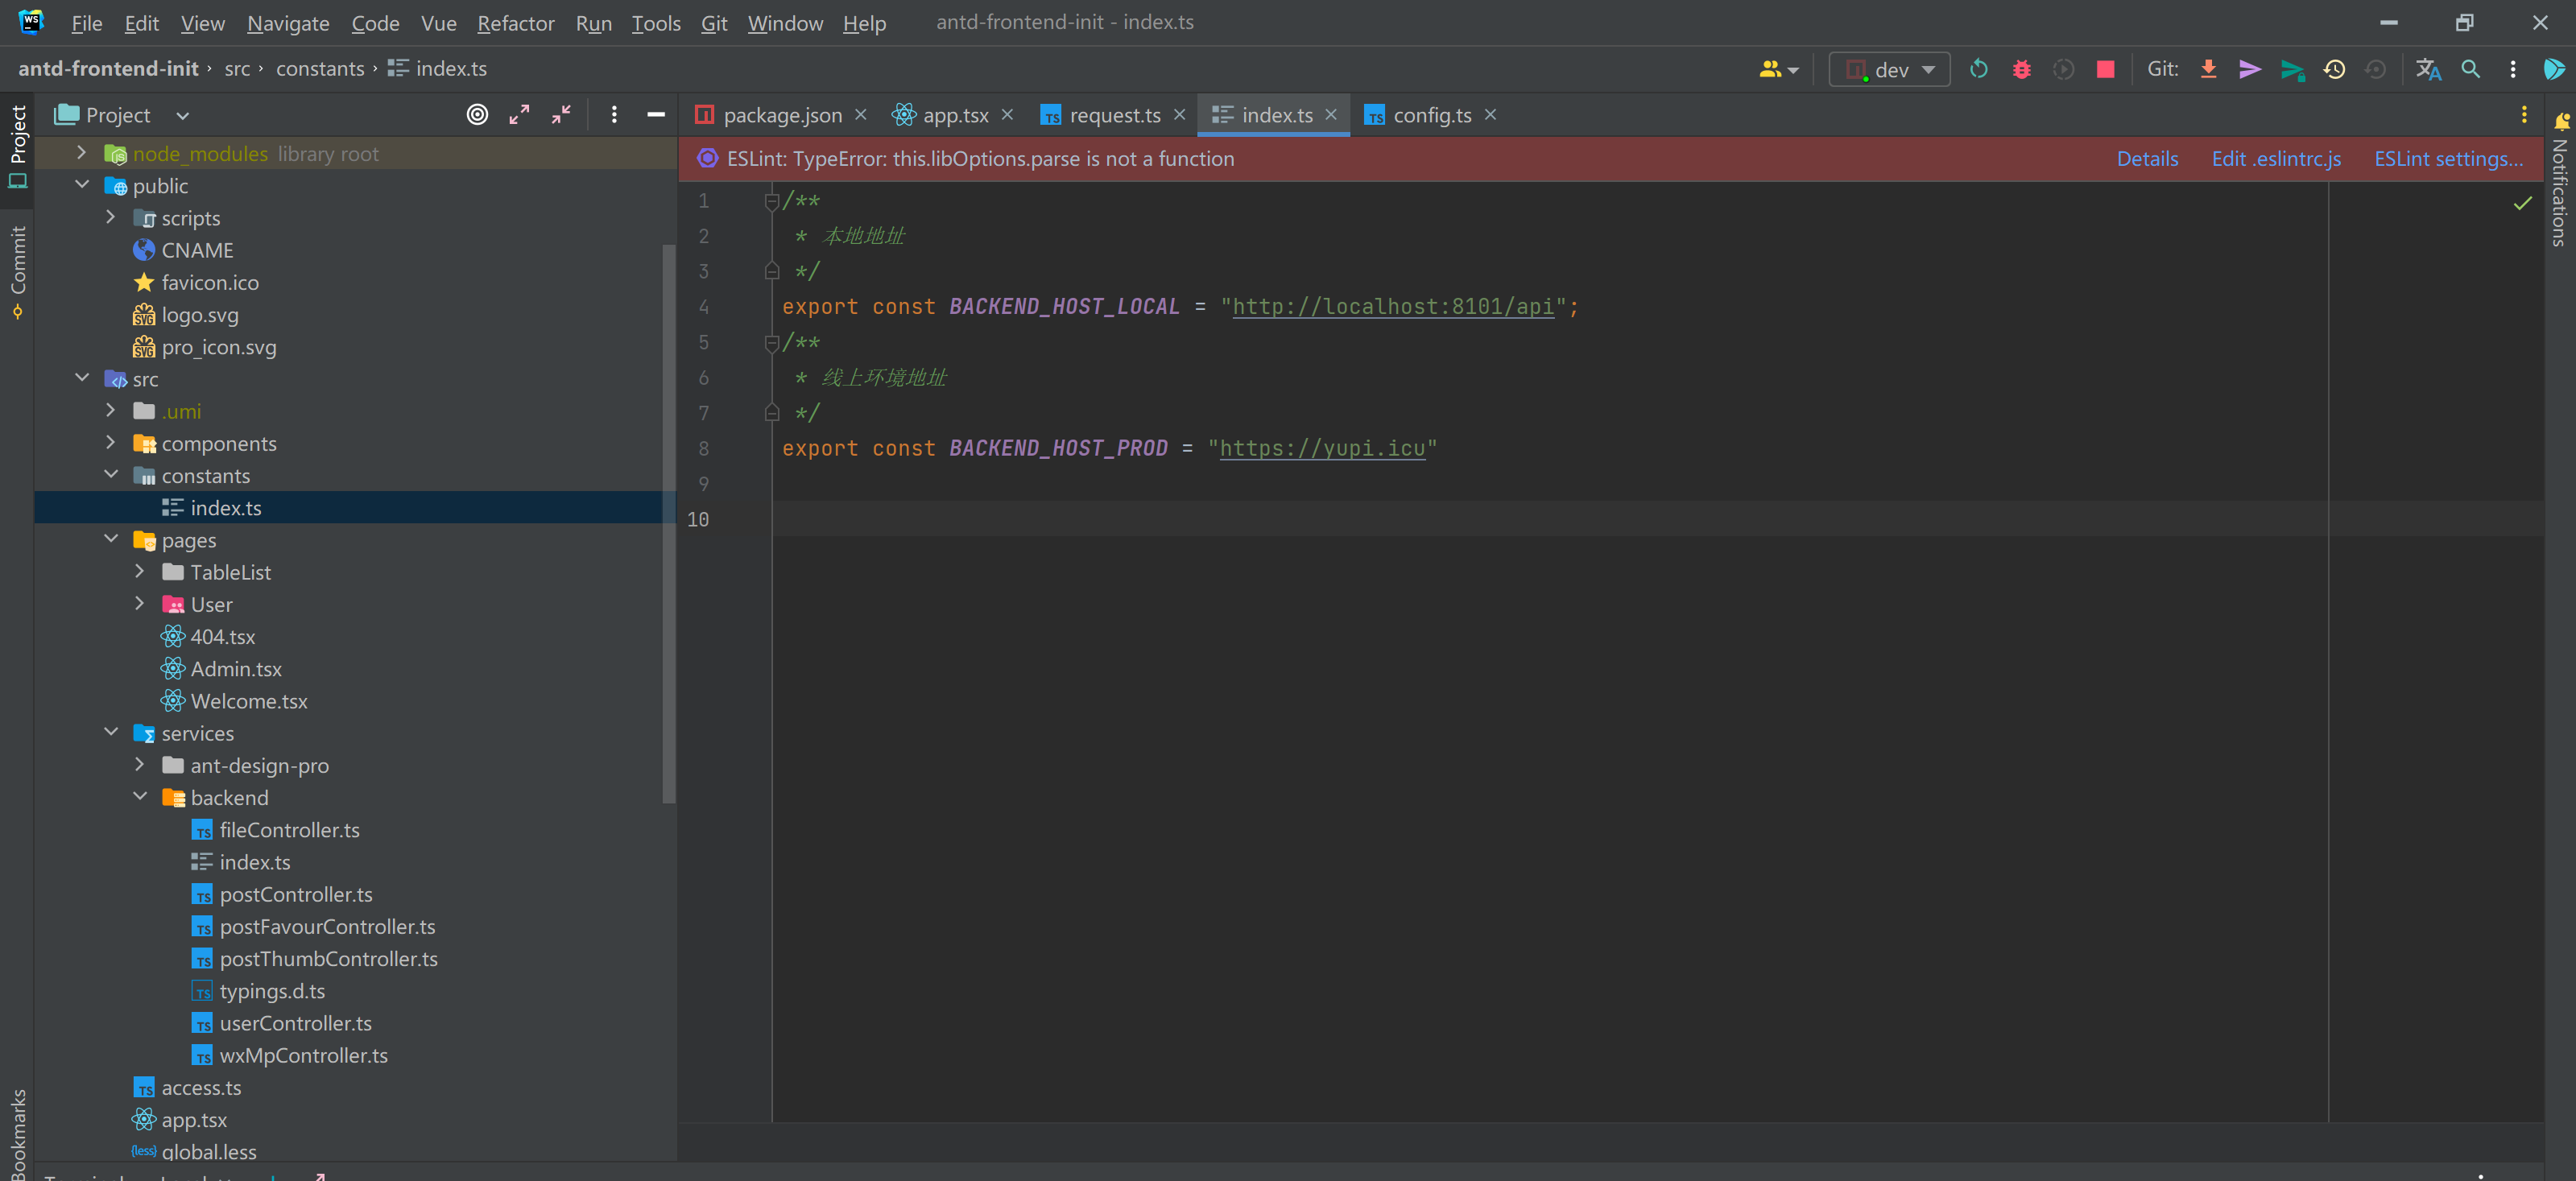
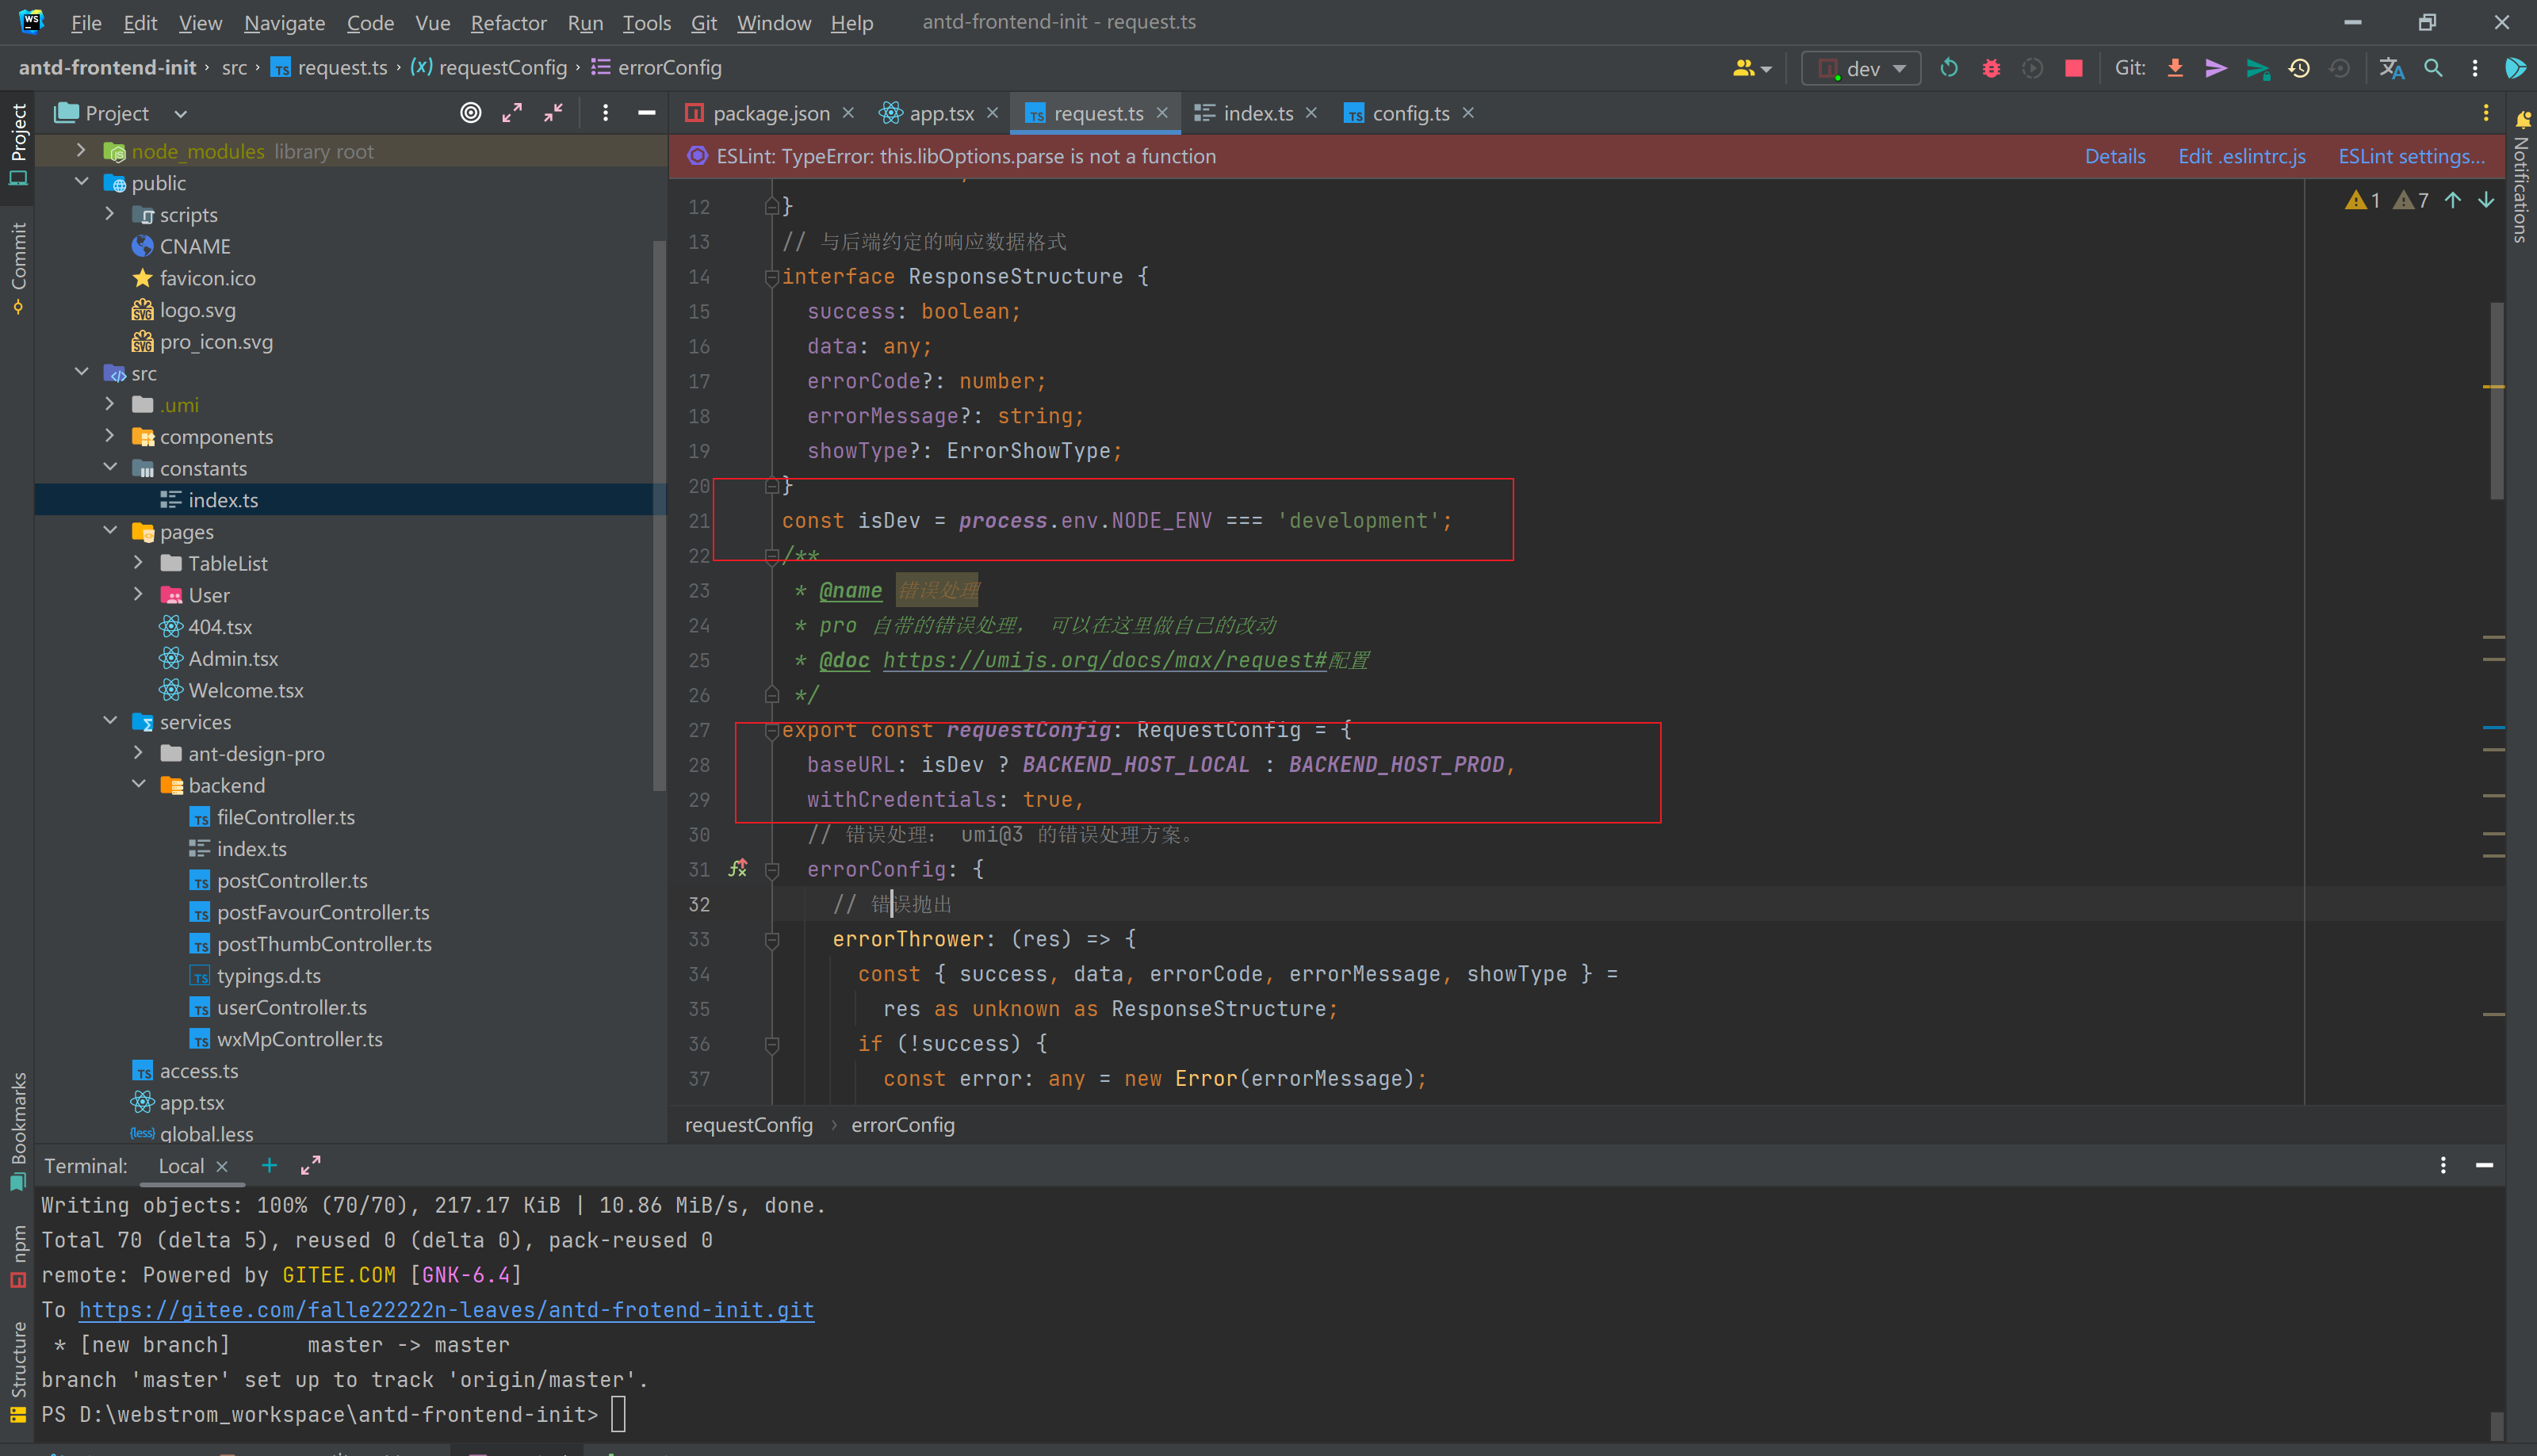
5)引入环境变量,根据环境变量区分不同环境请求地址
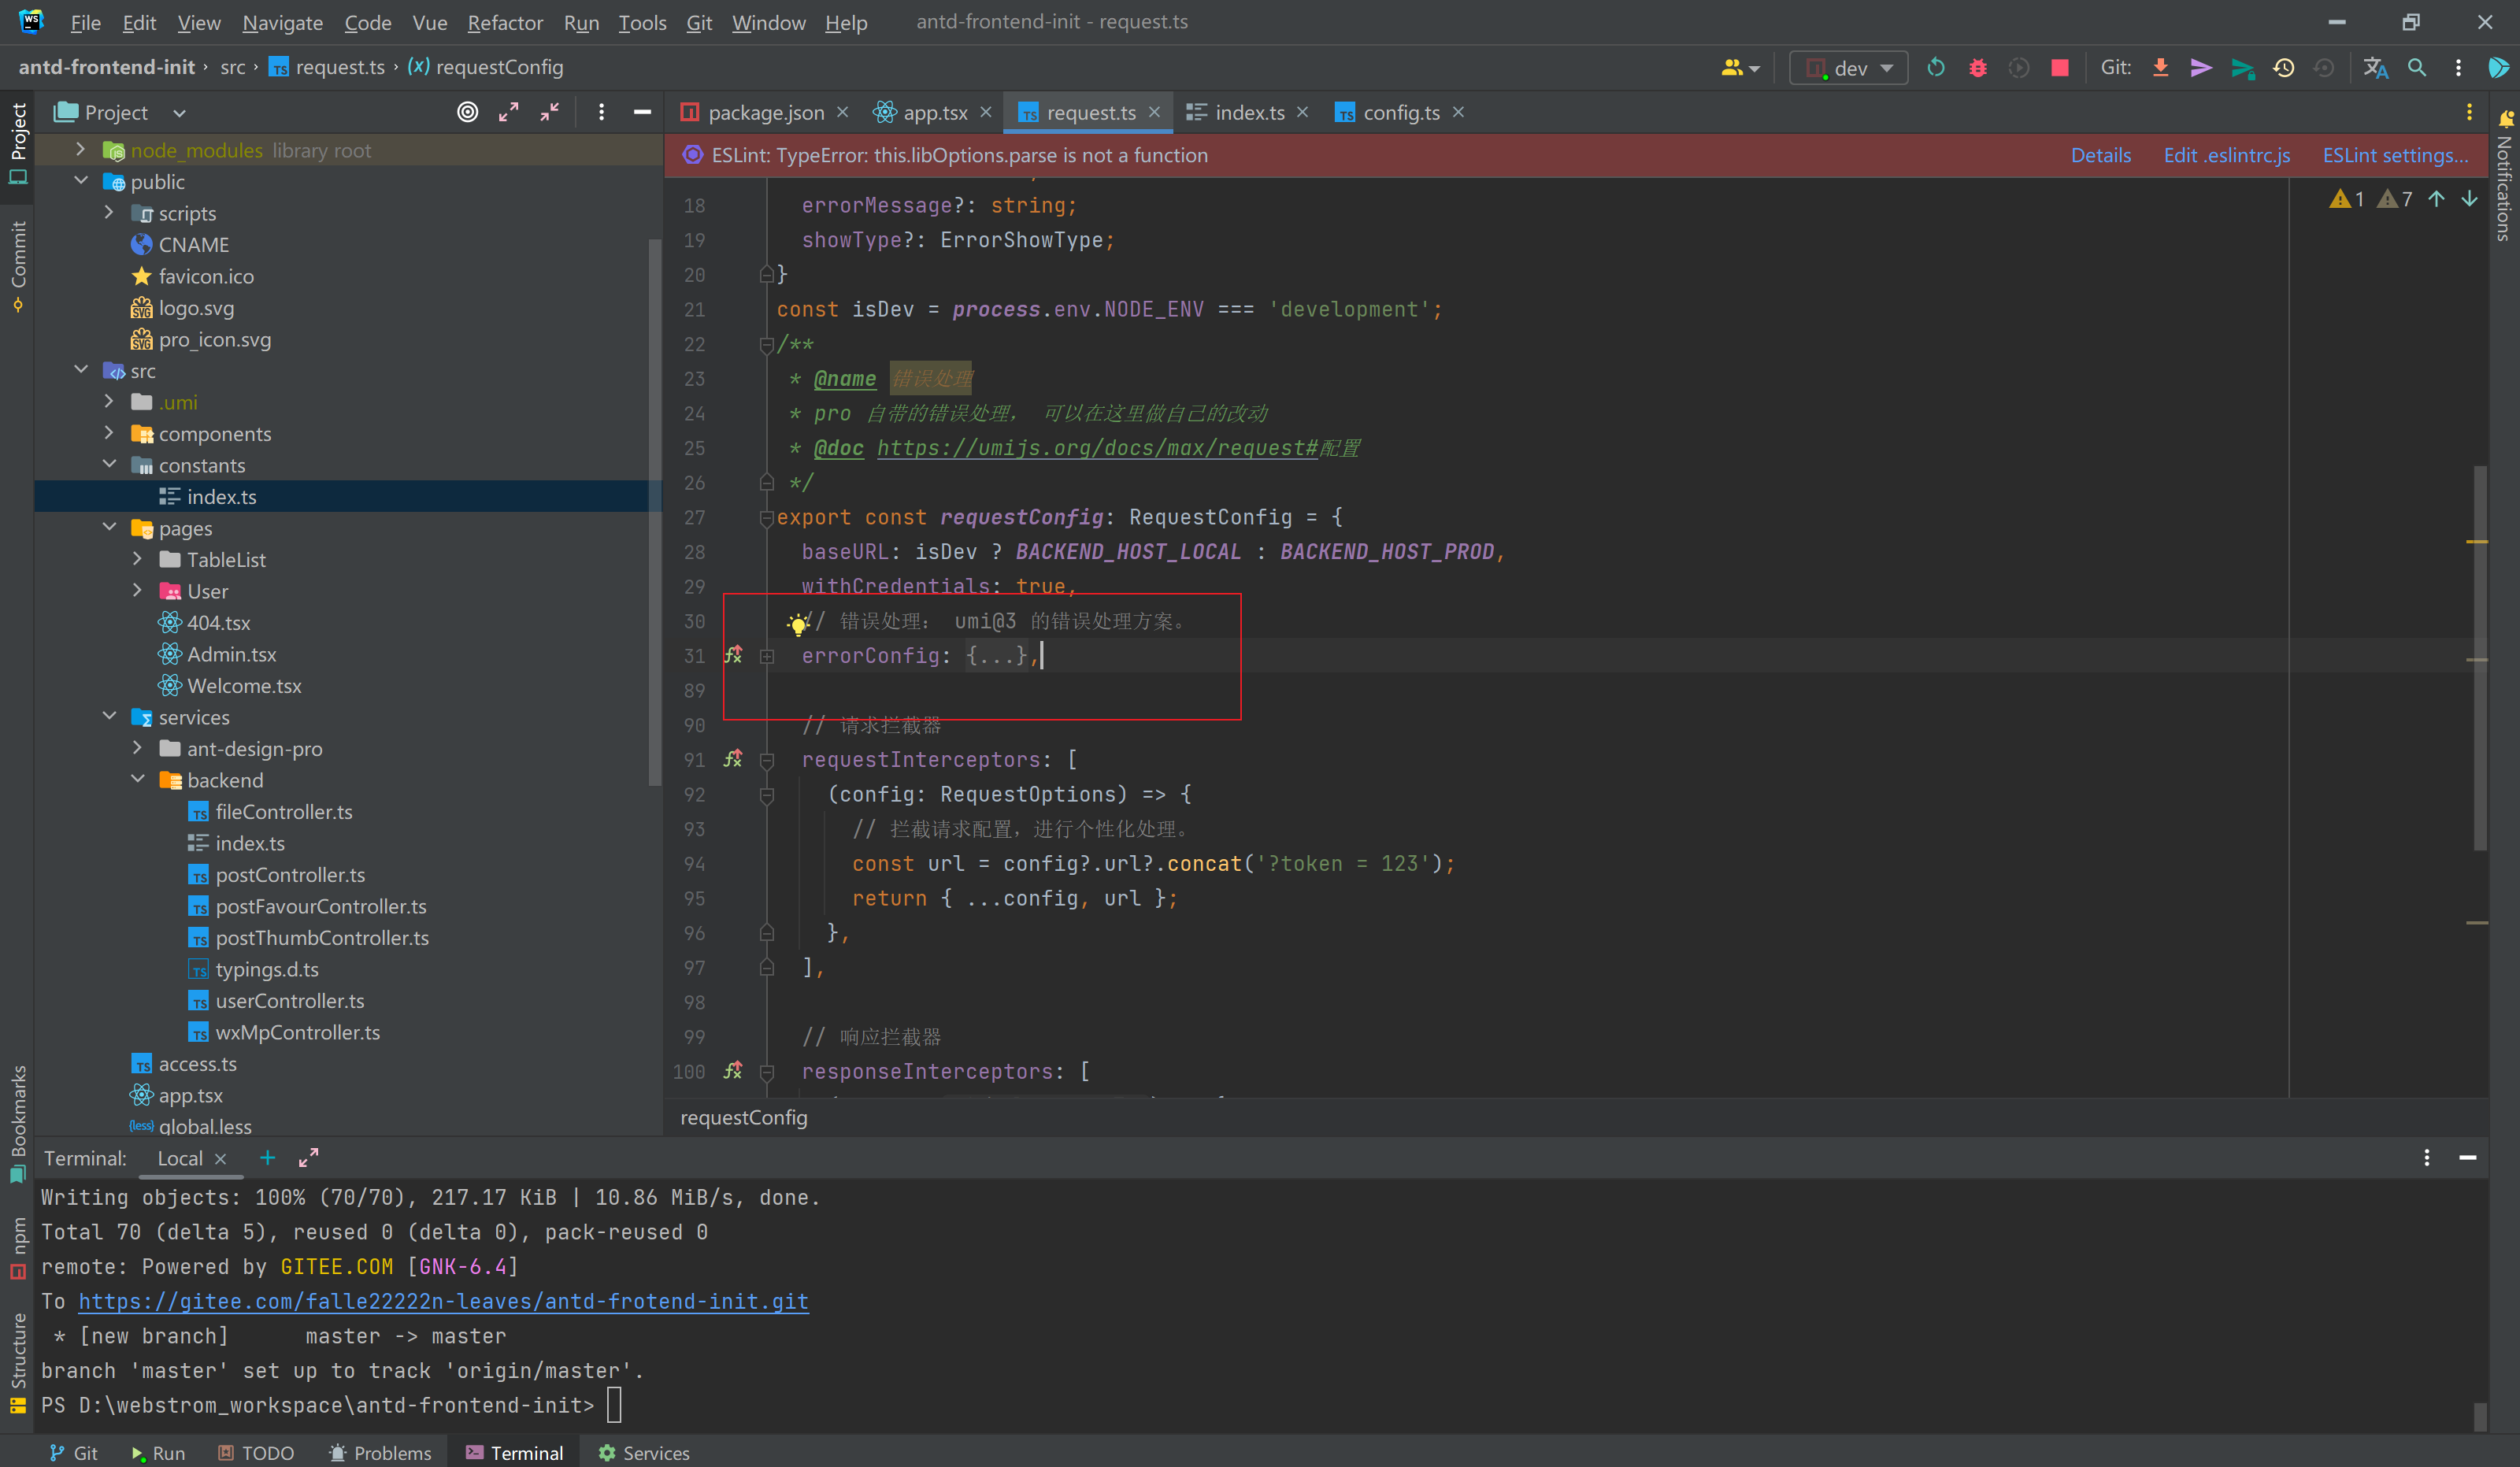
6)删除错误处理,官方给的过于复杂,这边直接删除。
7)删除官方的拼接 Token,一般你要使用 Token,可以直接在Authorization 请求头中携带 Token。
// 请求拦截器

requestInterceptors: [

  (config: RequestOptions) => {

    // 拦截请求配置,进行个性化处理。

    return config;

  },

],
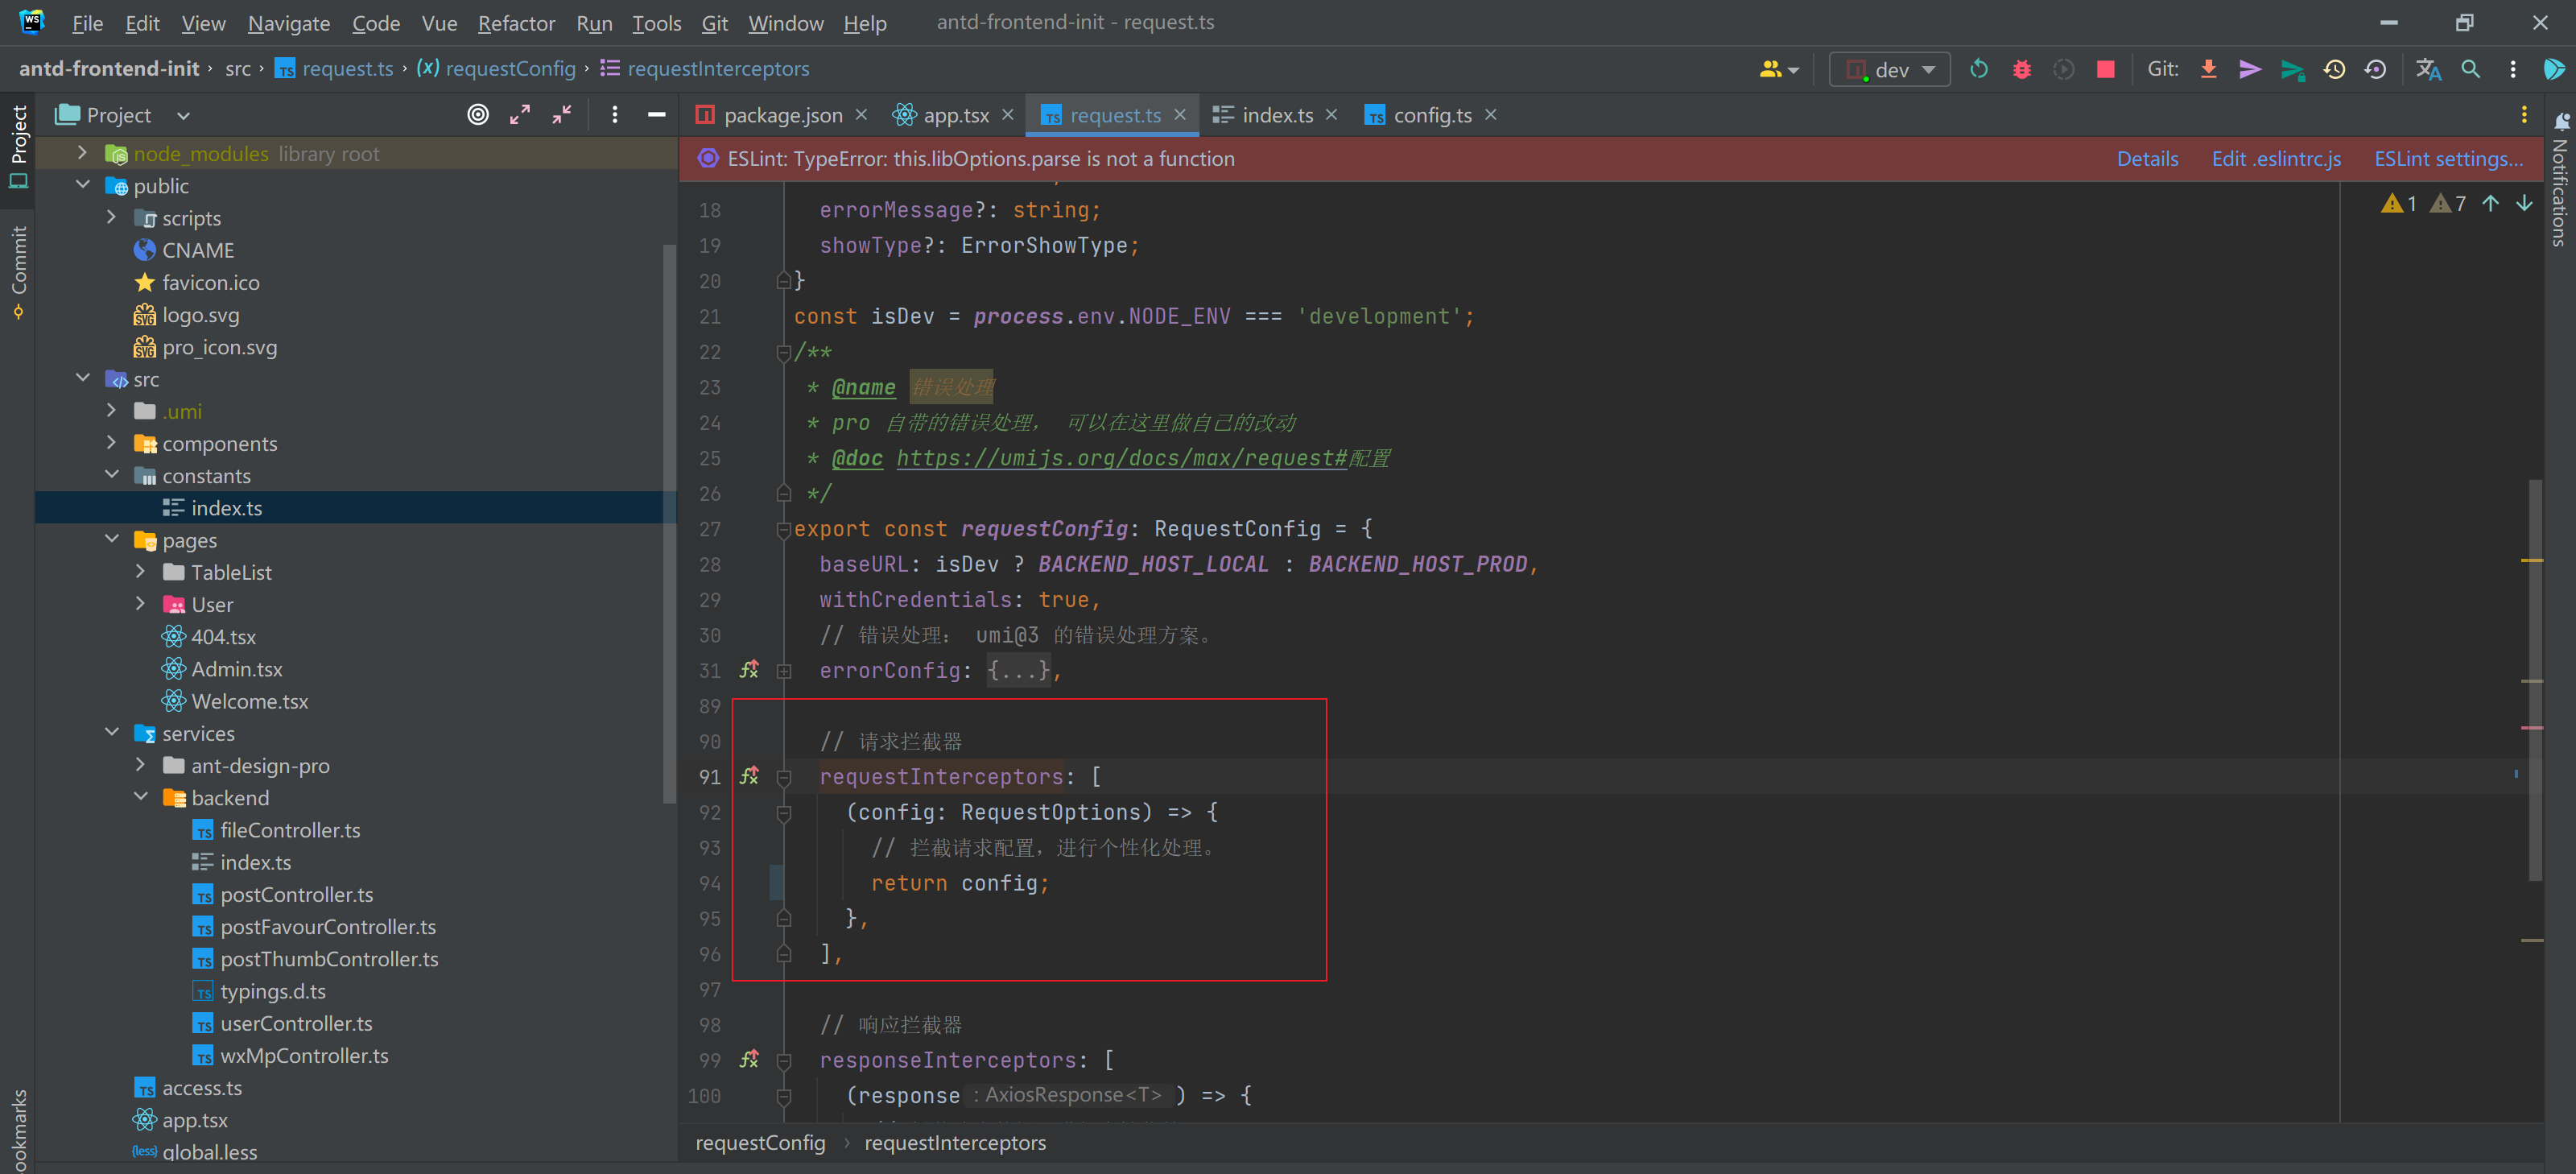
8)修改封装好的响应拦截器
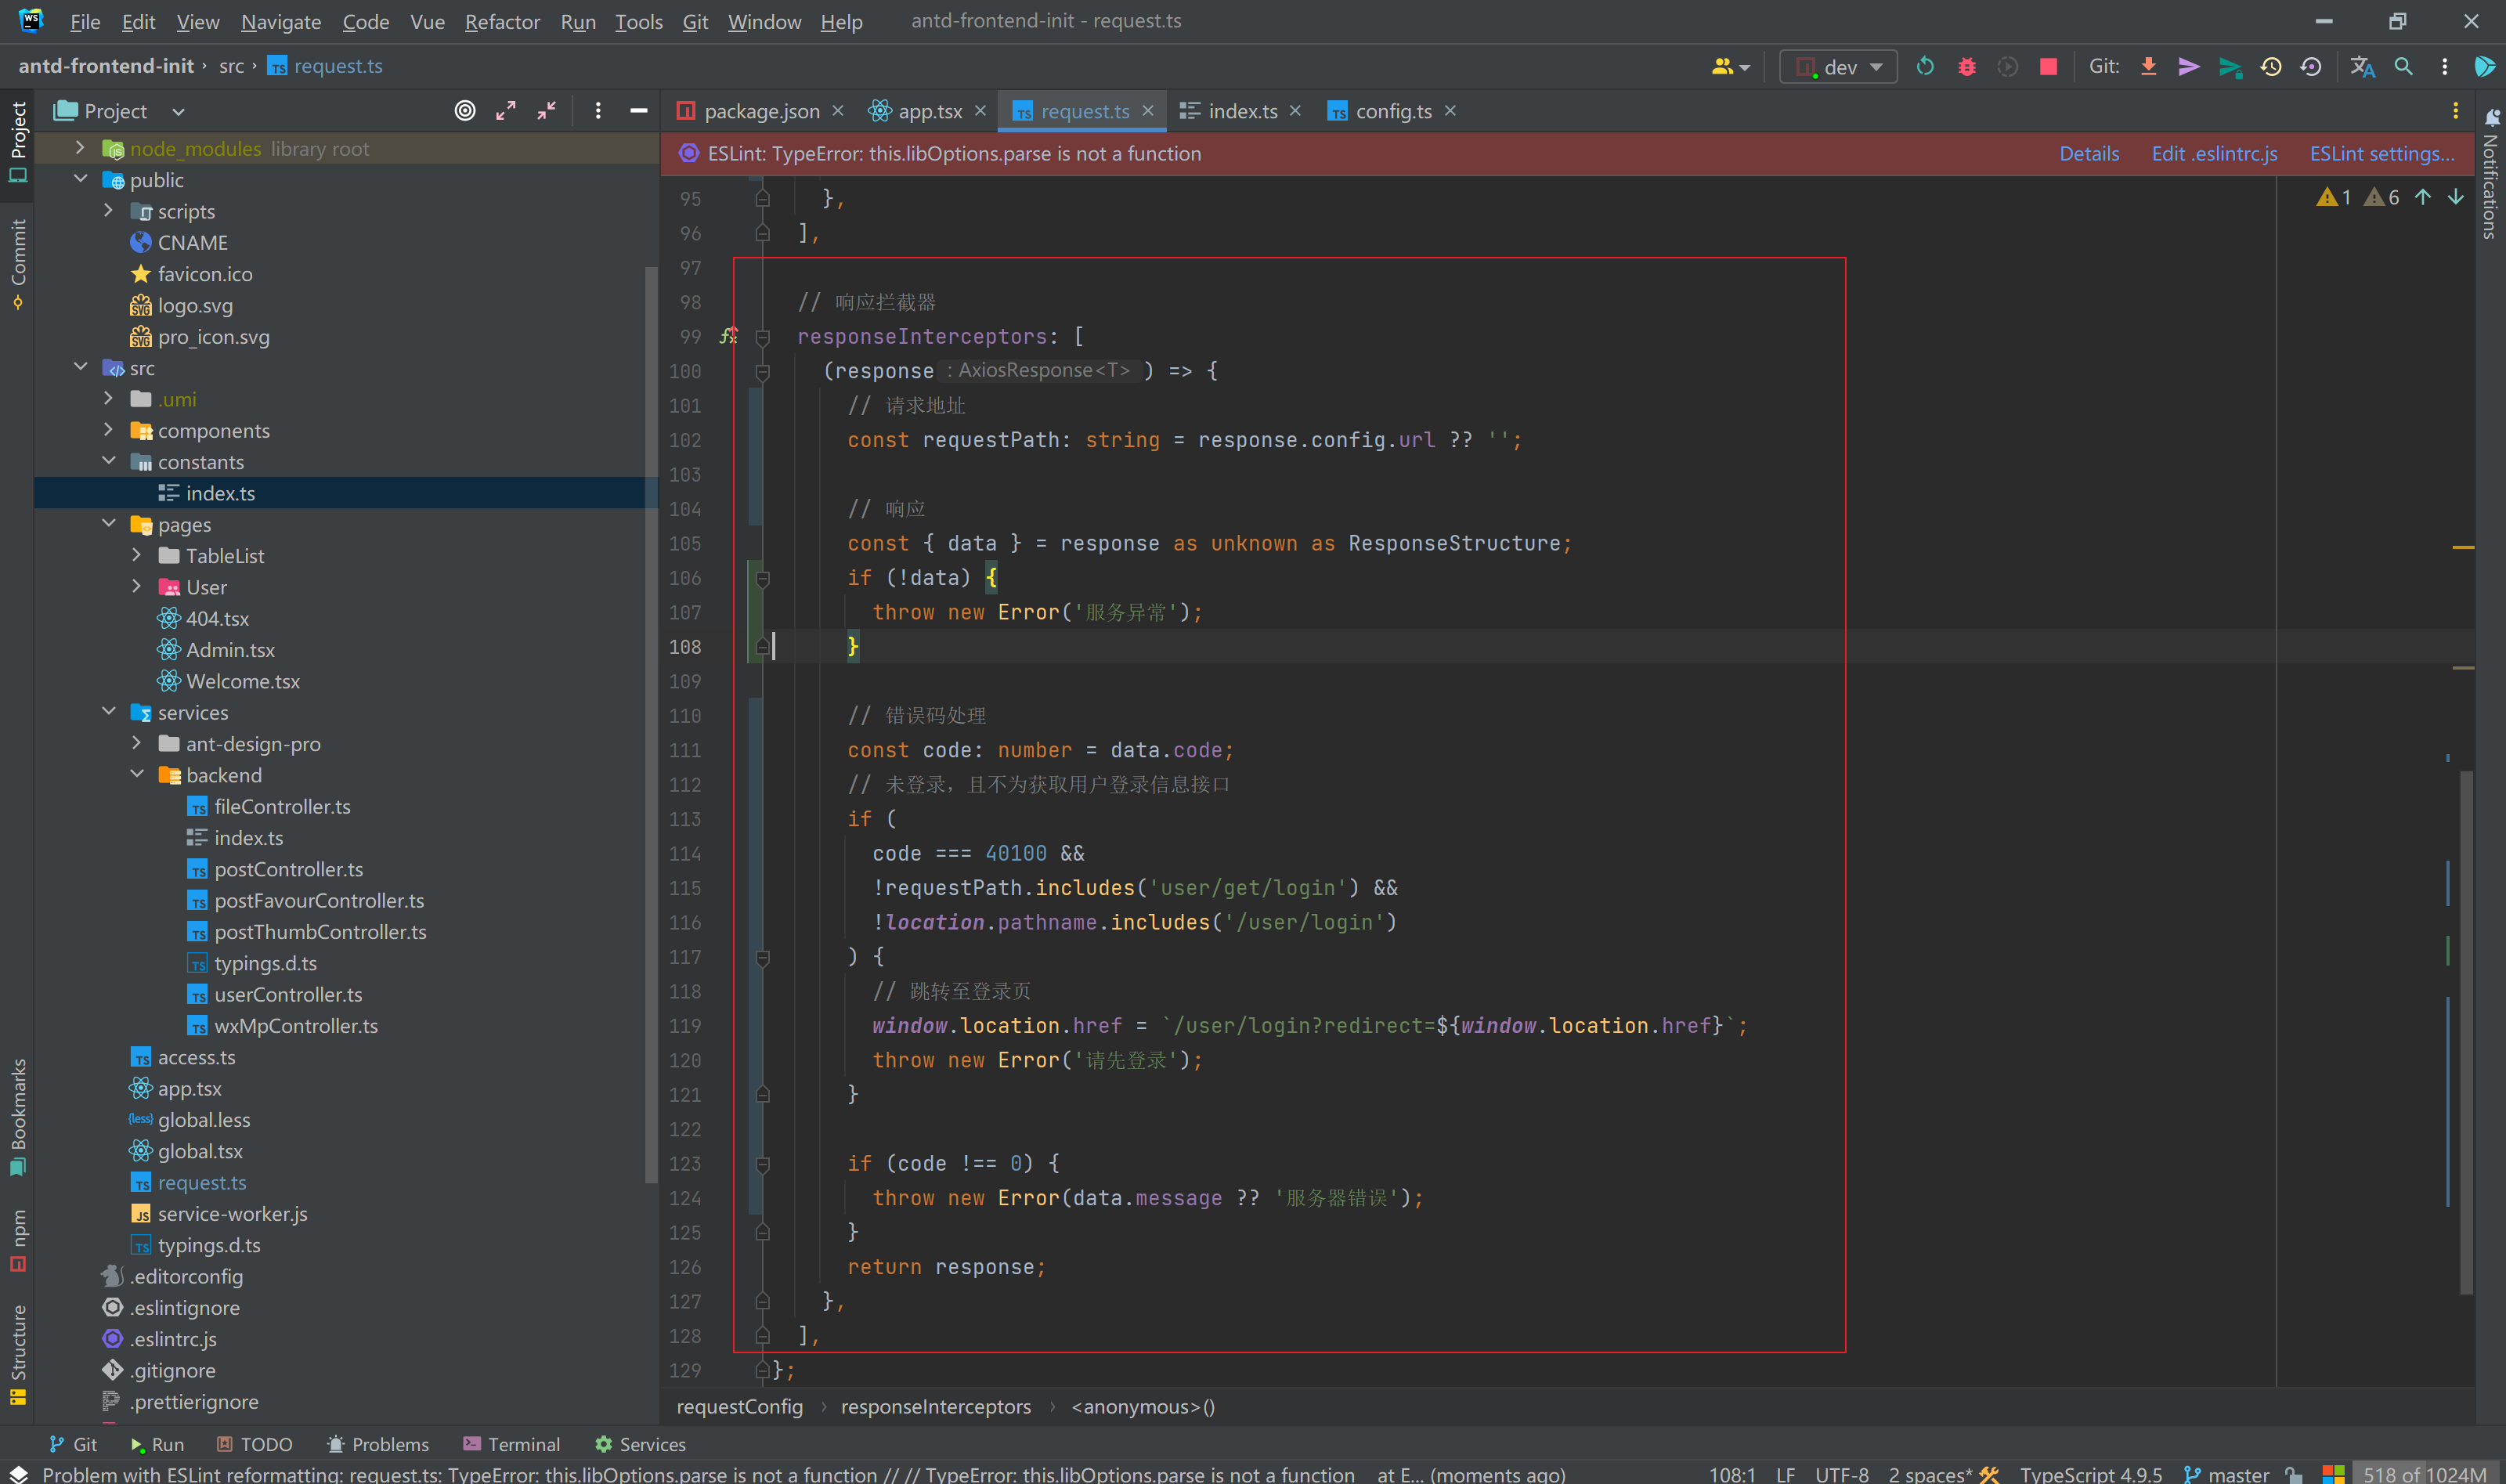 ```tsx
// 响应拦截器 responseInterceptors: [ (response) => { // 请求地址 const
requestPath: string = response.config.url ?? '';
```tsx
// 响应拦截器 responseInterceptors: [ (response) => { // 请求地址 const
requestPath: string = response.config.url ?? '';
// 响应

const { data } = response as unknown as ResponseStructure;

if (!data) {

  throw new Error('服务异常');

}

// 错误码处理

const code: number = data.code;

// 未登录,且不为获取用户登录信息接口

if (

  code === 40100 &&

  !requestPath.includes('user/get/login') &&

  !location.pathname.includes('/user/login')

) {

  // 跳转至登录页

  window.location.href = `/user/login?redirect=${window.location.href}`;

  throw new Error('请先登录');

}

if (code !== 0) {

  throw new Error(data.message ?? '服务器错误');

}

return response;
}, ],
```text
临时登录
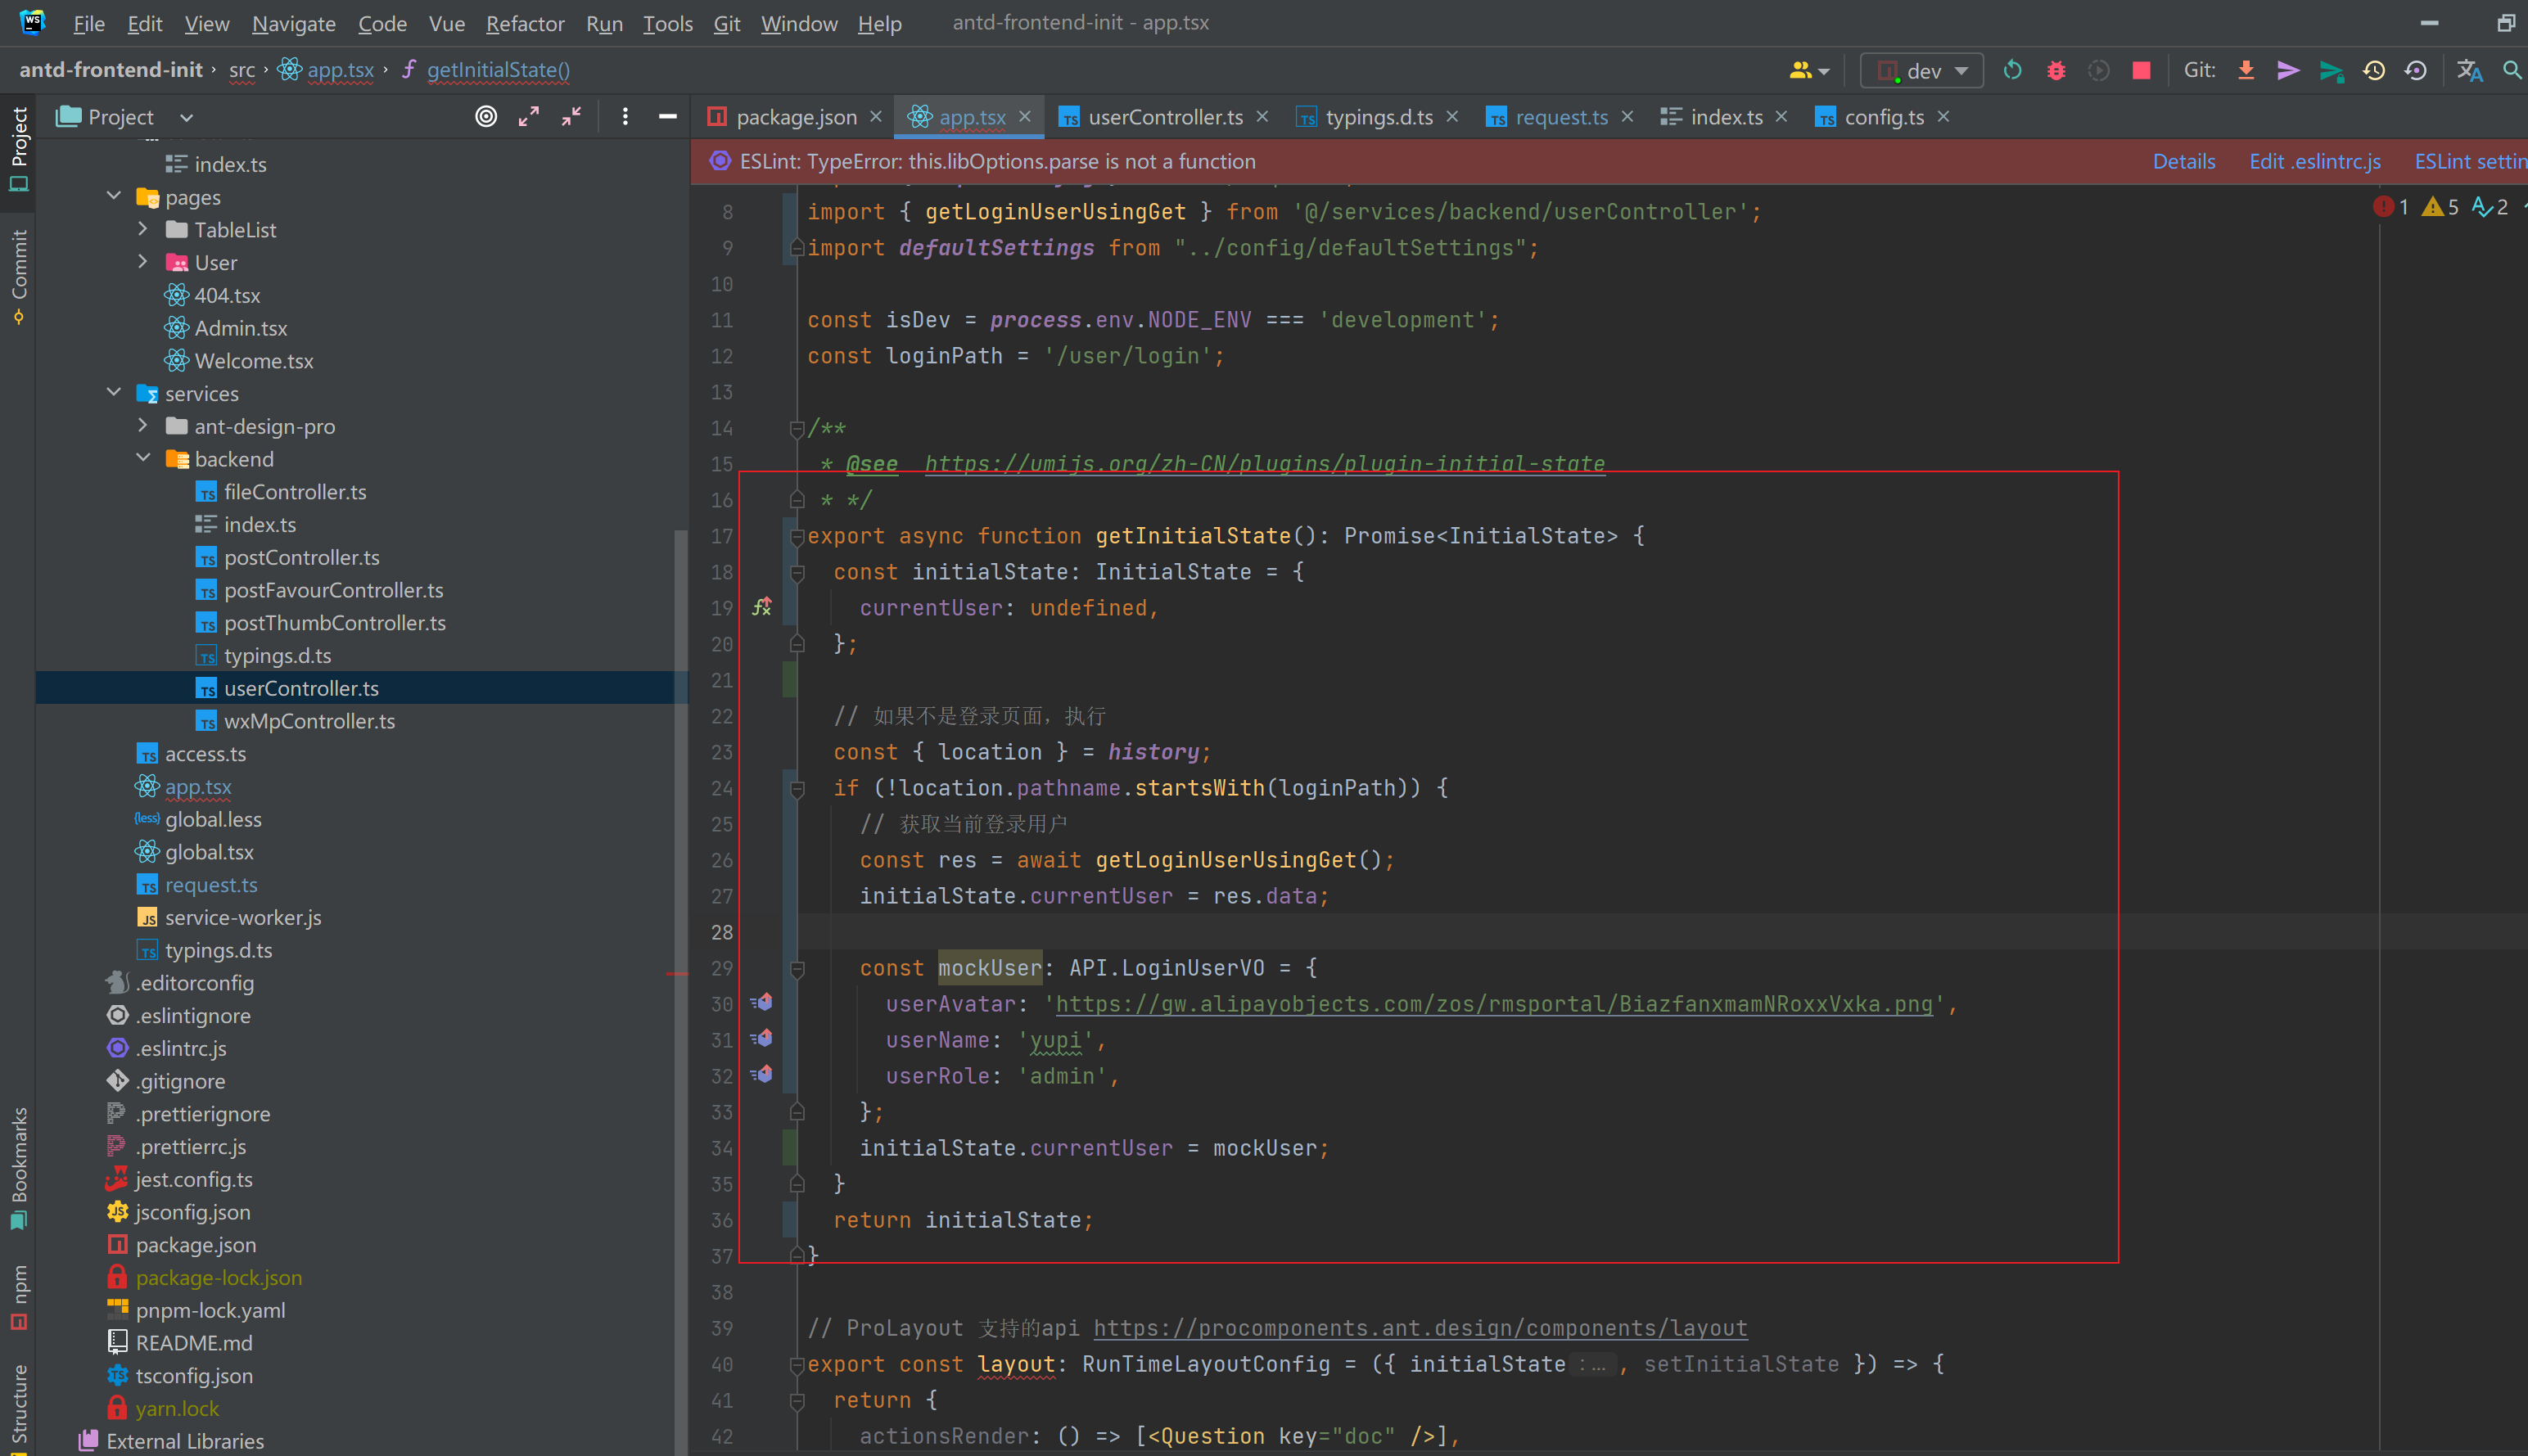
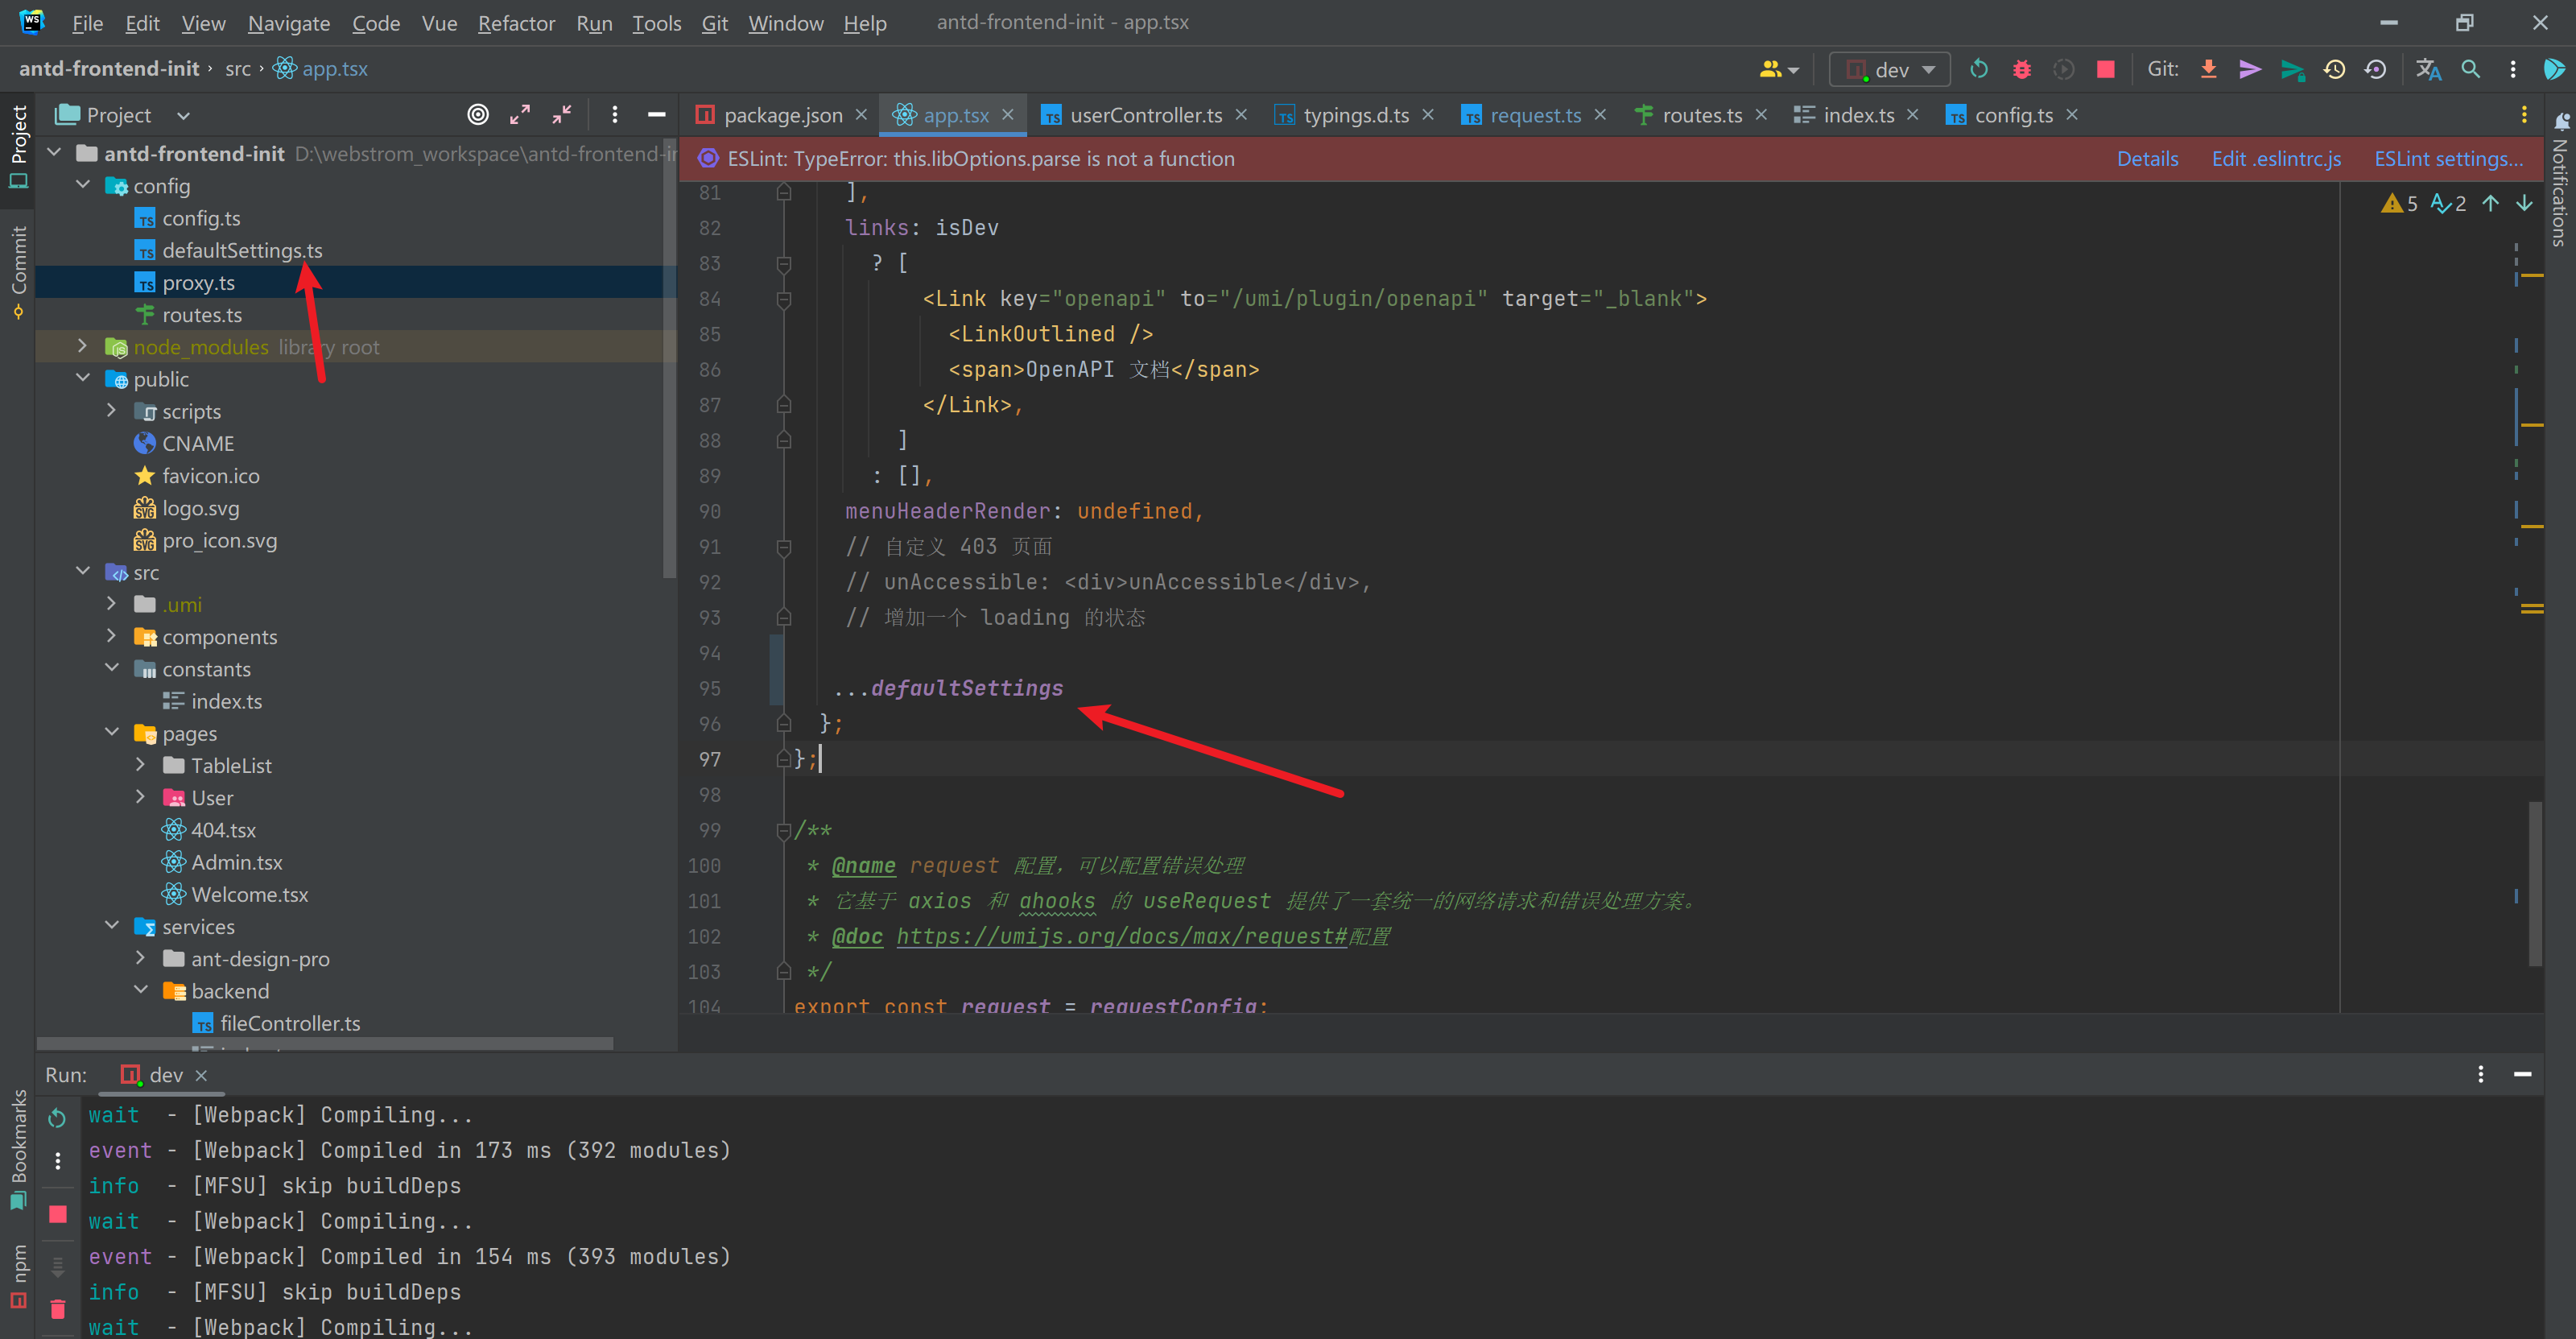
1)修改 app.tsx 中的 getInitialState,获取用户初始化状态,先利用 Mock 模拟数据,替换后将报错的 username、avatar 等全局替换即可。
/**

 * @see  https://umijs.org/zh-CN/plugins/plugin-initial-state

 * */

export async function getInitialState(): Promise<InitialState> {

  const initialState: InitialState = {

    currentUser: undefined,

  };

  // 如果不是登录页面,执行

  const { location } = history;

  if (!location.pathname.startsWith(loginPath)) {

    // 获取当前登录用户

    const res = await getLoginUser();

    initialState.currentUser = res.data;

    const mockUser: API.LoginUserVO = {

      userAvatar: 'https://gw.alipayobjects.com/zos/rmsportal/BiazfanxmamNRoxxVxka.png',

      userName: 'yupi',

      userRole: 'admin',

    };

    initialState.currentUser = mockUser;

  }

  return initialState;

}
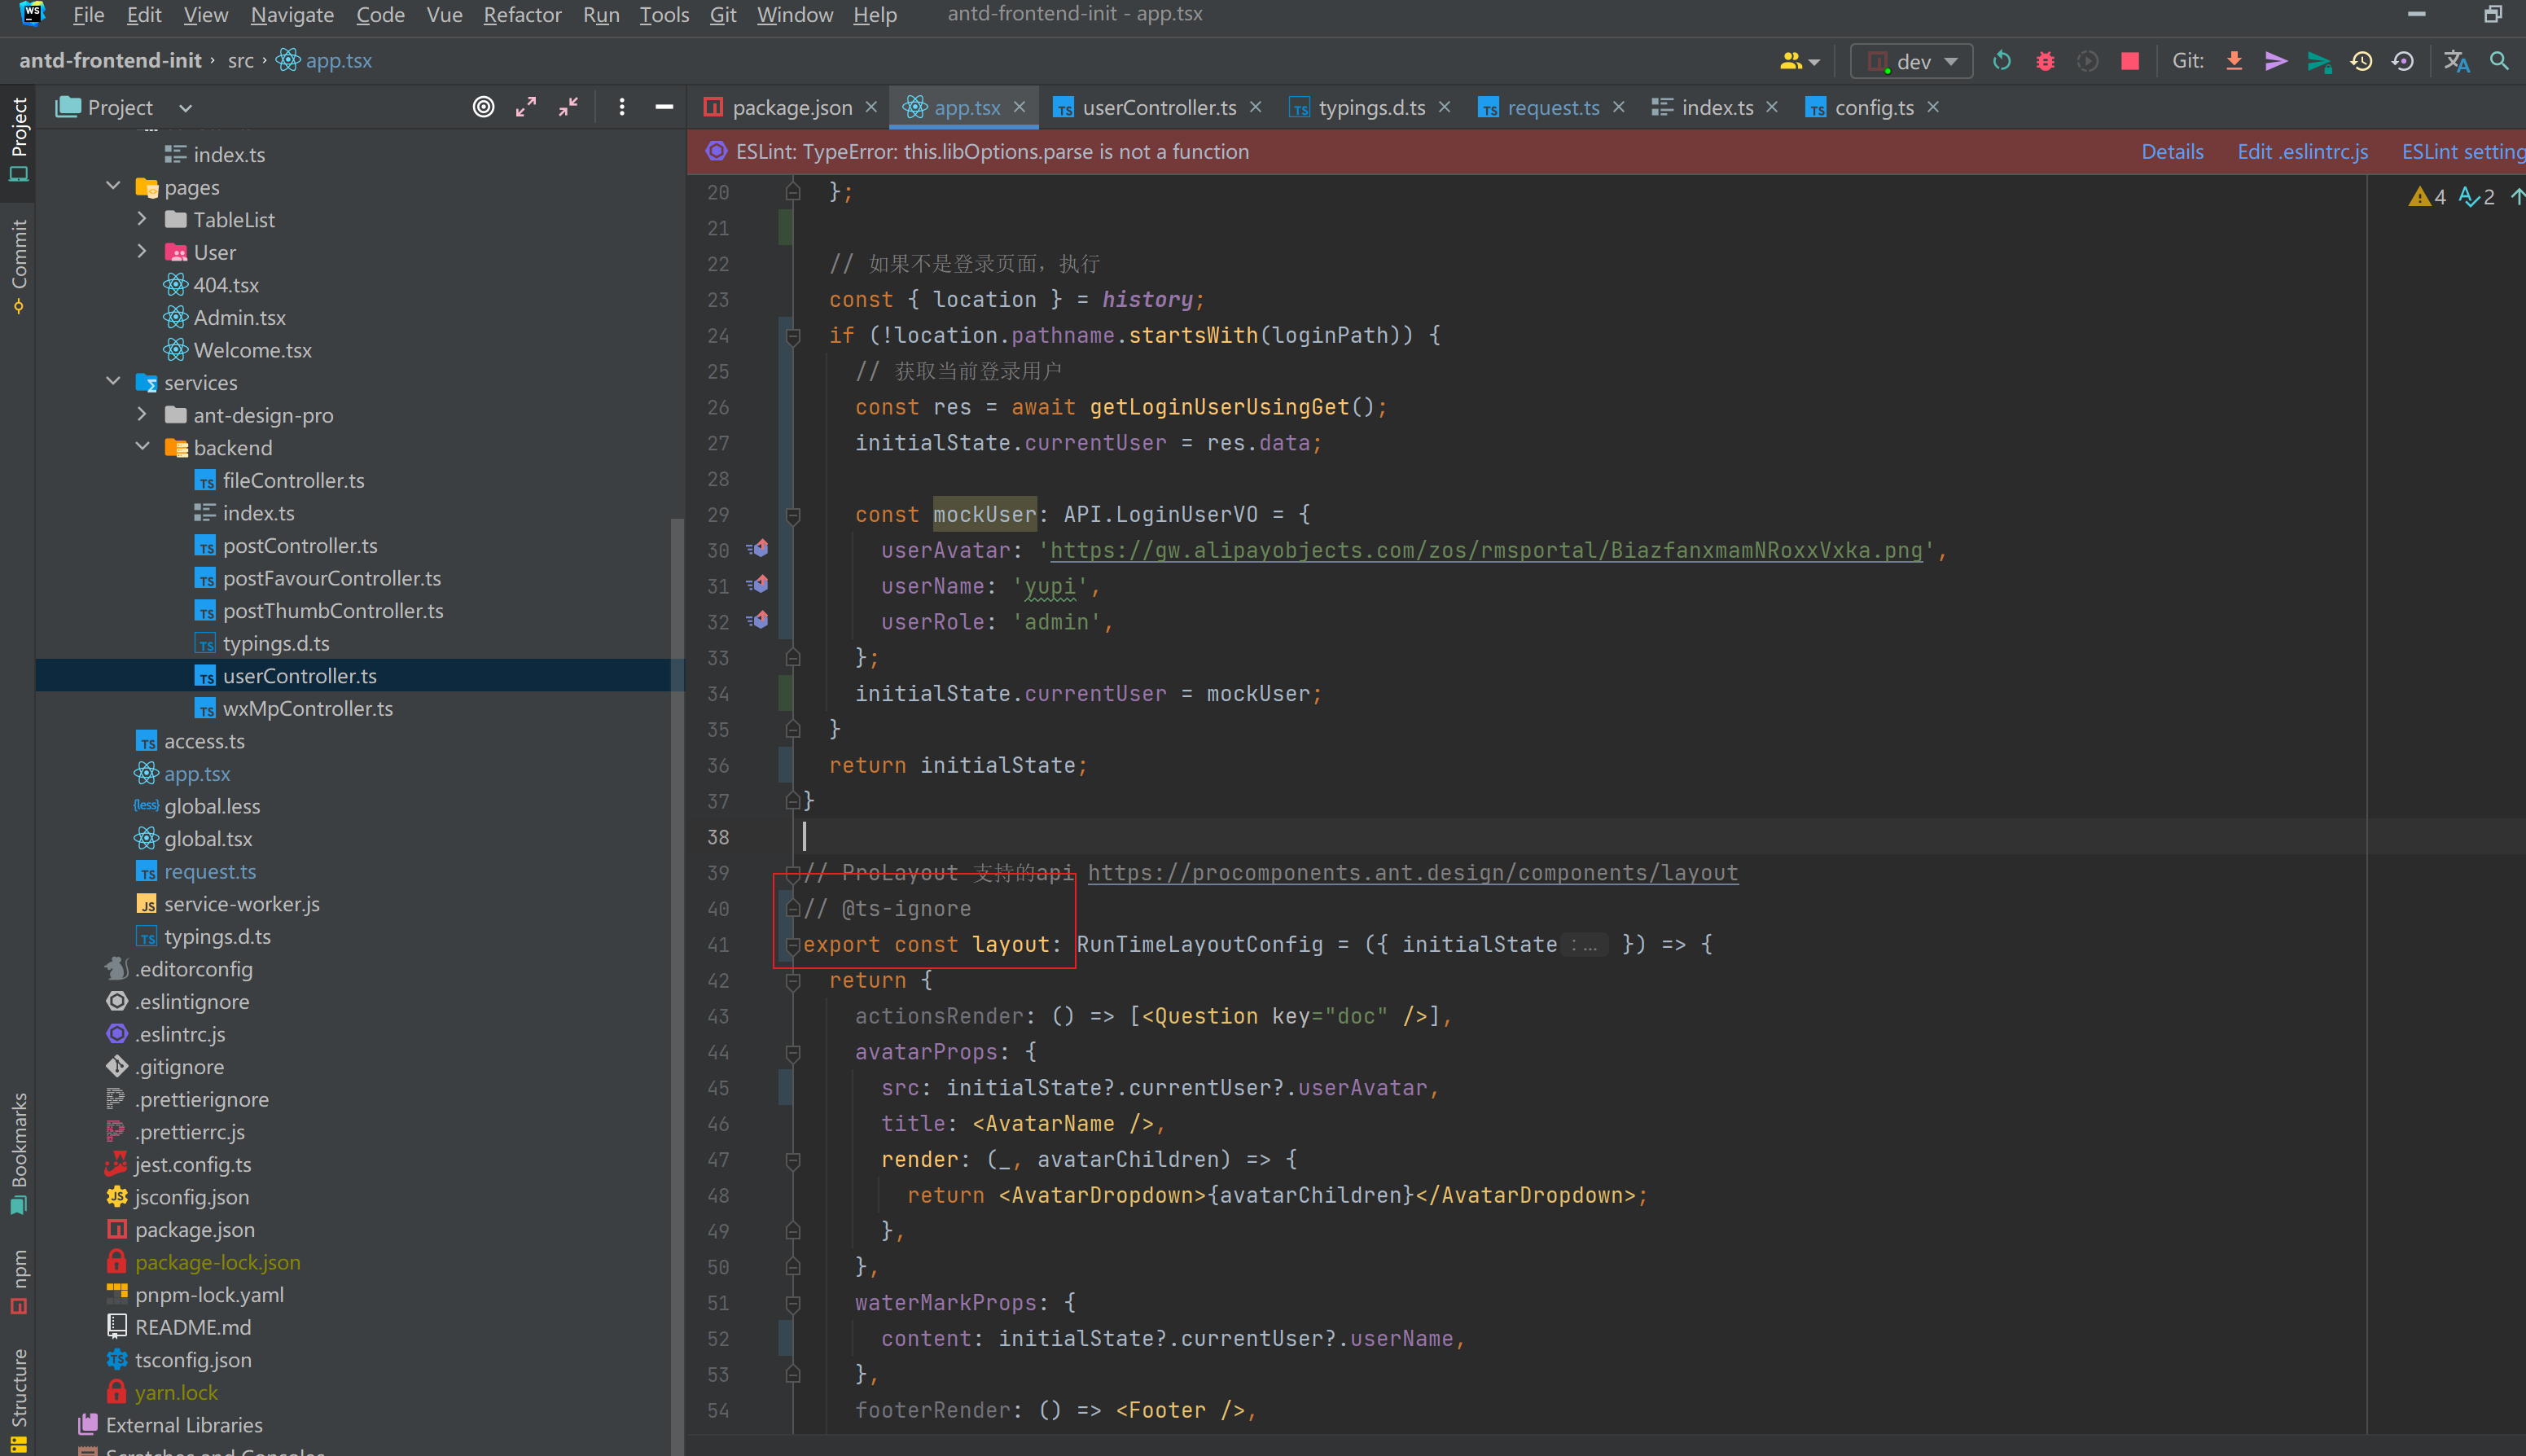
2)先用 @ ts-ignore 忽略 ts 类型提示错误
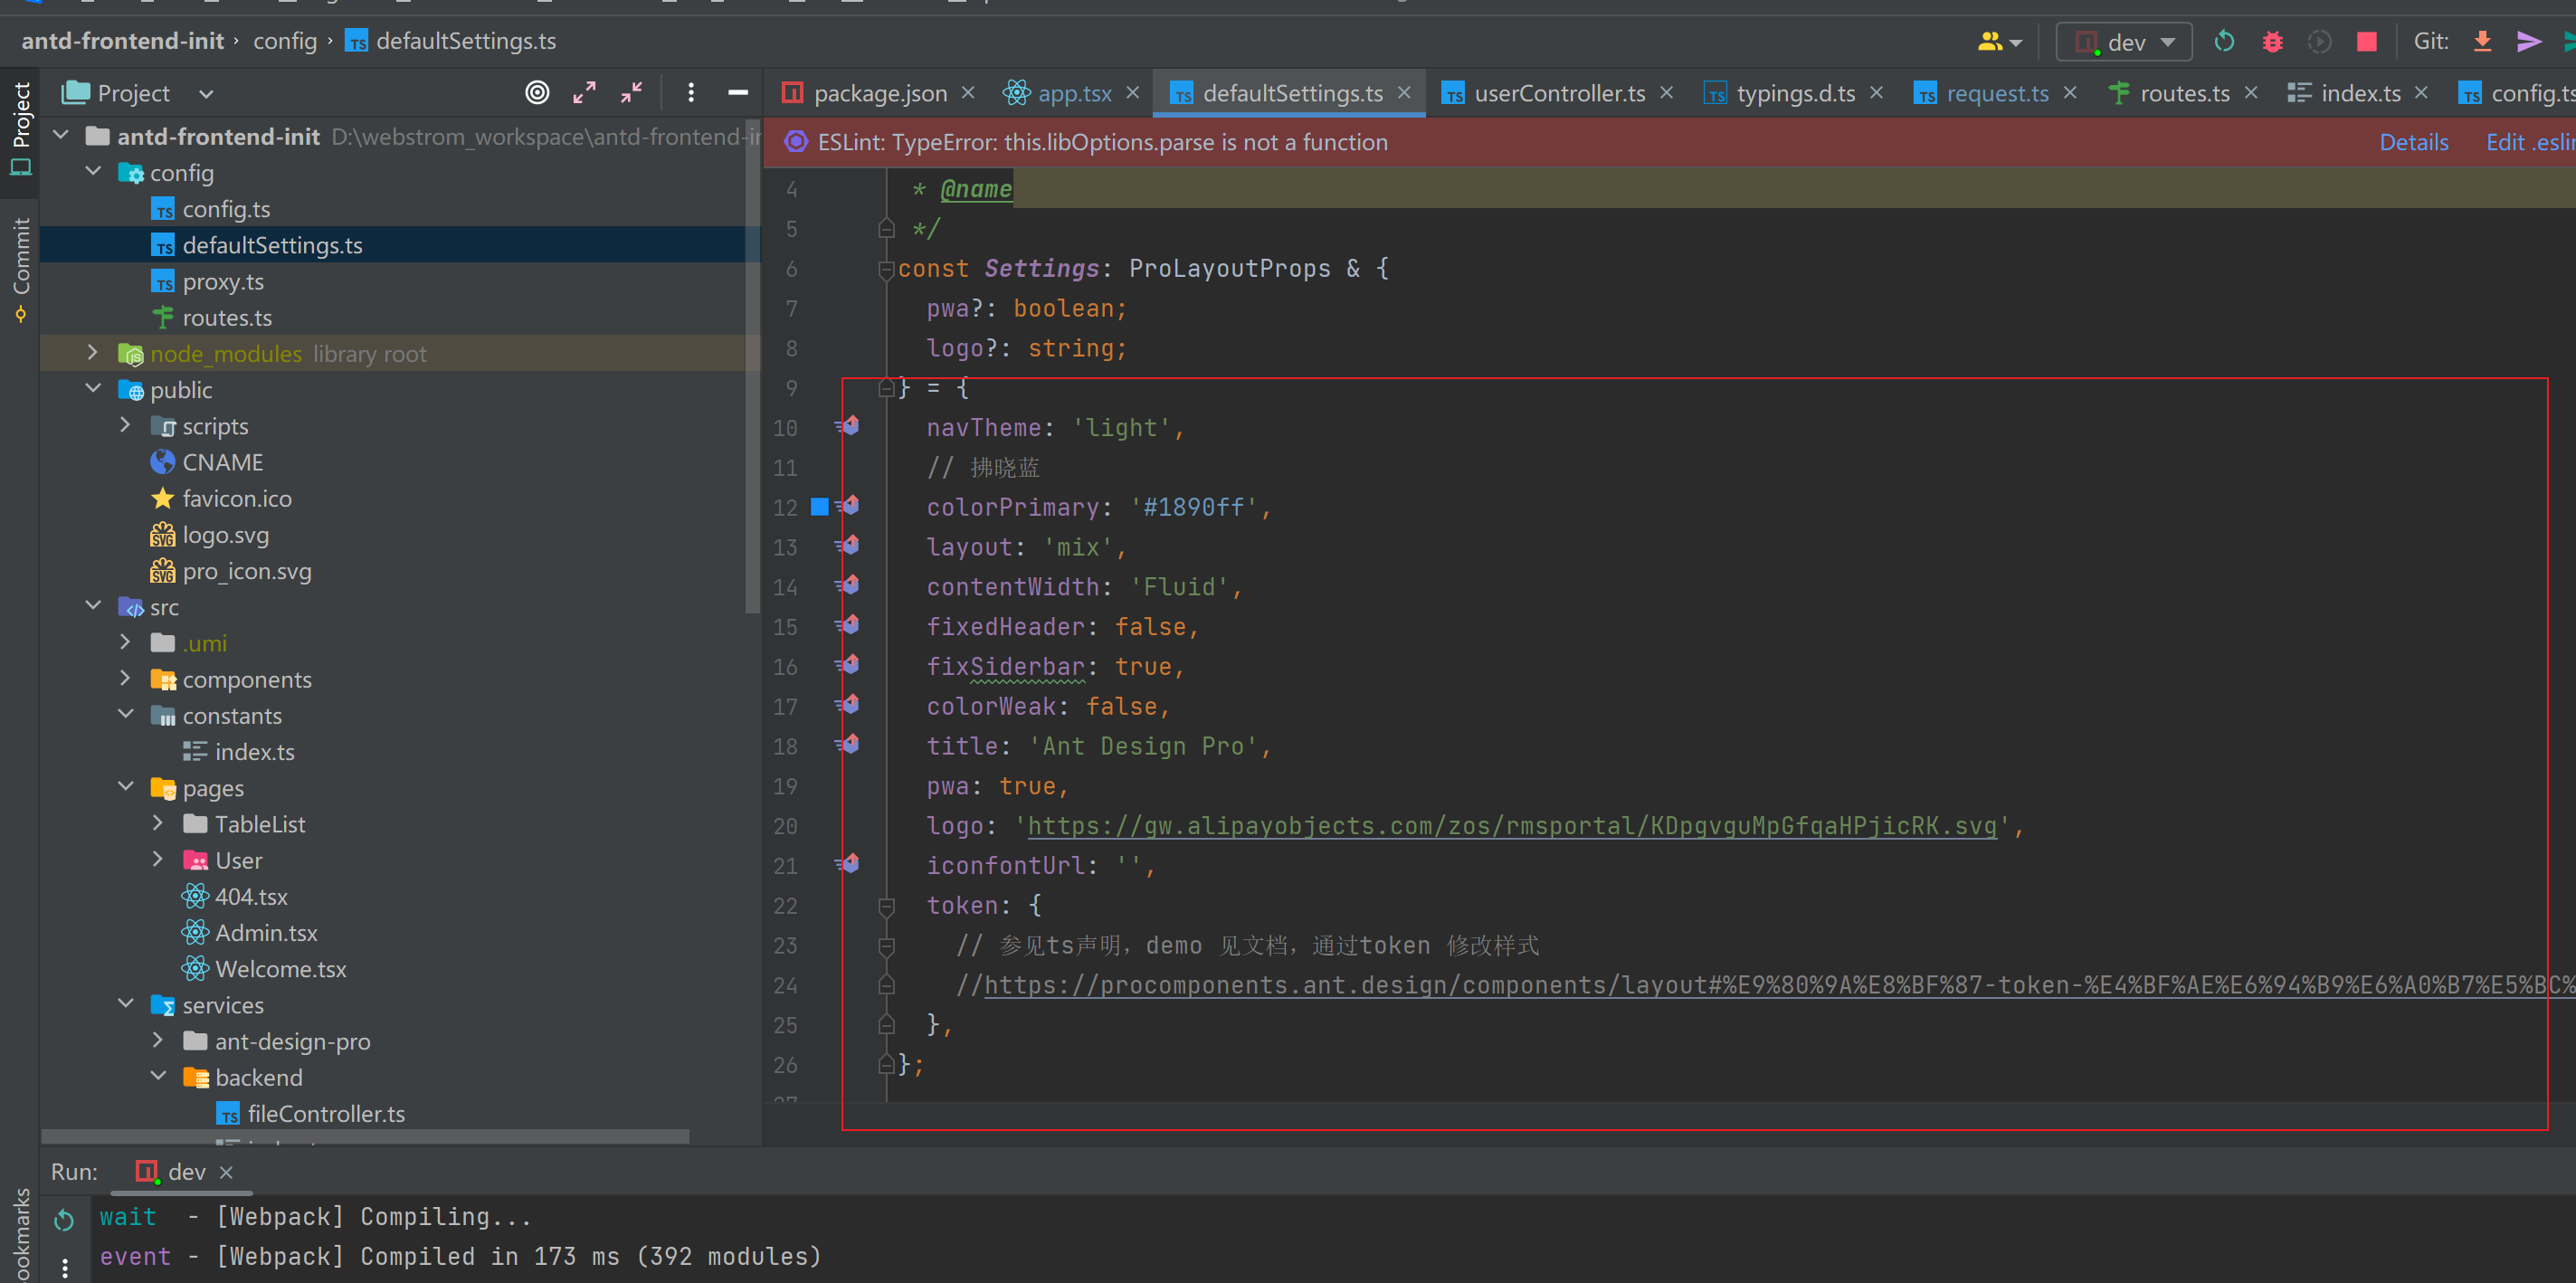
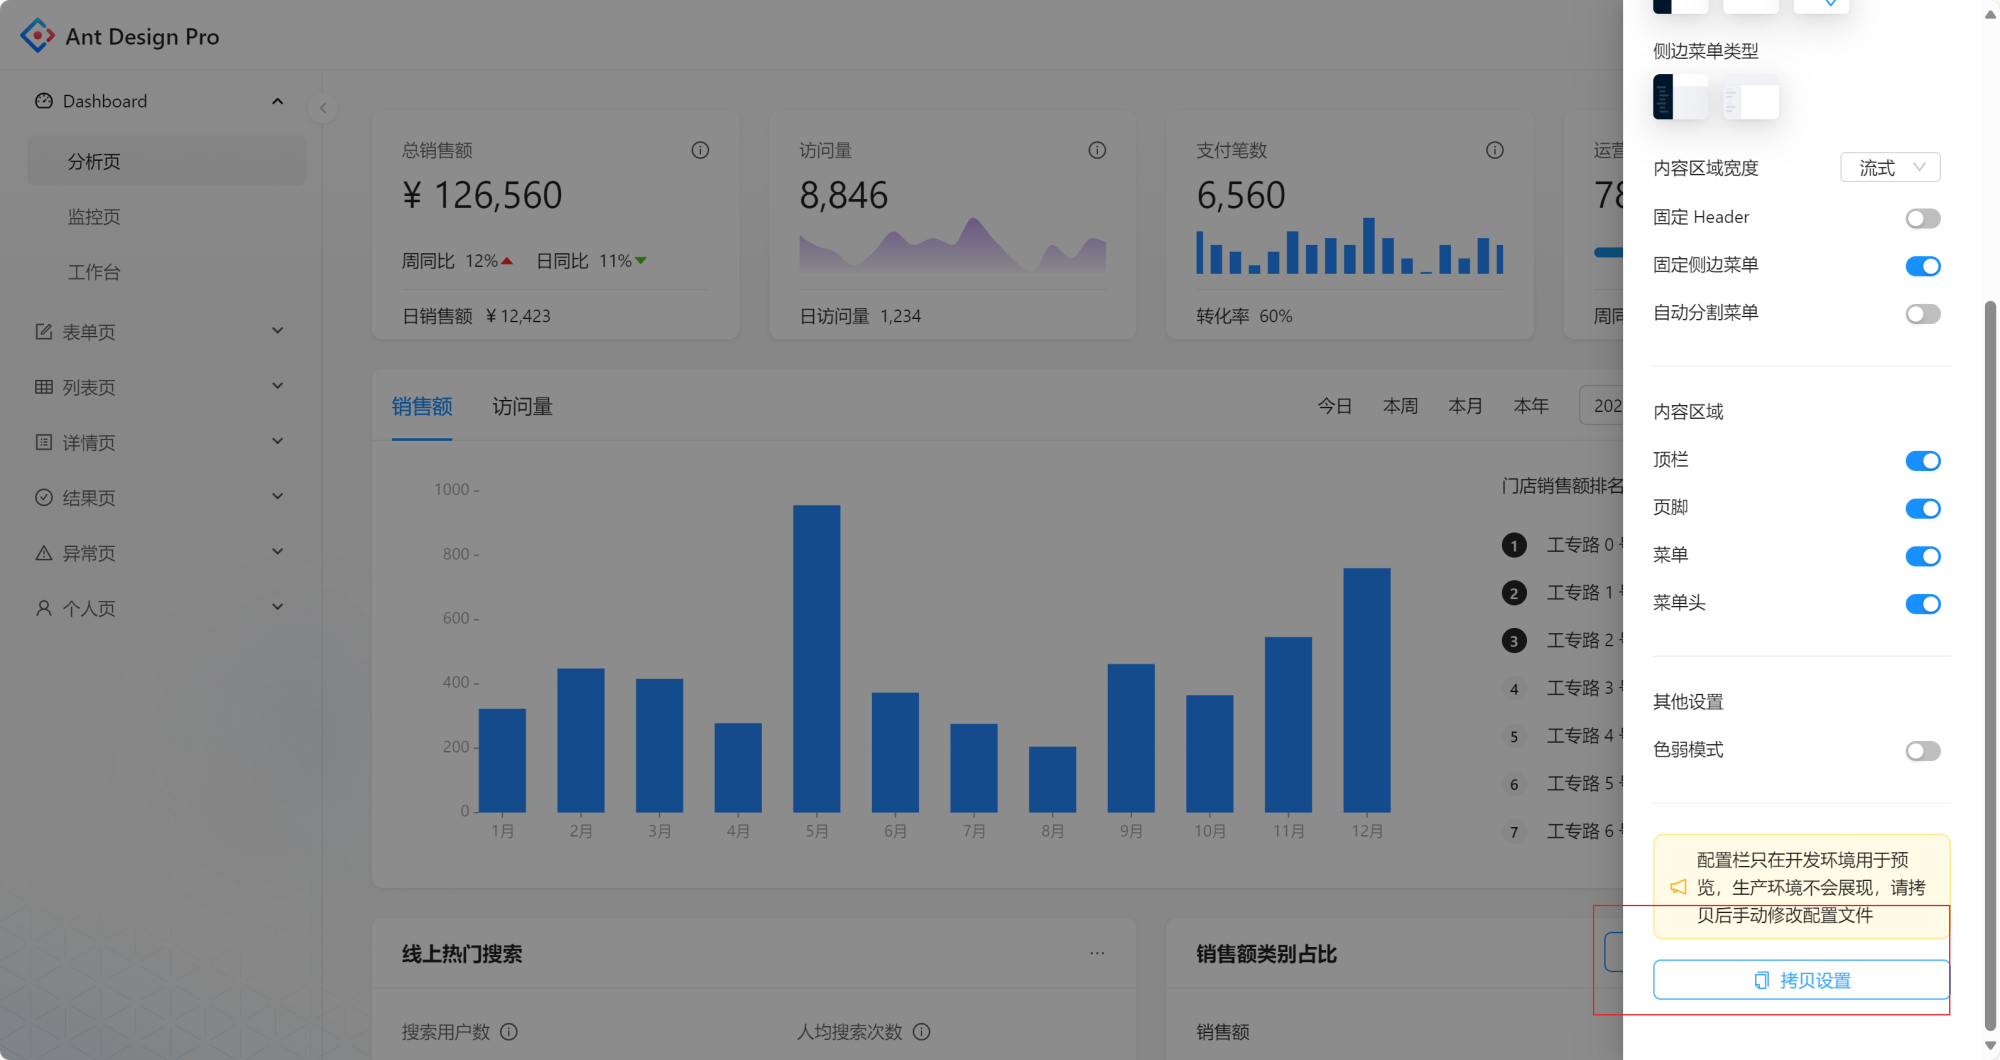
2.1)移除无用配置,比如 setting drawers 可以不要,需要可视化得到配置可以使用在线地址:分析页 - Ant Design Pro
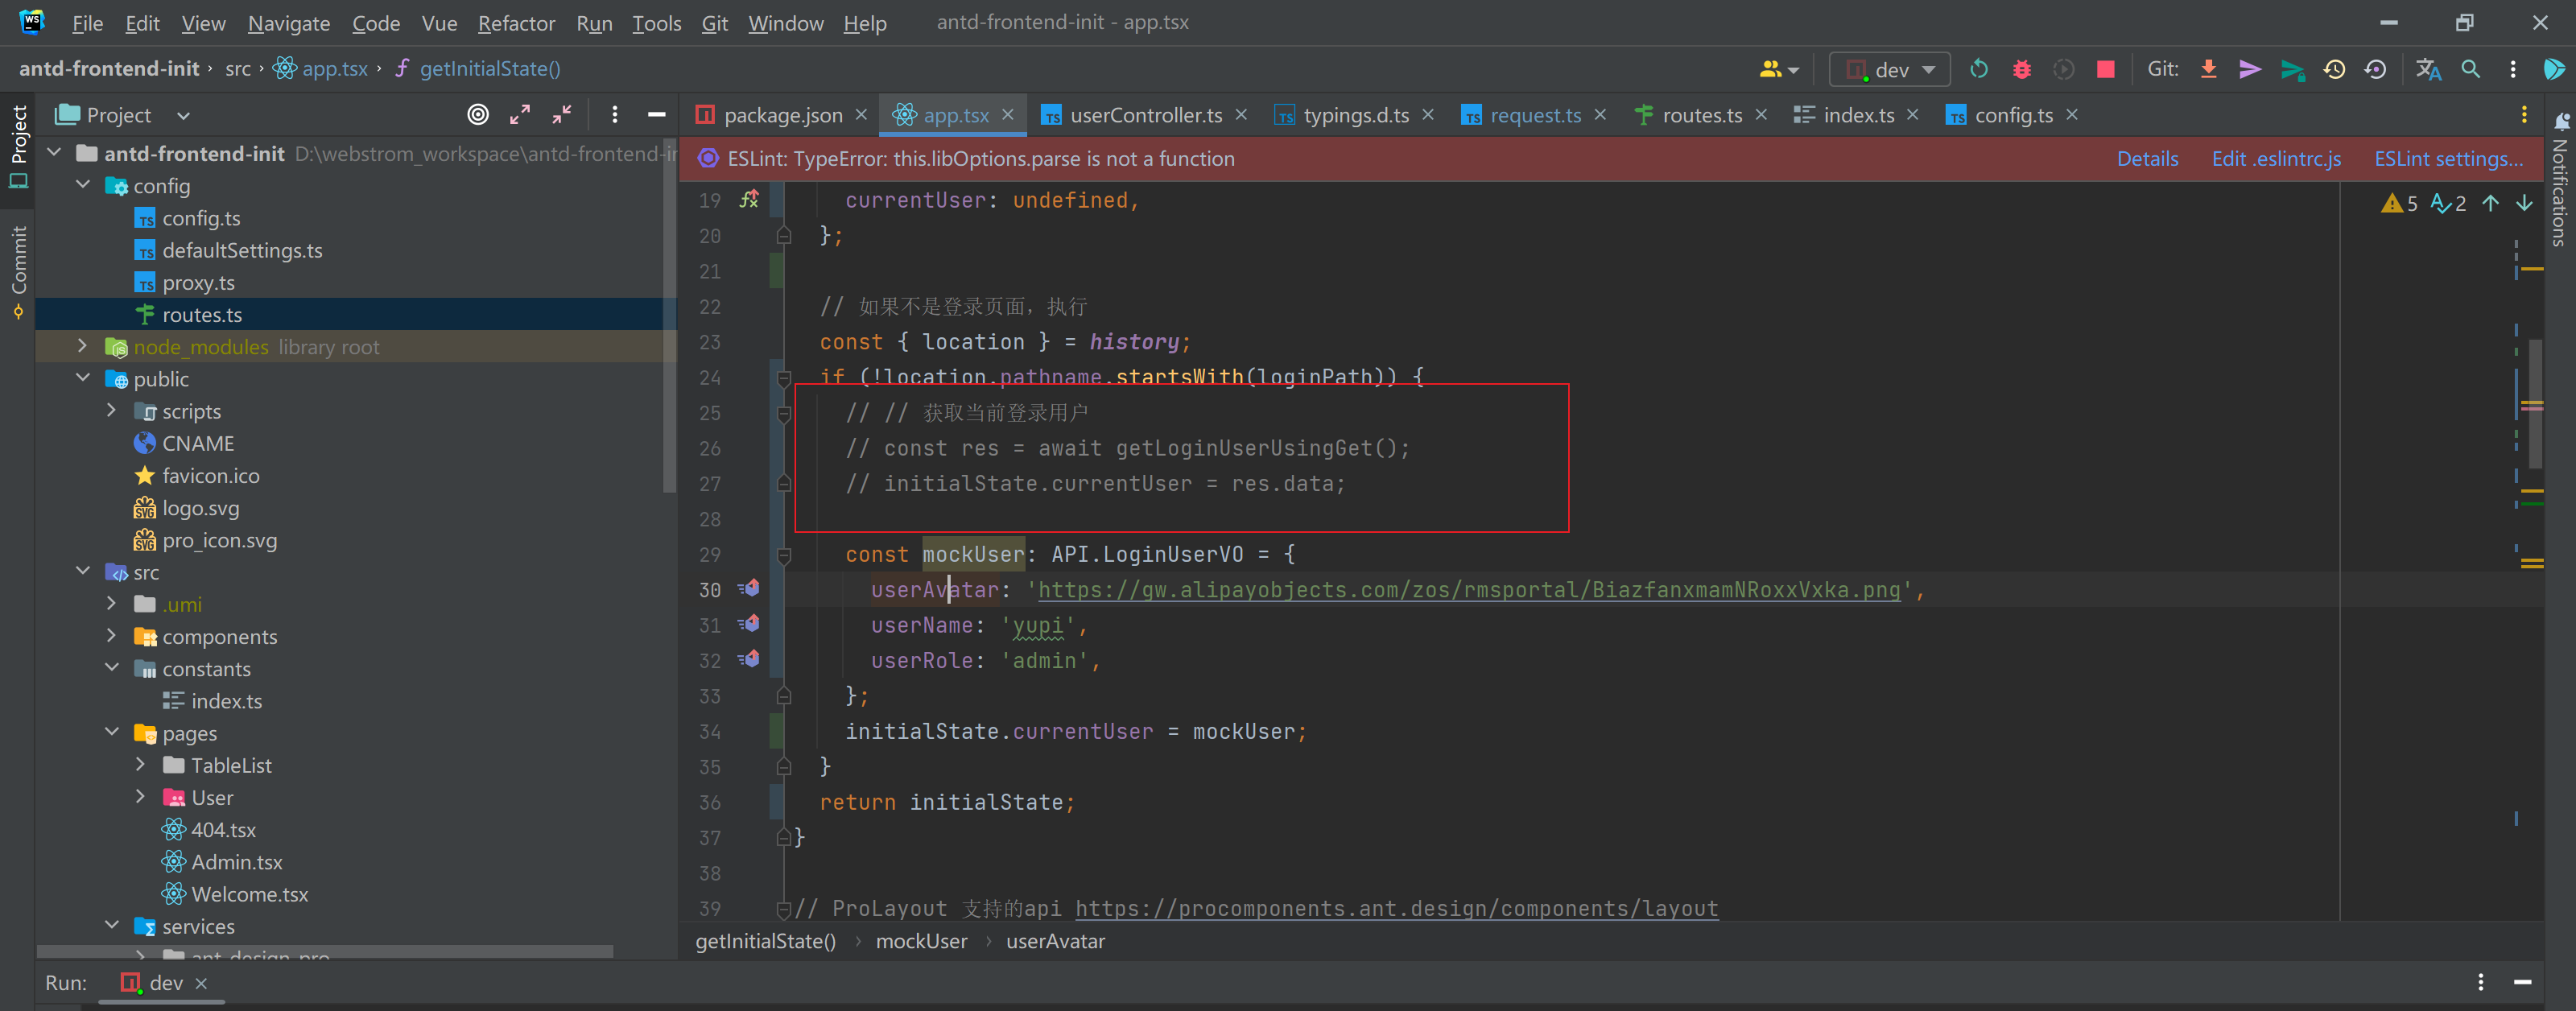
3)注释请求后端的代码,访问主页面,不会再重定向到登录页
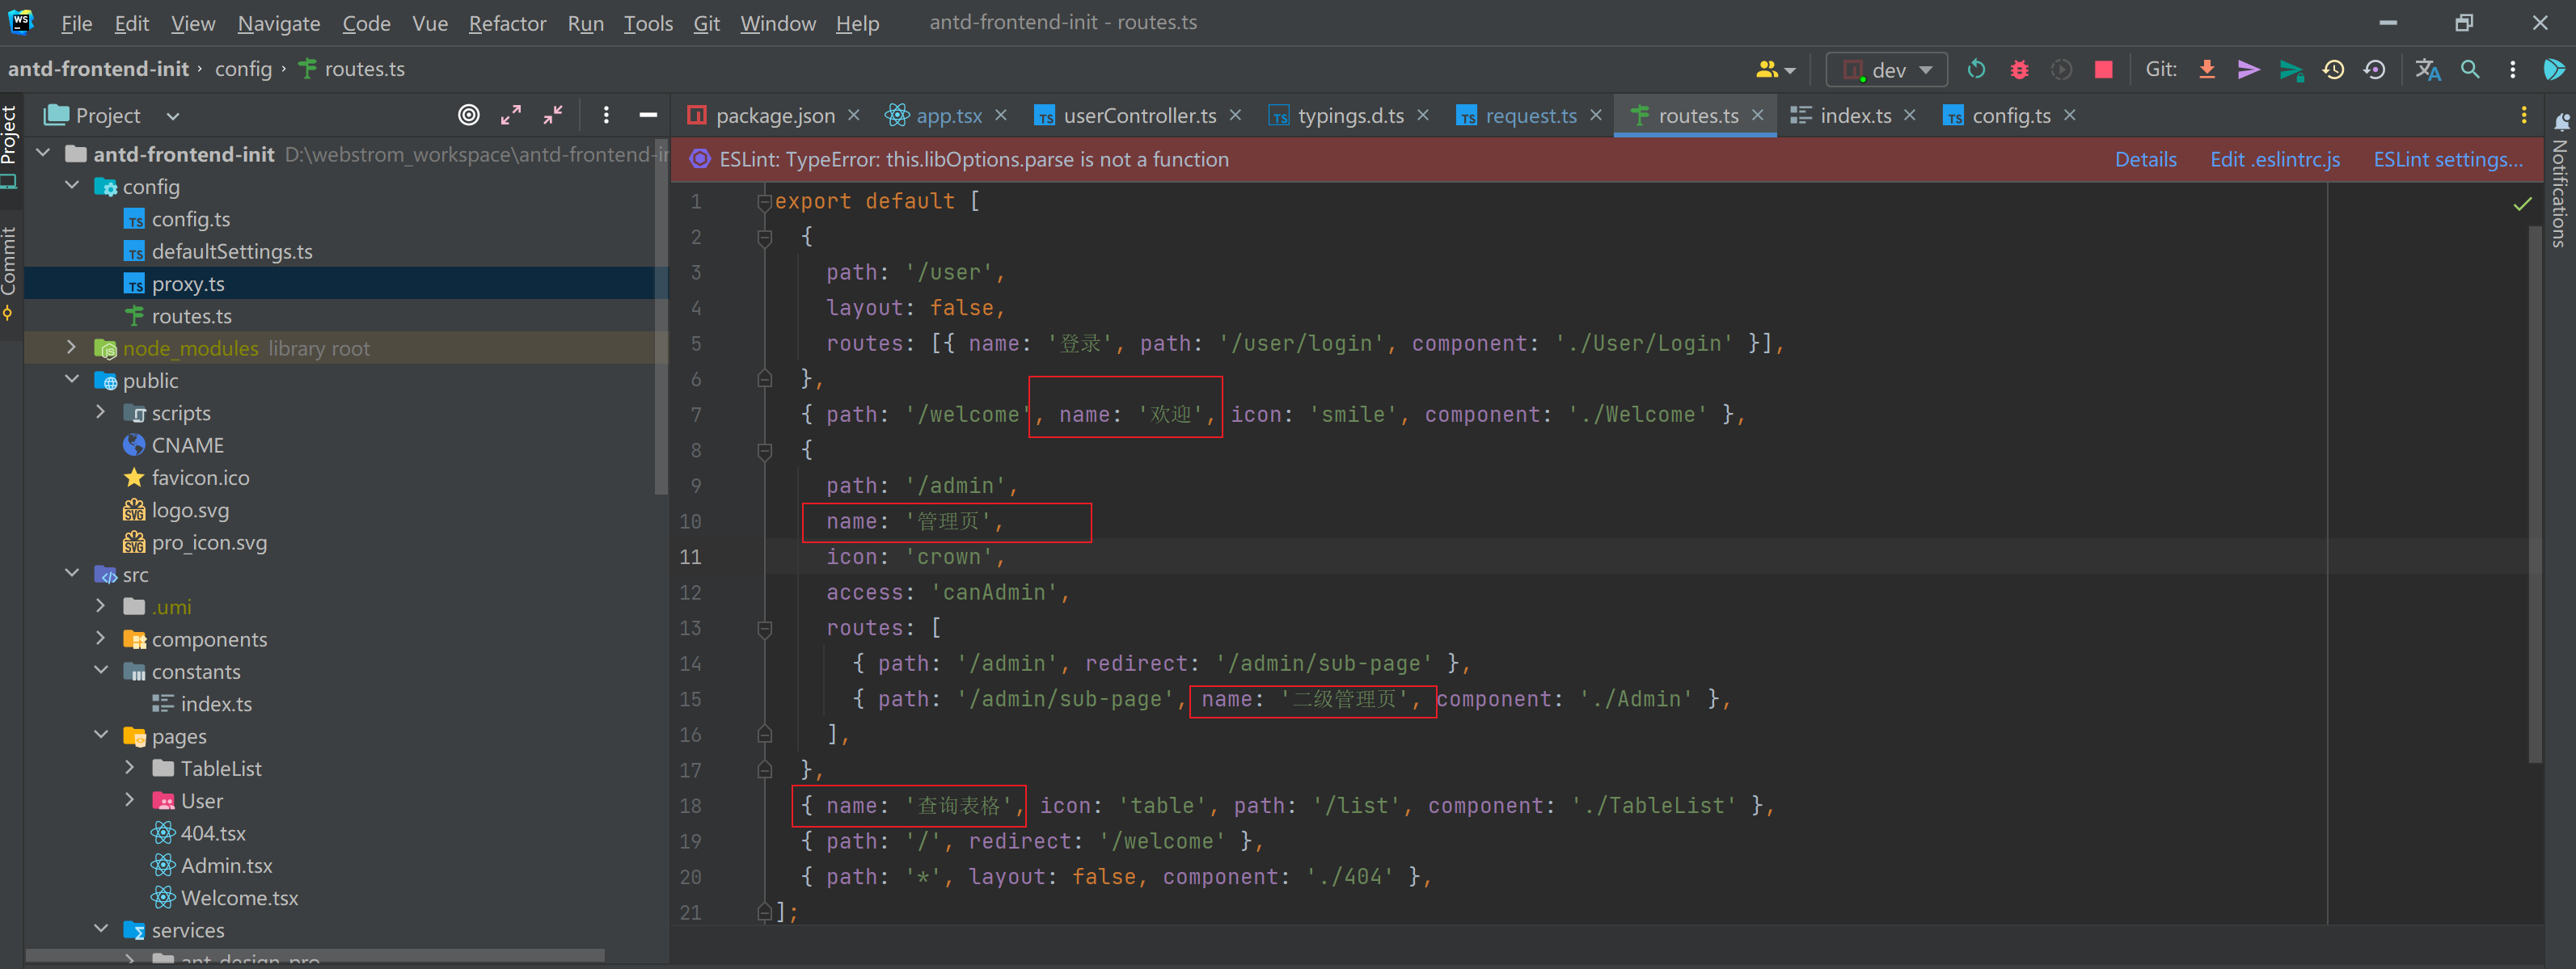
4)如果侧边栏没有展示,给路由加上 name 属性即可
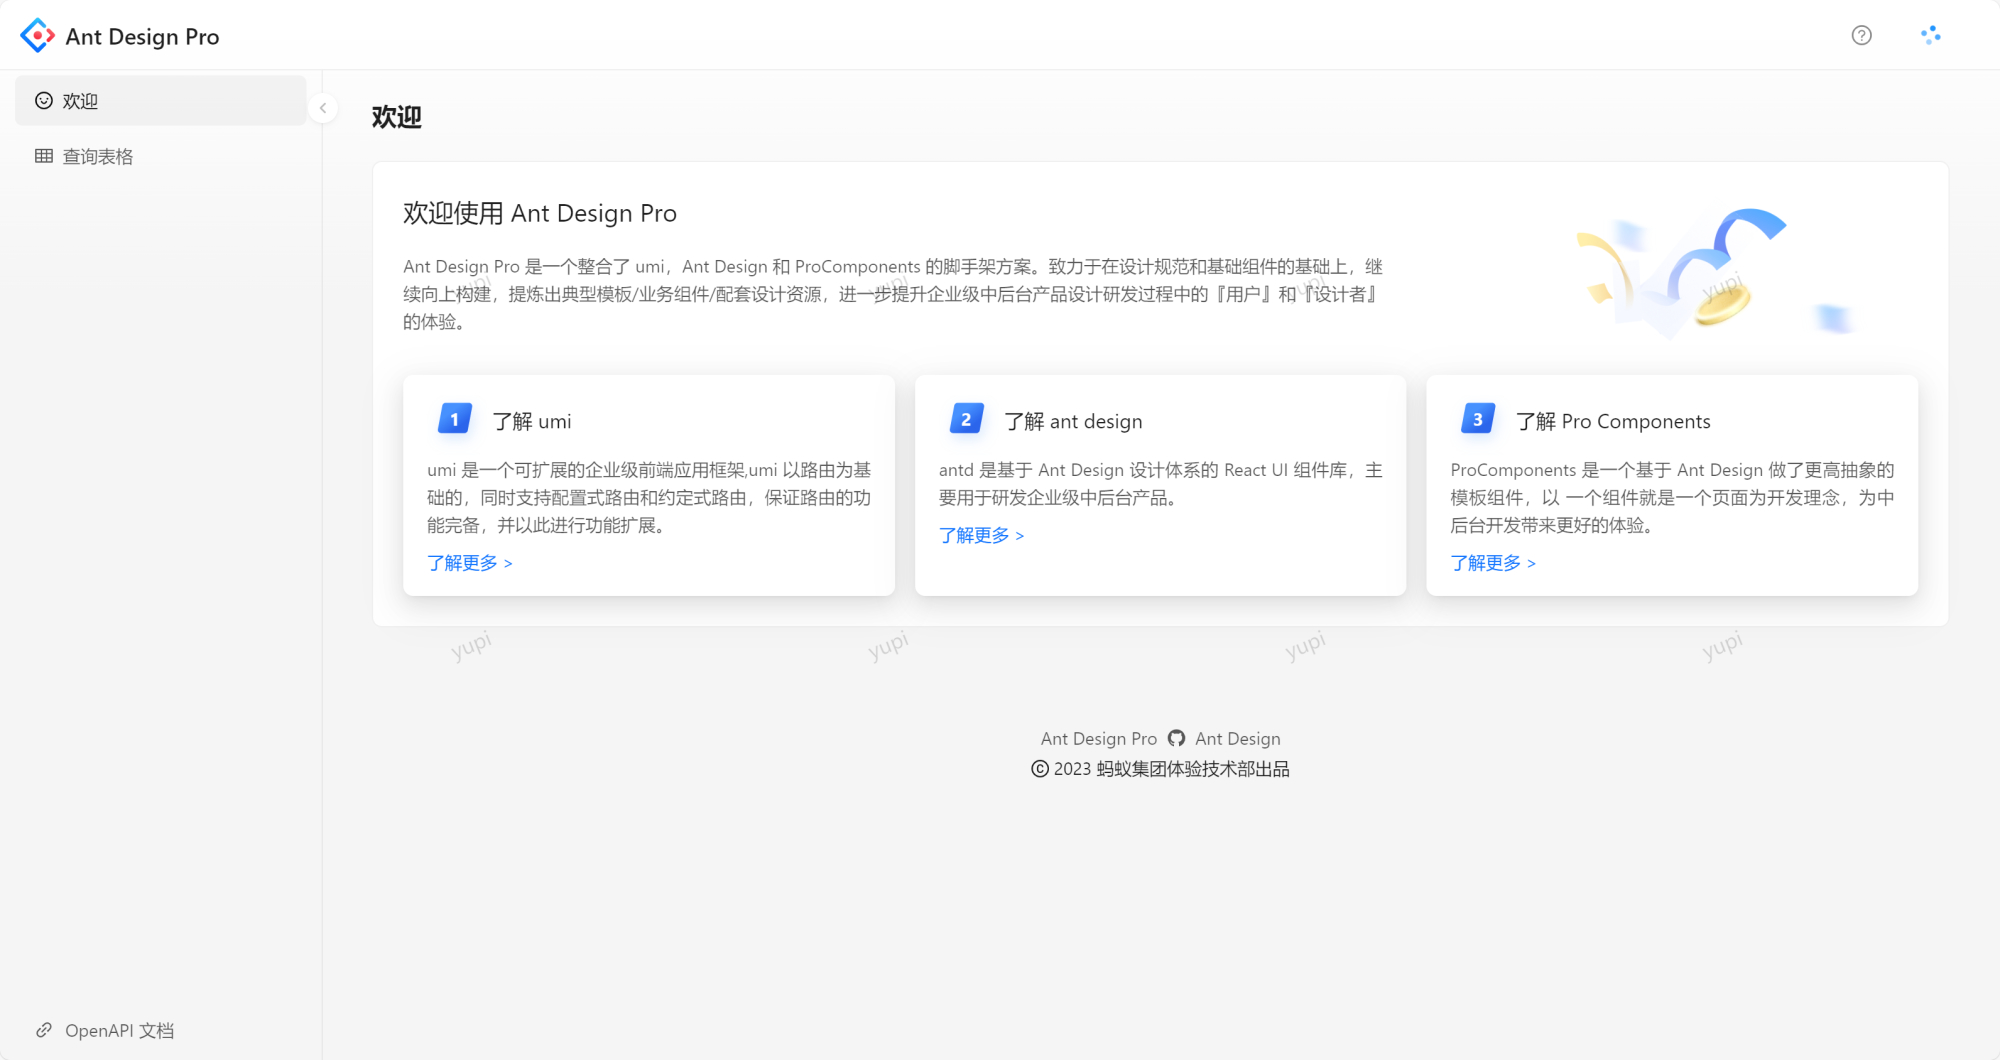
5)查看登录效果
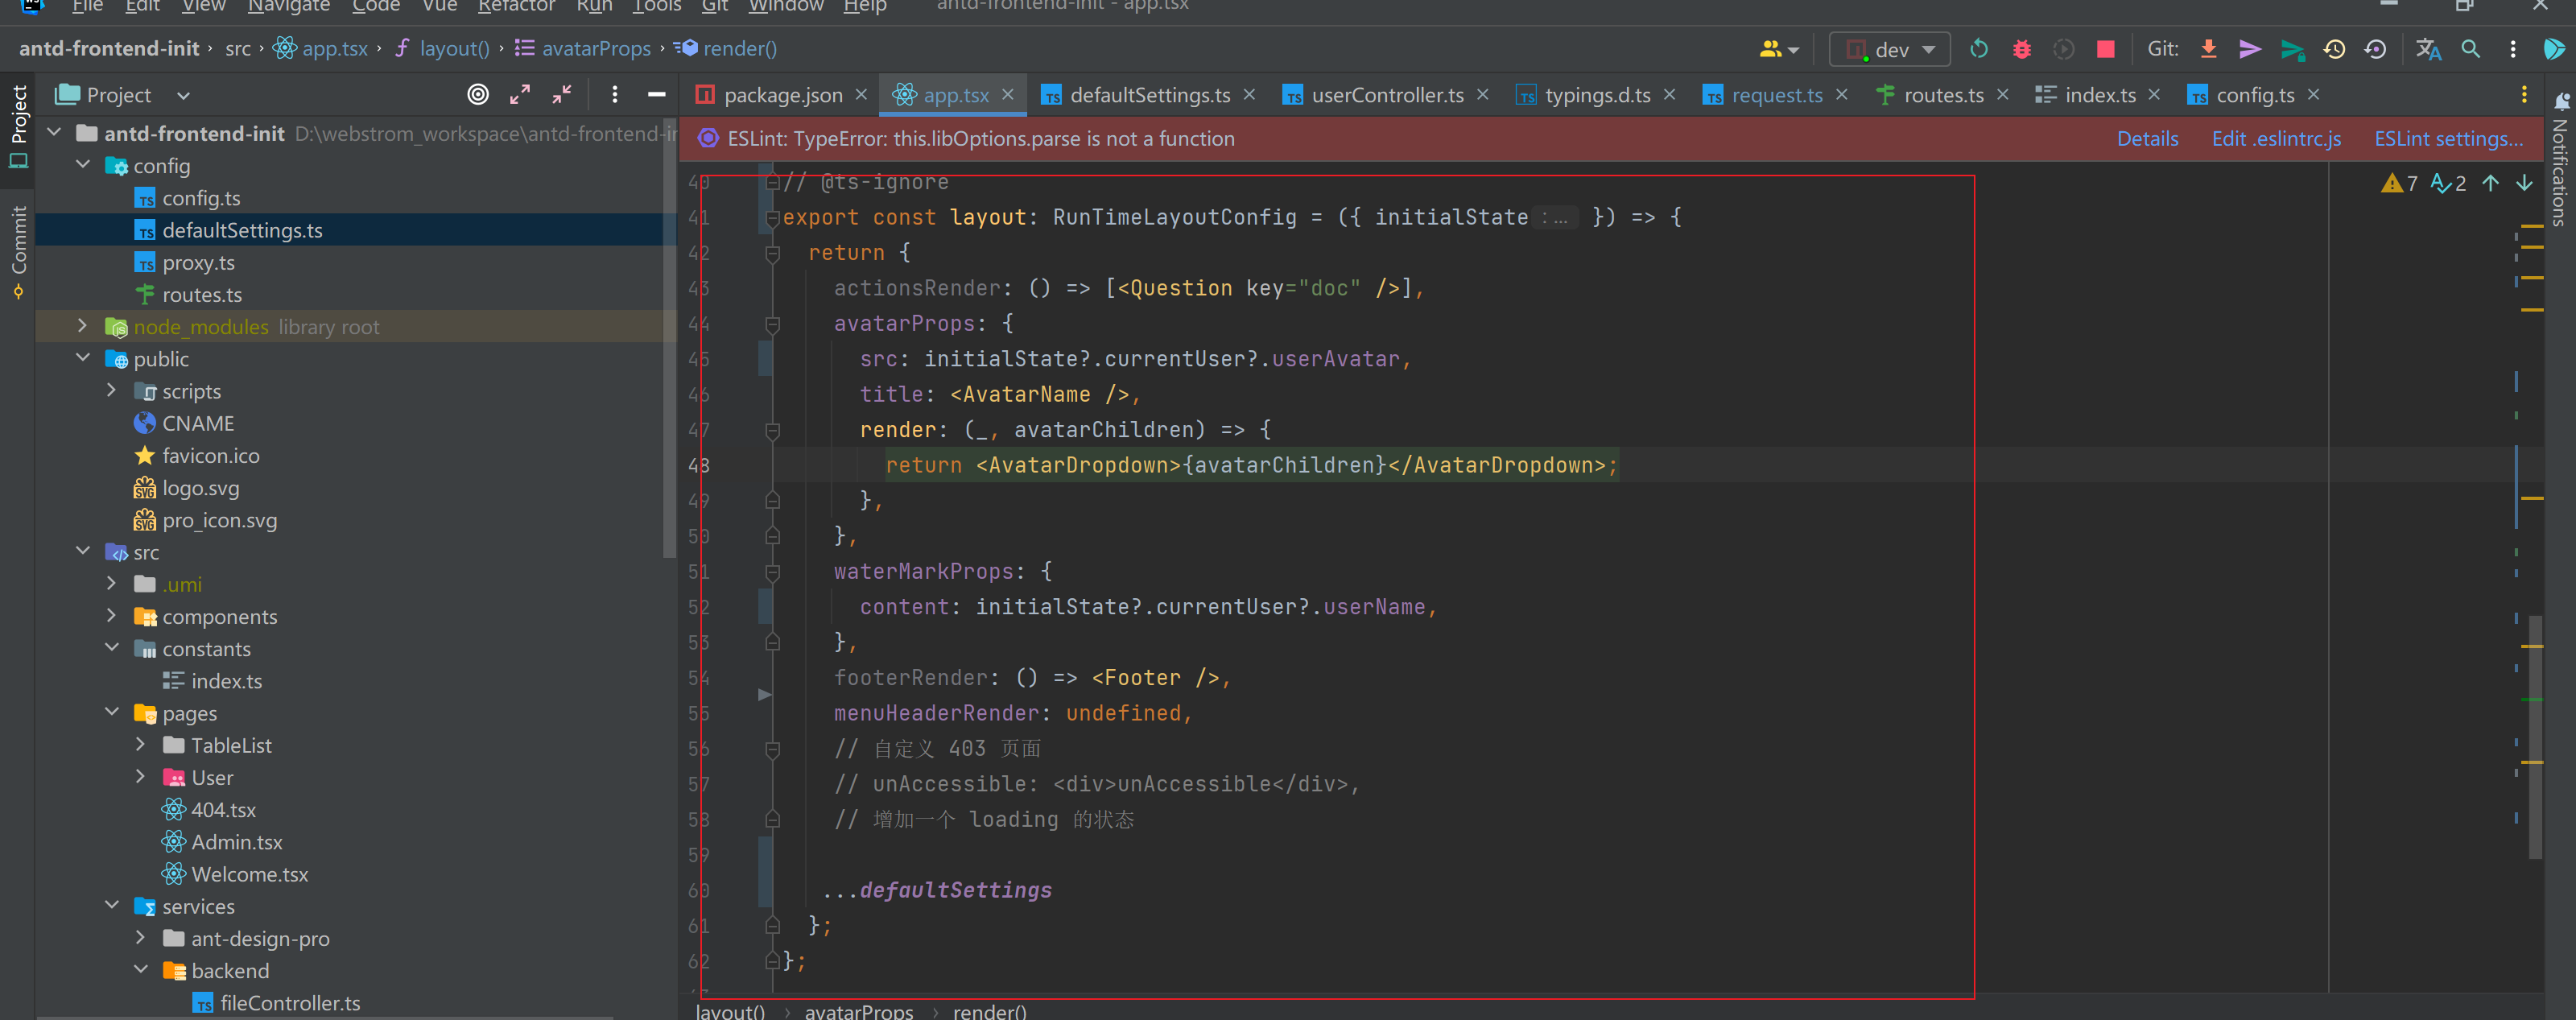
6)优化 layout 的配置
// ProLayout 支持的api https://procomponents.ant.design/components/layout

// @ts-ignore

export const layout: RunTimeLayoutConfig = ({ initialState }) => {

  return {

    actionsRender: () => [<Question key="doc" />],

    avatarProps: {

      src: initialState?.currentUser?.userAvatar,

      title: <AvatarName />,

      render: (_, avatarChildren) => {

        return <AvatarDropdown>{avatarChildren}</AvatarDropdown>;

      },

    },

    waterMarkProps: {

      content: initialState?.currentUser?.userName,

    },

    footerRender: () => <Footer />,

    menuHeaderRender: undefined,

    // 自定义 403 页面

    // unAccessible: <div>unAccessible</div>,

    // 增加一个 loading 的状态

    ...defaultSettings

  };

};
基础布局
右上角信息
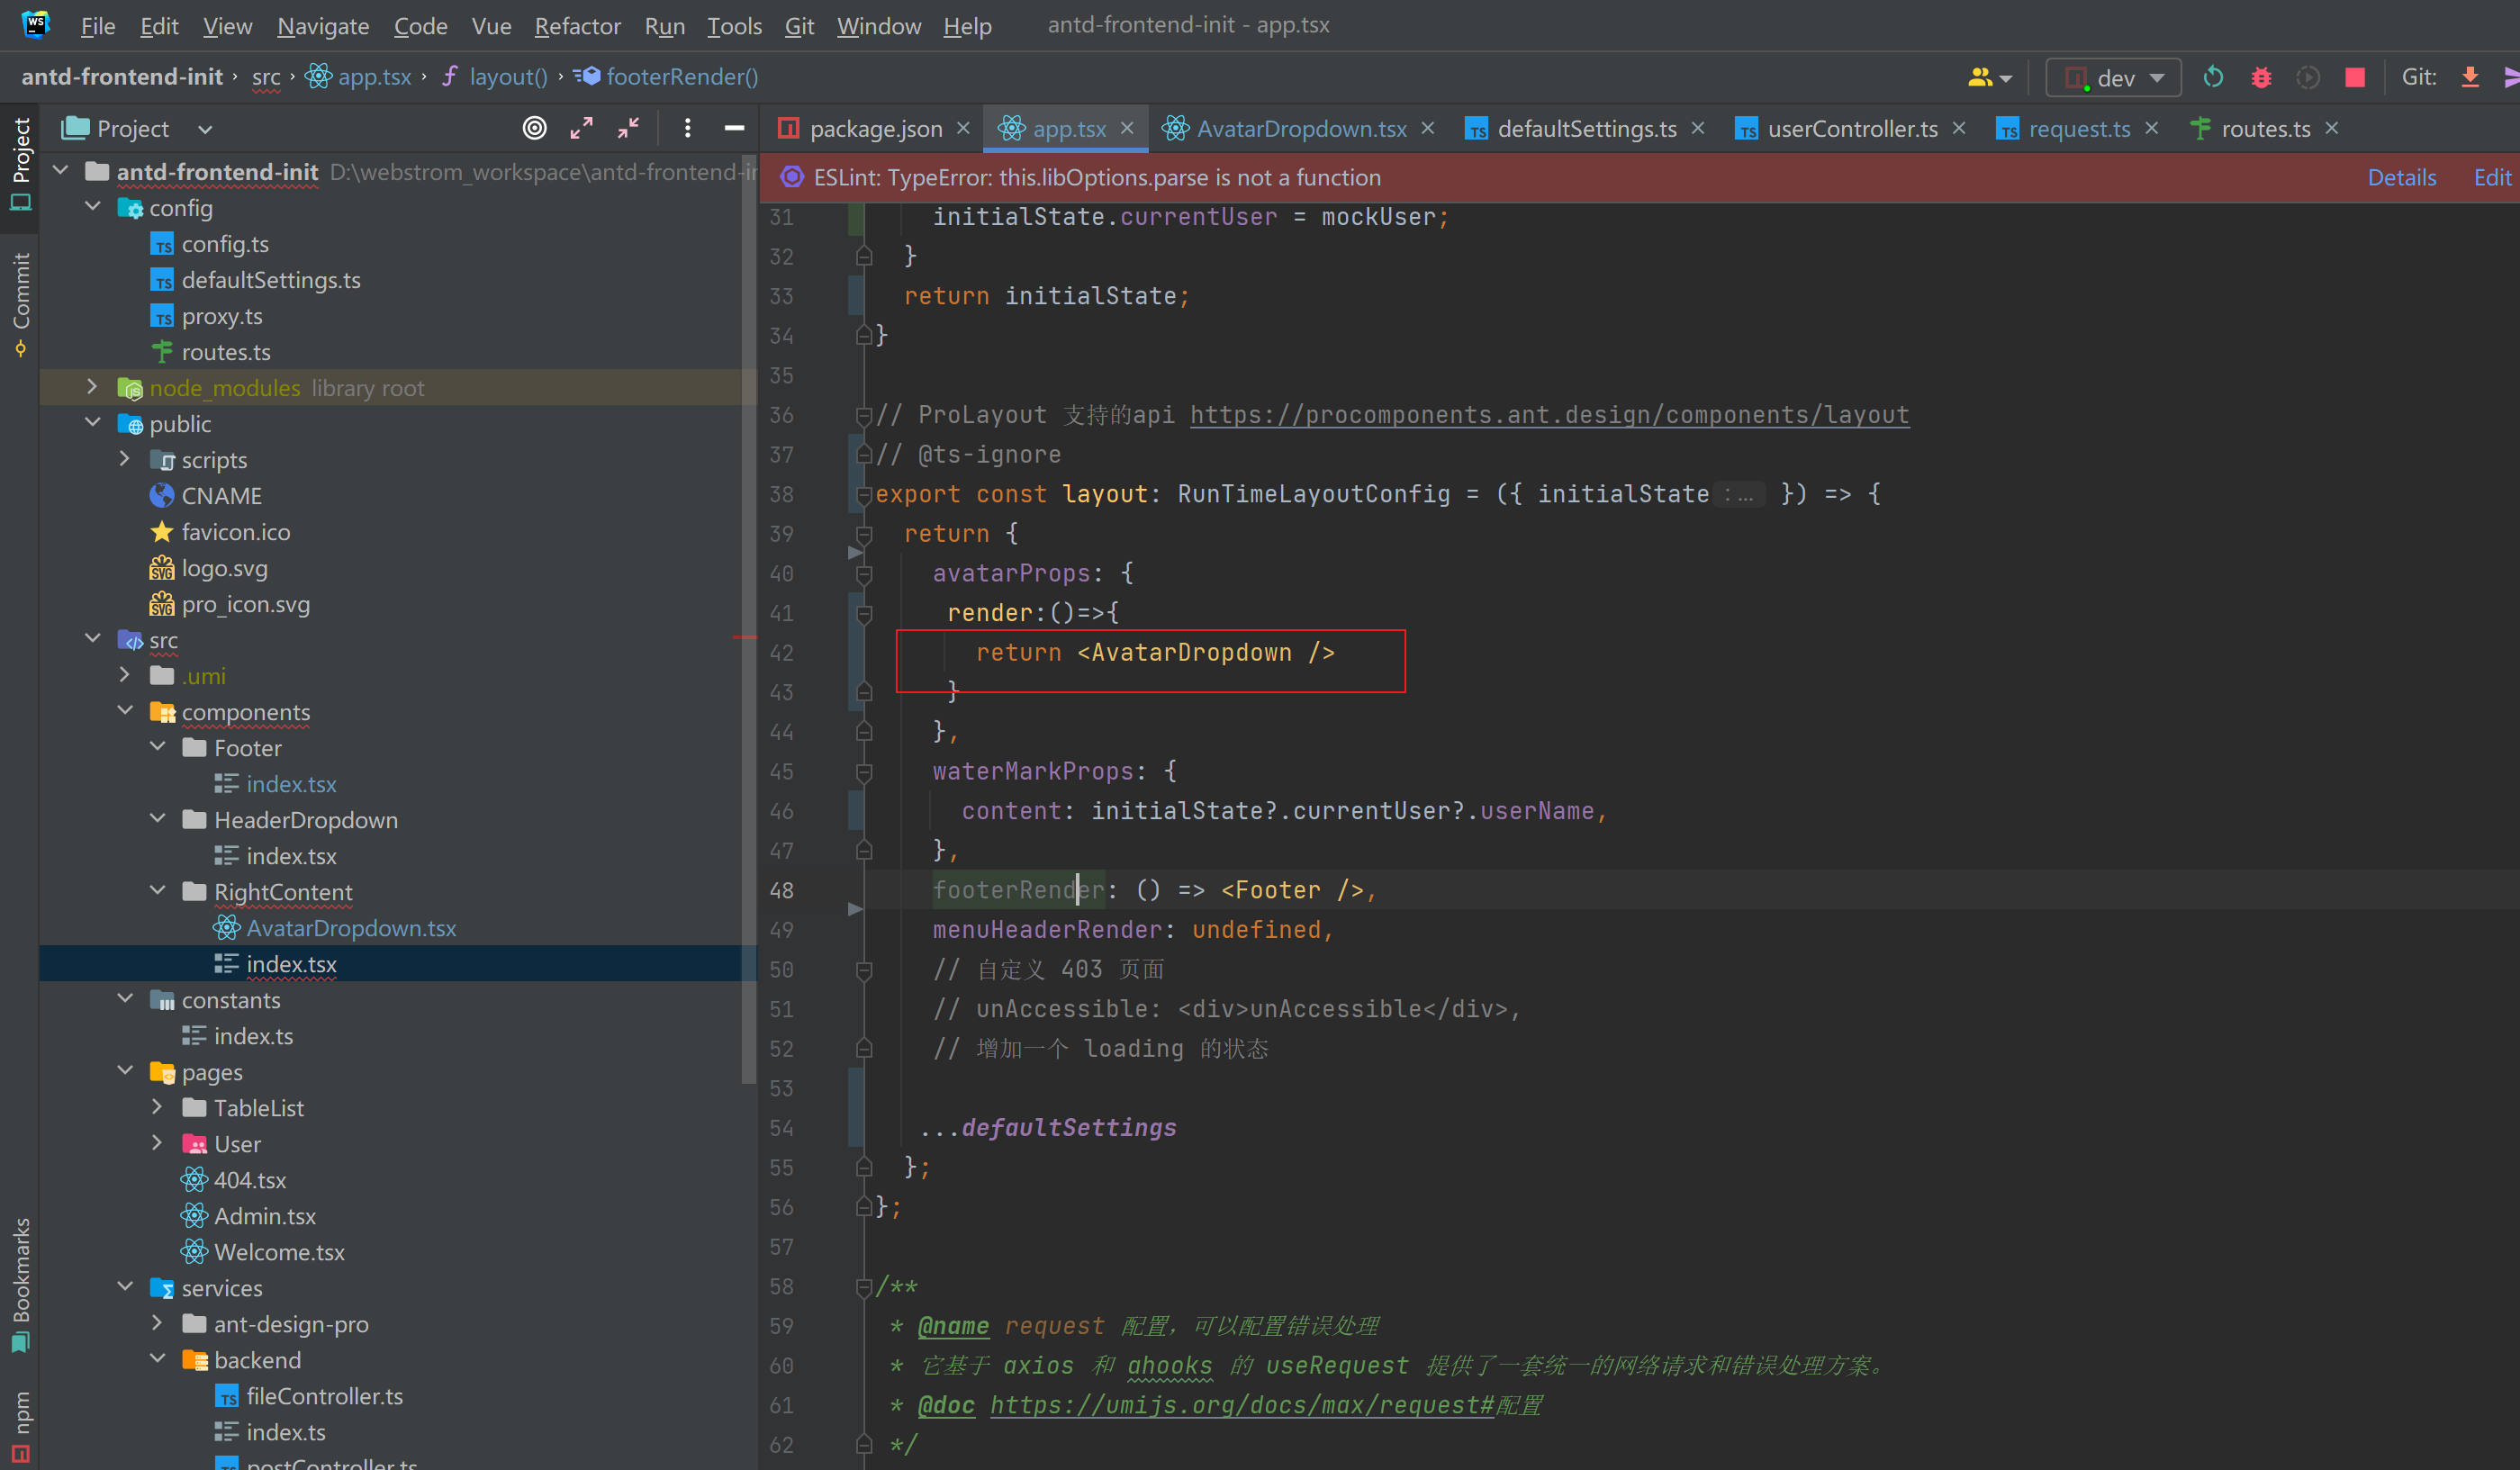
1)修改 app.tsx 的 layout
// ProLayout 支持的api https://procomponents.ant.design/components/layout

// @ts-ignore

export const layout: RunTimeLayoutConfig = ({ initialState }) => {

  return {

    avatarProps: {

      render:()=>{

        return <AvatarDropdown />

      }

    },

    waterMarkProps: {

      content: initialState?.currentUser?.userName,

    },

    footerRender: () => <Footer />,

    menuHeaderRender: undefined,

    // 自定义 403 页面

    // unAccessible: <div>unAccessible</div>,

    // 增加一个 loading 的状态

    ...defaultSettings

  };

};
2)修改 AvatarDropdown.tsx
import {userLogoutUsingPost} from '@/services/backend/userController';

import {LogoutOutlined, SettingOutlined, UserOutlined} from '@ant-design/icons';

import {history, useModel} from '@umijs/max';

import {Avatar, Button, Space} from 'antd';

import {stringify} from 'querystring';

import type {MenuInfo} from 'rc-menu/lib/interface';

import React, {useCallback} from 'react';

import {flushSync} from 'react-dom';

import {Link} from 'umi';

import HeaderDropdown from '../HeaderDropdown';

export type GlobalHeaderRightProps = {

  menu?: boolean;

  children?: React.ReactNode;

};

export const AvatarDropdown: React.FC<GlobalHeaderRightProps> = ({menu}) => {

  /**

   * 退出登录,并且将当前的 url 保存

   */

  const loginOut = async () => {

    await userLogoutUsingPost();

    const {search, pathname} = window.location;

    const urlParams = new URL(window.location.href).searchParams;

    /** 此方法会跳转到 redirect 参数所在的位置 */

    const redirect = urlParams.get('redirect');

    // Note: There may be security issues, please note

    if (window.location.pathname !== '/user/login' && !redirect) {

      history.replace({

        pathname: '/user/login',

        search: stringify({

          redirect: pathname + search,

        }),

      });

    }

  };

  const {initialState, setInitialState} = useModel('@@initialState');

  const

    (event: MenuInfo) => {

      const {key} = event;

      if (key === 'logout') {

        flushSync(() => {

          setInitialState((s) => ({...s, currentUser: undefined}));

        });

        loginOut();

        return;

      }

      history.push(`/account/${key}`);

    },

    [setInitialState],

  );

  const {currentUser} = initialState || {};

  // 未登录

  if (!currentUser) {

    return (


        <Button type="primary" shape="round">

          登录

        </Button>


    );

  }

  const menuItems = [

    ...(menu

        ? [

          {

            key: 'center',

            icon: <UserOutlined/>,

            label: '个人中心',

          },

          {

            key: 'settings',

            icon: <SettingOutlined/>,

            label: '个人设置',

          },

          {

            type: 'divider' as const,

          },

        ]

        : []),

    {

      key: 'logout',

      icon: <LogoutOutlined/>,

      label: '退出登录',

    },

  ];

  return (

    <HeaderDropdown

      menu={{

        selectedKeys: [],

        onClick: onMenuClick,

        items: menuItems,

      }}

      >

      <Space>

        {currentUser?.userAvatar ? (<Avatar size="small" src={currentUser?.userAvatar} />):

        (<Avatar size="small" icon={<UserOutlined/>}/>)}

        <span className="anticon">{currentUser?.userName ?? '无名'}</span>

      </Space>

    </HeaderDropdown>

  );

};
效果图:
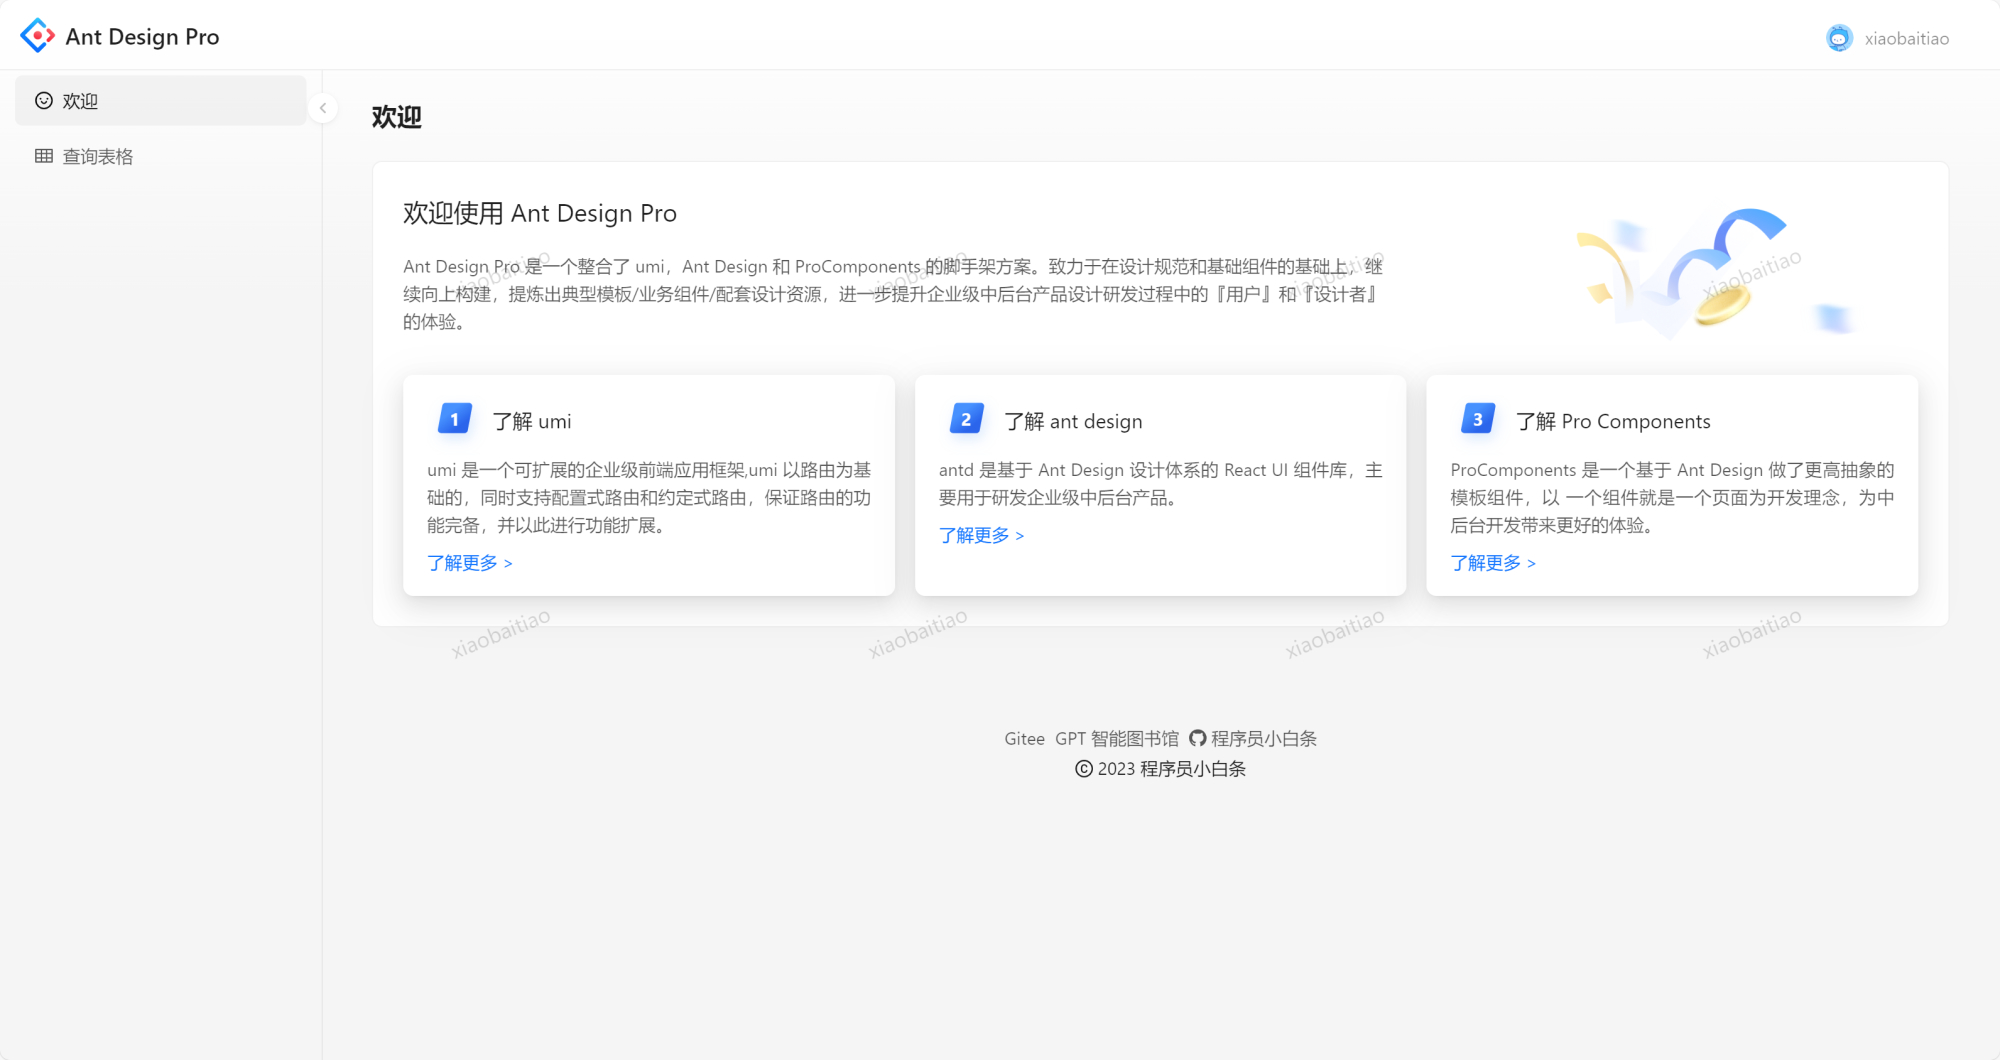
底部信息
修改成你自己的个人博客,GitHub等地址就可以了。
import { GithubOutlined } from '@ant-design/icons';

import { DefaultFooter } from '@ant-design/pro-components';

import '@umijs/max';

import React from 'react';

const Footer: React.FC = () => {

  const defaultMessage = '程序员鱼皮';

  const currentYear = new Date().getFullYear();

  return (

    <DefaultFooter

      copyright={`${currentYear} ${defaultMessage}`}

      links={[

        {

          key: 'codeNav',

          title: '编程导航',

          href: 'https://yupi.icu',

          blankTarget: true,

        },

        {

          key: 'Ant Design',

          title: '编程宝典',

          href: 'https://codefather.cn',

          blankTarget: true,

        },

        {

          key: 'github',

          title: <><GithubOutlined /> 鱼皮源码</>,

          href: 'https://github.com/liyupi',

          blankTarget: true,

        },

      ]}

      />

  );

};

export default Footer;
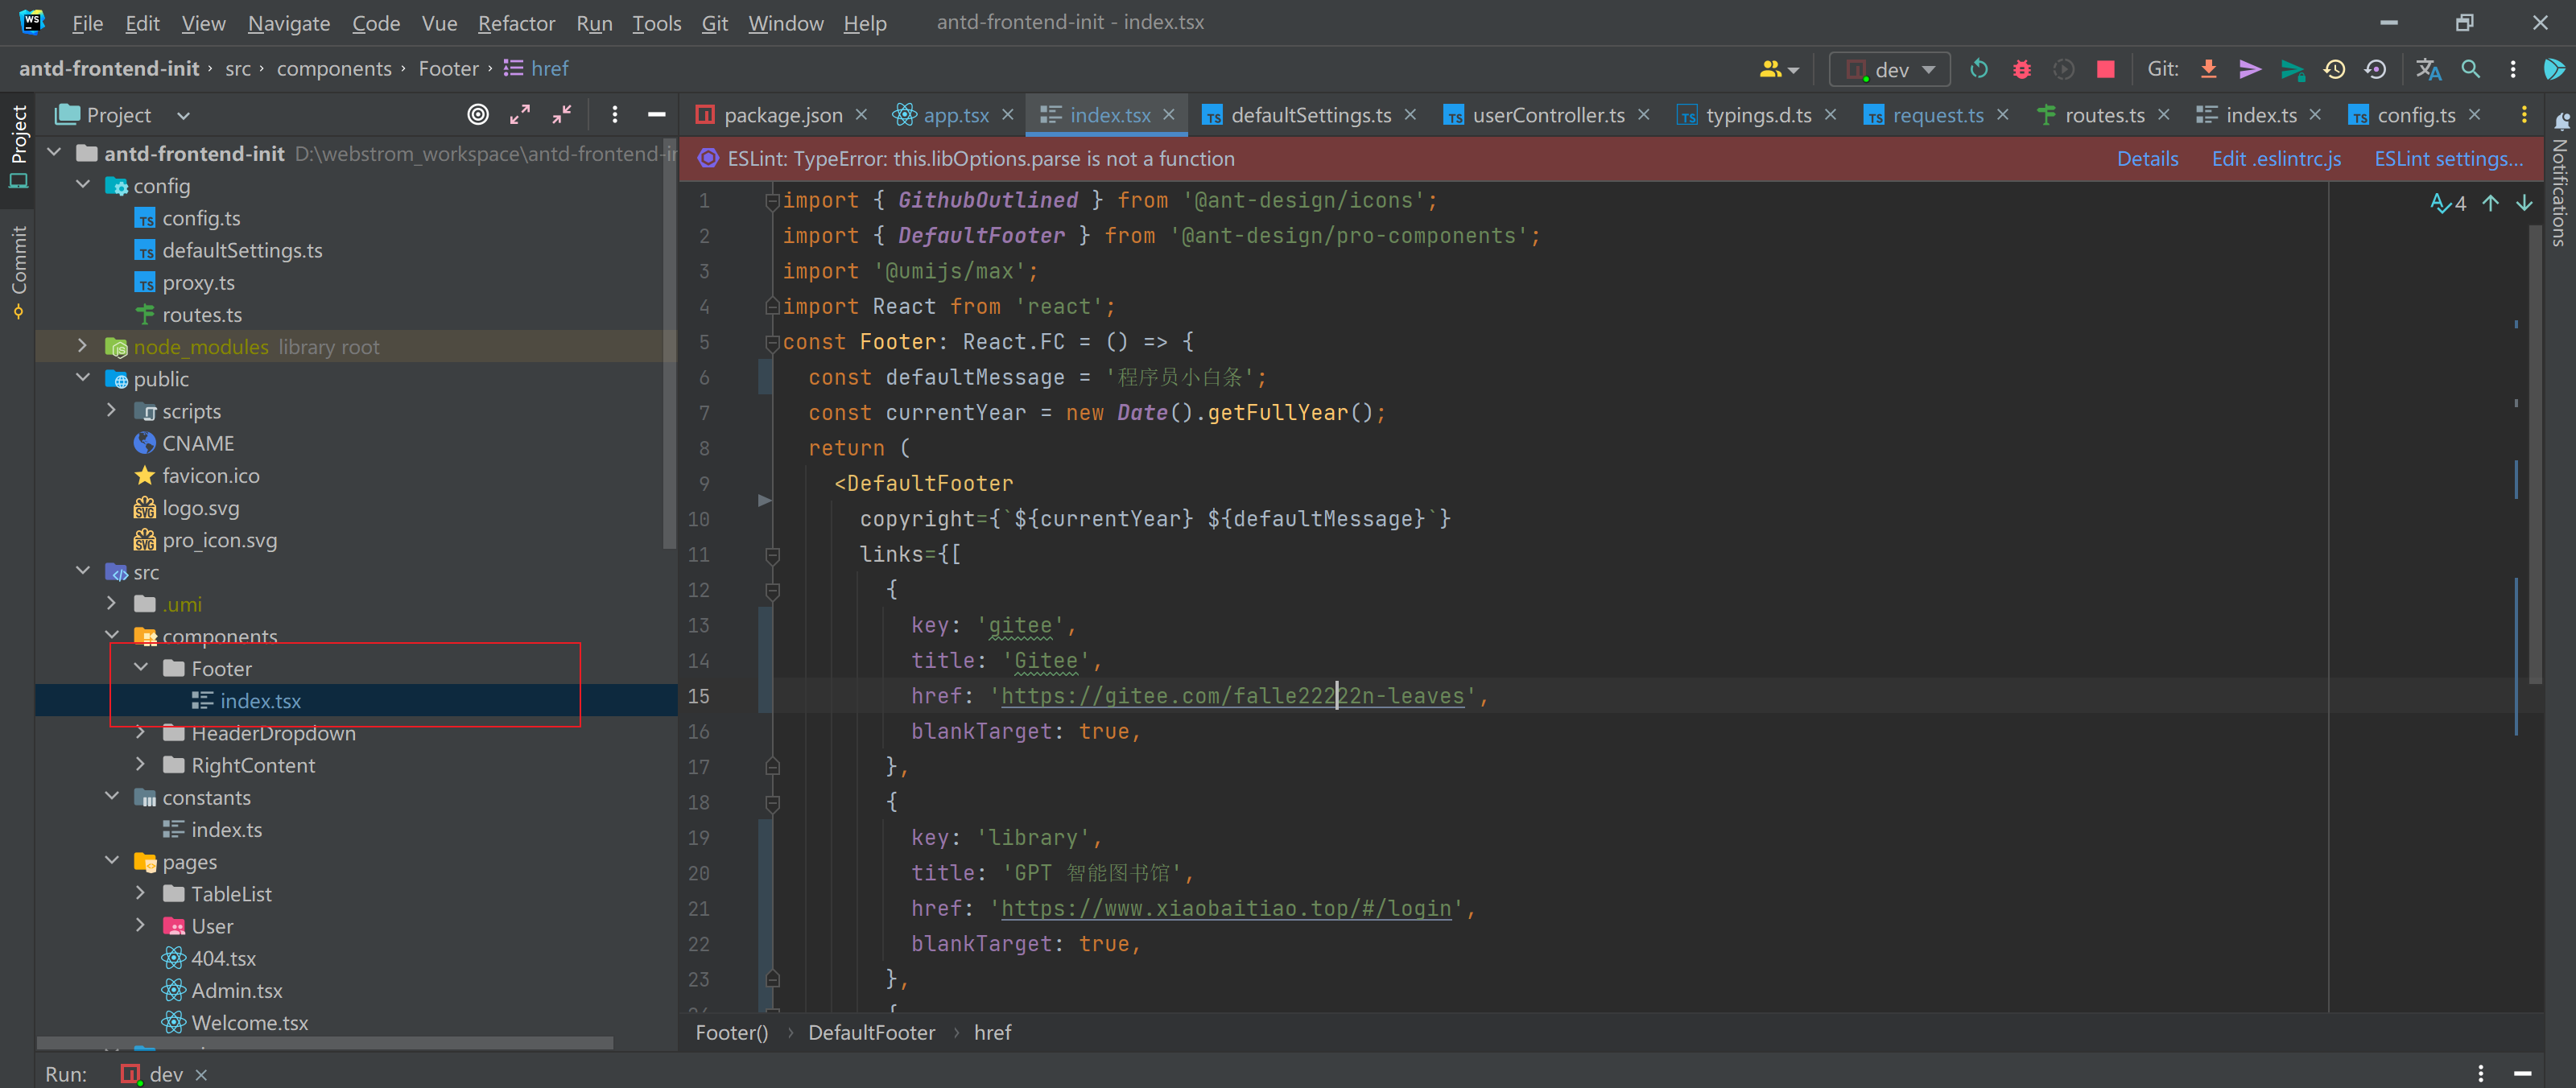
权限管理
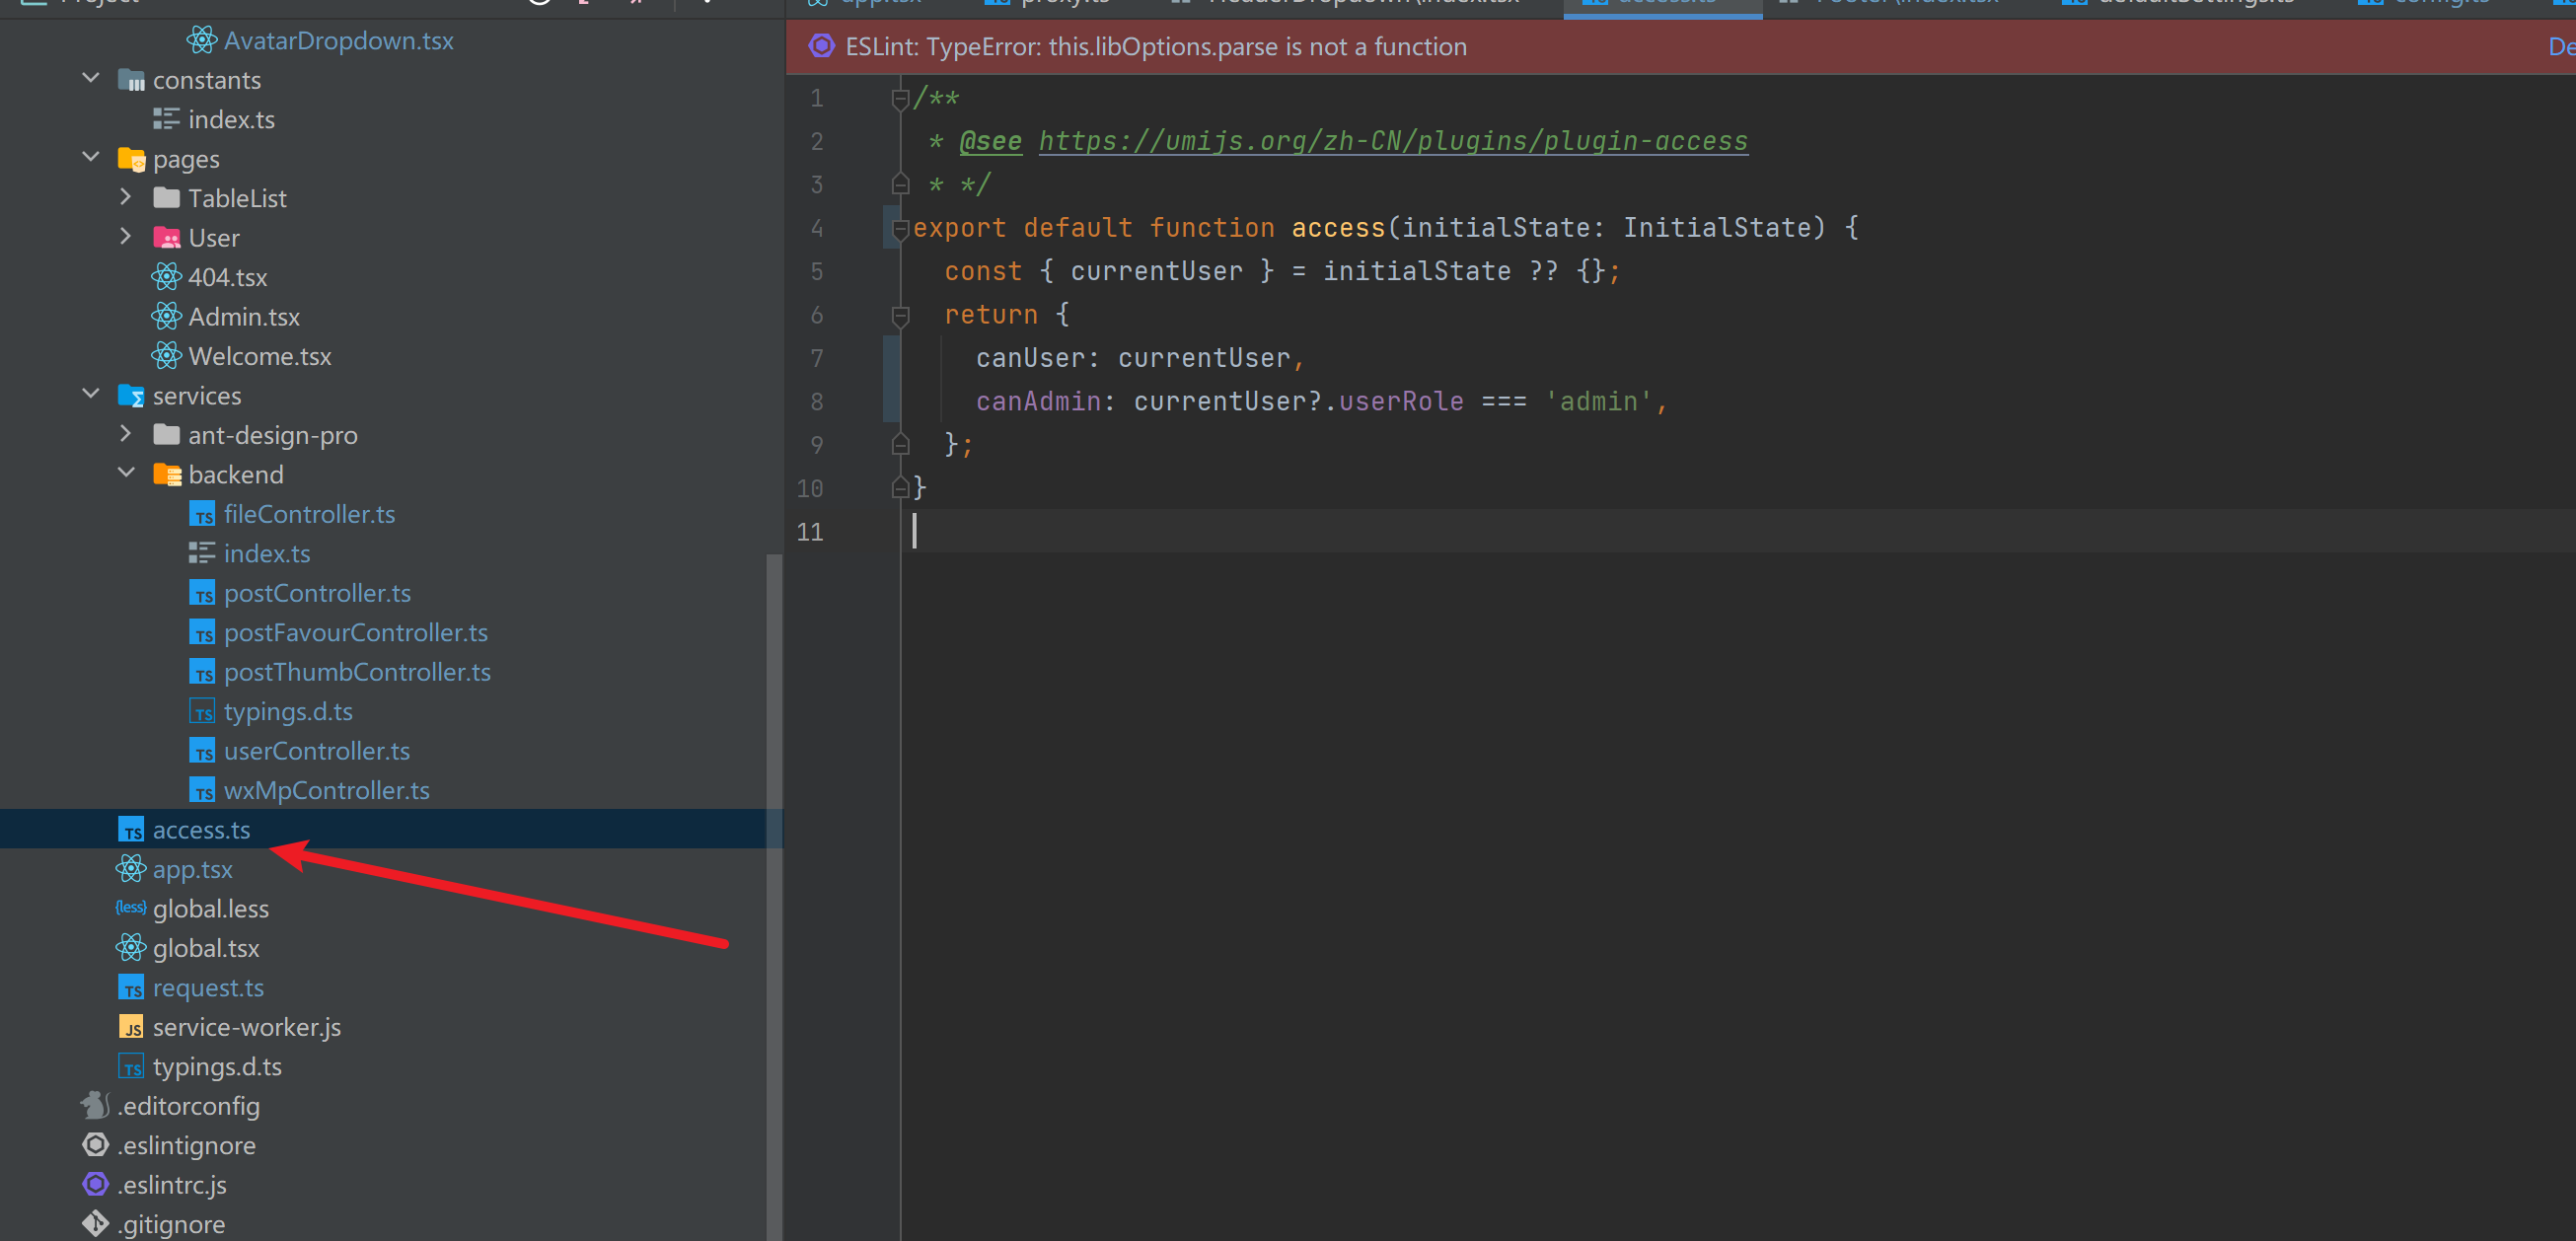
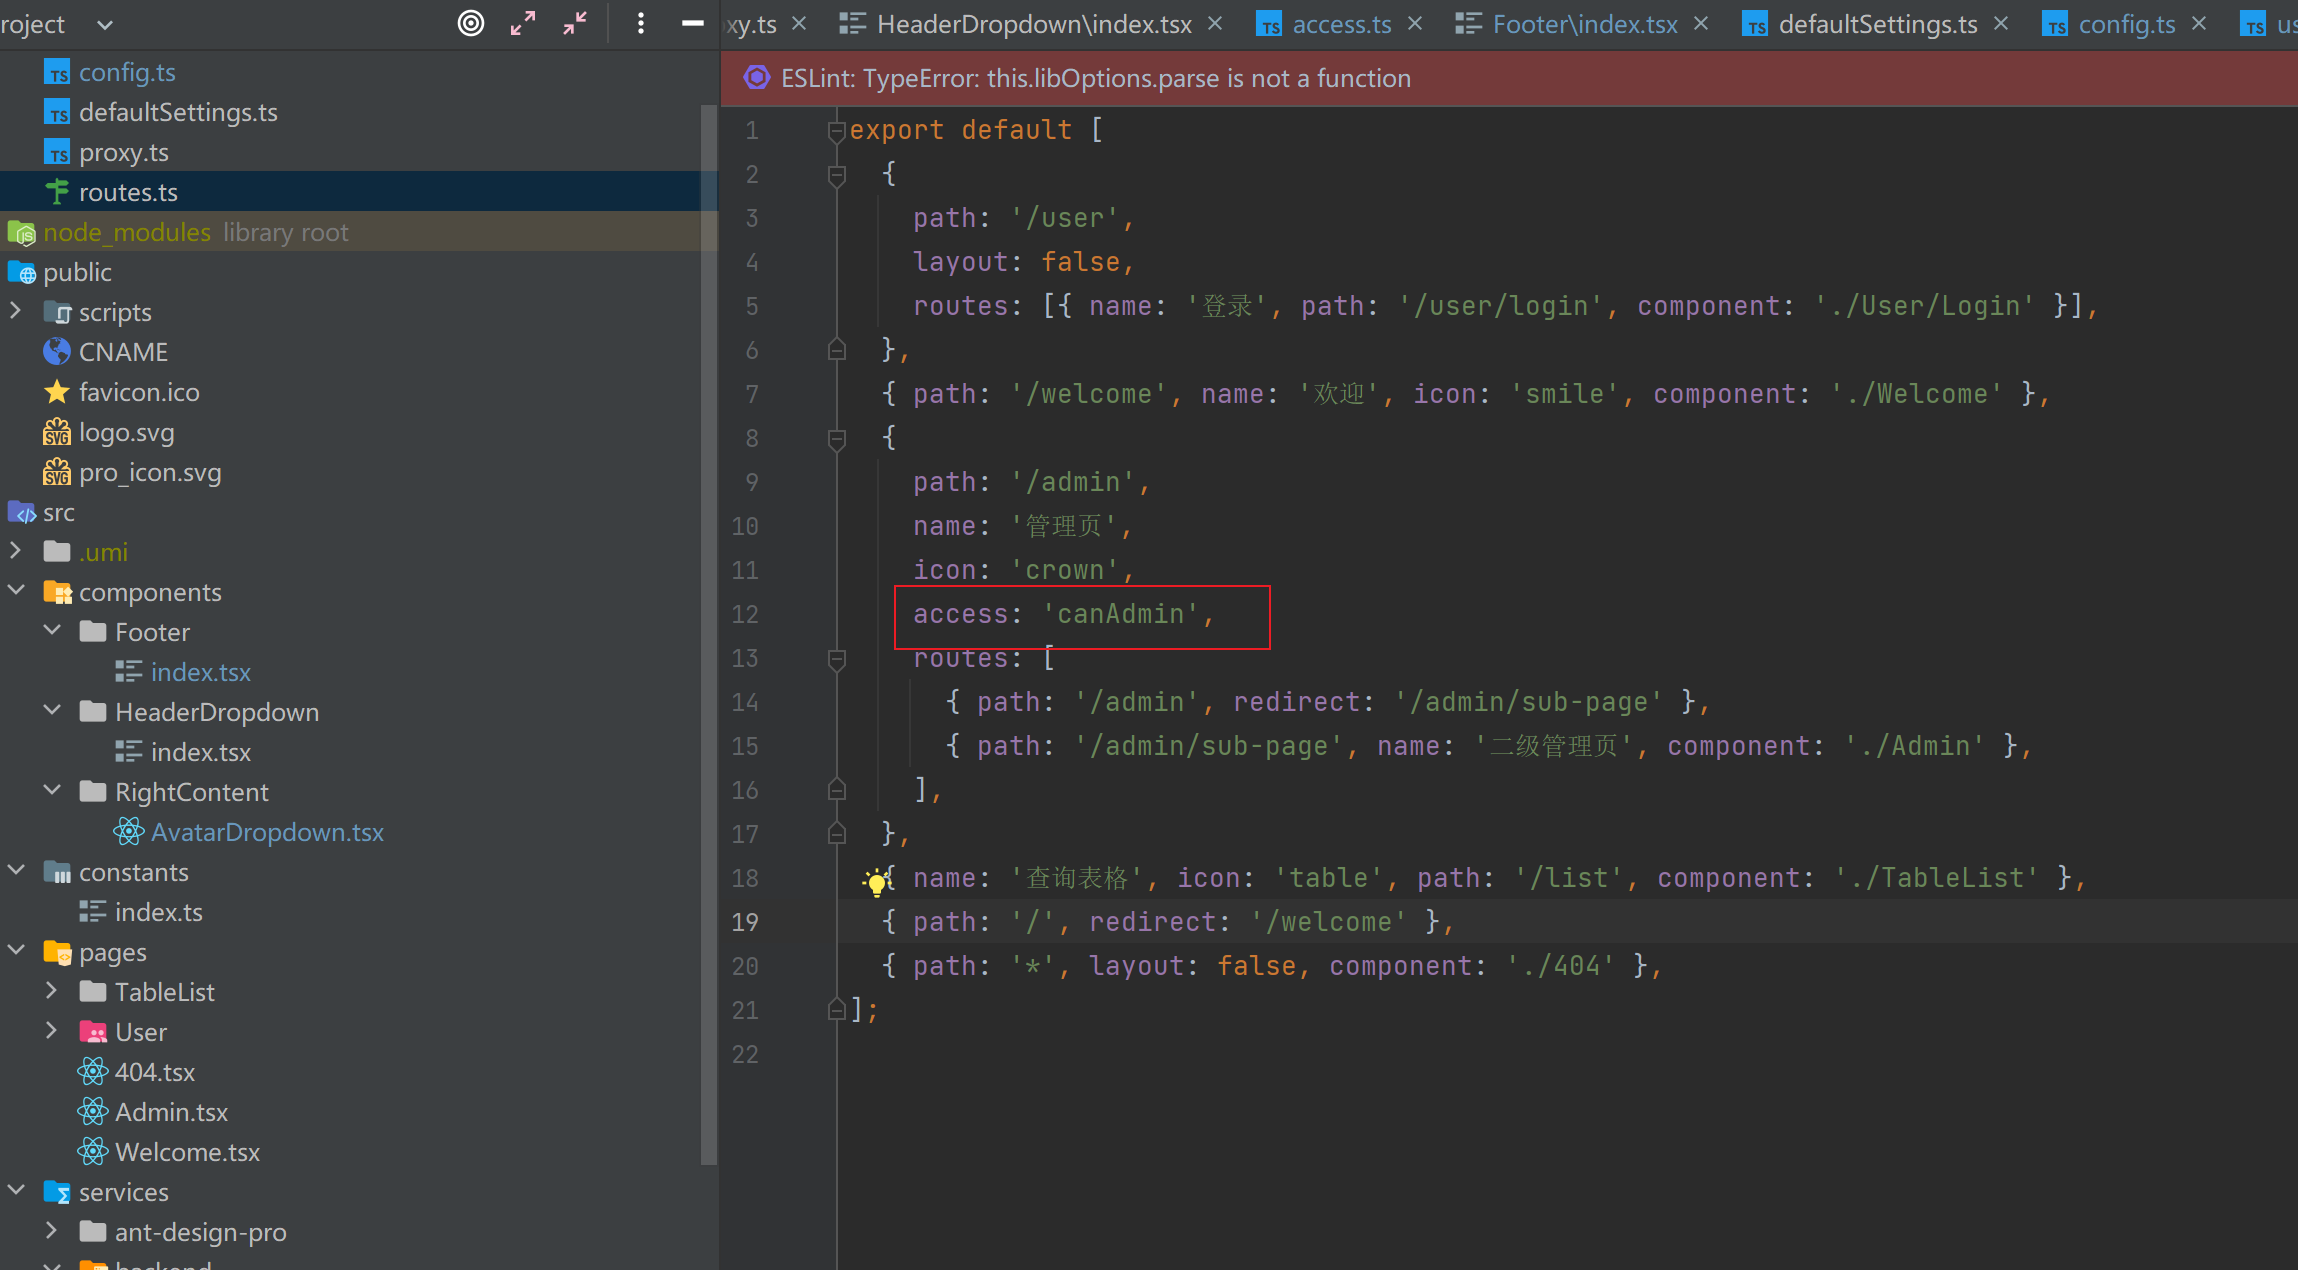
修改 access.ts,给管理员添加 access:canAdmin
/**

 * @see https://umijs.org/zh-CN/plugins/plugin-access

 * */

export default function access(initialState: InitialState) {

  const { currentUser } = initialState ?? {};

  return {

    canUser: currentUser,

    canAdmin: currentUser?.userRole === 'admin',

  };

}
用户登录
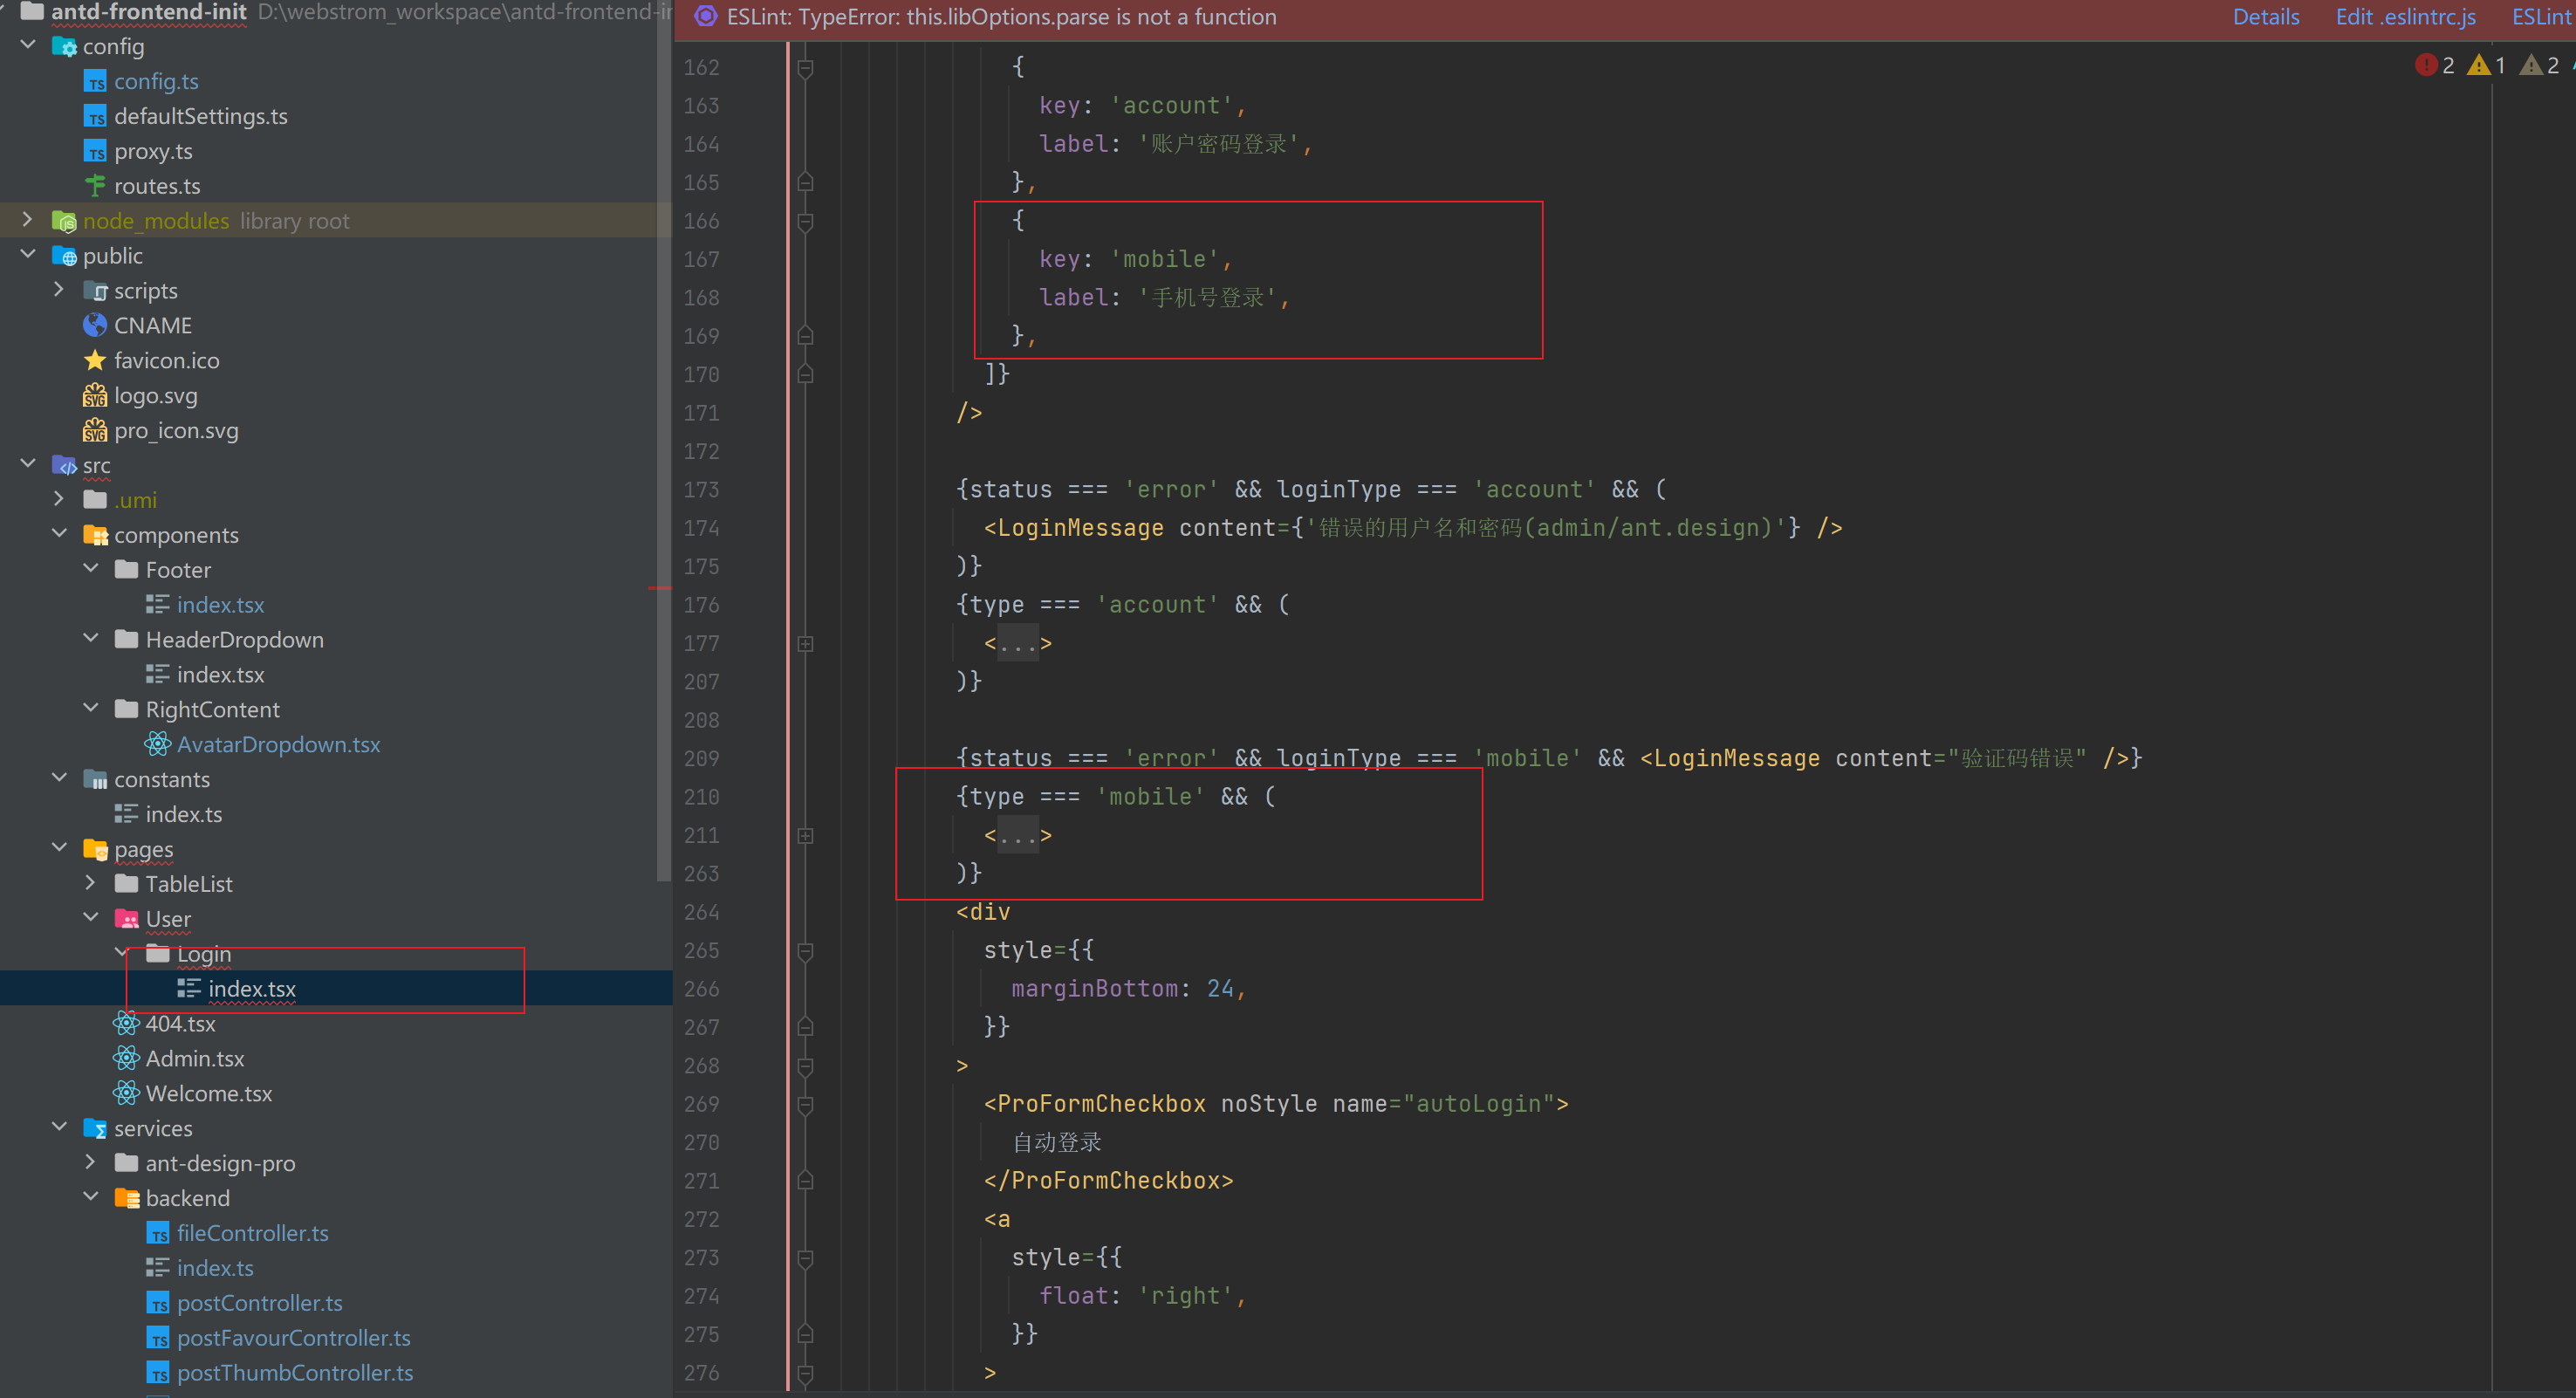
1)移除手机号登录,验证码错误也可以一并删除
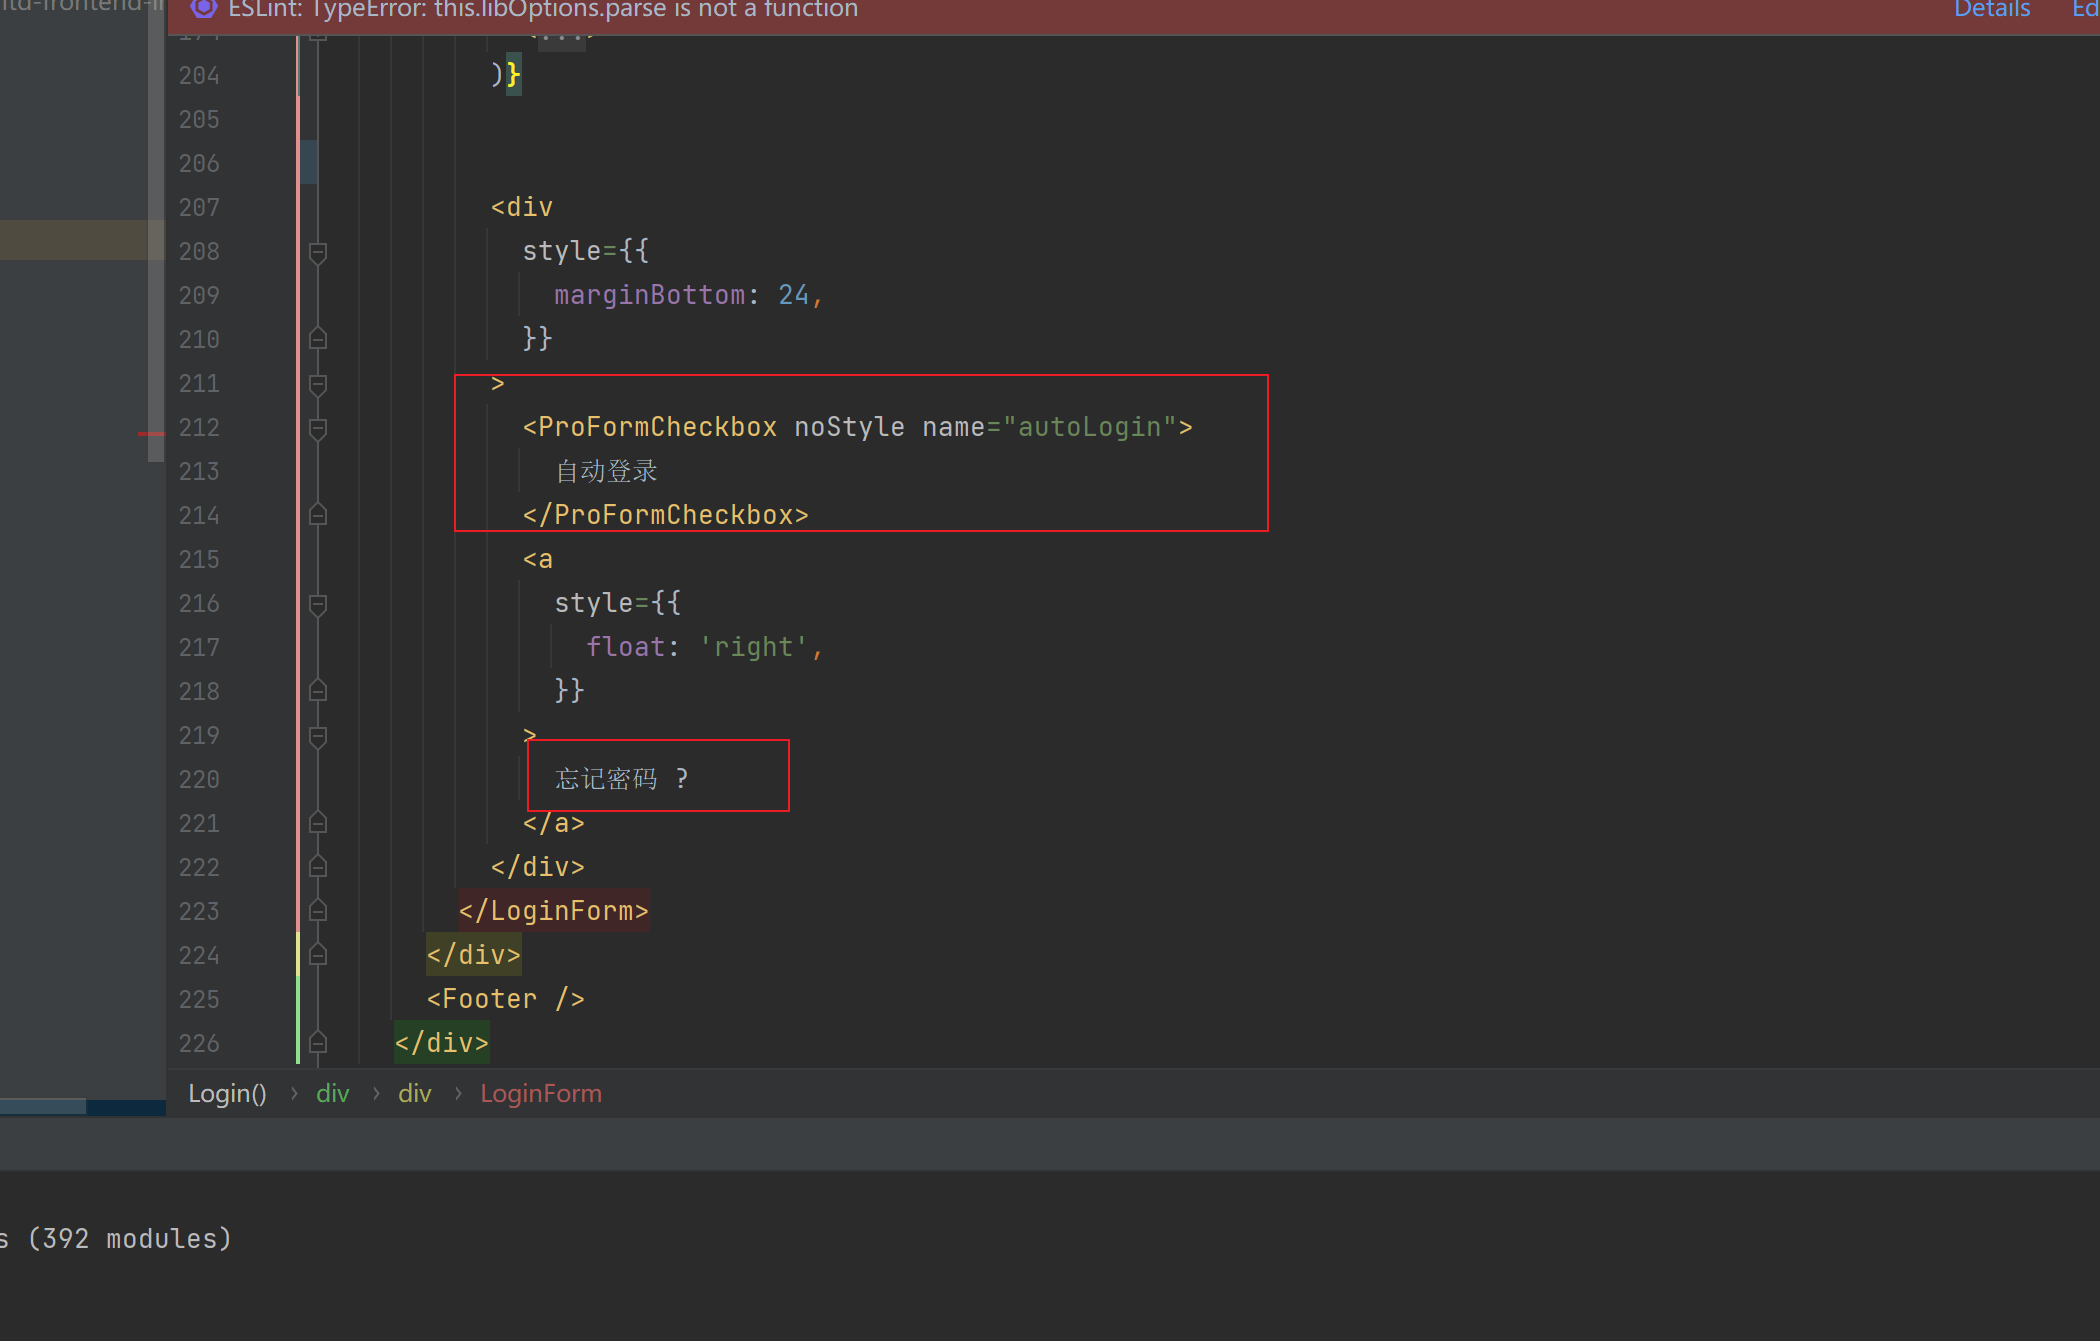
2)移除自动登录,将忘记密码改为新用户注册
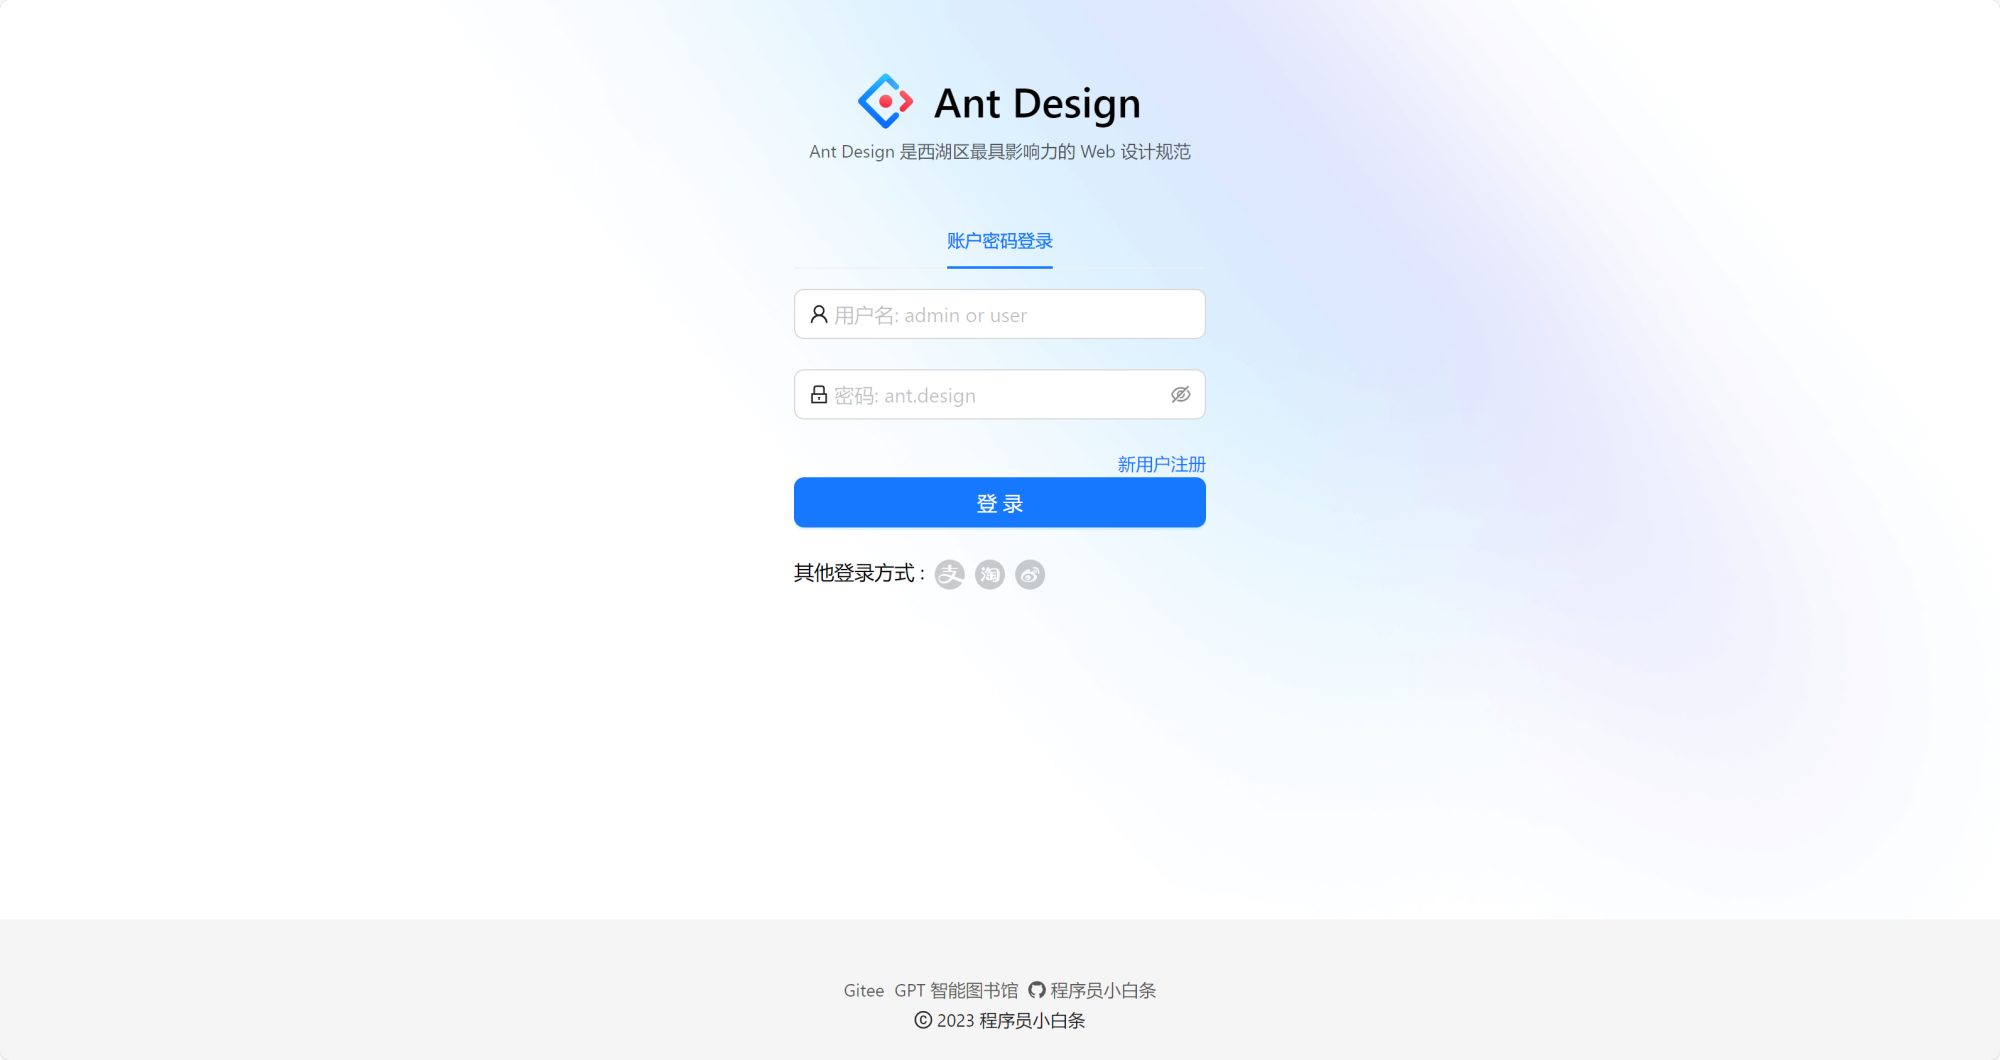
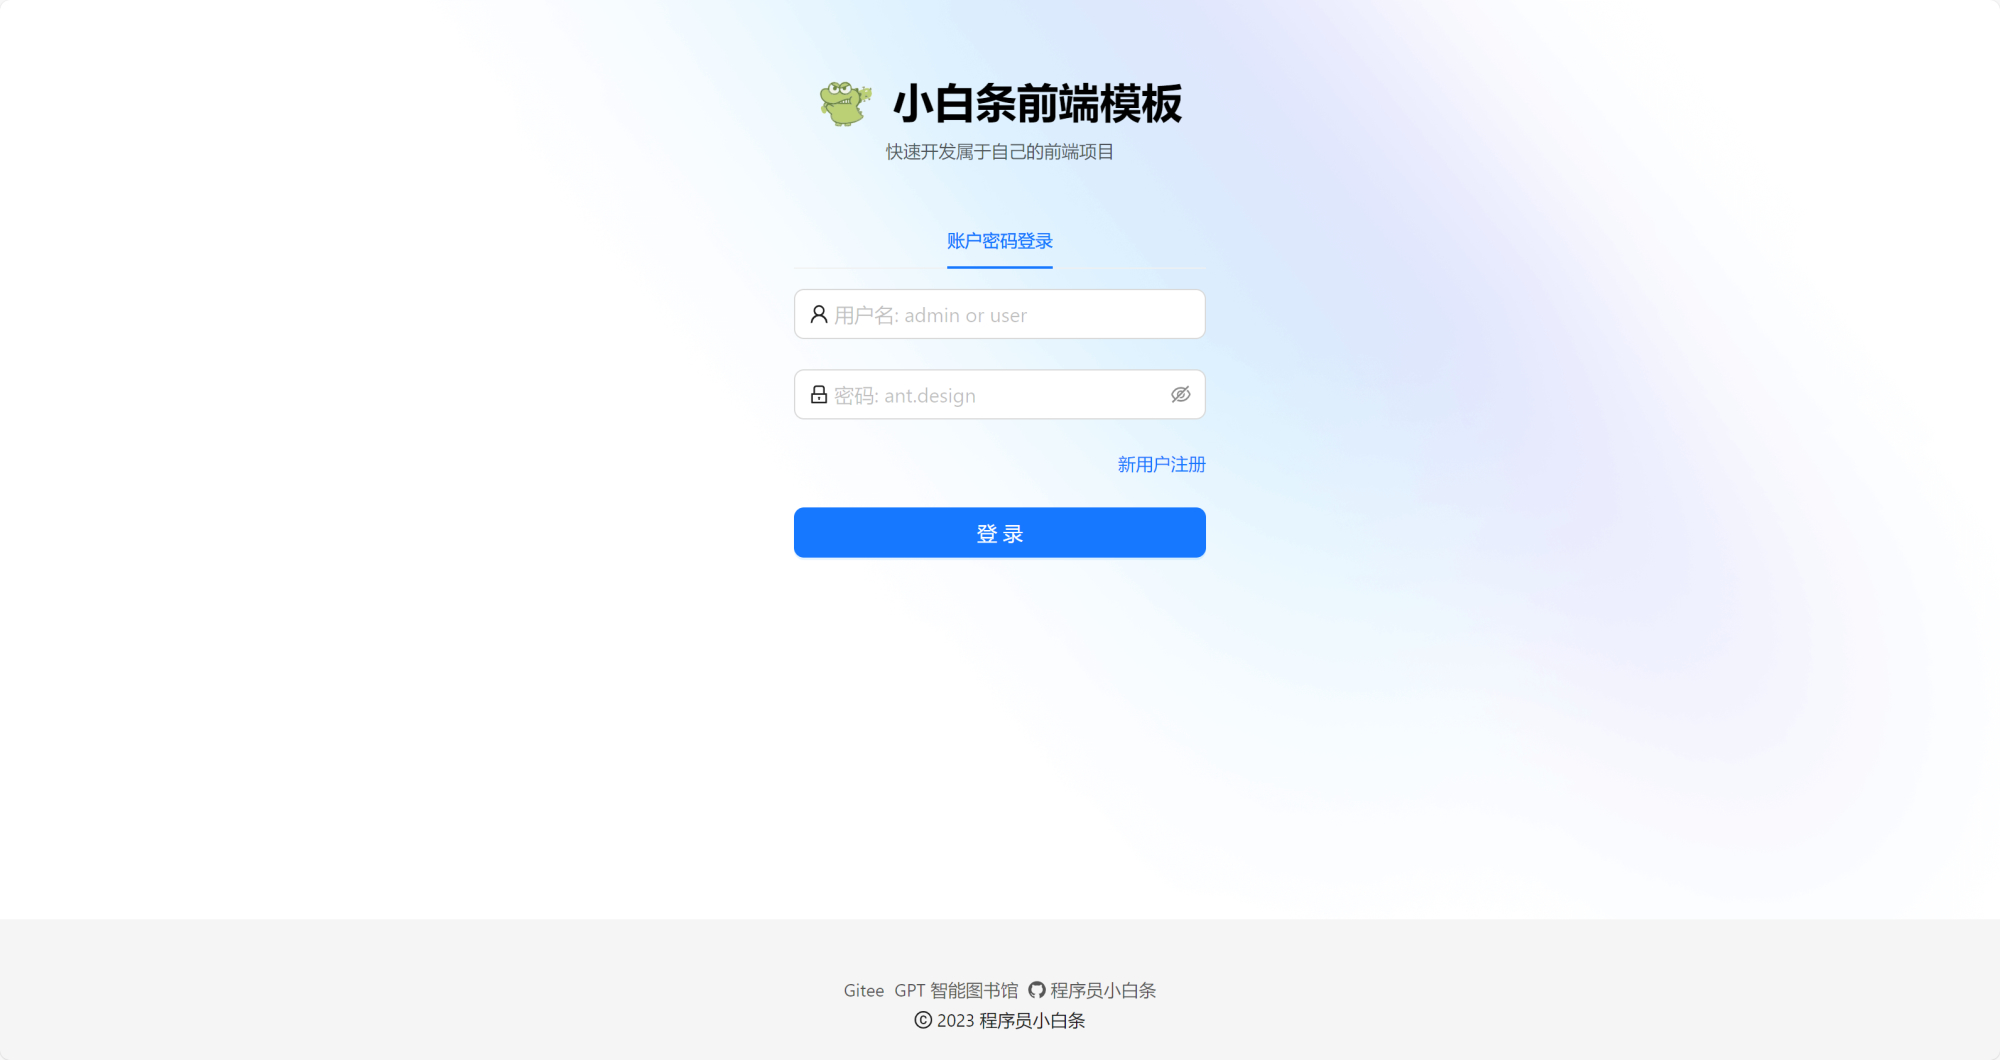
效果图:
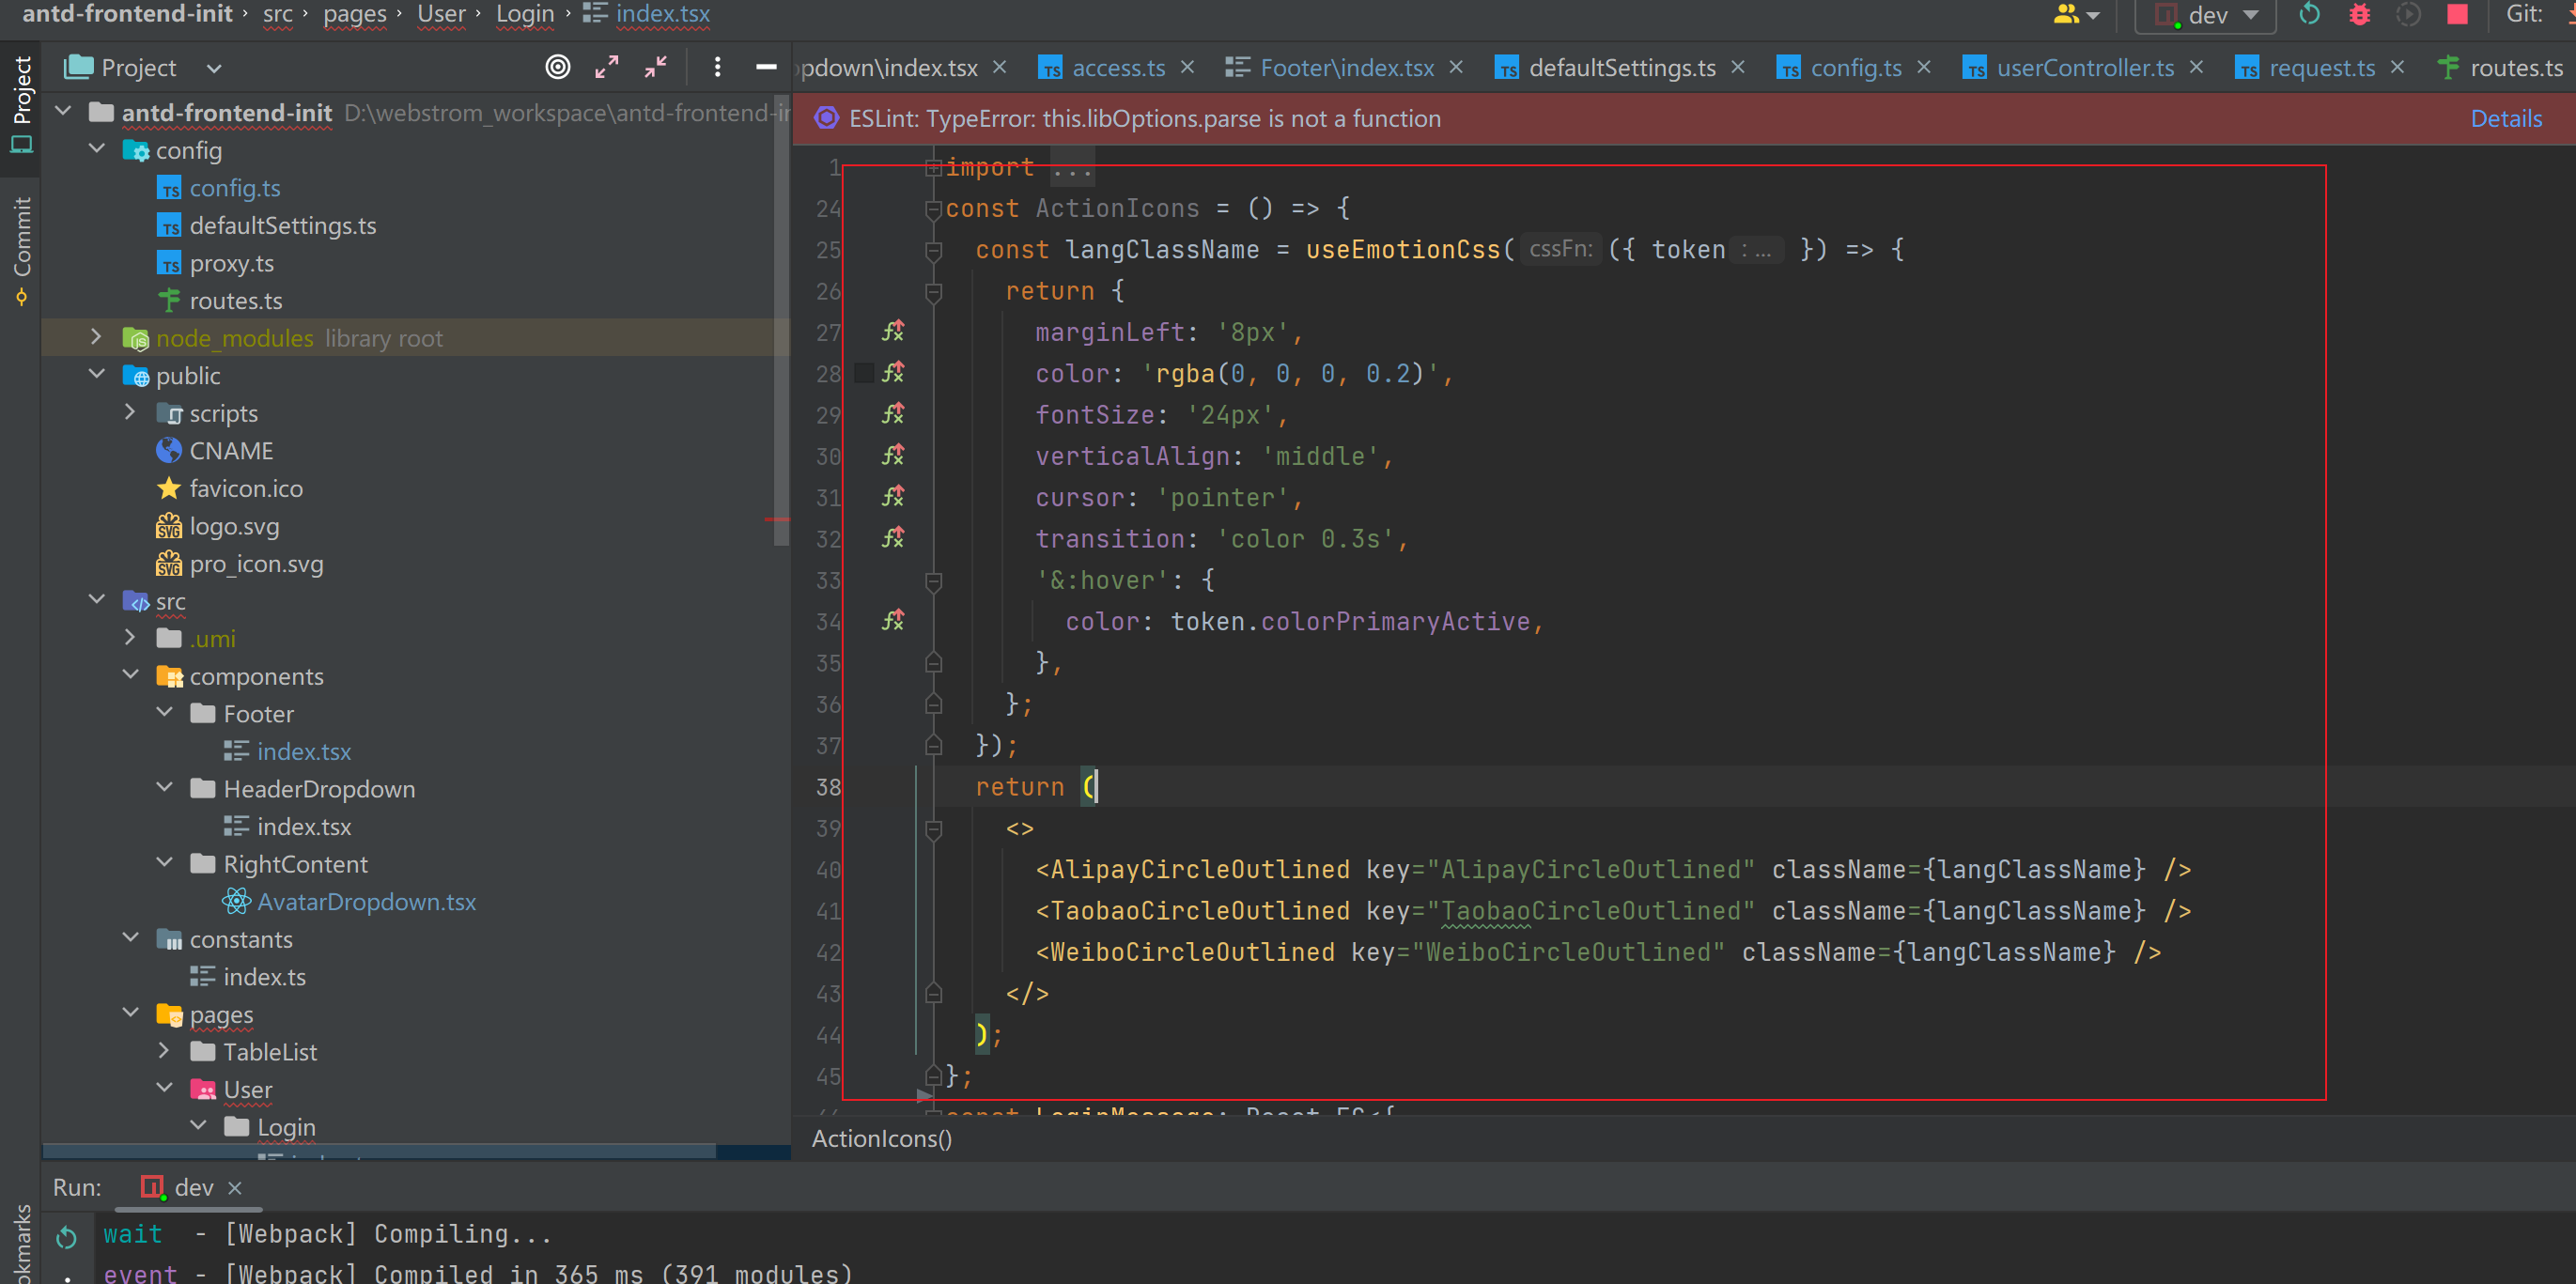
3)移除其他登录方式和一些无用的模块,清除不需要导入的模块和包,按 ctrl + alt + o
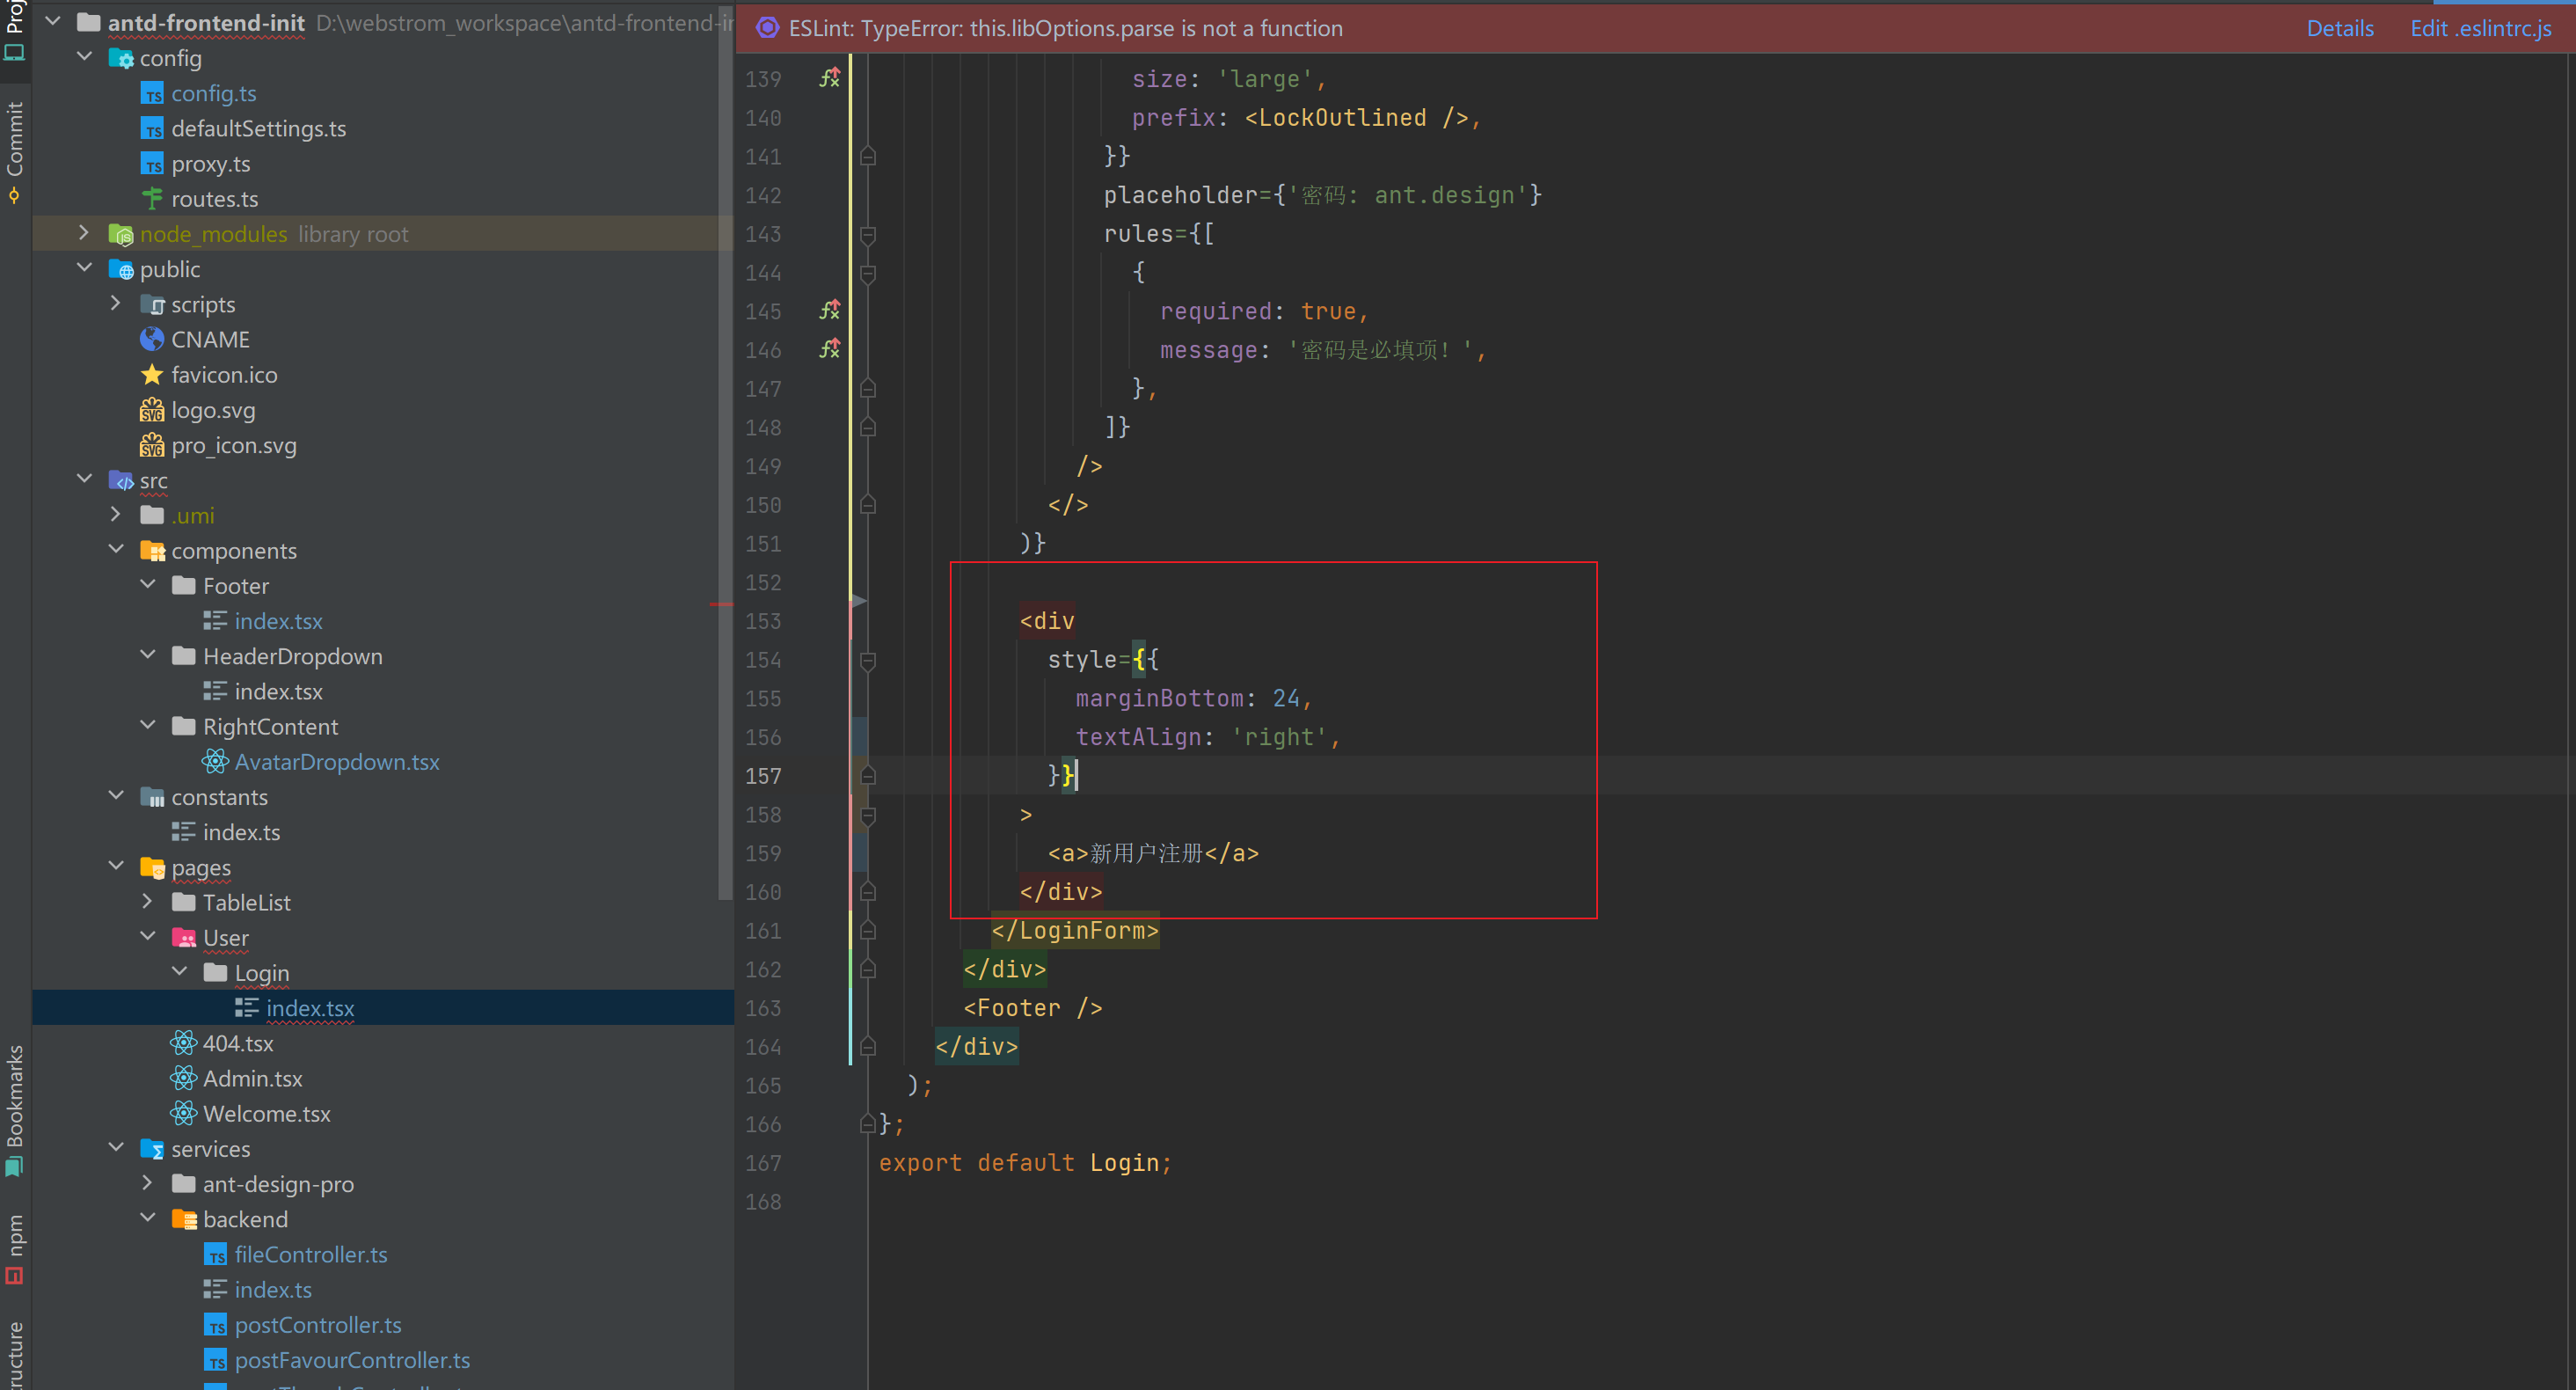
4)调整新用户注册的位置,移除浮动,父标签加 textAlign:
5)修改 logo.svg,自己替换即可,将标题和副标题自己替换。
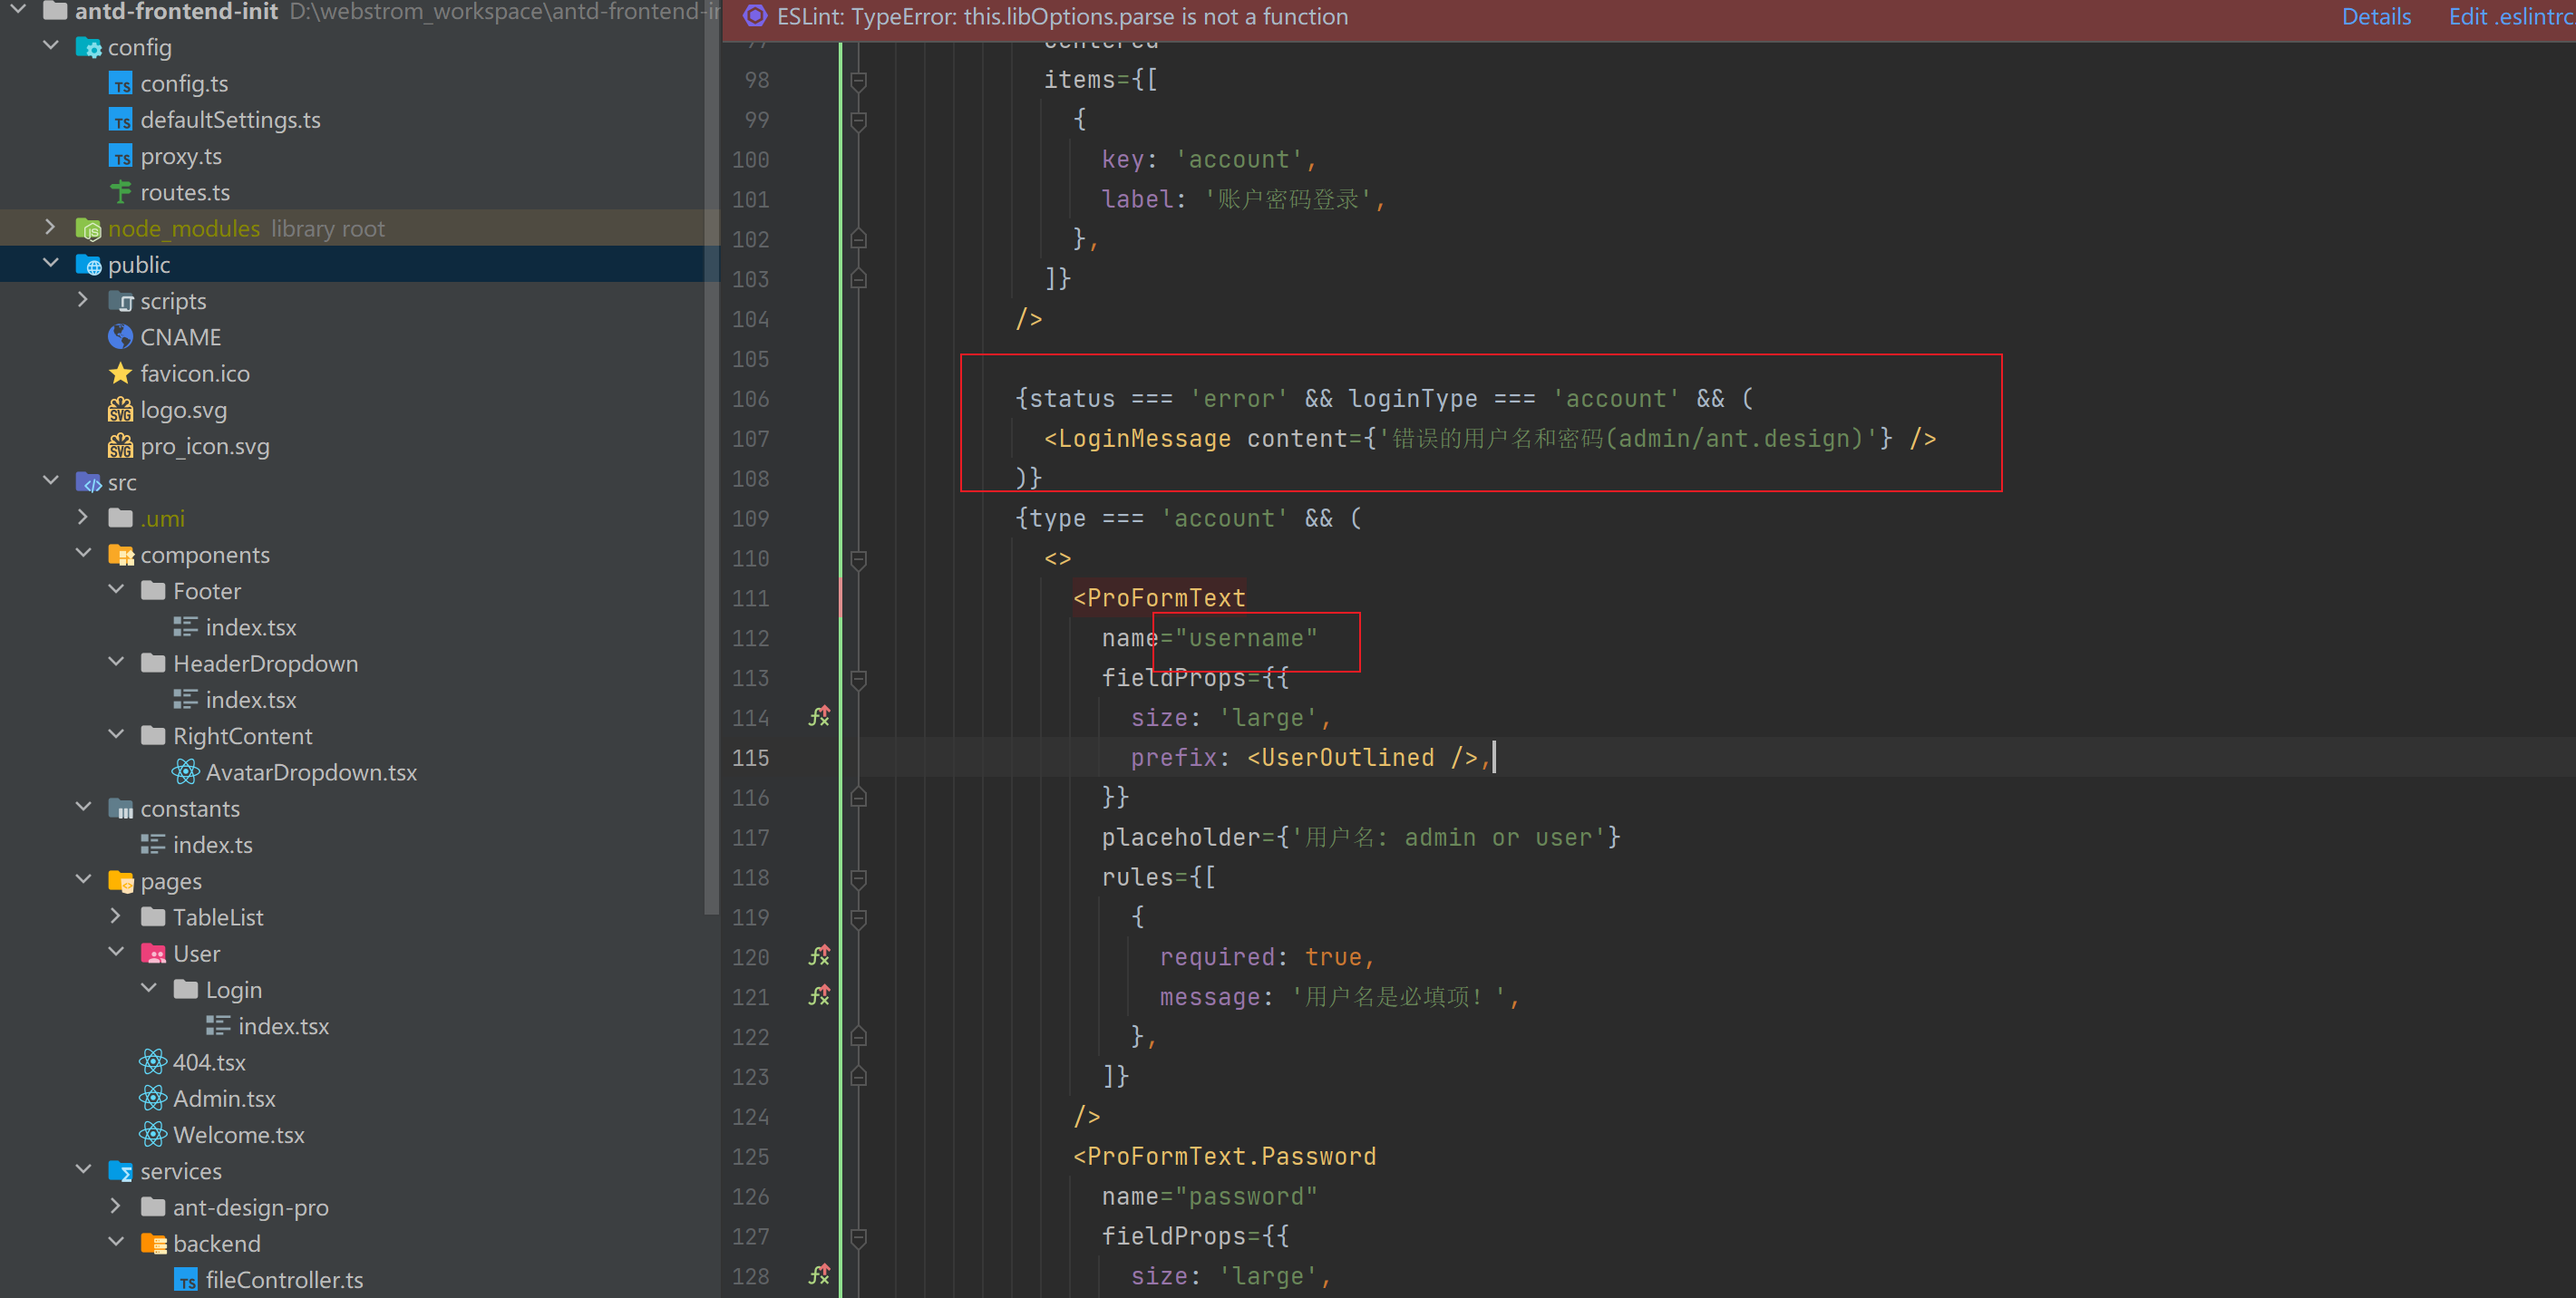
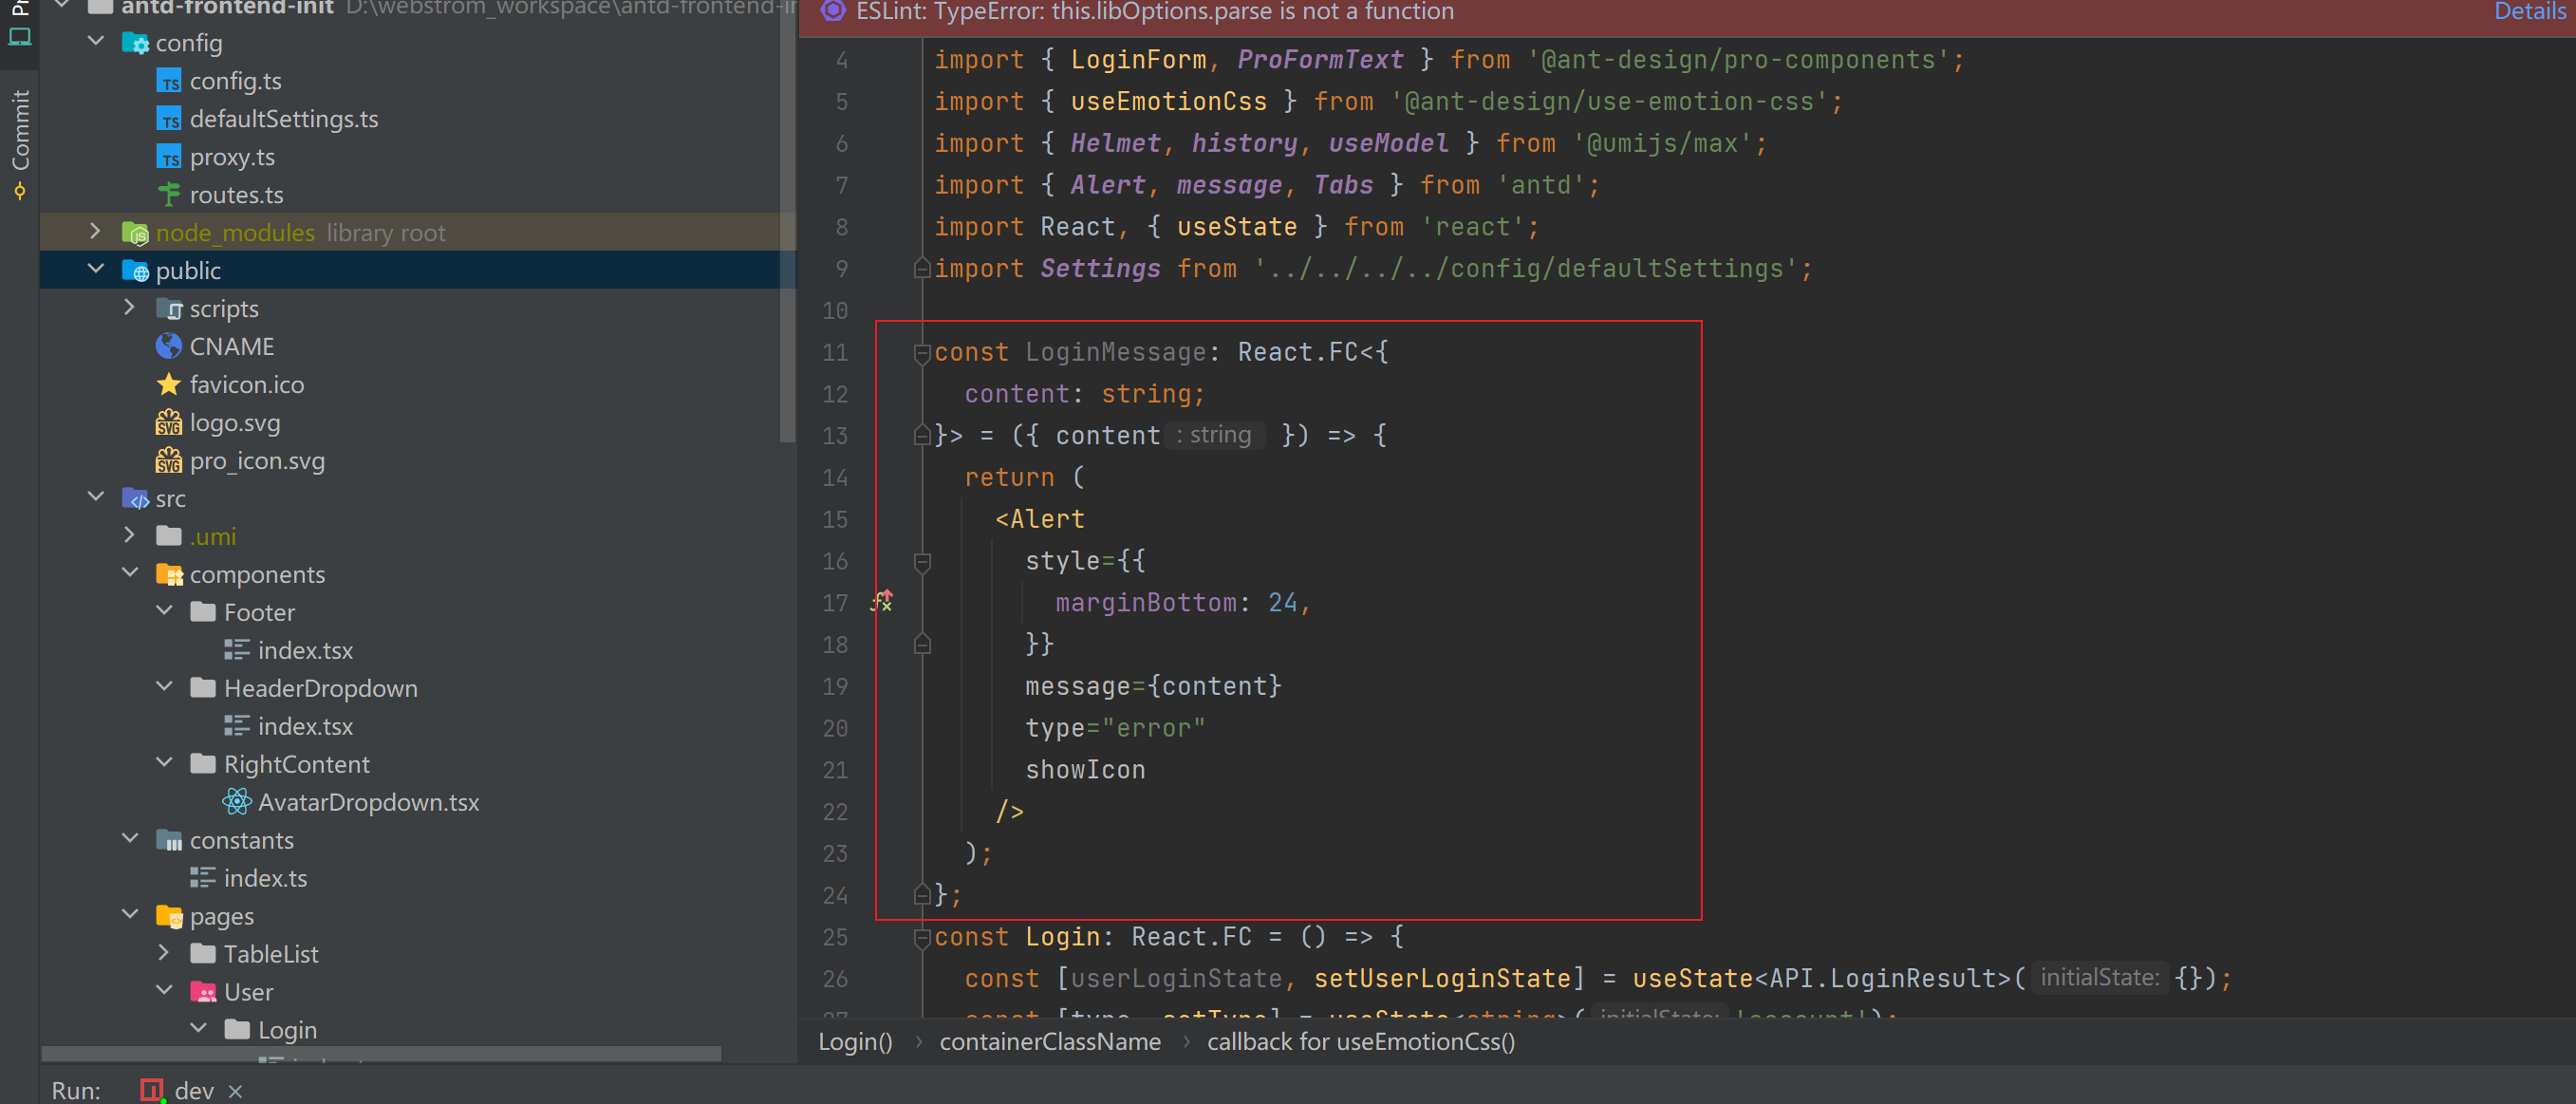
6)移除错误提示,修改官方的用户名 username 和 密码 password 为 userAccount 和 userPassword
7)移除其他不必要的代码
8)修改登录按钮后触发的事件
const handleSubmit = async (values: API.UserLoginRequest) => {

  try {

    // 登录

    const res = await userLogin({

      ...values,

    });

    if (res.code === 0) {

      const defaultLoginSuccessMessage = '登录成功!';

      message.success(defaultLoginSuccessMessage);

      // 保存已登录用户信息

      setInitialState({

        ...initialState,

        currentUser:res.data

      })

      const urlParams = new URL(window.location.href).searchParams;

      history.push(urlParams.get('redirect') || '/');

      return;

    }

    // 如果失败去设置用户错误信息

  } catch (error) {

    const defaultLoginFailureMessage = '登录失败,请重试!';

    console.log(error);

    message.error(defaultLoginFailureMessage);

  }

};
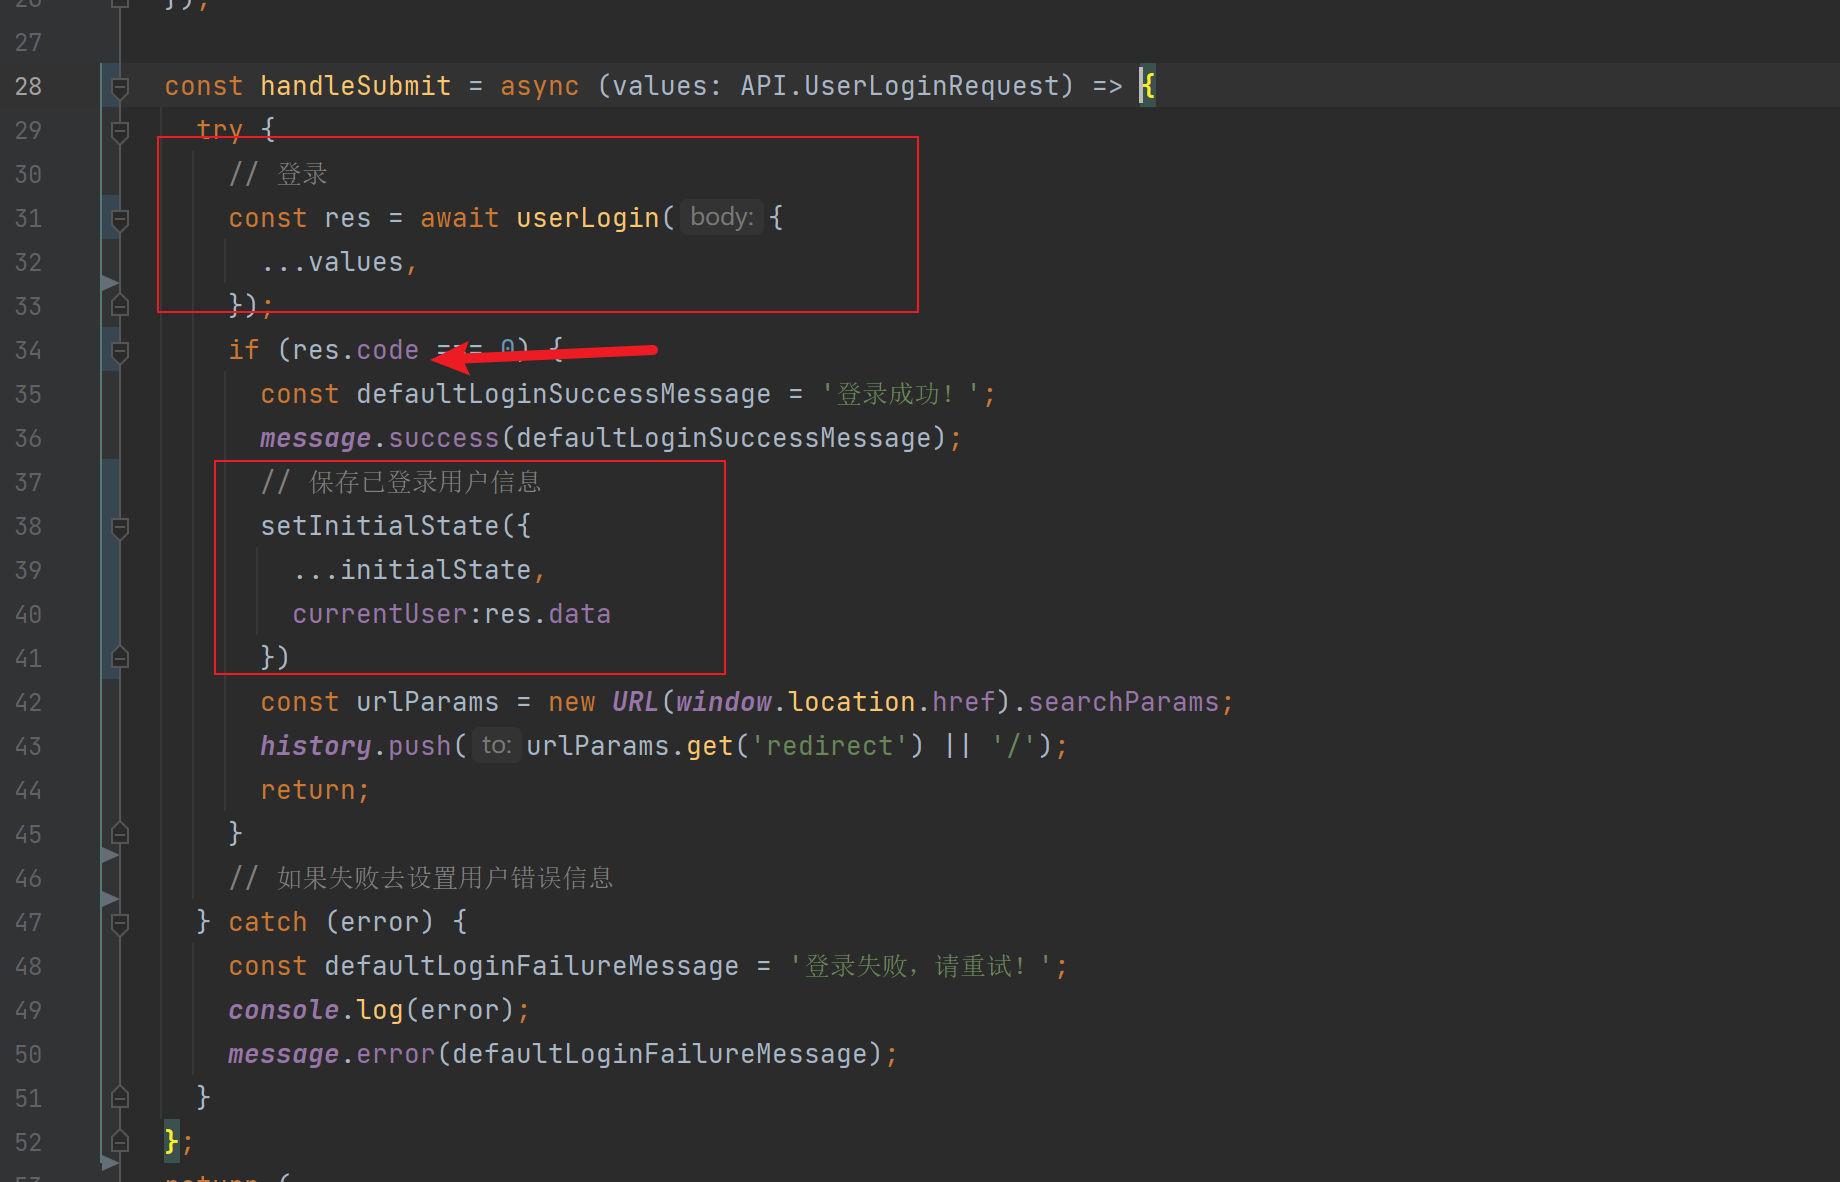
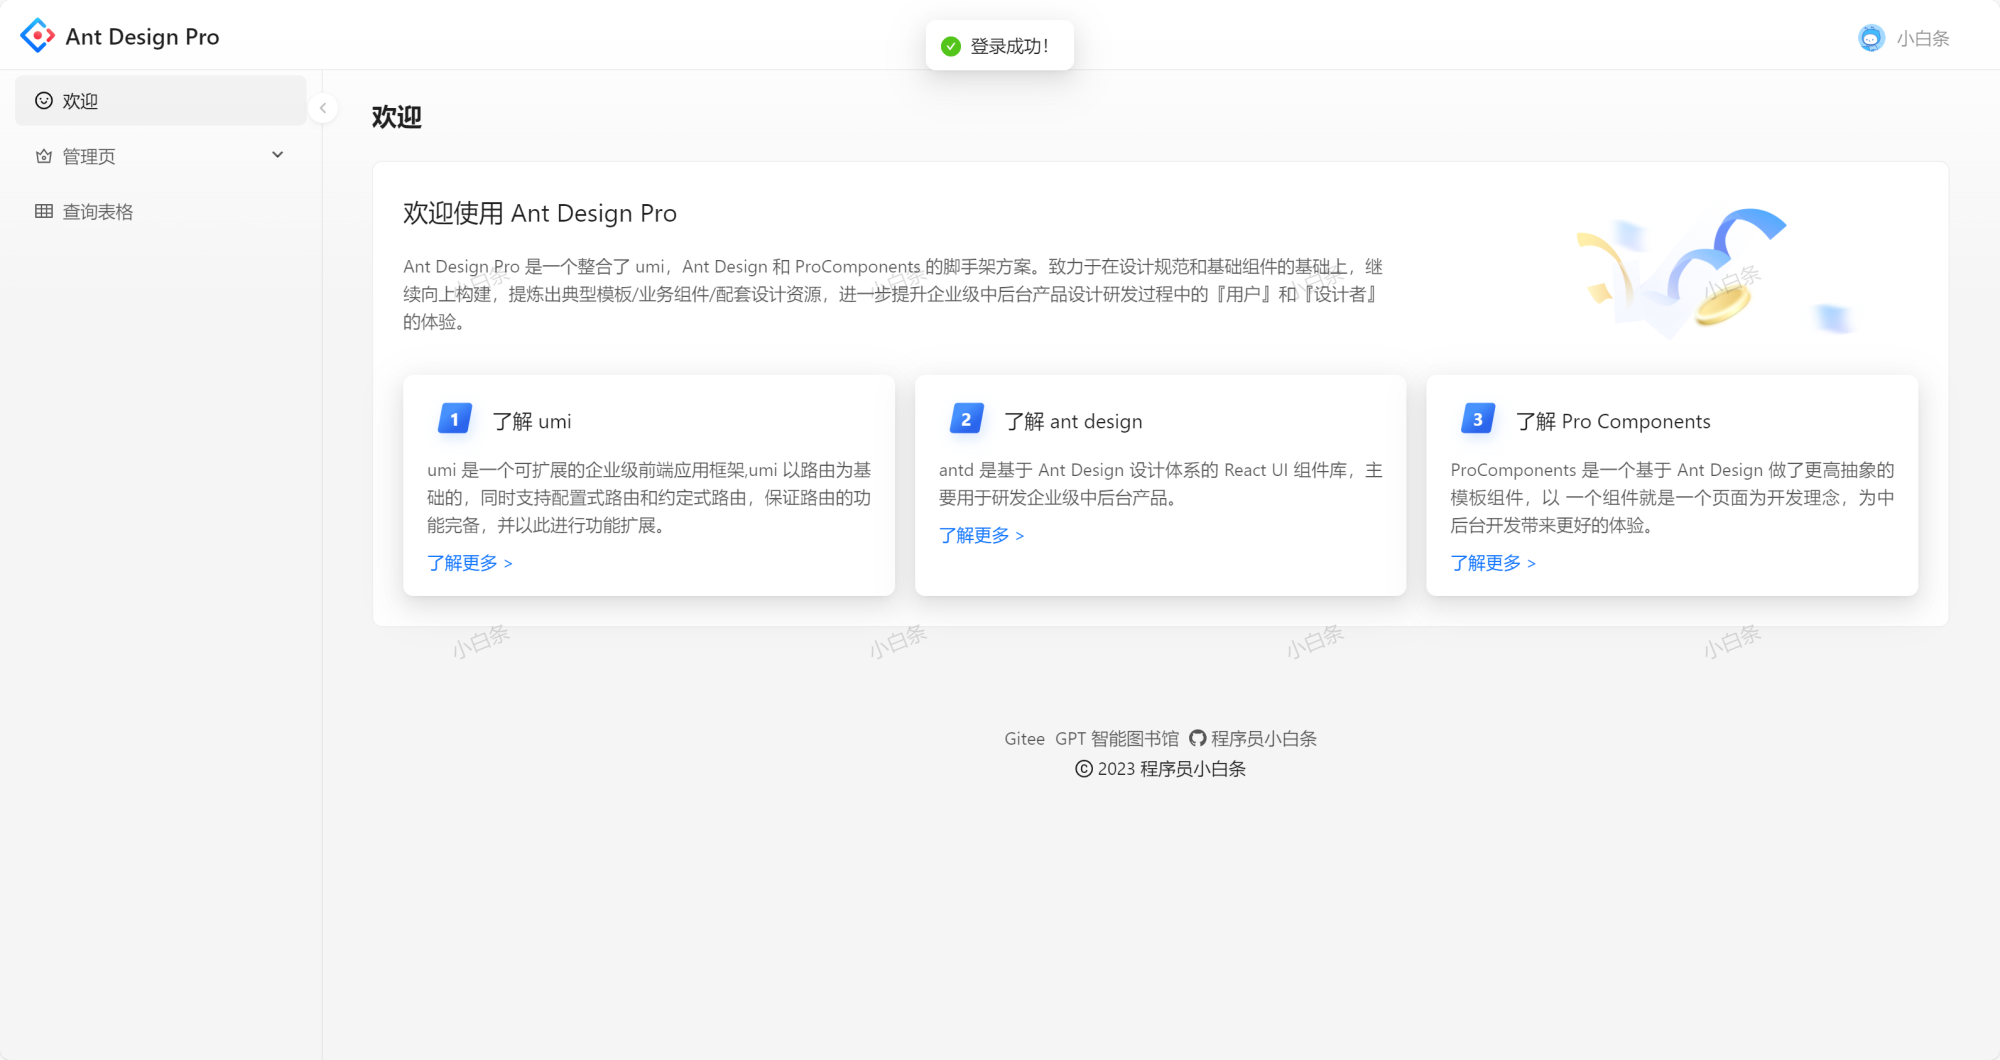
9)输入账号和密码,与后端数据库的一致即可,登录成功效果图展示如下
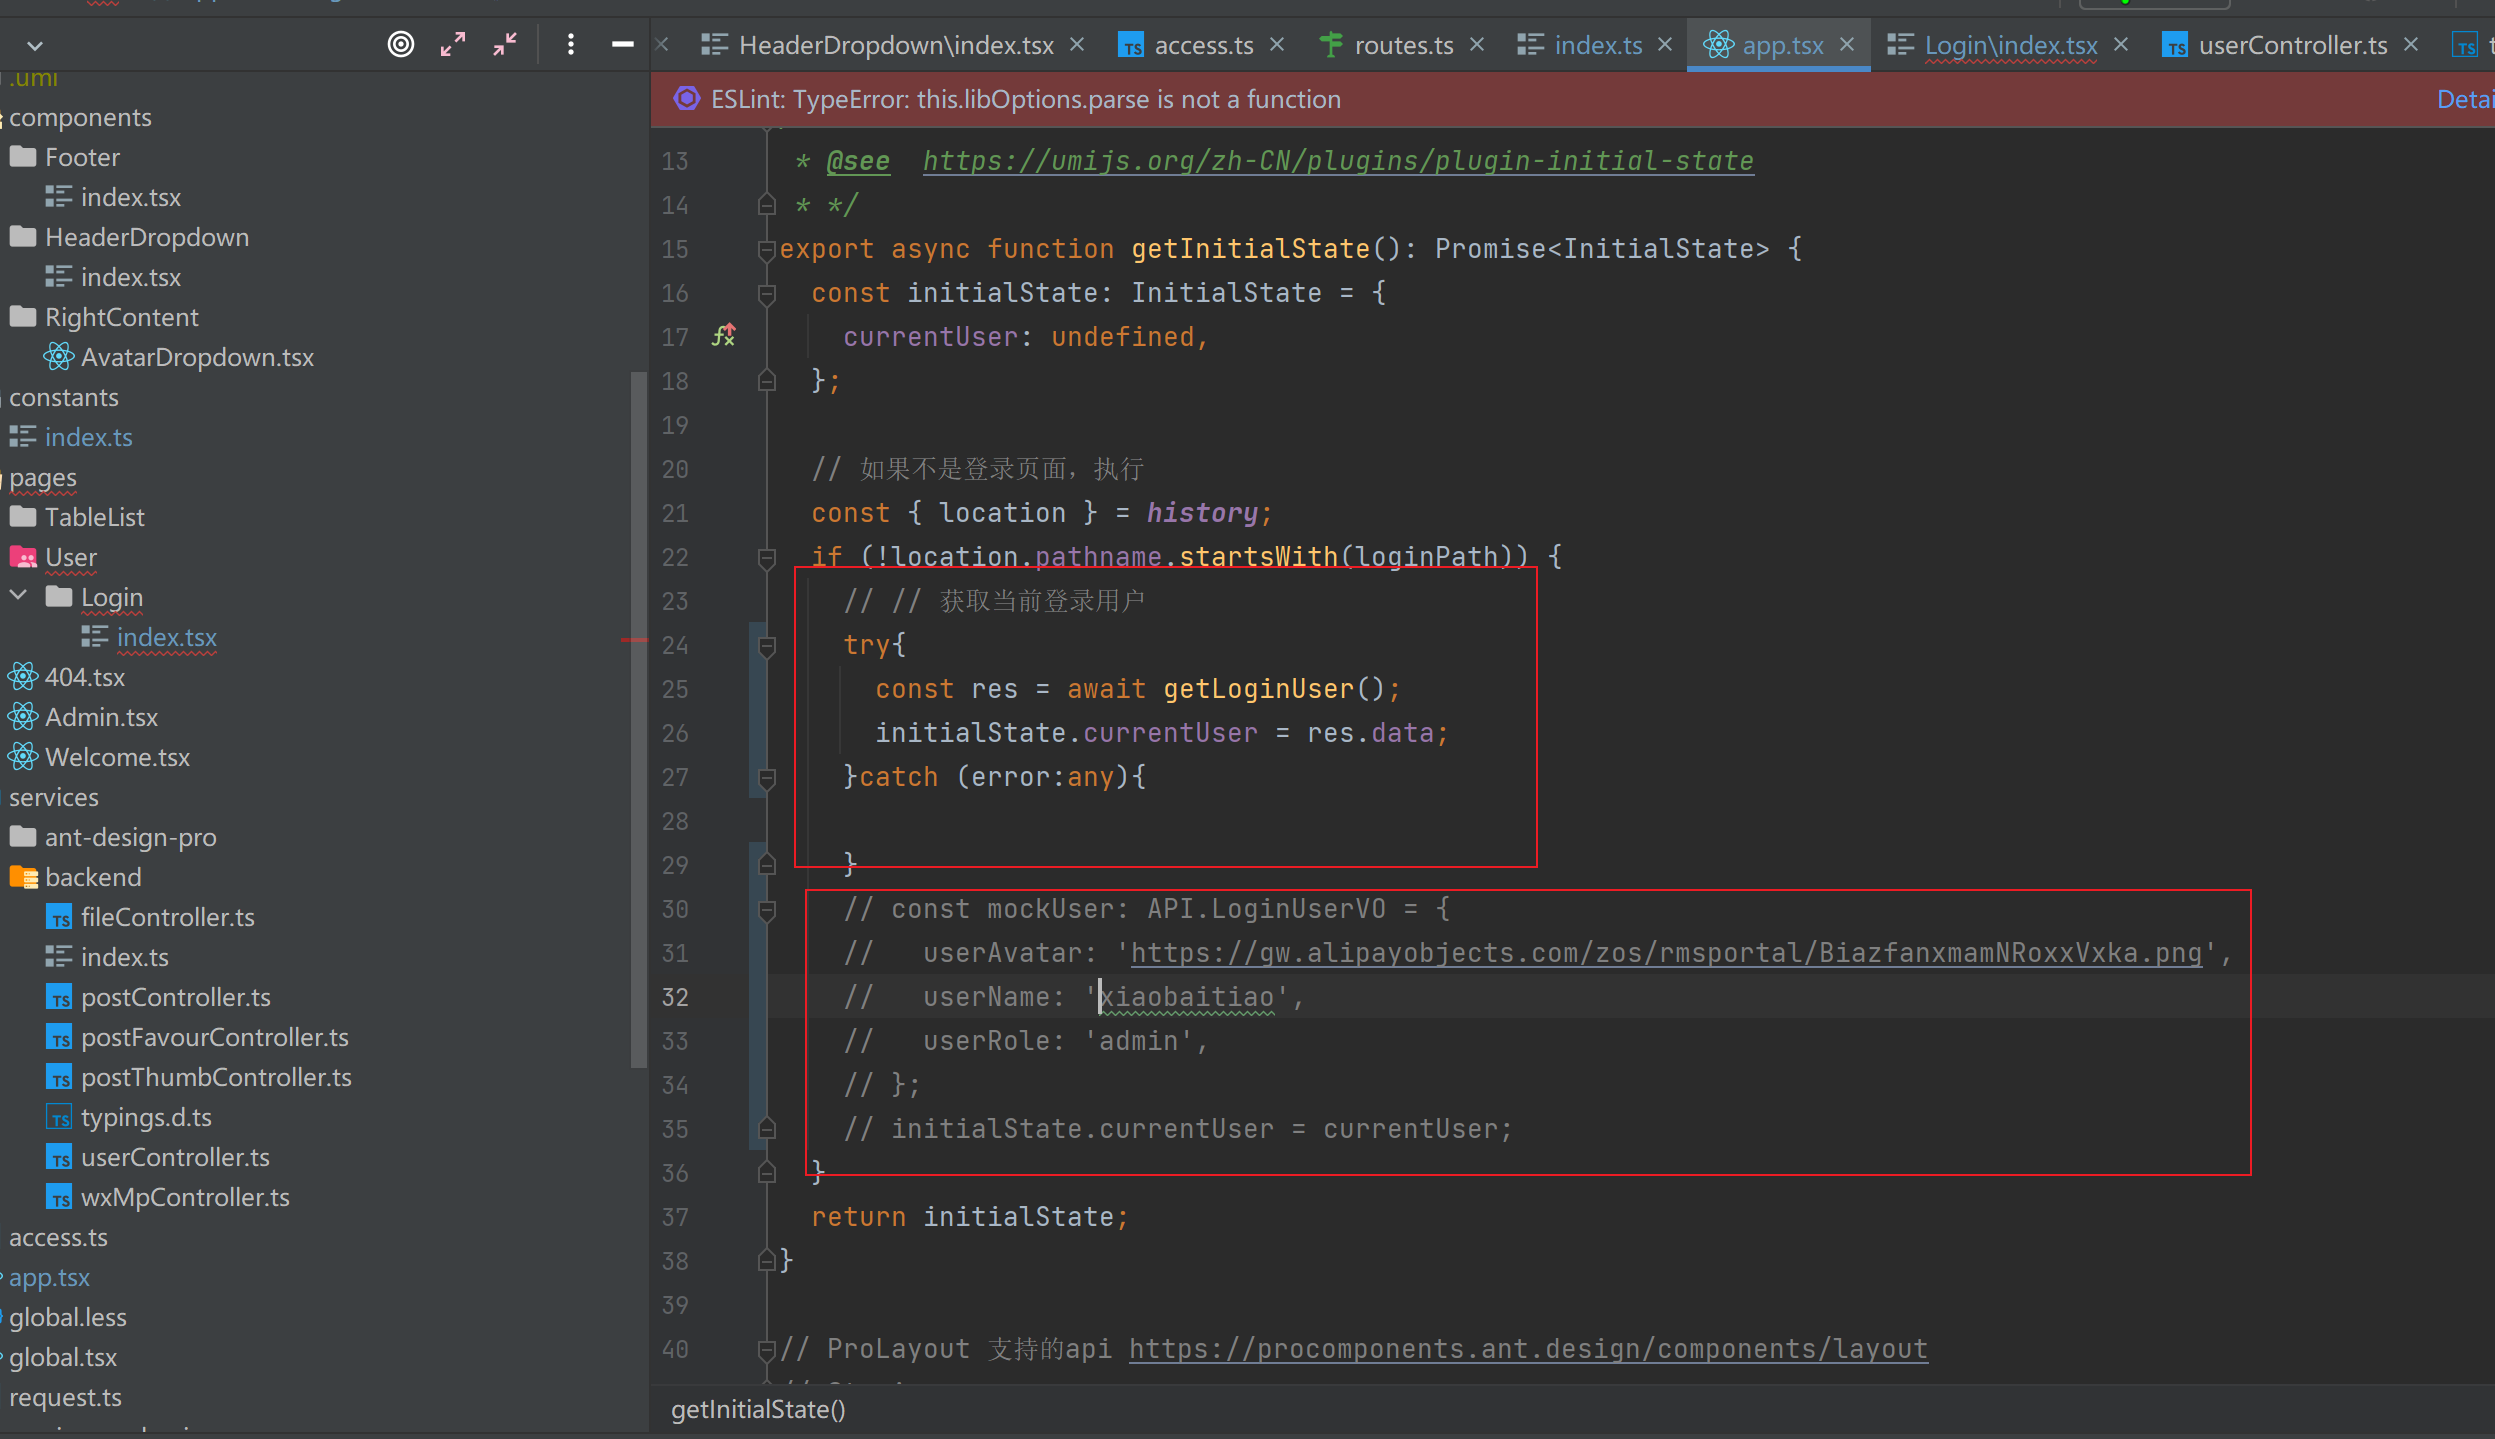
10)之前由于初始化的时候获取的还是模拟的状态,因此刷新后,用户状态会失效。将 app.tsx 的代码进行修改。
export async function getInitialState(): Promise<InitialState> {

  const initialState: InitialState = {

    currentUser: undefined,

  };

  // 如果不是登录页面,执行

  const { location } = history;

  if (!location.pathname.startsWith(loginPath)) {

    // // 获取当前登录用户

    try{

      const res = await getLoginUser();

      initialState.currentUser = res.data;

    }catch (error:any){

    }

    // const mockUser: API.LoginUserVO = {

    //   userAvatar: 'https://gw.alipayobjects.com/zos/rmsportal/BiazfanxmamNRoxxVxka.png',

    //   userName: 'xiaobaitiao',

    //   userRole: 'admin',

    // };

    // initialState.currentUser = currentUser;

  }

  return initialState;

}
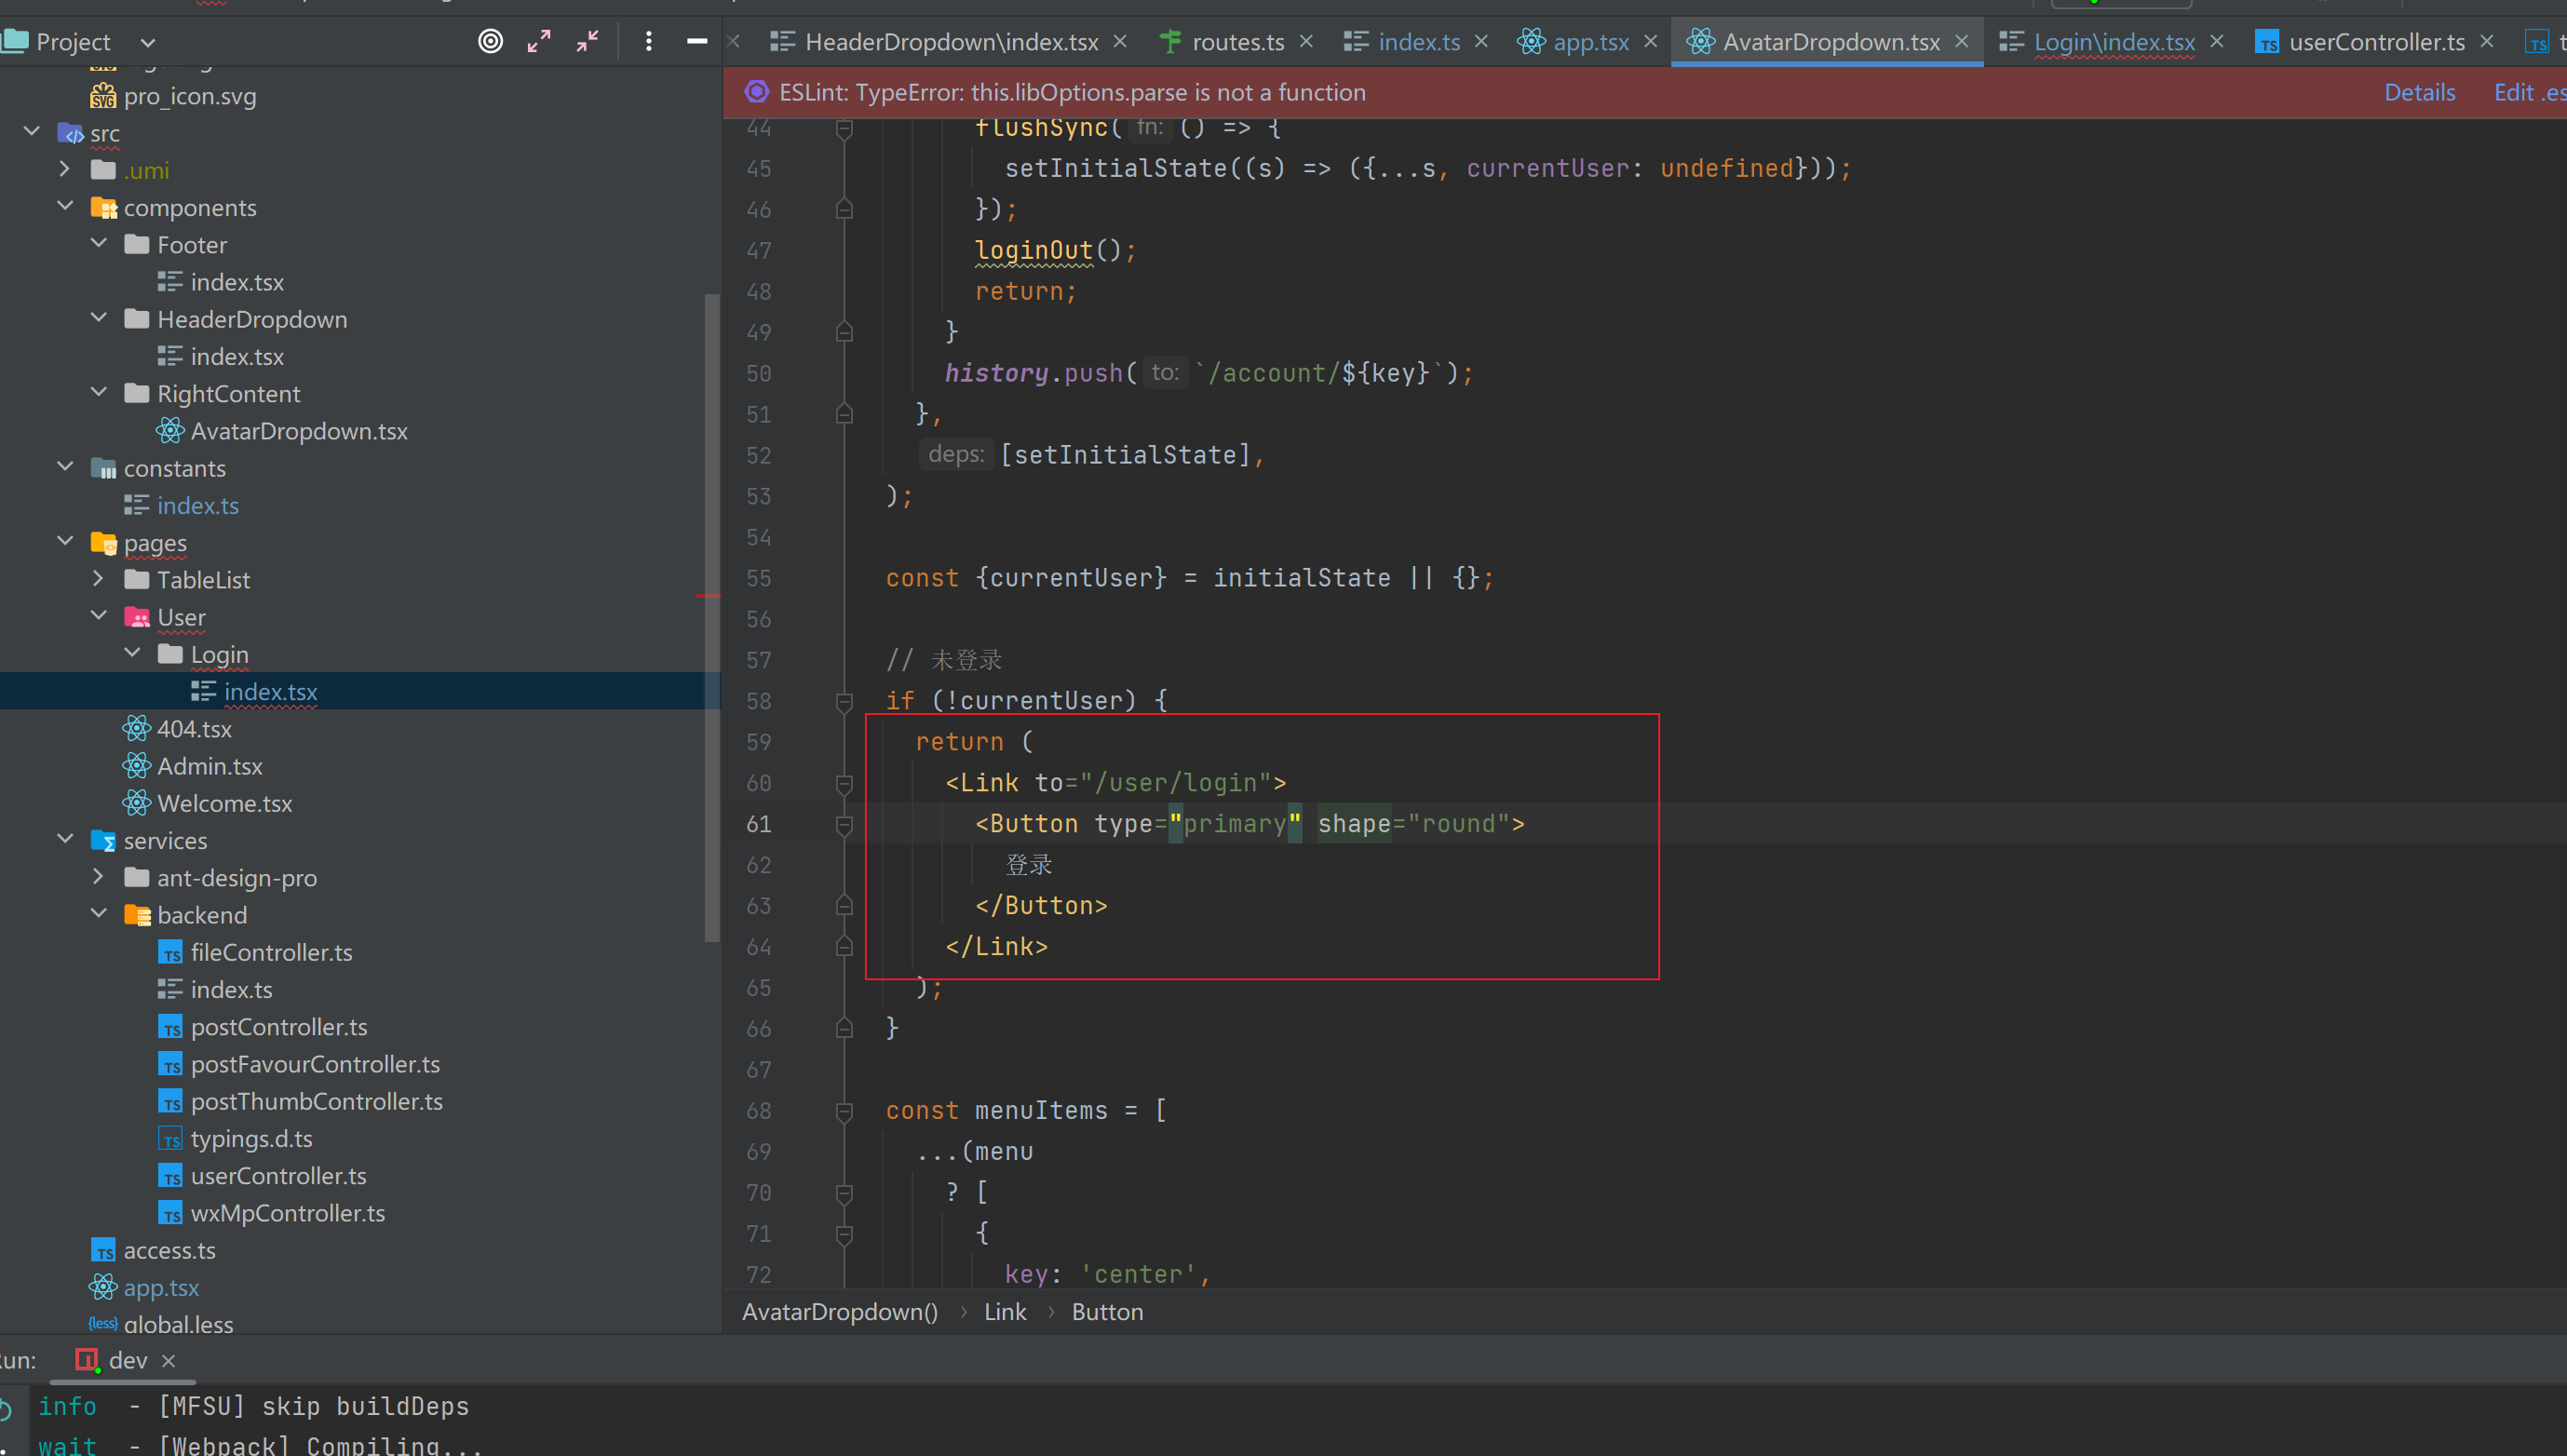
11)修改官方的退出登录接口,修改为我们自己后端的退出登录方法。
12)给登录按钮添加跳转链接
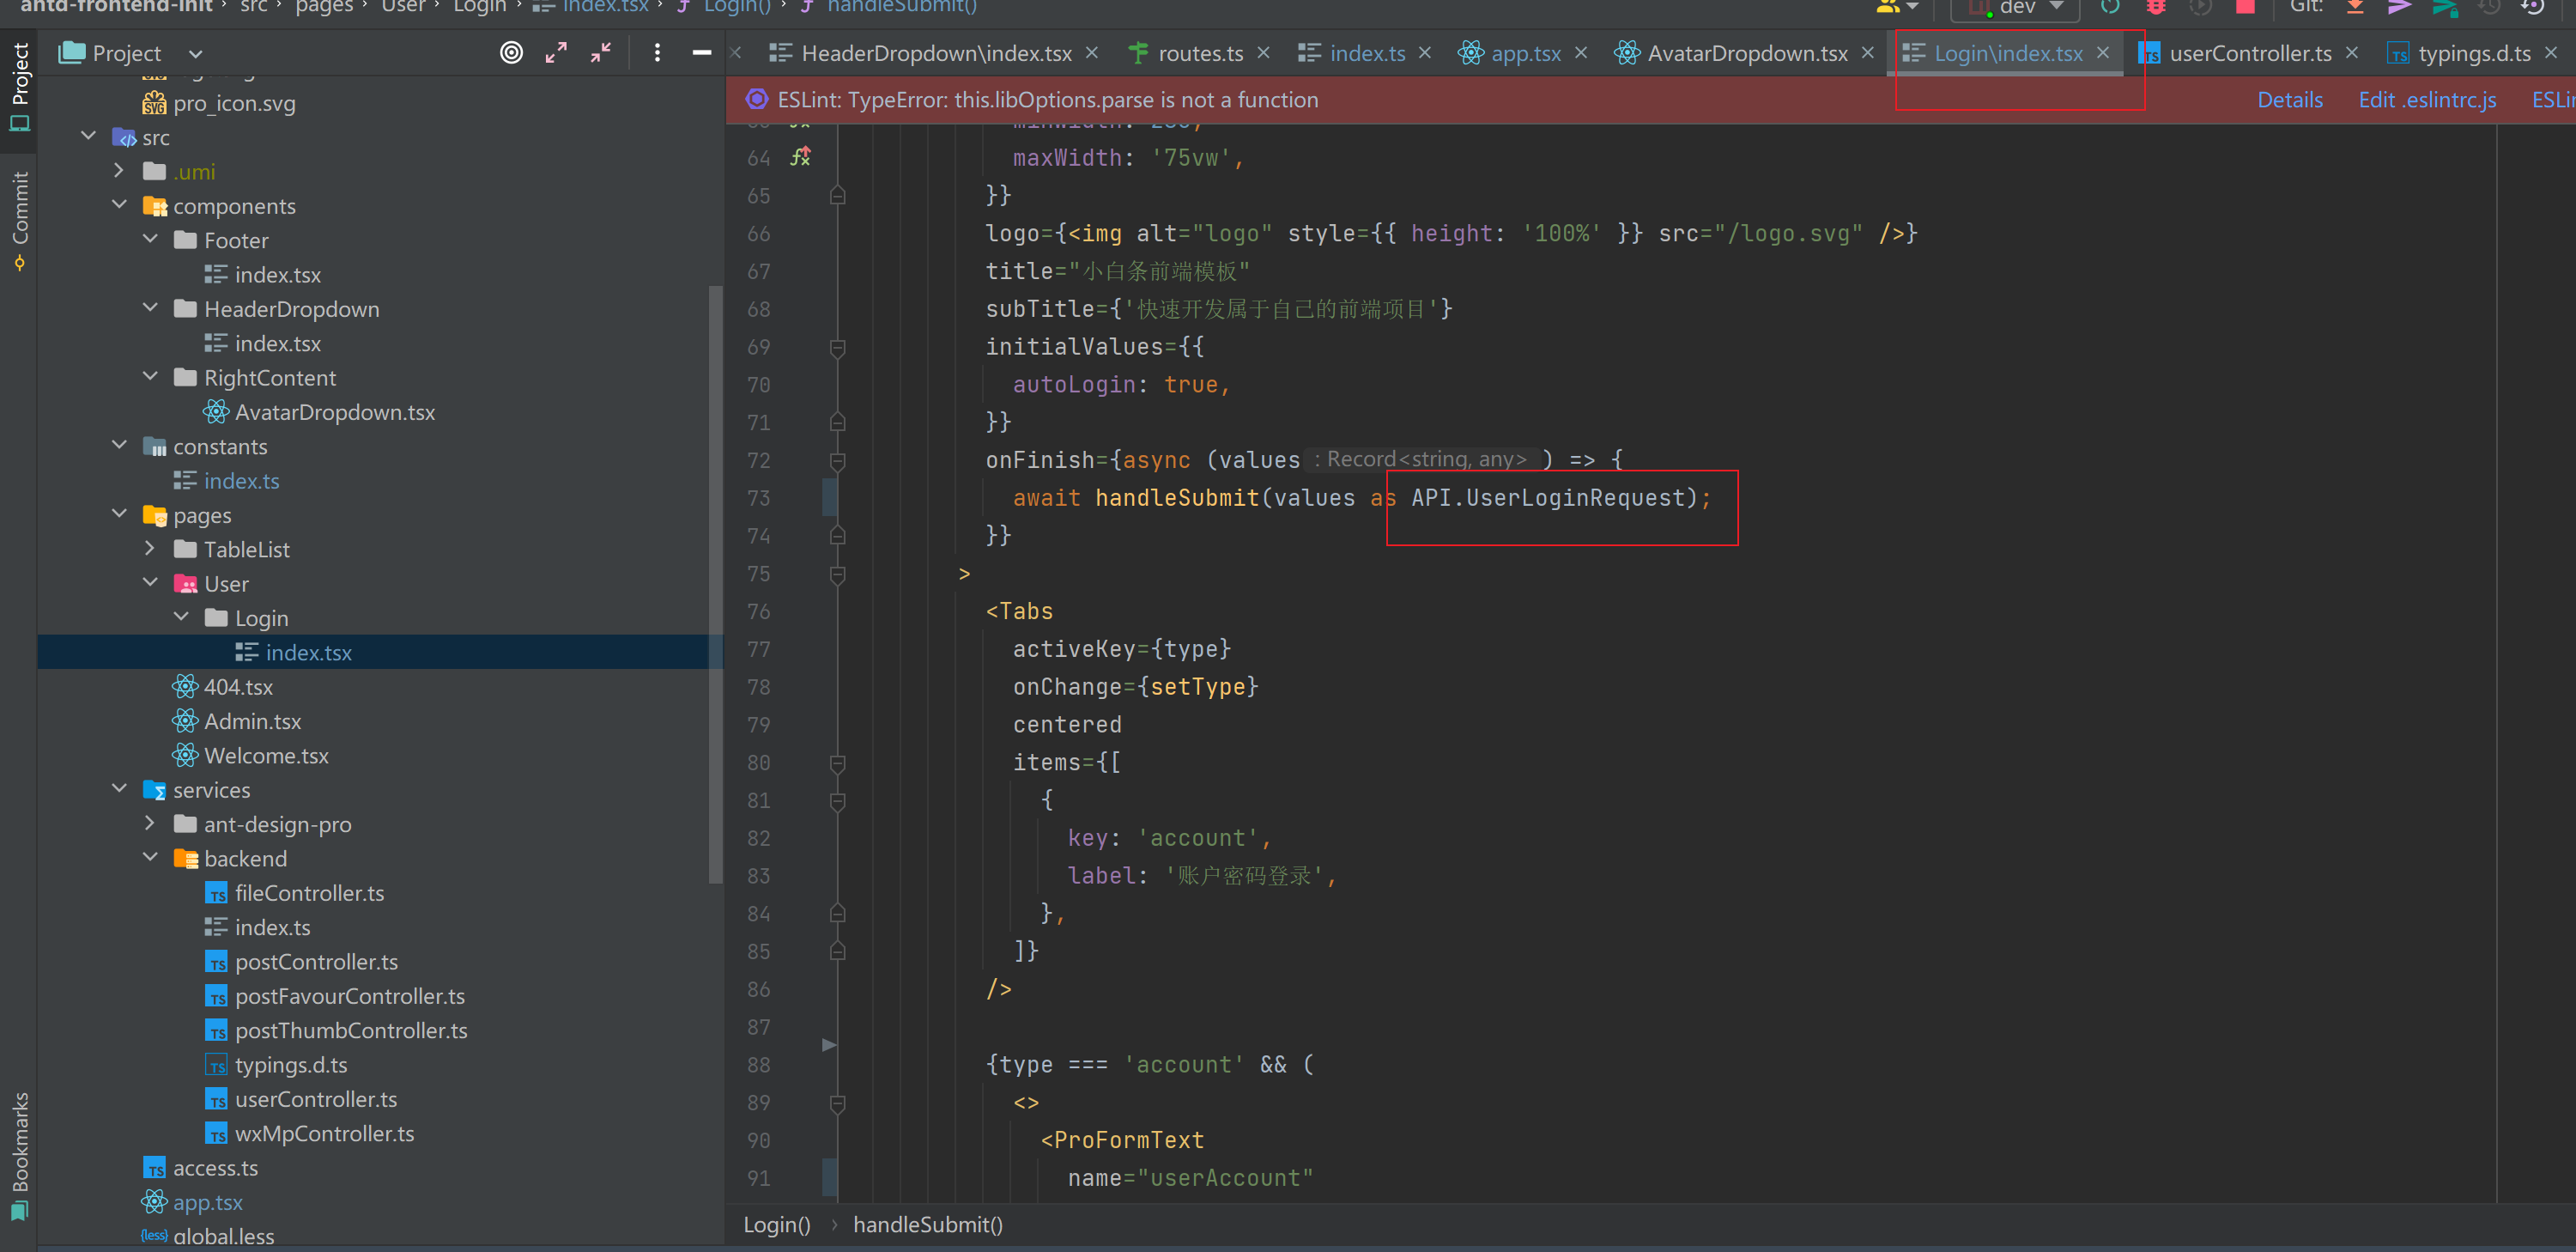
13)根据后端的接口返回相对应的错误信息,再次修改 index.tsx 的 handleSubmit 方法
const handleSubmit = async (values: API.UserLoginRequest) => {

  try {

    // 登录

    const res = await userLogin({

      ...values,

    });

    const defaultLoginSuccessMessage = '登录成功!';

    message.success(defaultLoginSuccessMessage);

    // 保存已登录用户信息

    setInitialState({

      ...initialState,

      currentUser: res.data,

    });

    const urlParams = new URL(window.location.href).searchParams;

    history.push(urlParams.get('redirect') || '/');

    return;

    // 如果失败去设置用户错误信息

  } catch (error: any) {

    const defaultLoginFailureMessage = `登录失败,请重试!${error.message}`;

    message.error(defaultLoginFailureMessage);

  }

};
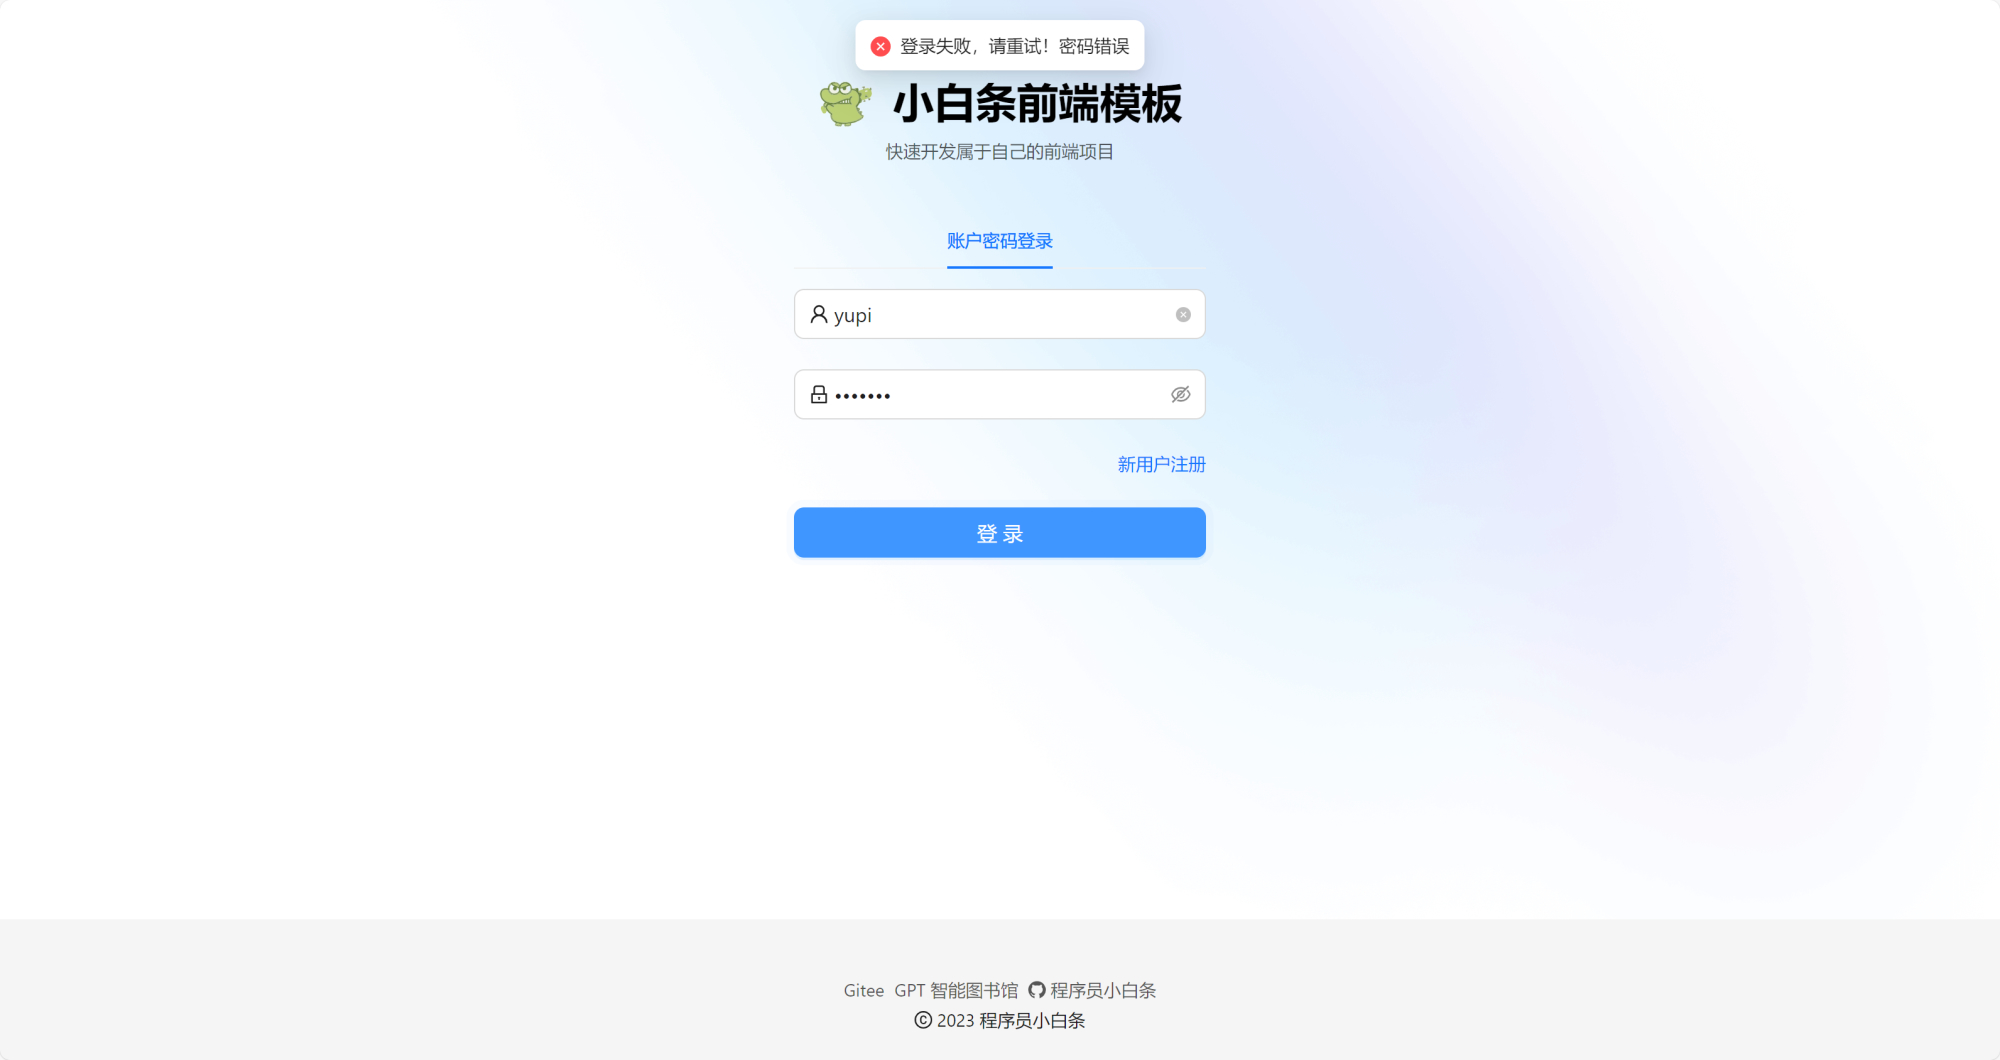
错误提示效果图:
14)修改 ts 类型
用户管理
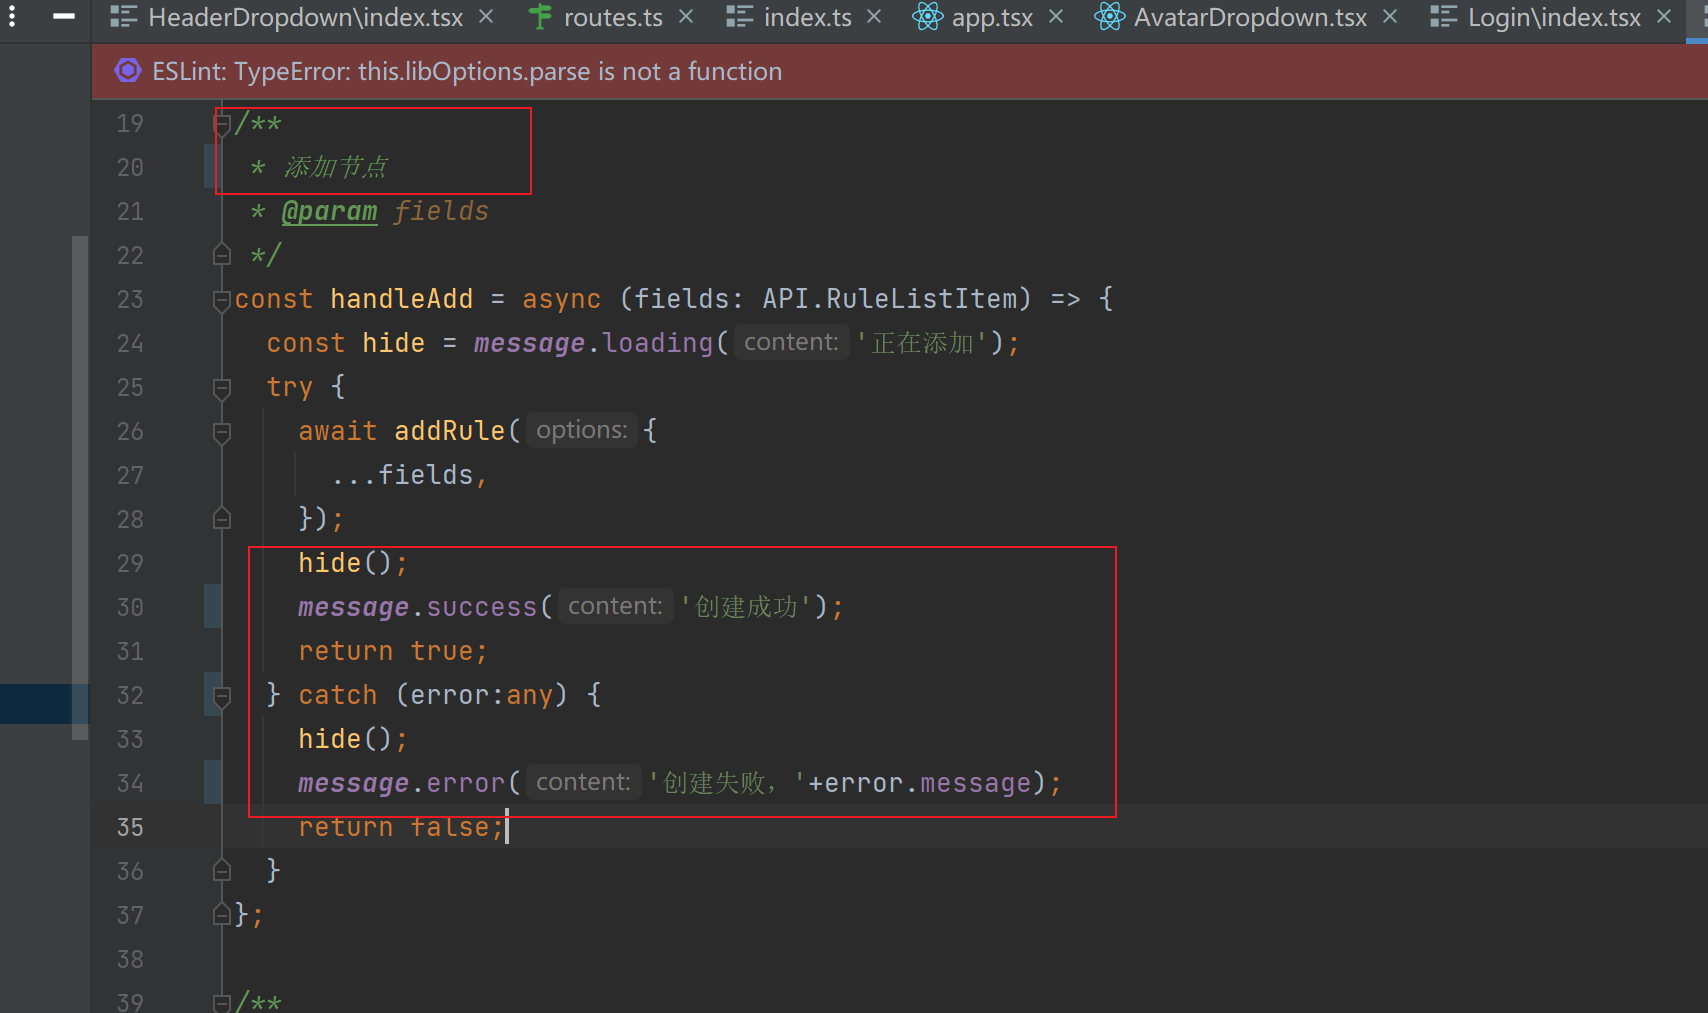
1)调整添加节点的代码
/**

 * 添加节点

 * @param fields

 */

const handleAdd = async (fields: API.RuleListItem) => {

  const hide = message.loading('正在添加');

  try {

    await addRule({

      ...fields,

    });

    hide();

    message.success('创建成功');

    return true;

  } catch (error:any) {

    hide();

    message.error('创建失败,'+error.message);

    return false;

  }

};
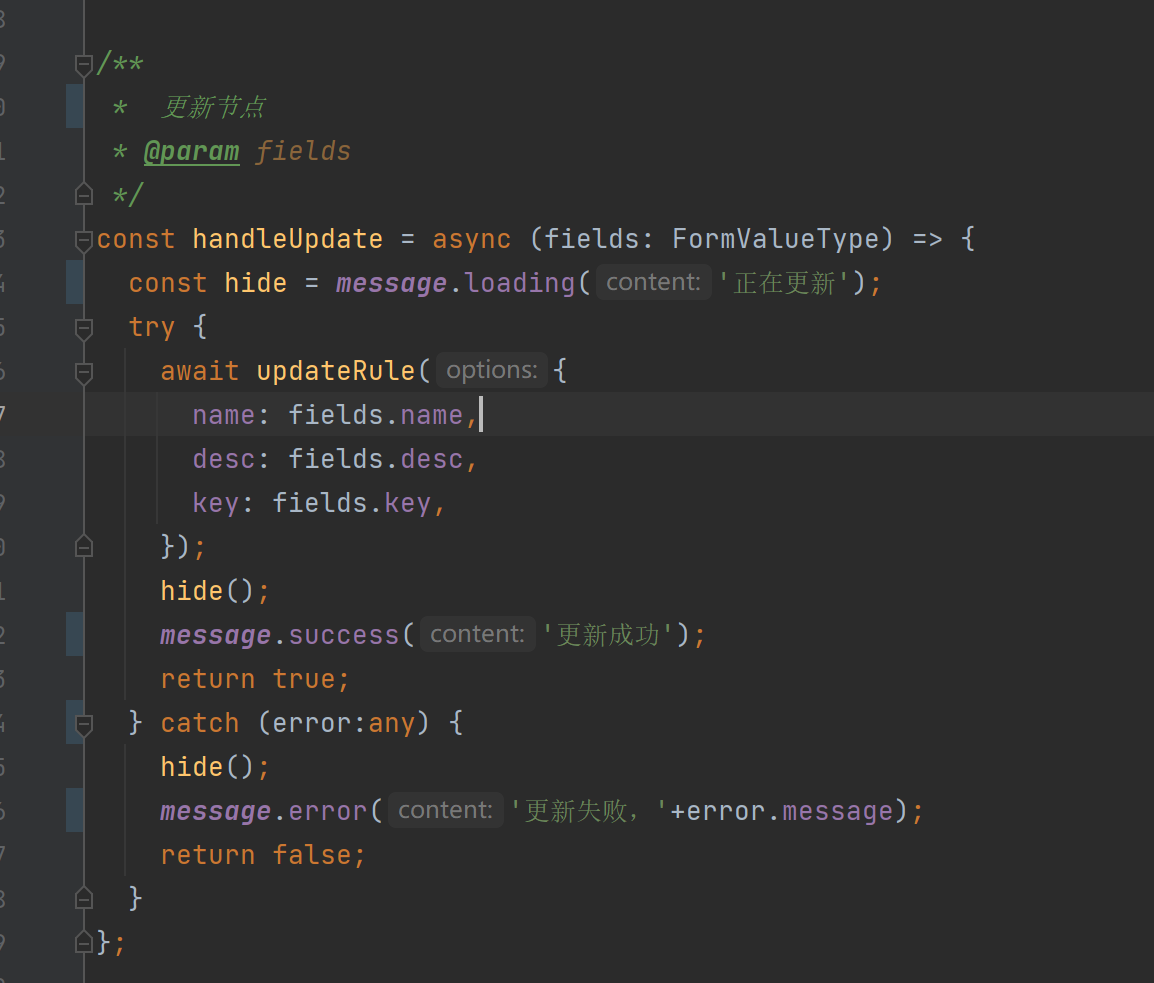
2)调整更新节点的方法
/**

 *  更新节点

 * @param fields

 */

const handleUpdate = async (fields: FormValueType) => {

  const hide = message.loading('正在更新');

  try {

    await updateRule({

      name: fields.name,

      desc: fields.desc,

      key: fields.key,

    });

    hide();

    message.success('更新成功');

    return true;

  } catch (error:any) {

    hide();

    message.error('更新失败,'+error.message);

    return false;

  }

};
3)调整删除节点的代码
/**

 * 删除节点

 * @param selectedRows

 */

const handleRemove = async (selectedRows: API.RuleListItem[]) => {

  const hide = message.loading('正在删除');

  if (!selectedRows) return true;

  try {

    await removeRule({

      key: selectedRows.map((row) => row.key),

    });

    hide();

    message.success('删除成功');

    return true;

  } catch (error:any) {

    hide();

    message.error('删除失败,'+error.message);

    return false;

  }

};
4)移除获取详情和批量删除的代码
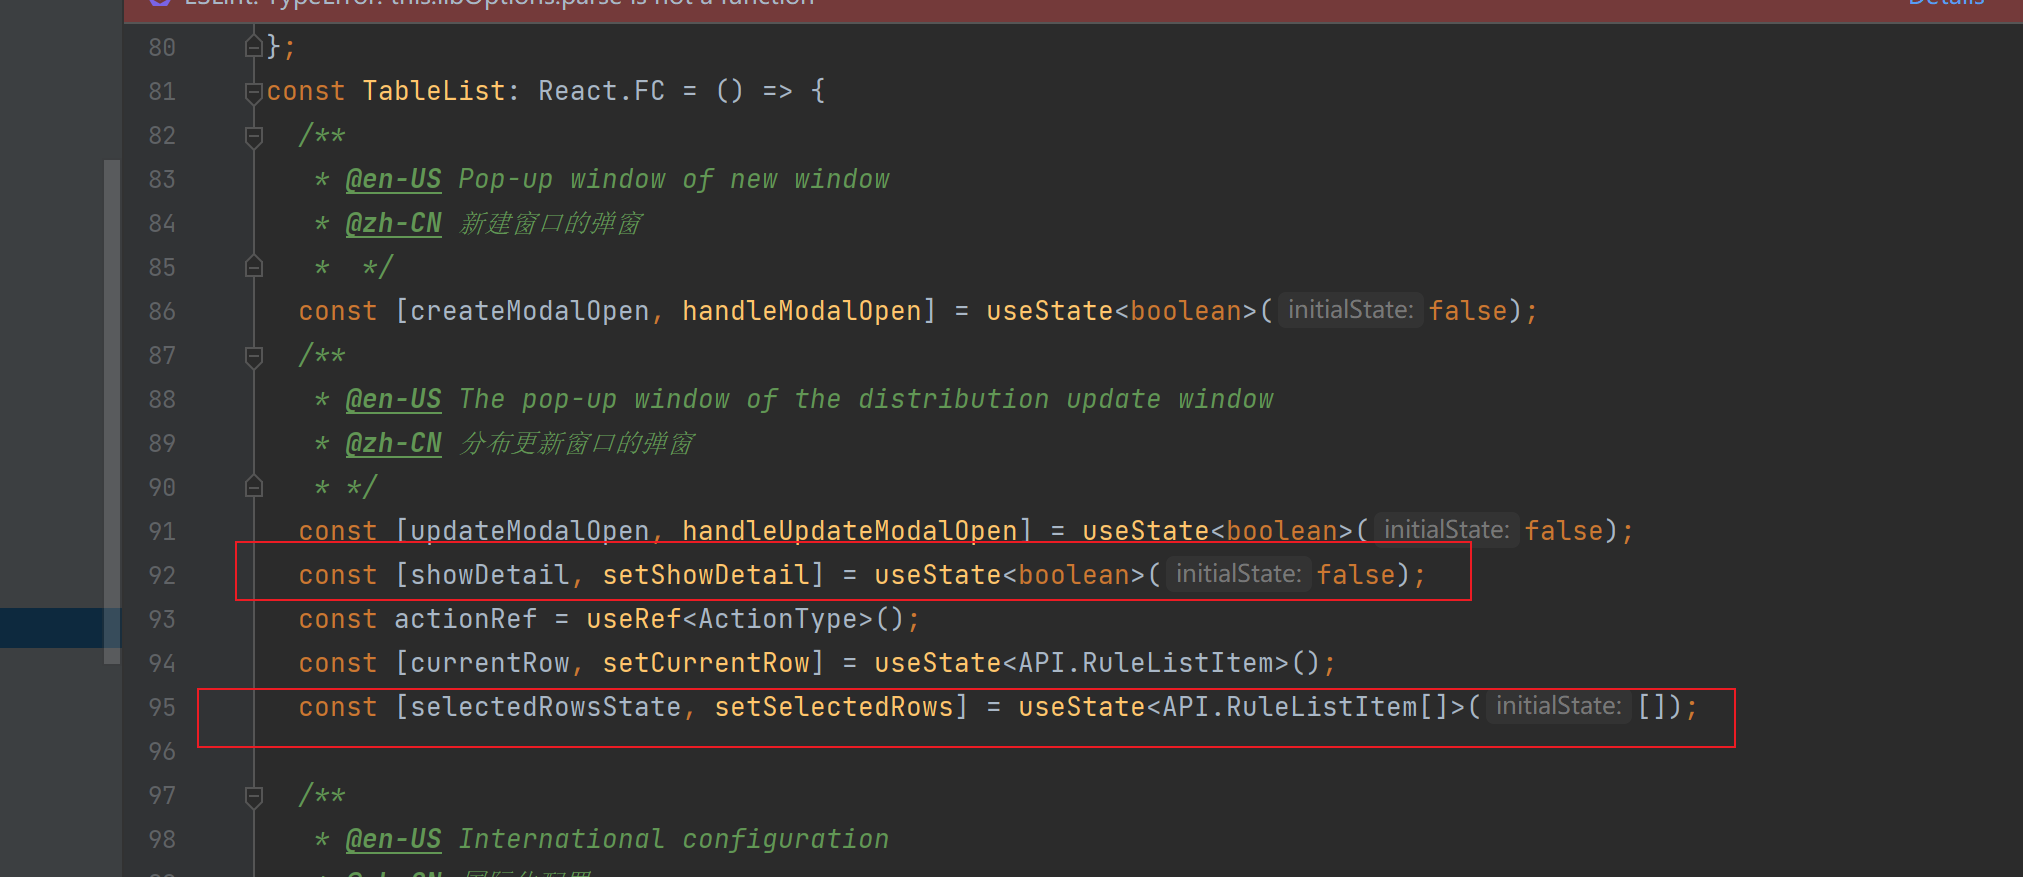
5)删除其余批量选择和显示详情的代码
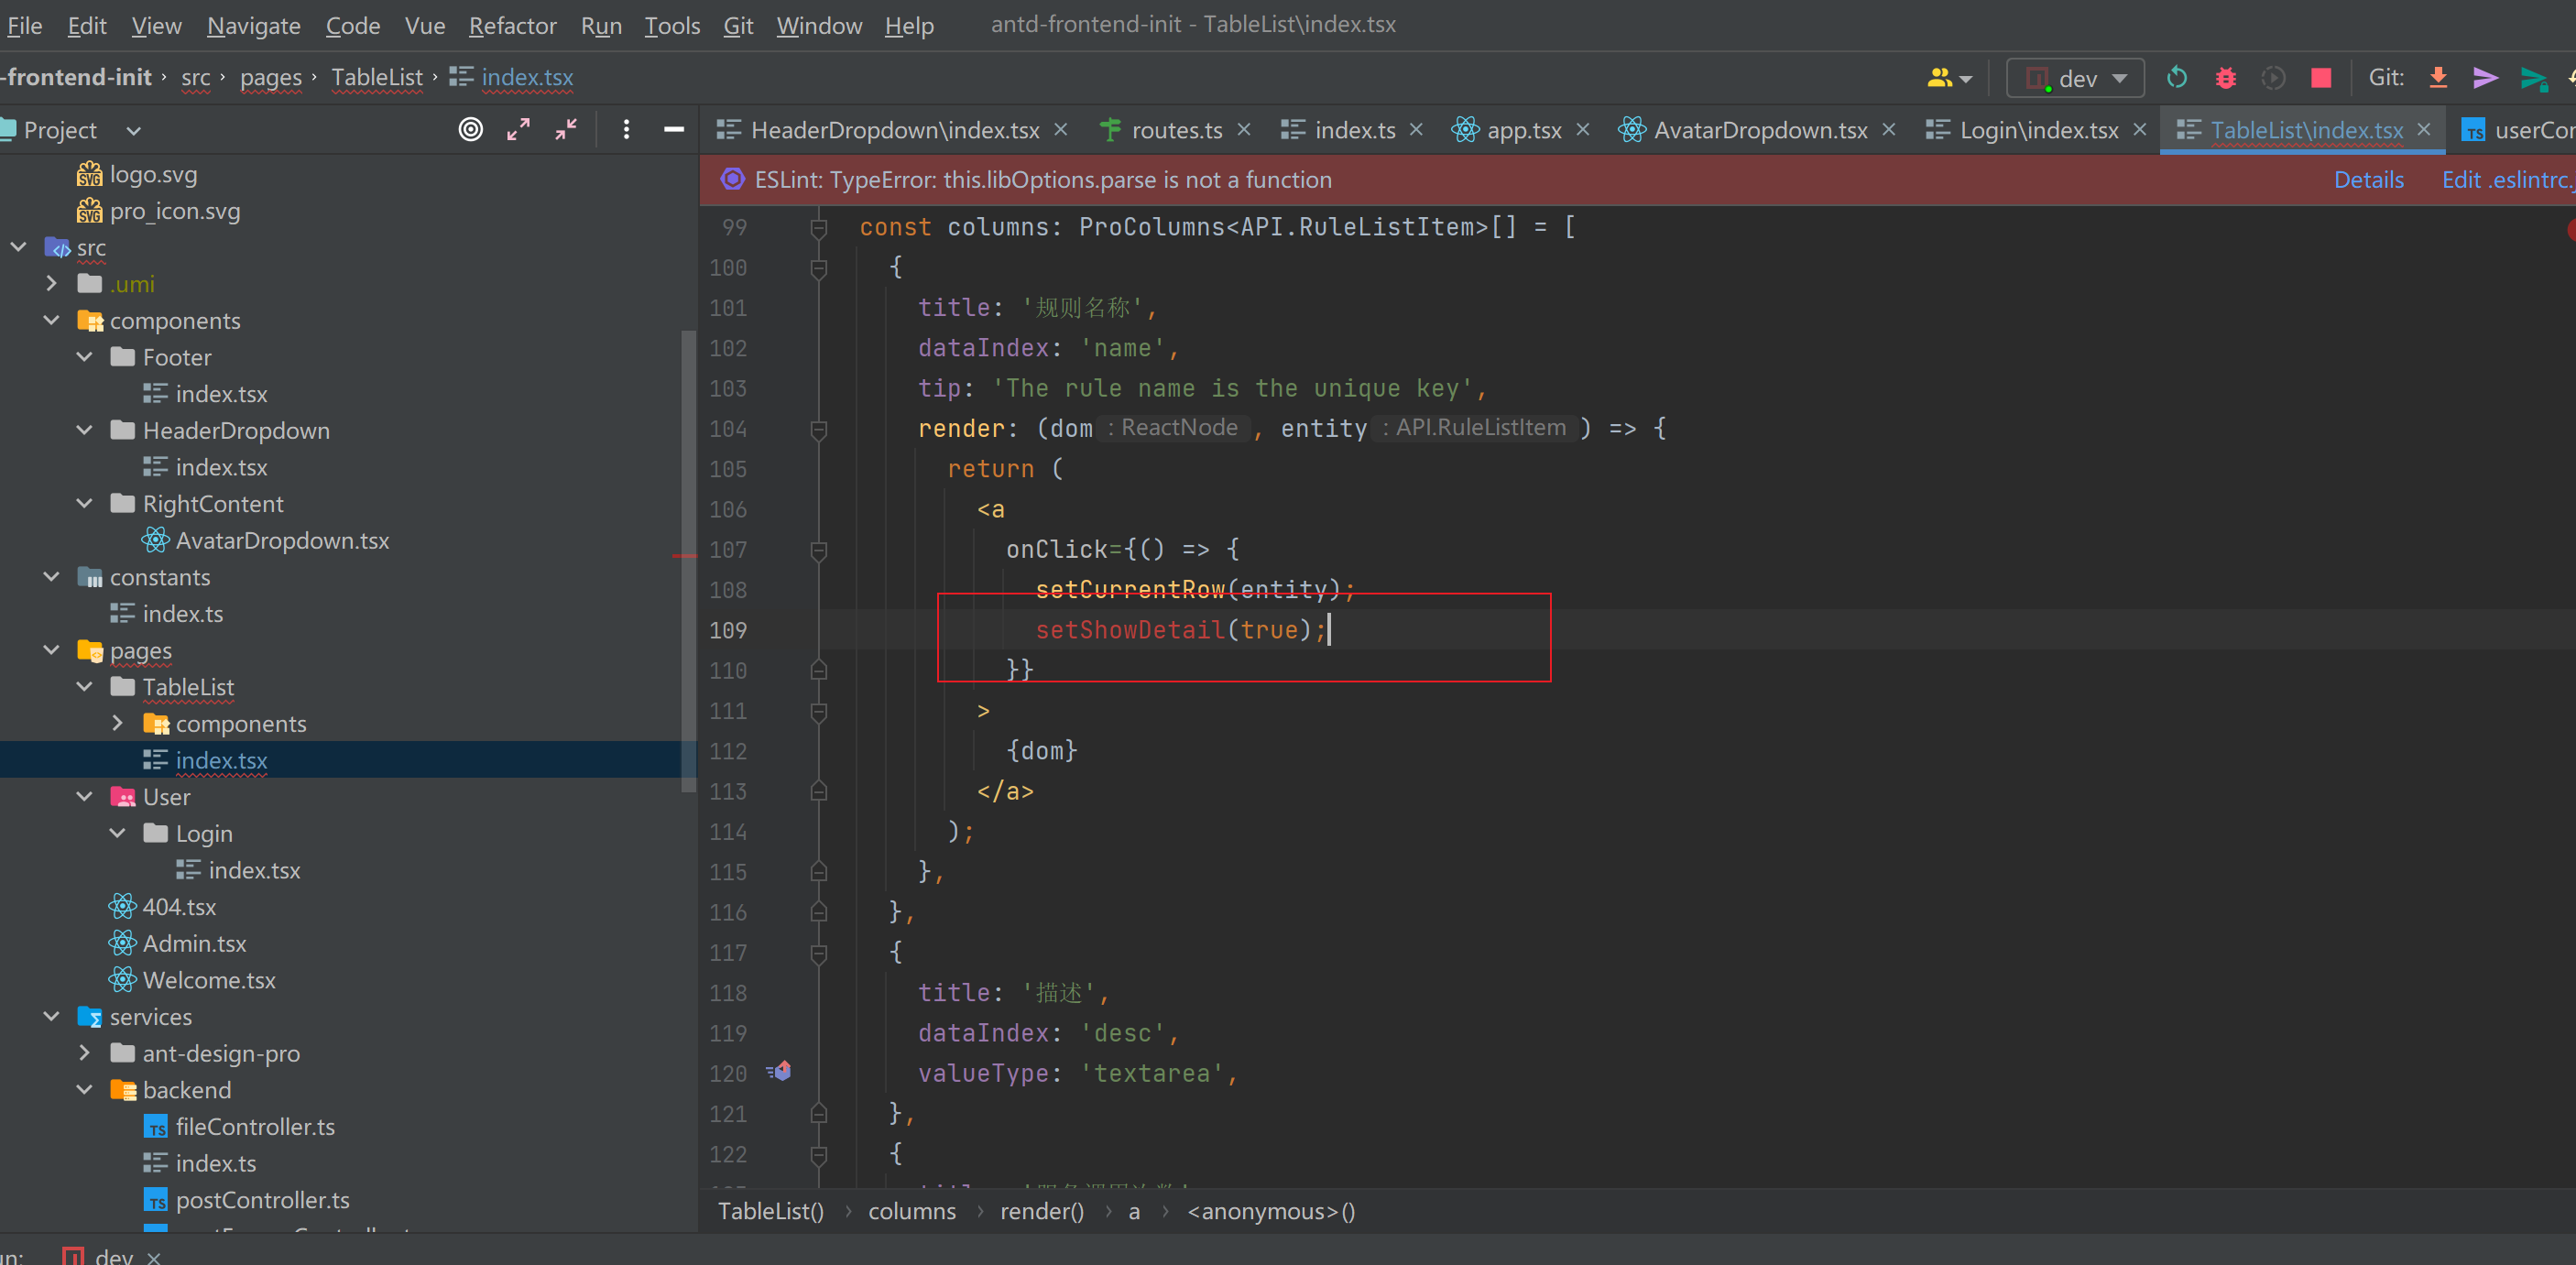
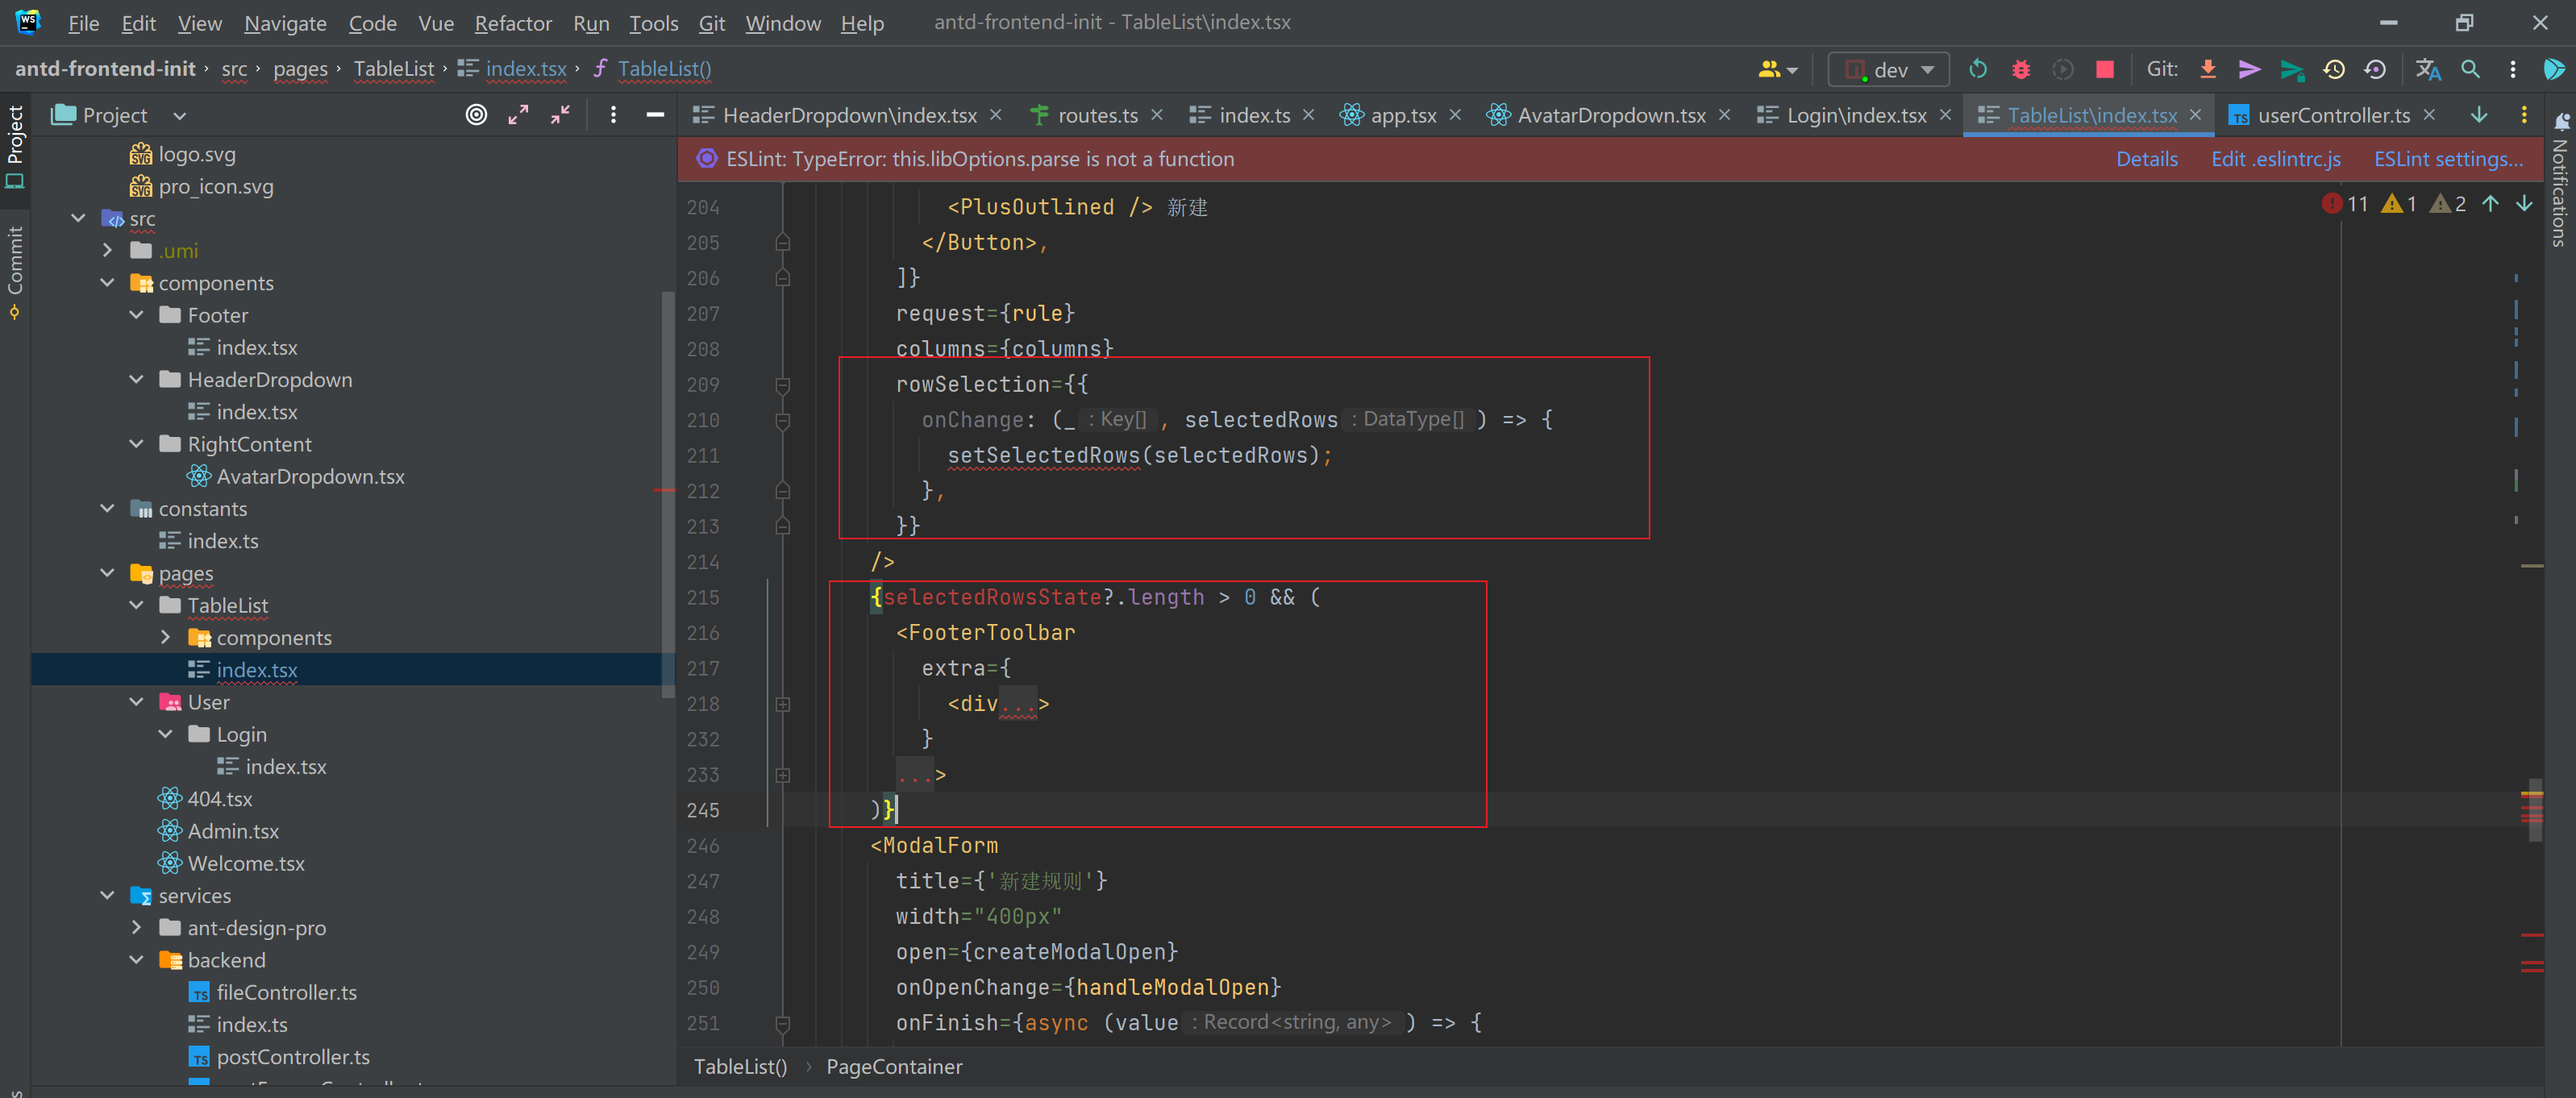
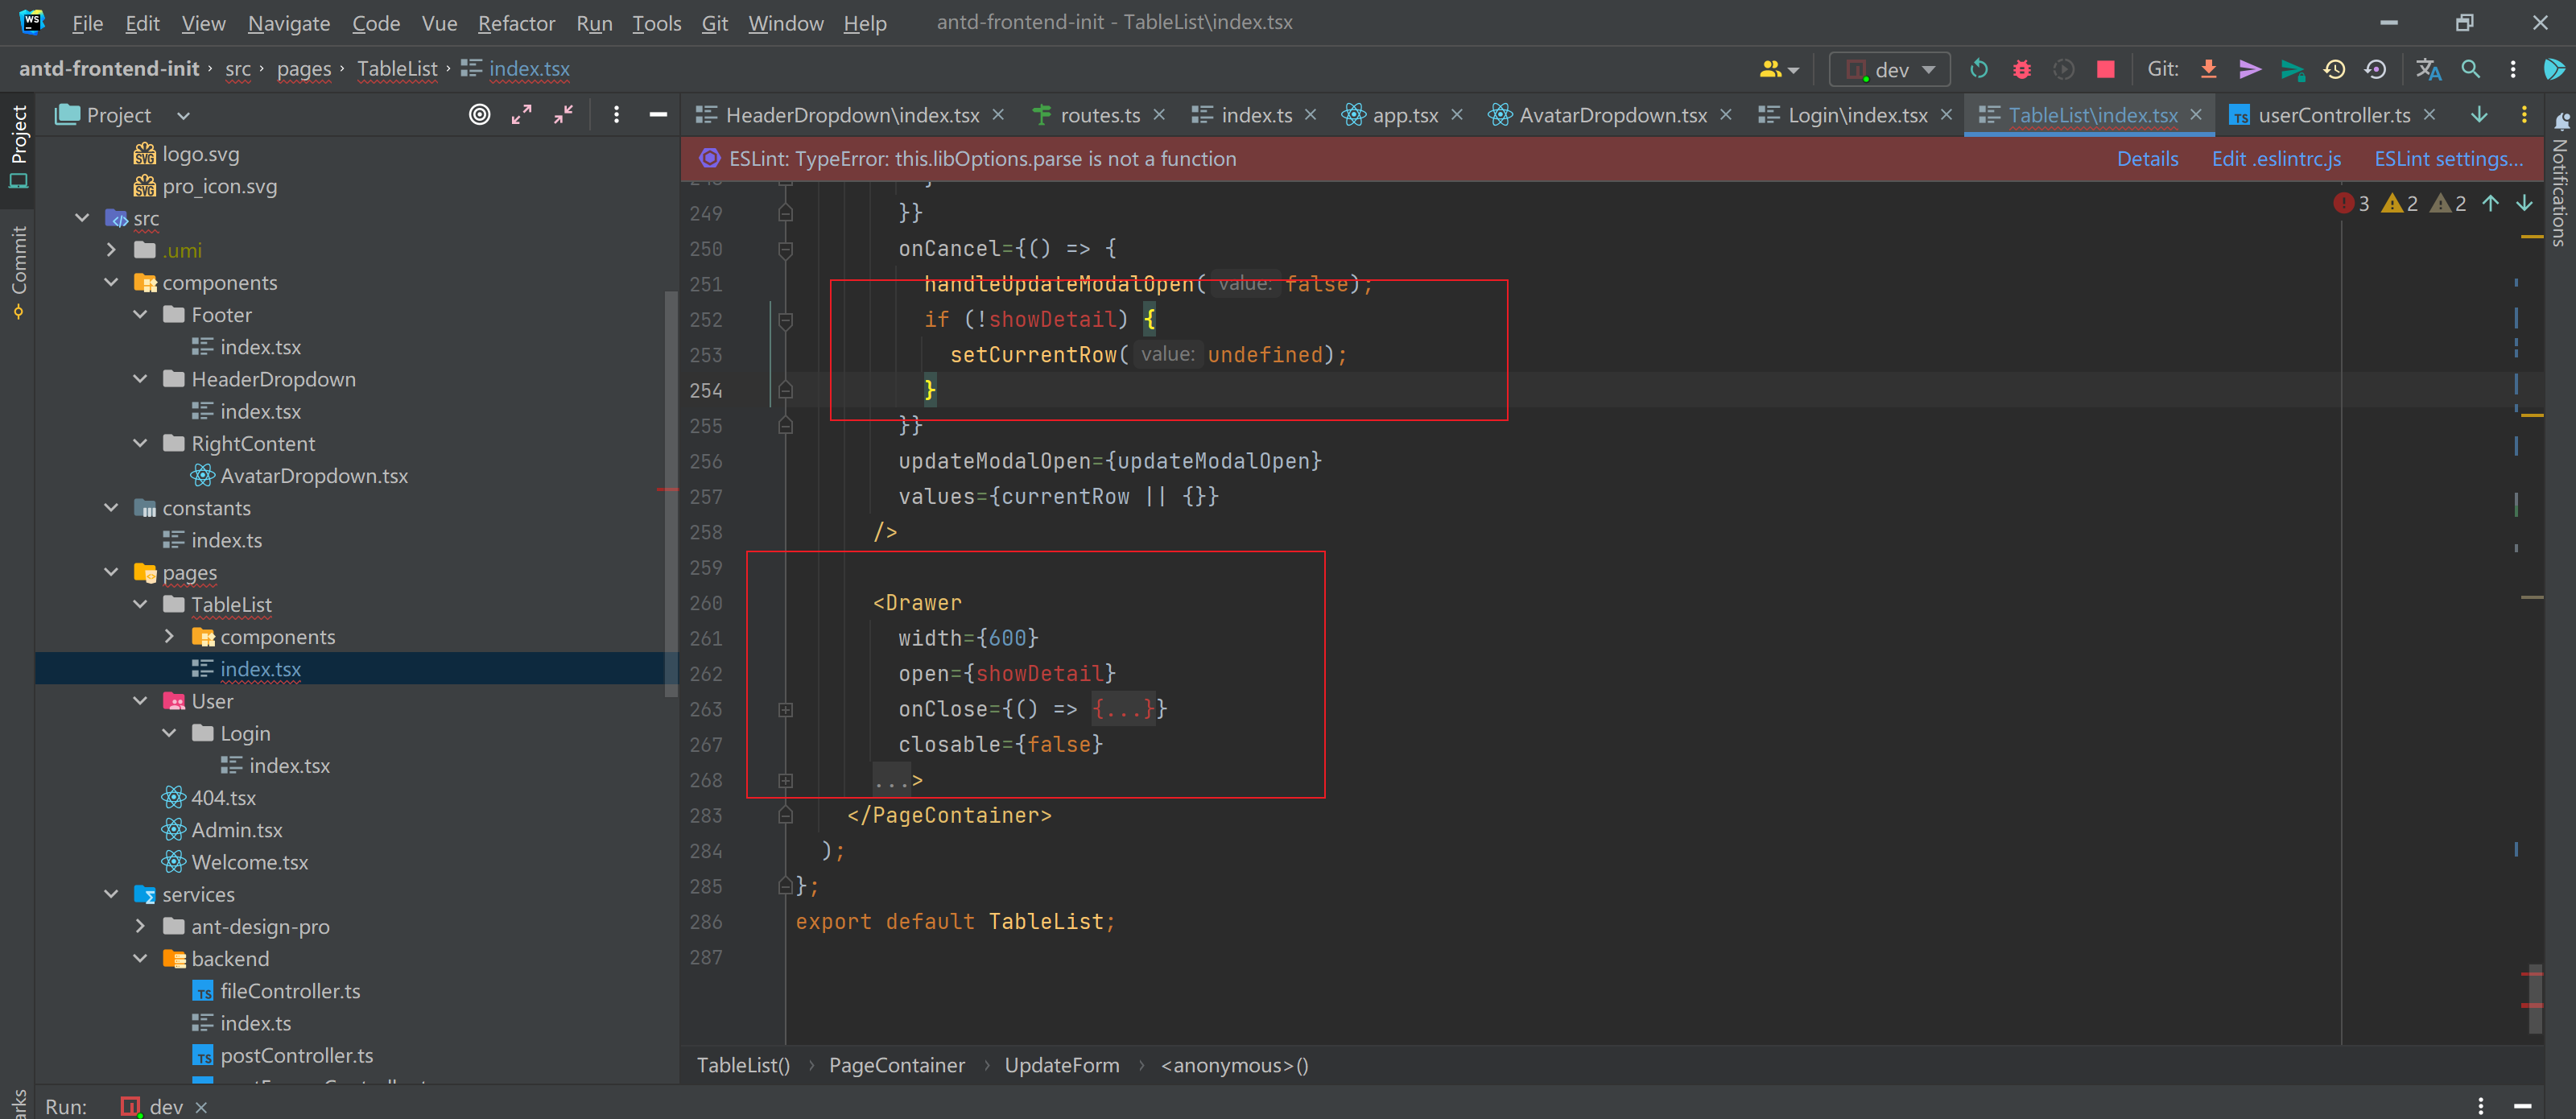
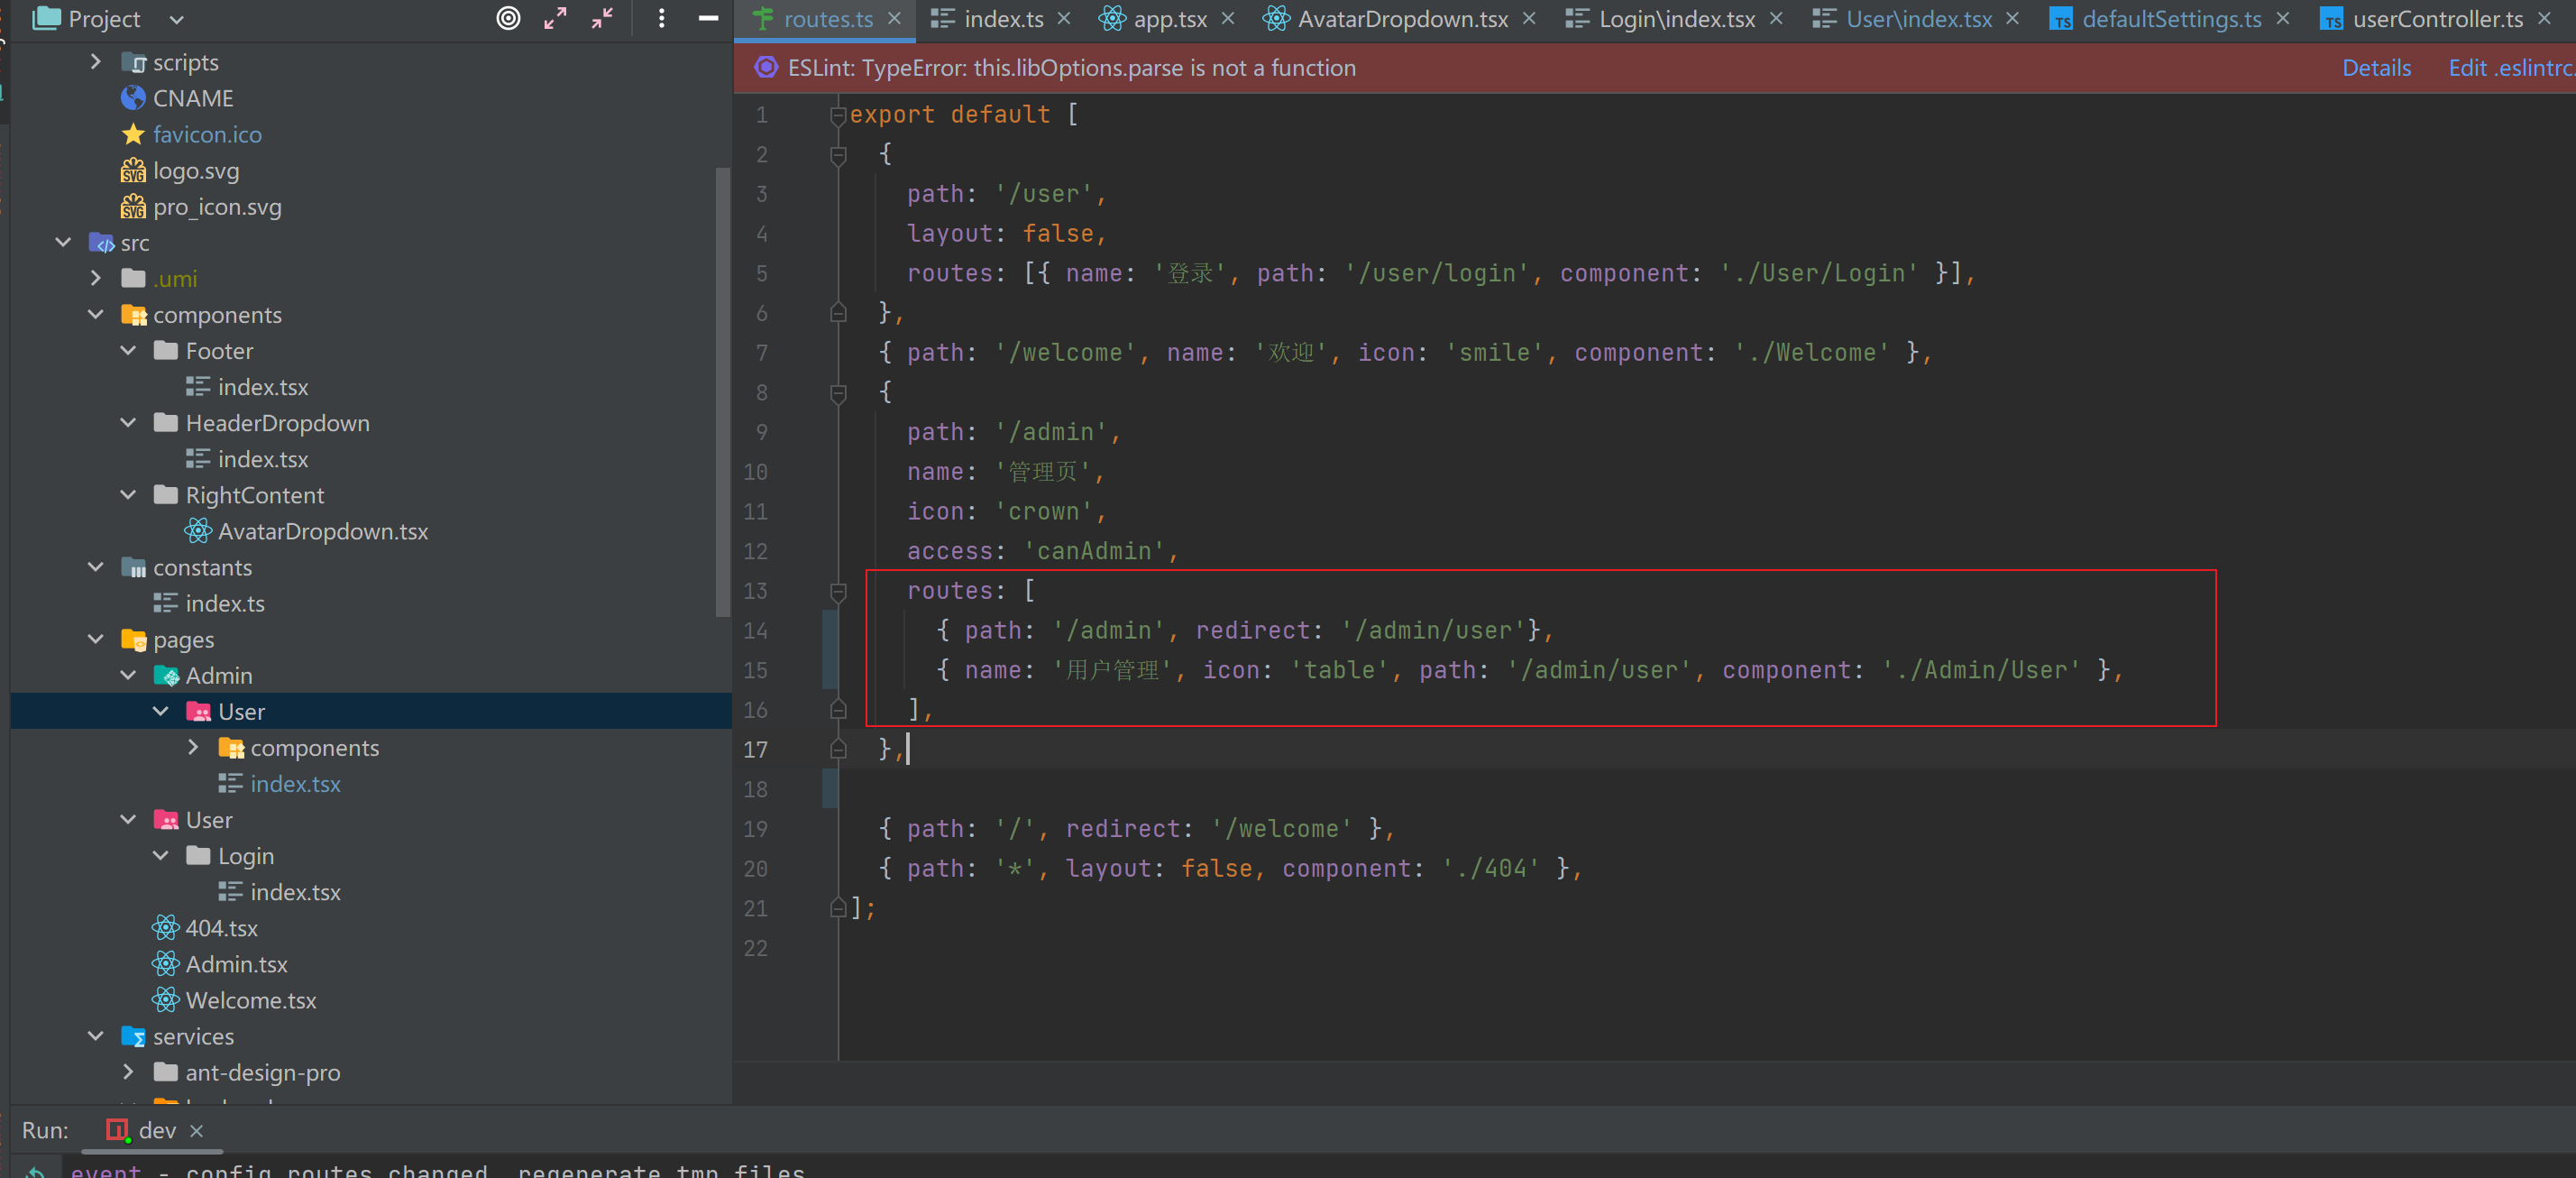
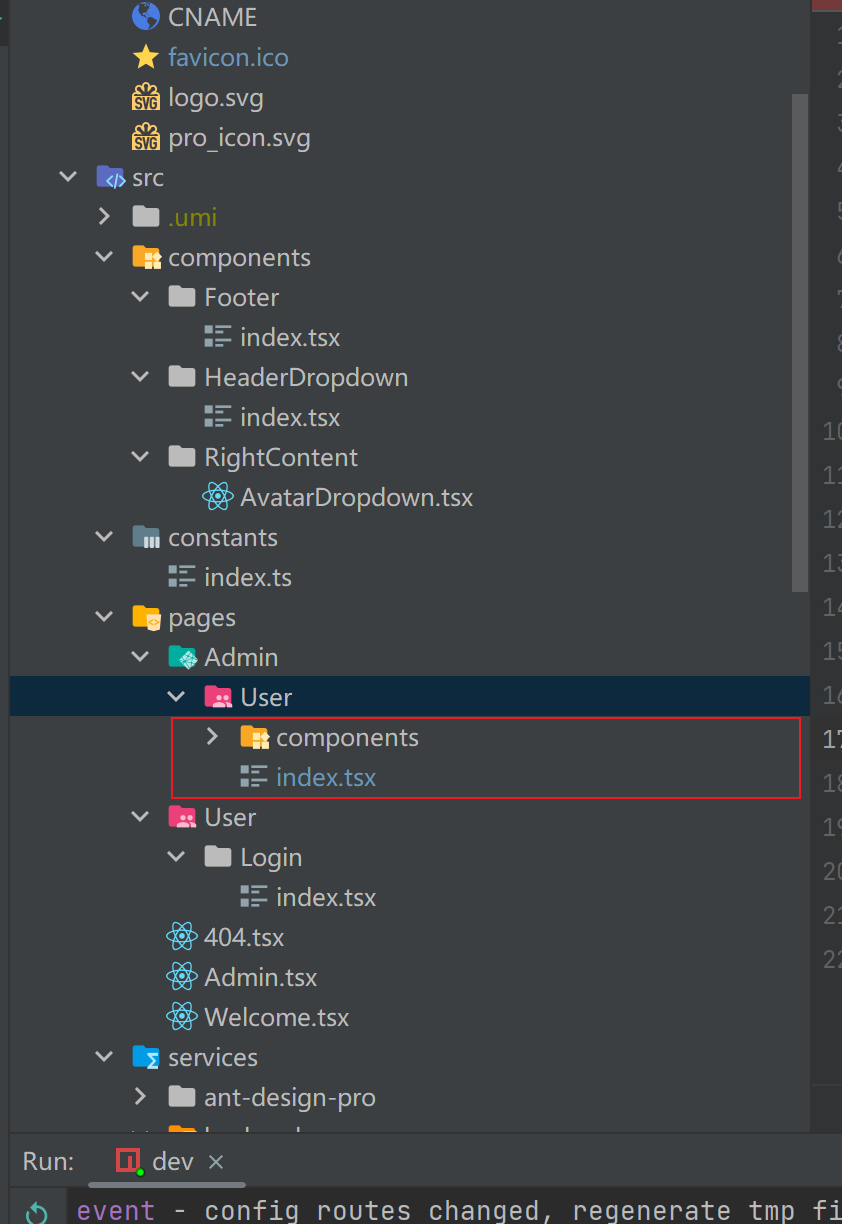
6)修改路由配置,将用户管理移动到管理员的二级路由,将原有的 TableList 文件夹下的 index.tsx 和 components 组件一并移动到 Admin/User 文件夹下。
export default [

  {

    path: '/user',

    layout: false,

    routes: [{ name: '登录', path: '/user/login', component: './User/Login' }],

  },

  { path: '/welcome', name: '欢迎', icon: 'smile', component: './Welcome' },

  {

    path: '/admin',

    name: '管理页',

    icon: 'crown',

    access: 'canAdmin',

    routes: [

      { path: '/admin', redirect: '/admin/user'},

      { name: '用户管理', icon: 'table', path: '/admin/user', component: './Admin/User' },

    ],

  },

  { path: '/', redirect: '/welcome' },

  { path: '*', layout: false, component: './404' },

];
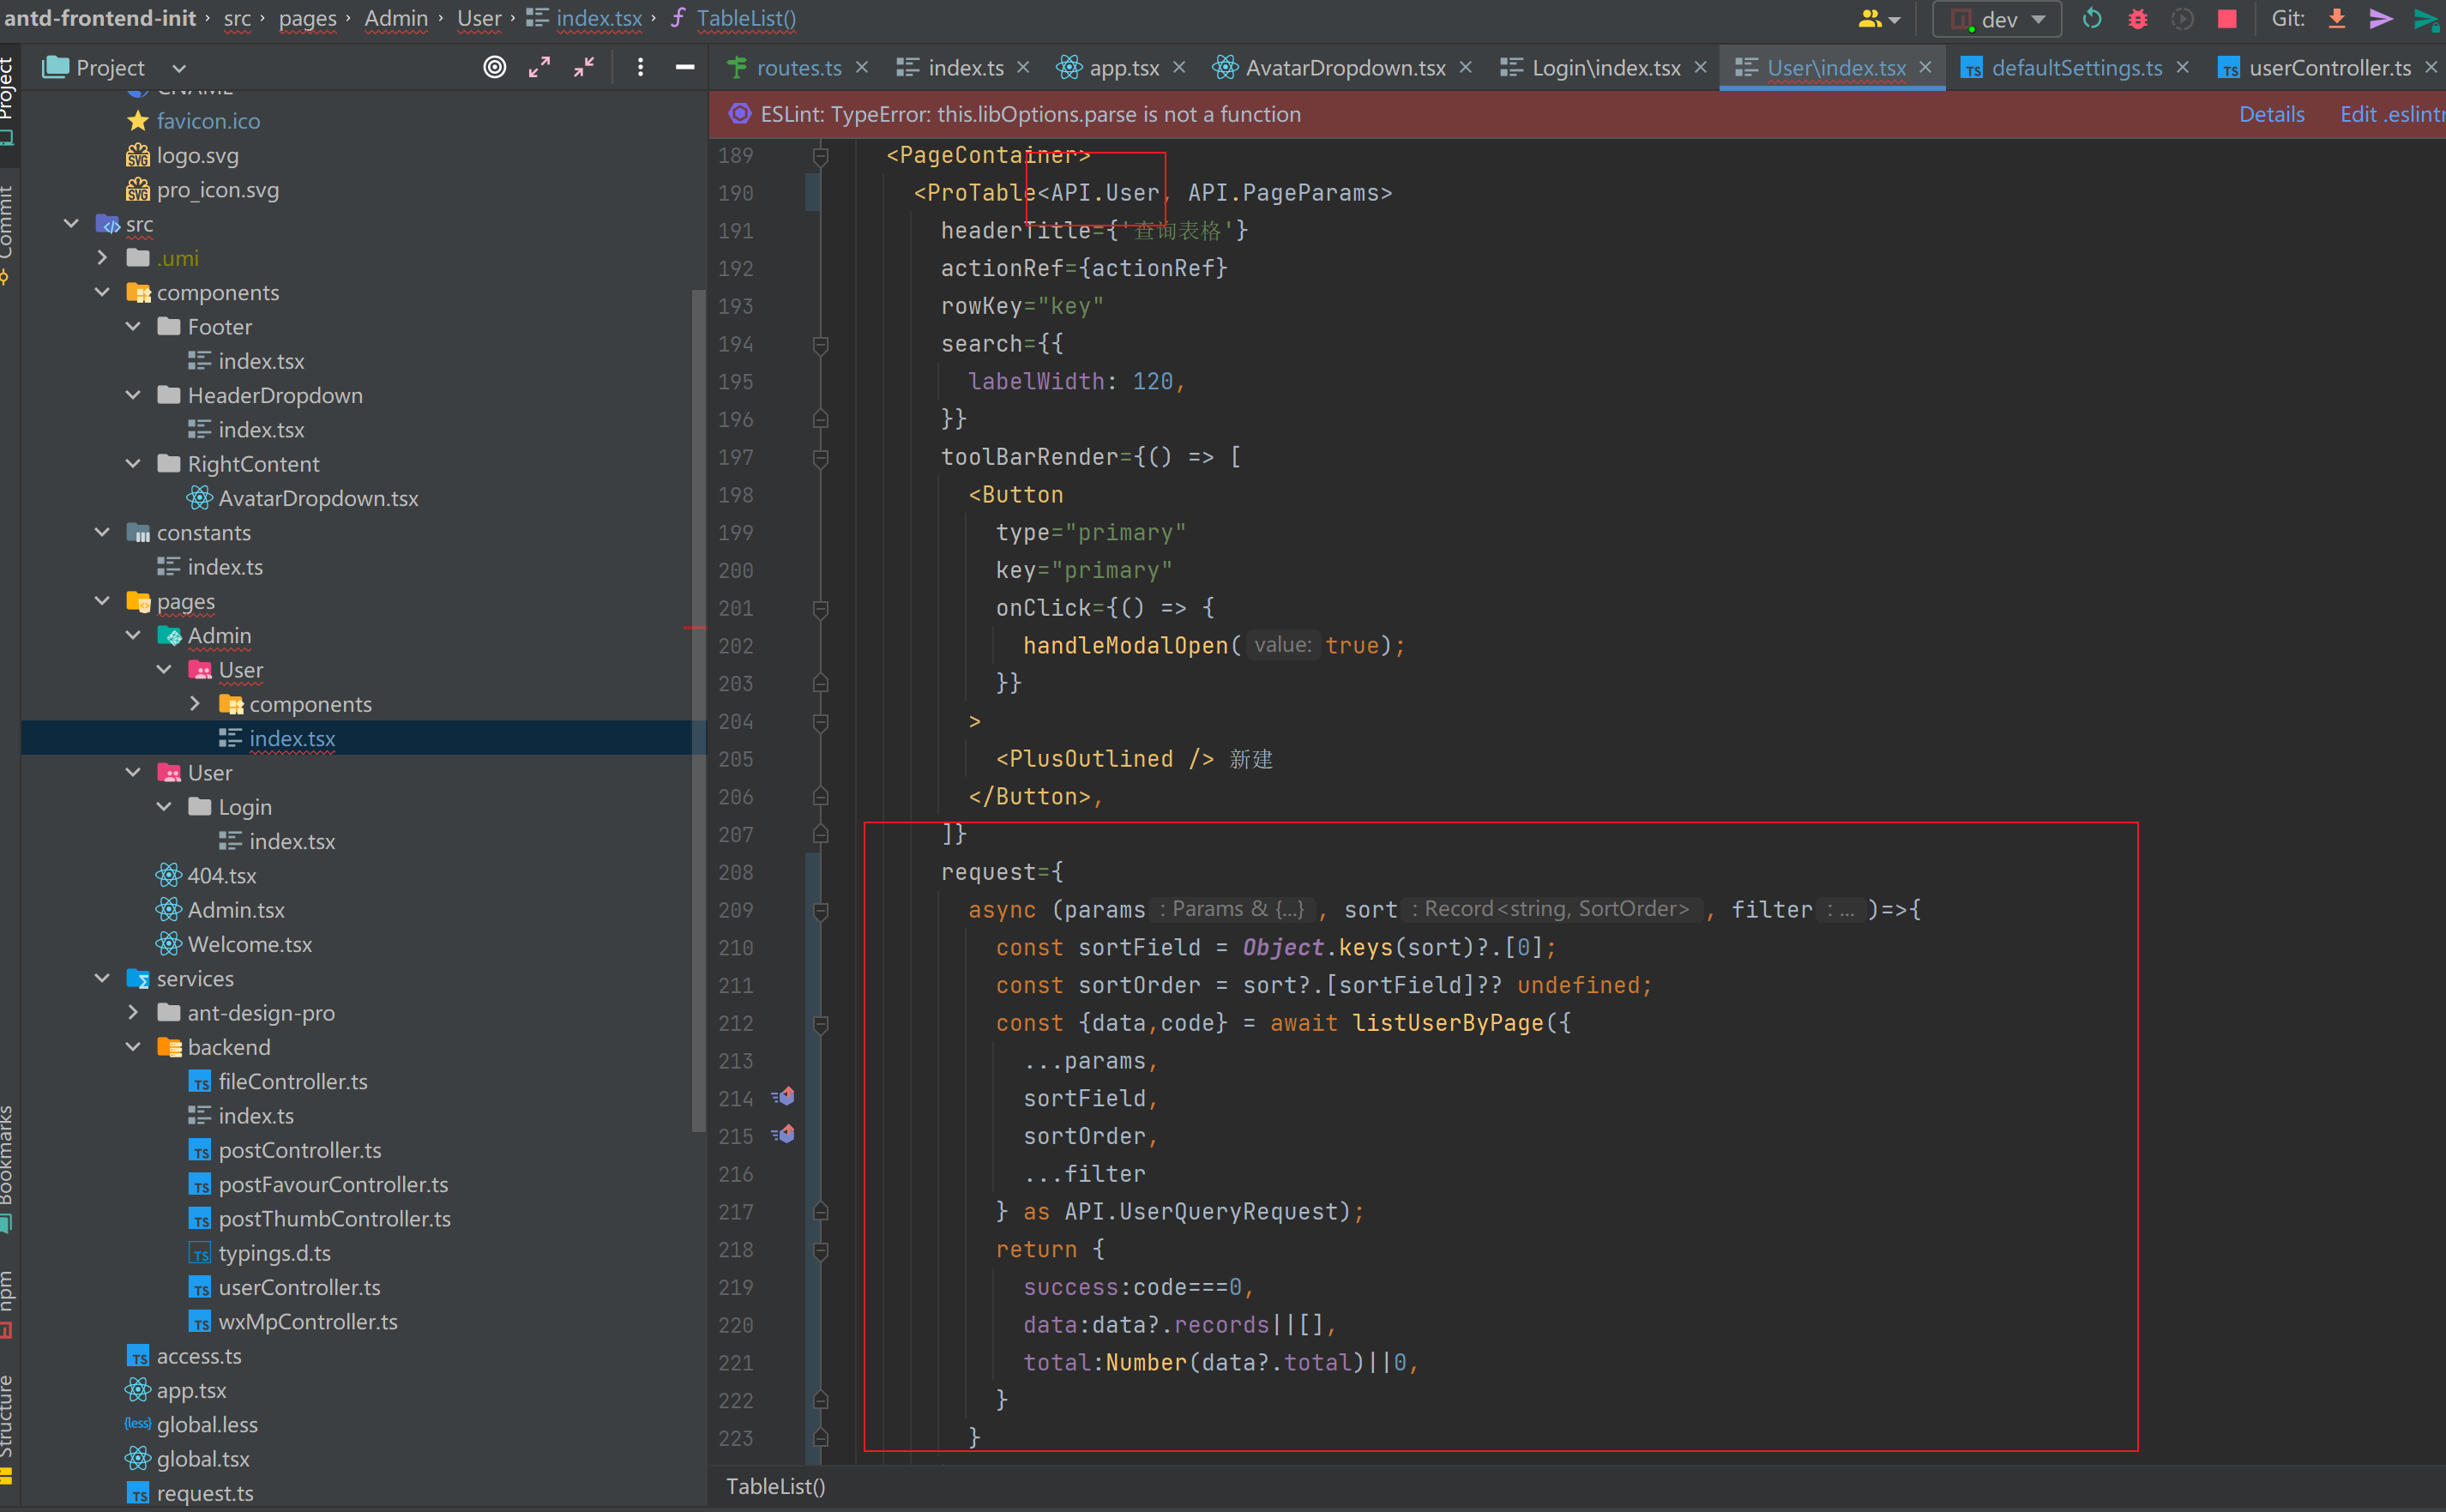
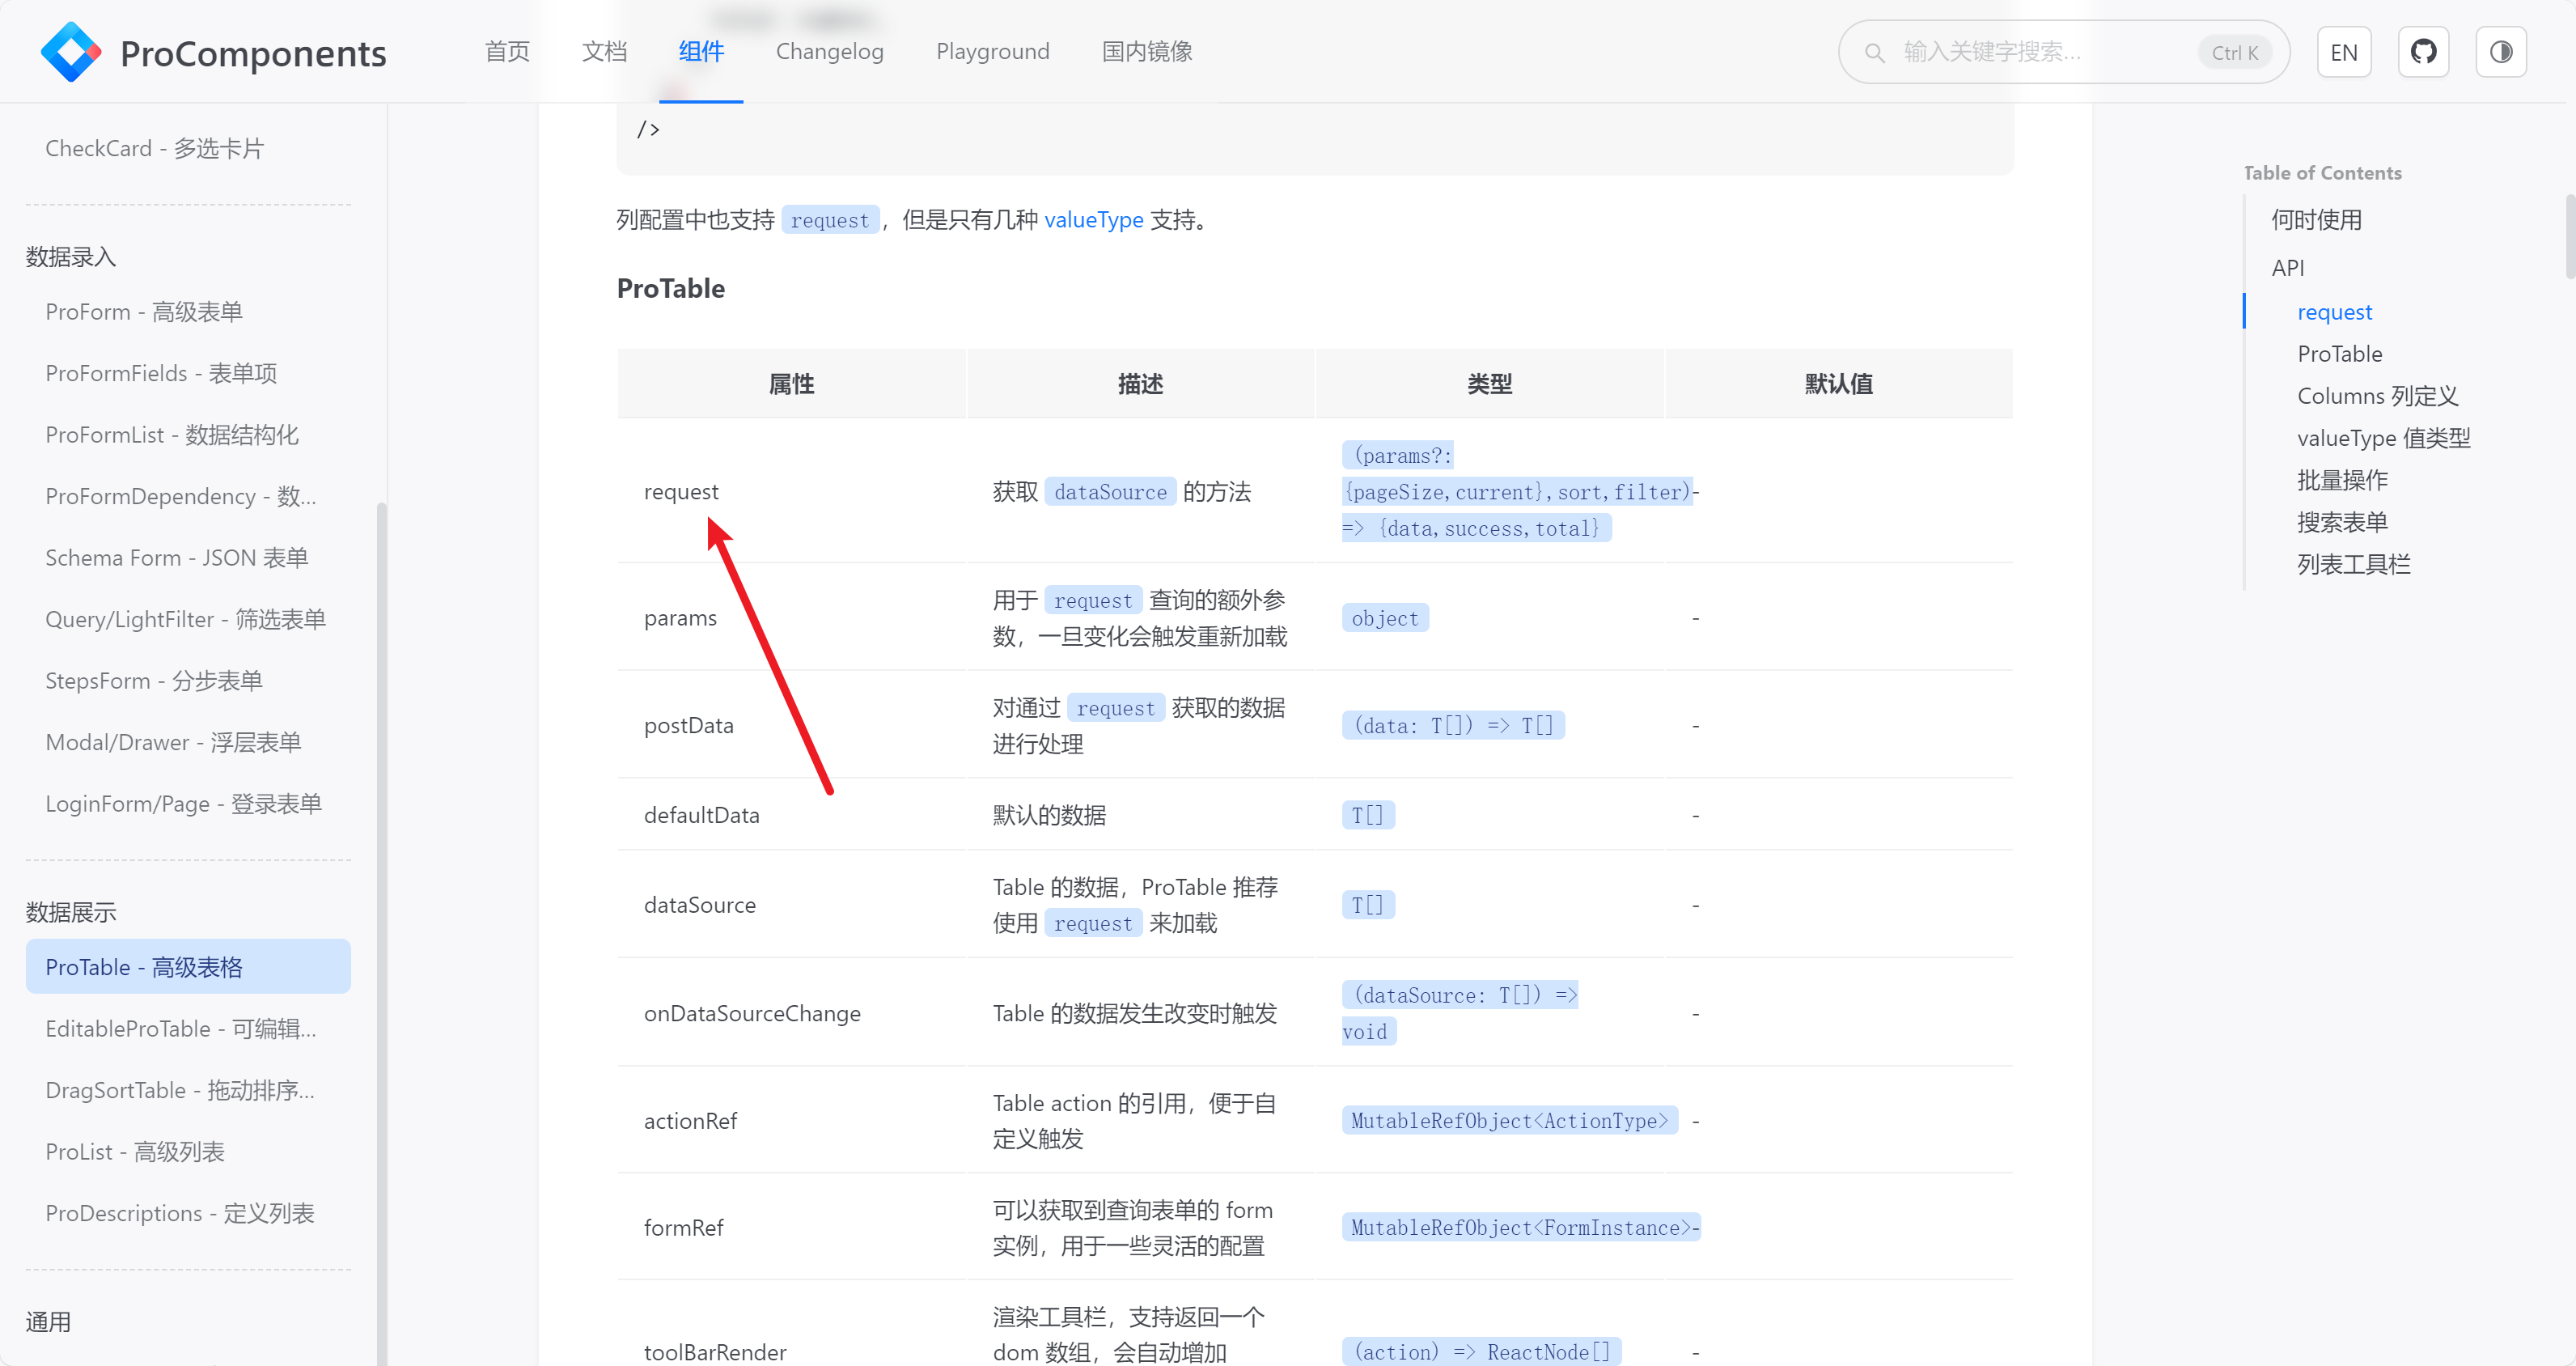
7)修改 ProTable 表格,请求我们自己的后台真实接口,修改 TS 类型。
高级组件的官方地址:ProTable - 高级表格 - ProComponents (ant.design)
request={

  async (params, sort, filter)=>{

    const sortField = Object.keys(sort)?.[0];

    const sortOrder = sort?.[sortField]?? undefined;

    const {data,code} = await listUserByPage({

      ...params,

      sortField,

      sortOrder,

      ...filter

    } as API.UserQueryRequest);

    return {

      success:code===0,

      data:data?.records||[],

      total:Number(data?.total)||0,

    }

  }

}
8)修改 columns 的配置,让前端的属性值和后端传递的对应即可,调整一下修改和删除的样式。
const columns: ProColumns<API.RuleListItem>[] = [

  {

    title: 'id',

    dataIndex: 'id',

    valueType: 'text',

  },

  {

    title: '账号',

    dataIndex: 'userAccount',

    valueType: 'text',

  },

  {

    title: '用户名',

    dataIndex: 'userName',

    valueType: 'text',

  },

  {

    title: '头像',

    dataIndex: 'userAvatar',

    valueType: 'image',

    fieldProps: {

      width: 64,

    },

    hideInSearch: true,

  },

  {

    title: '简介',

    dataIndex: 'userProfile',

    valueType: 'textarea',

  },

  {

    title: '权限',

    dataIndex: 'userRole',

    valueEnum: {

      user: {

        text: '用户',

      },

      admin: {

        text: '管理员',

      },

    },

  },

  {

    title: '创建时间',

    sorter: true,

    dataIndex: 'createTime',

    valueType: 'dateTime',

    hideInSearch: true,

  },

  {

    title: '更新时间',

    sorter: true,

    dataIndex: 'updateTime',

    valueType: 'dateTime',

    hideInSearch: true,

  },

  {

    title: '操作',

    dataIndex: 'option',

    valueType: 'option',

    render: (_, record) => (

      <Space size={"middle"}>

        <Typography.Link

          key="config" => {

            handleUpdateModalOpen(true);

            setCurrentRow(record);

          }}

          >

          修改

        </Typography.Link>

        <Typography.Link type="danger" key="subscribeAlert" href="#root/tpZcnSinM0zu">

          删除

        </Typography.Link>

      </Space>

    ),

  },

];
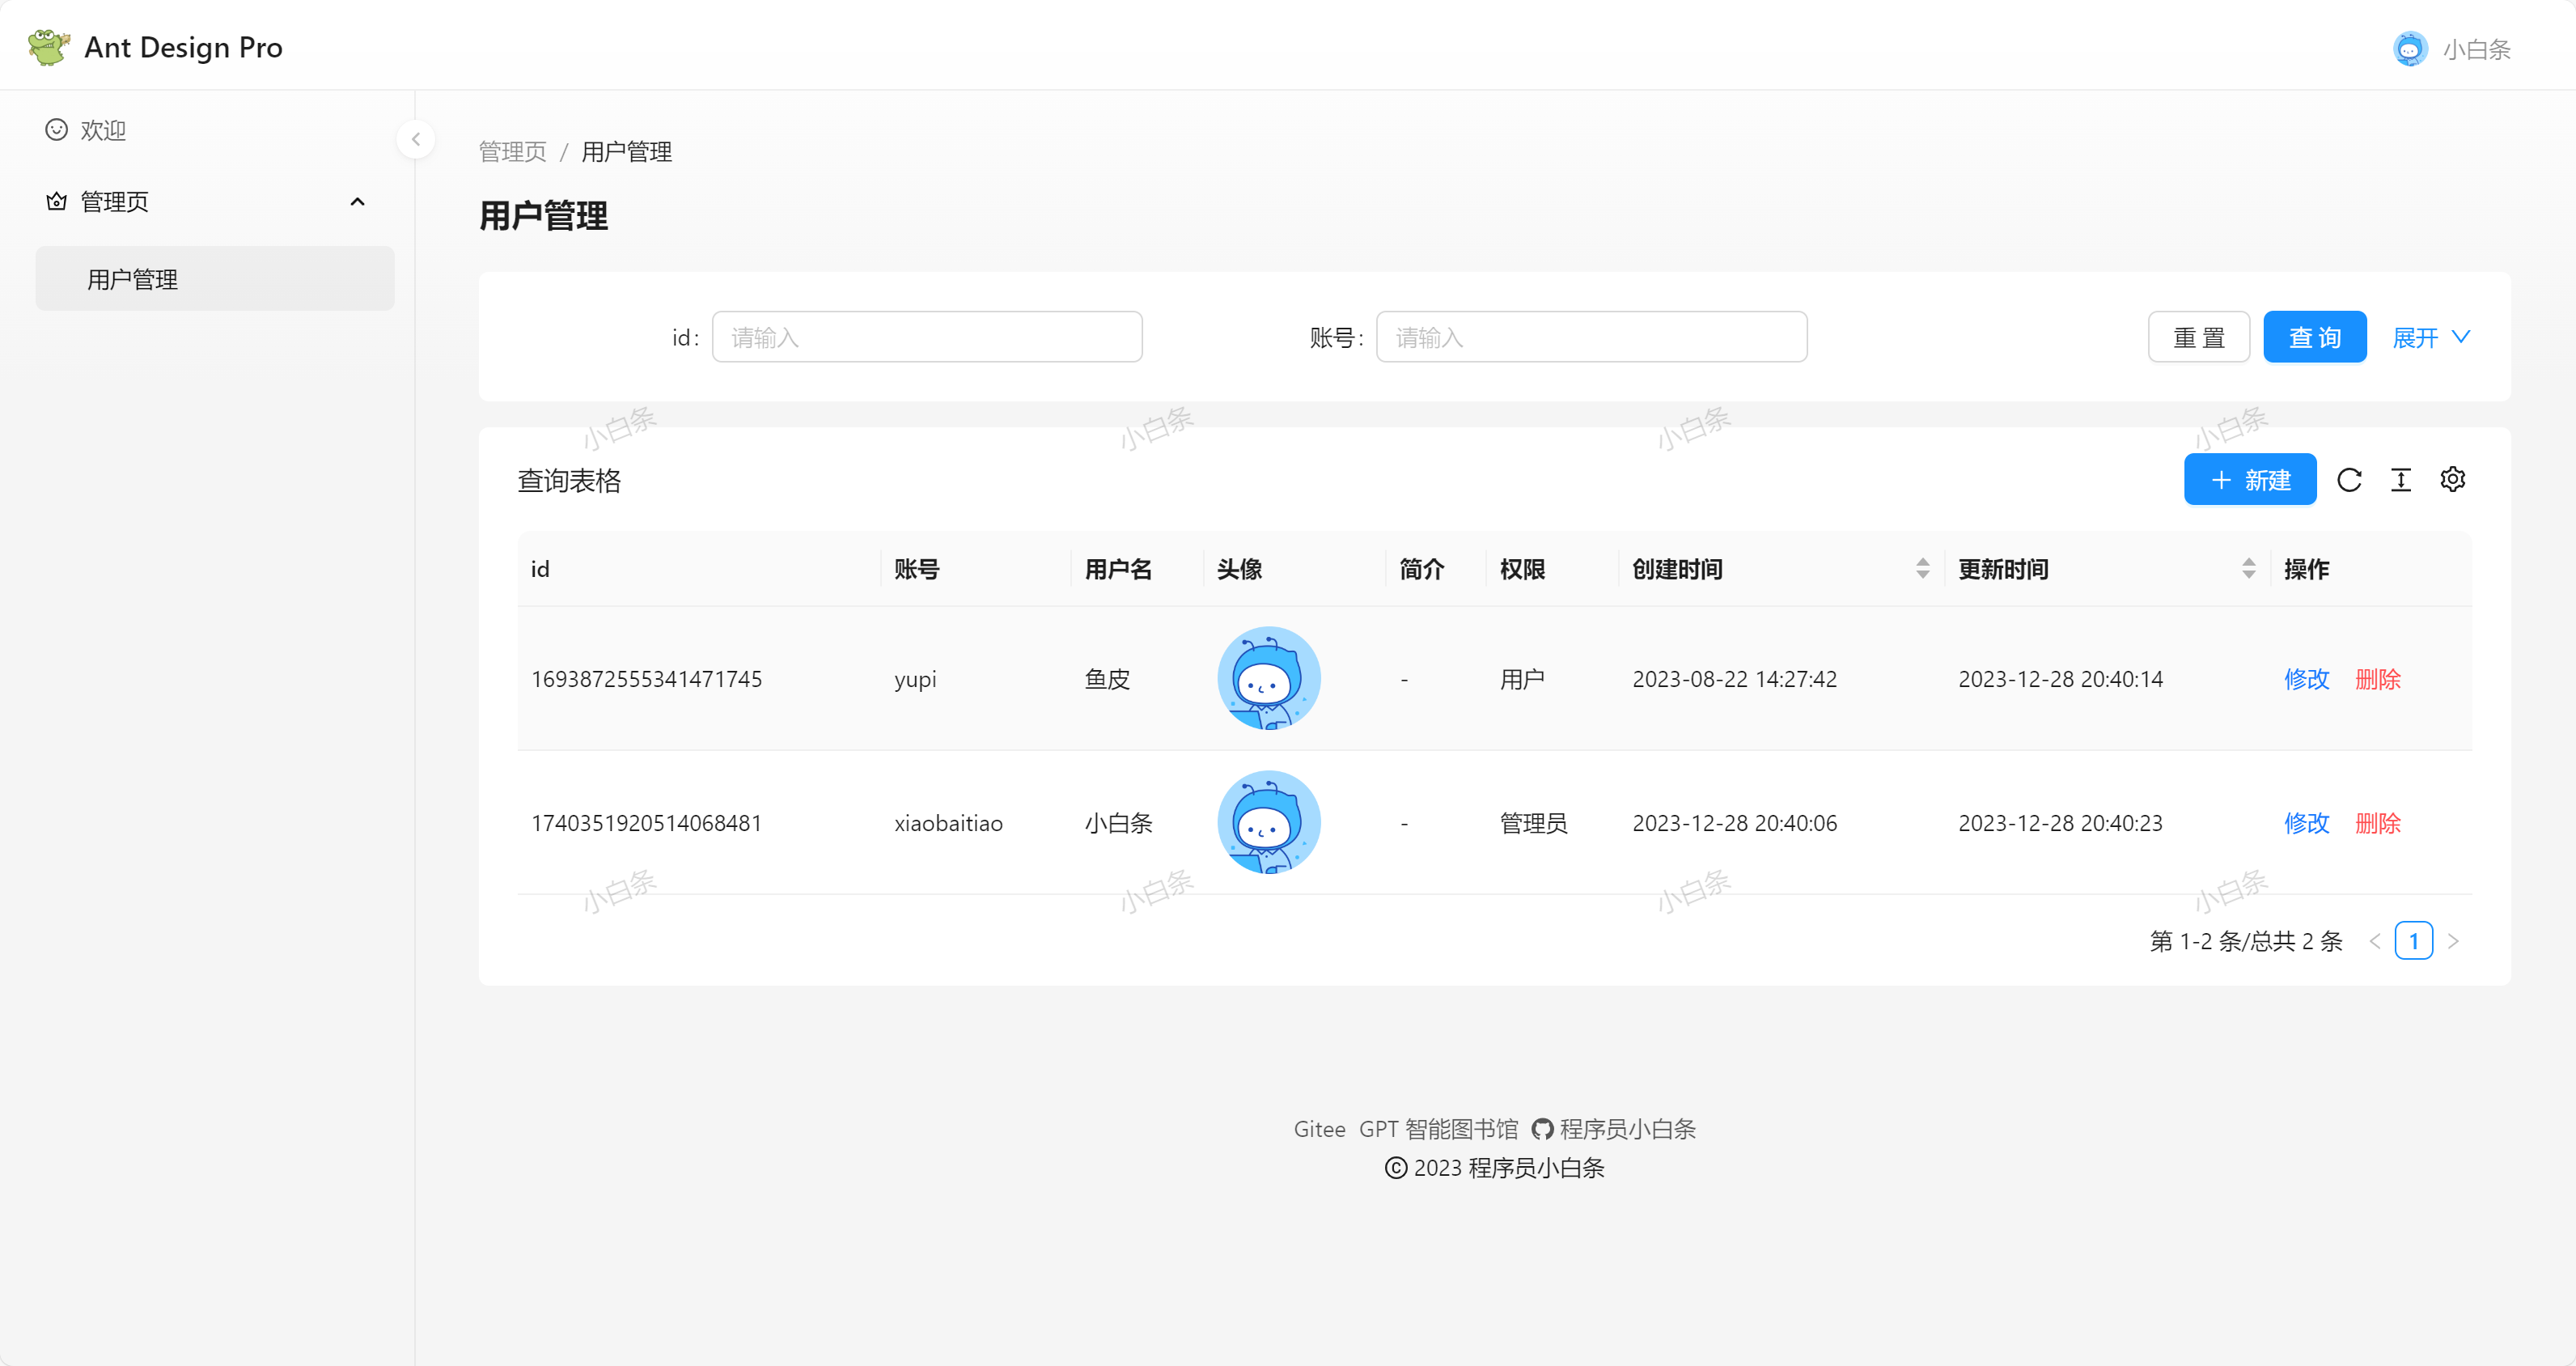
数据展示效果:
9)添加删除用户的功能
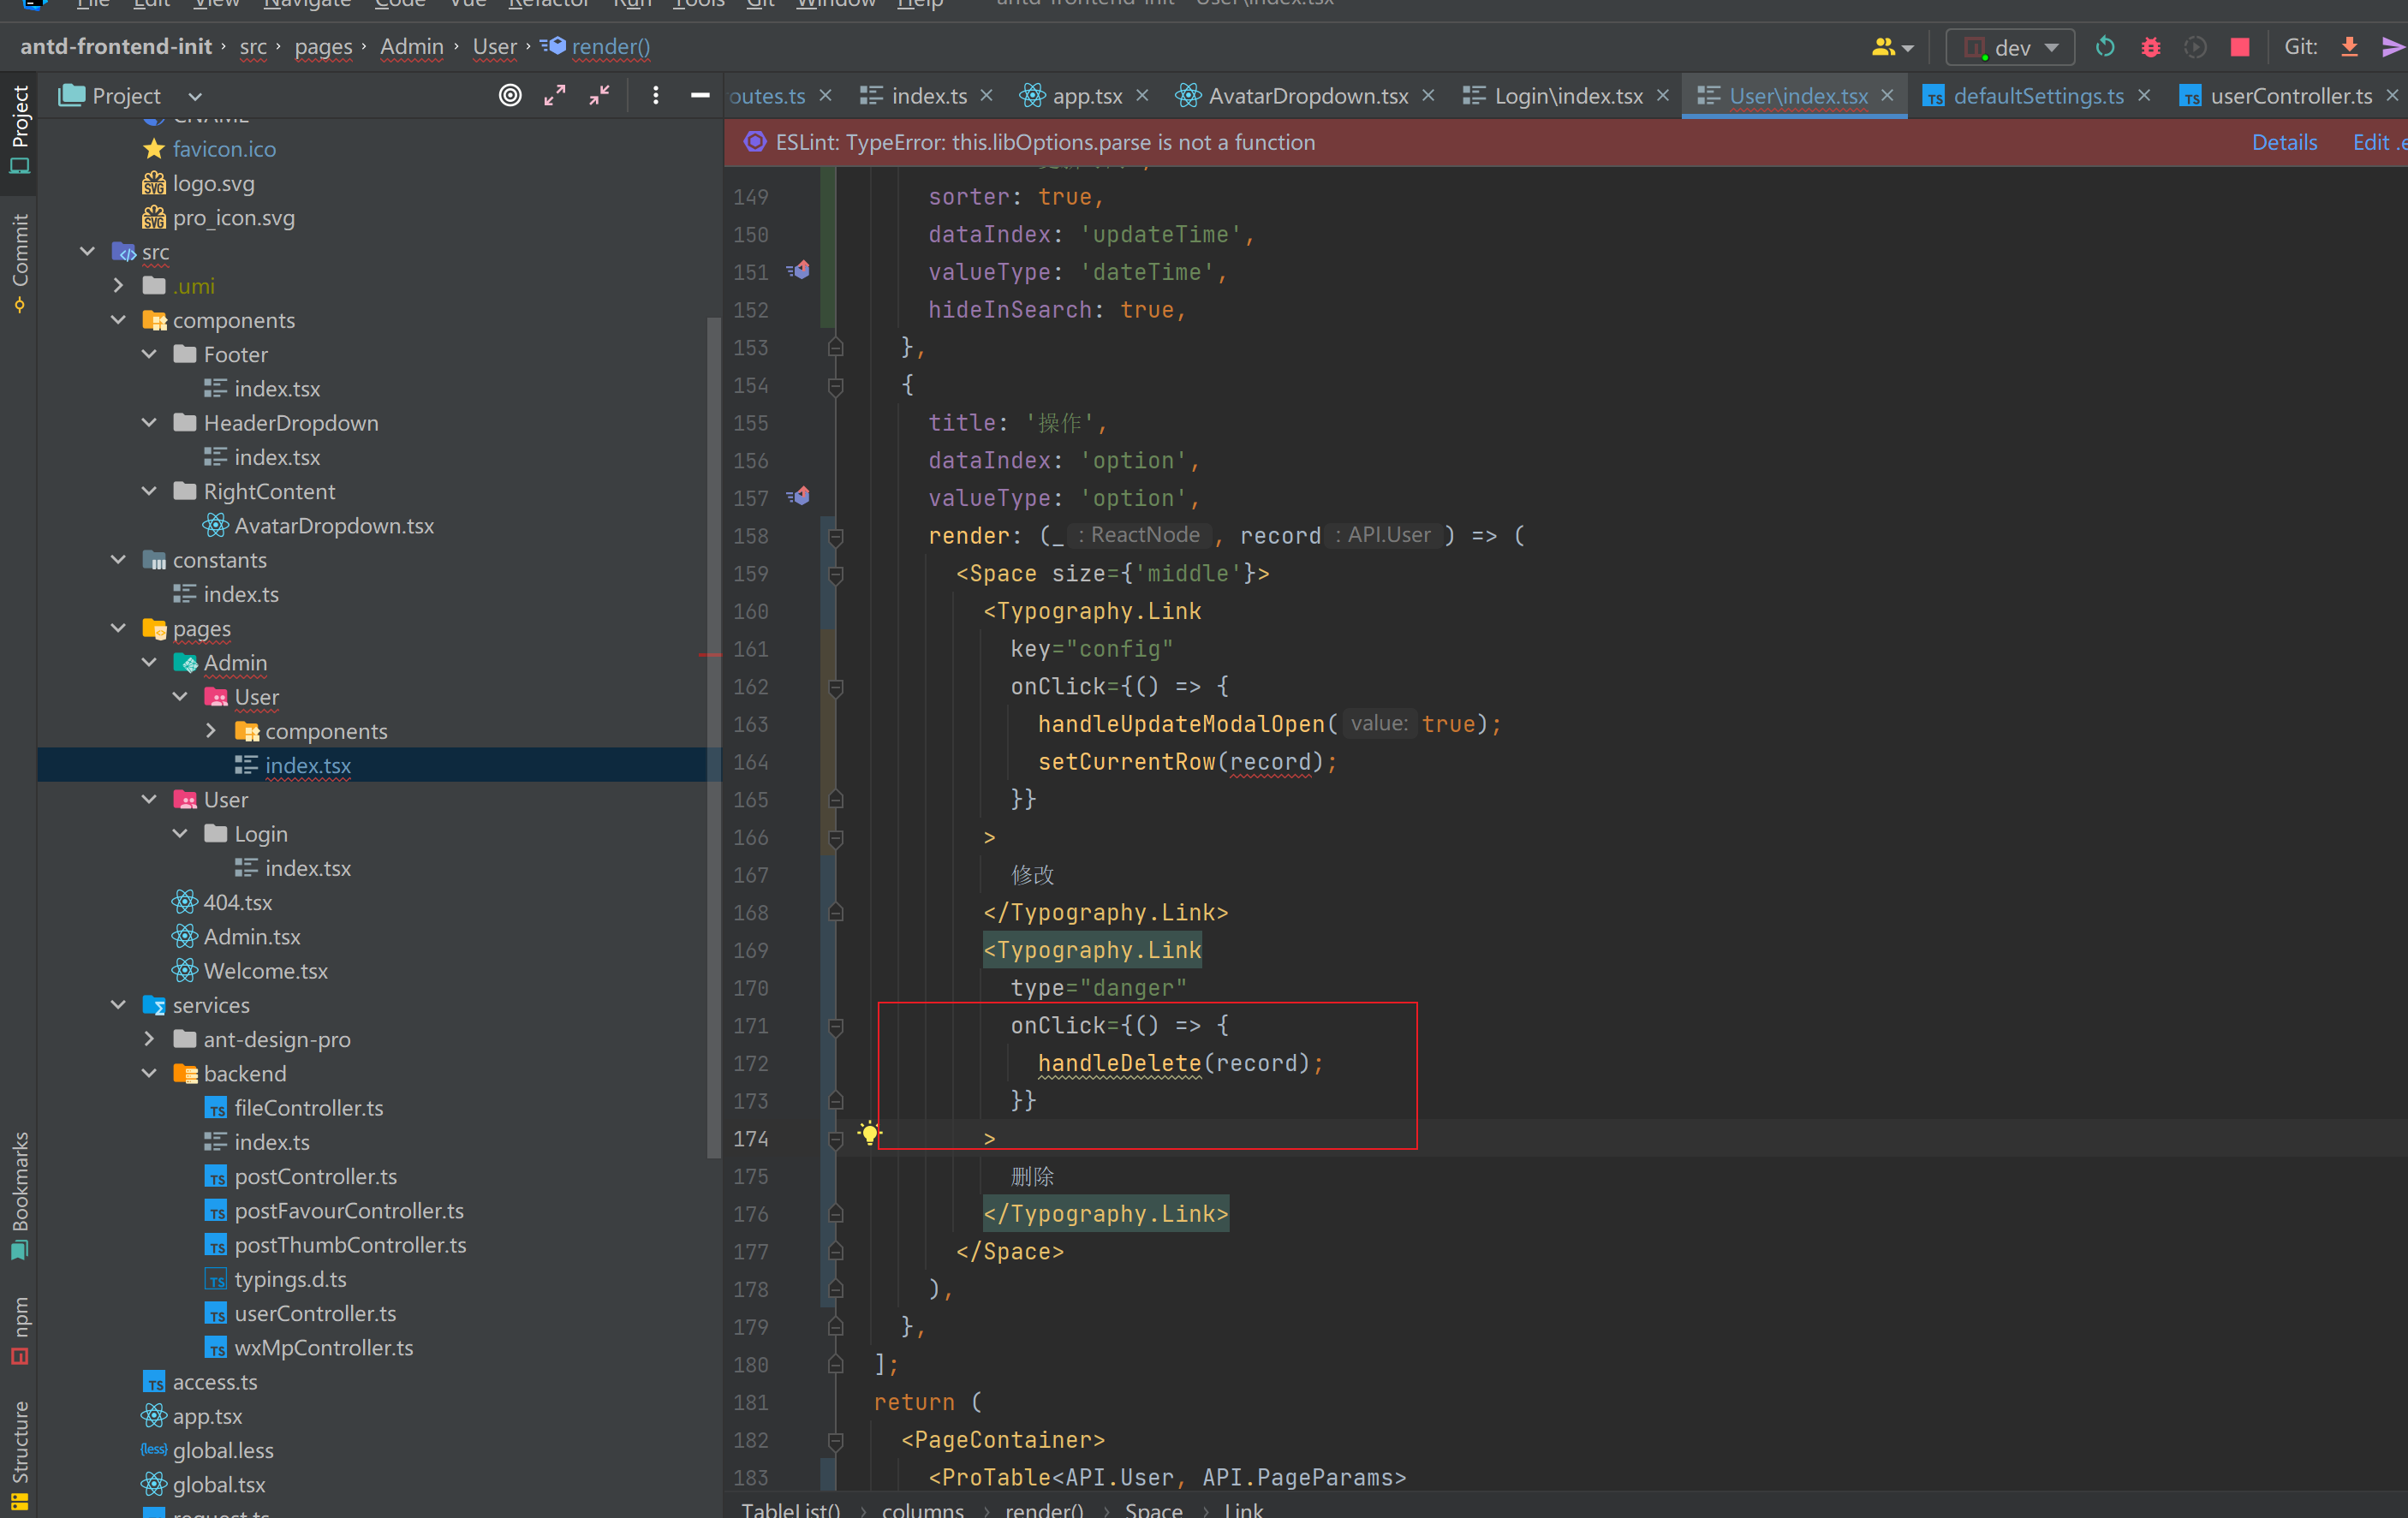
先给链接添加触发事件,传入对应的数据行,方法名称修改一下,handleRemove -> handleDelete
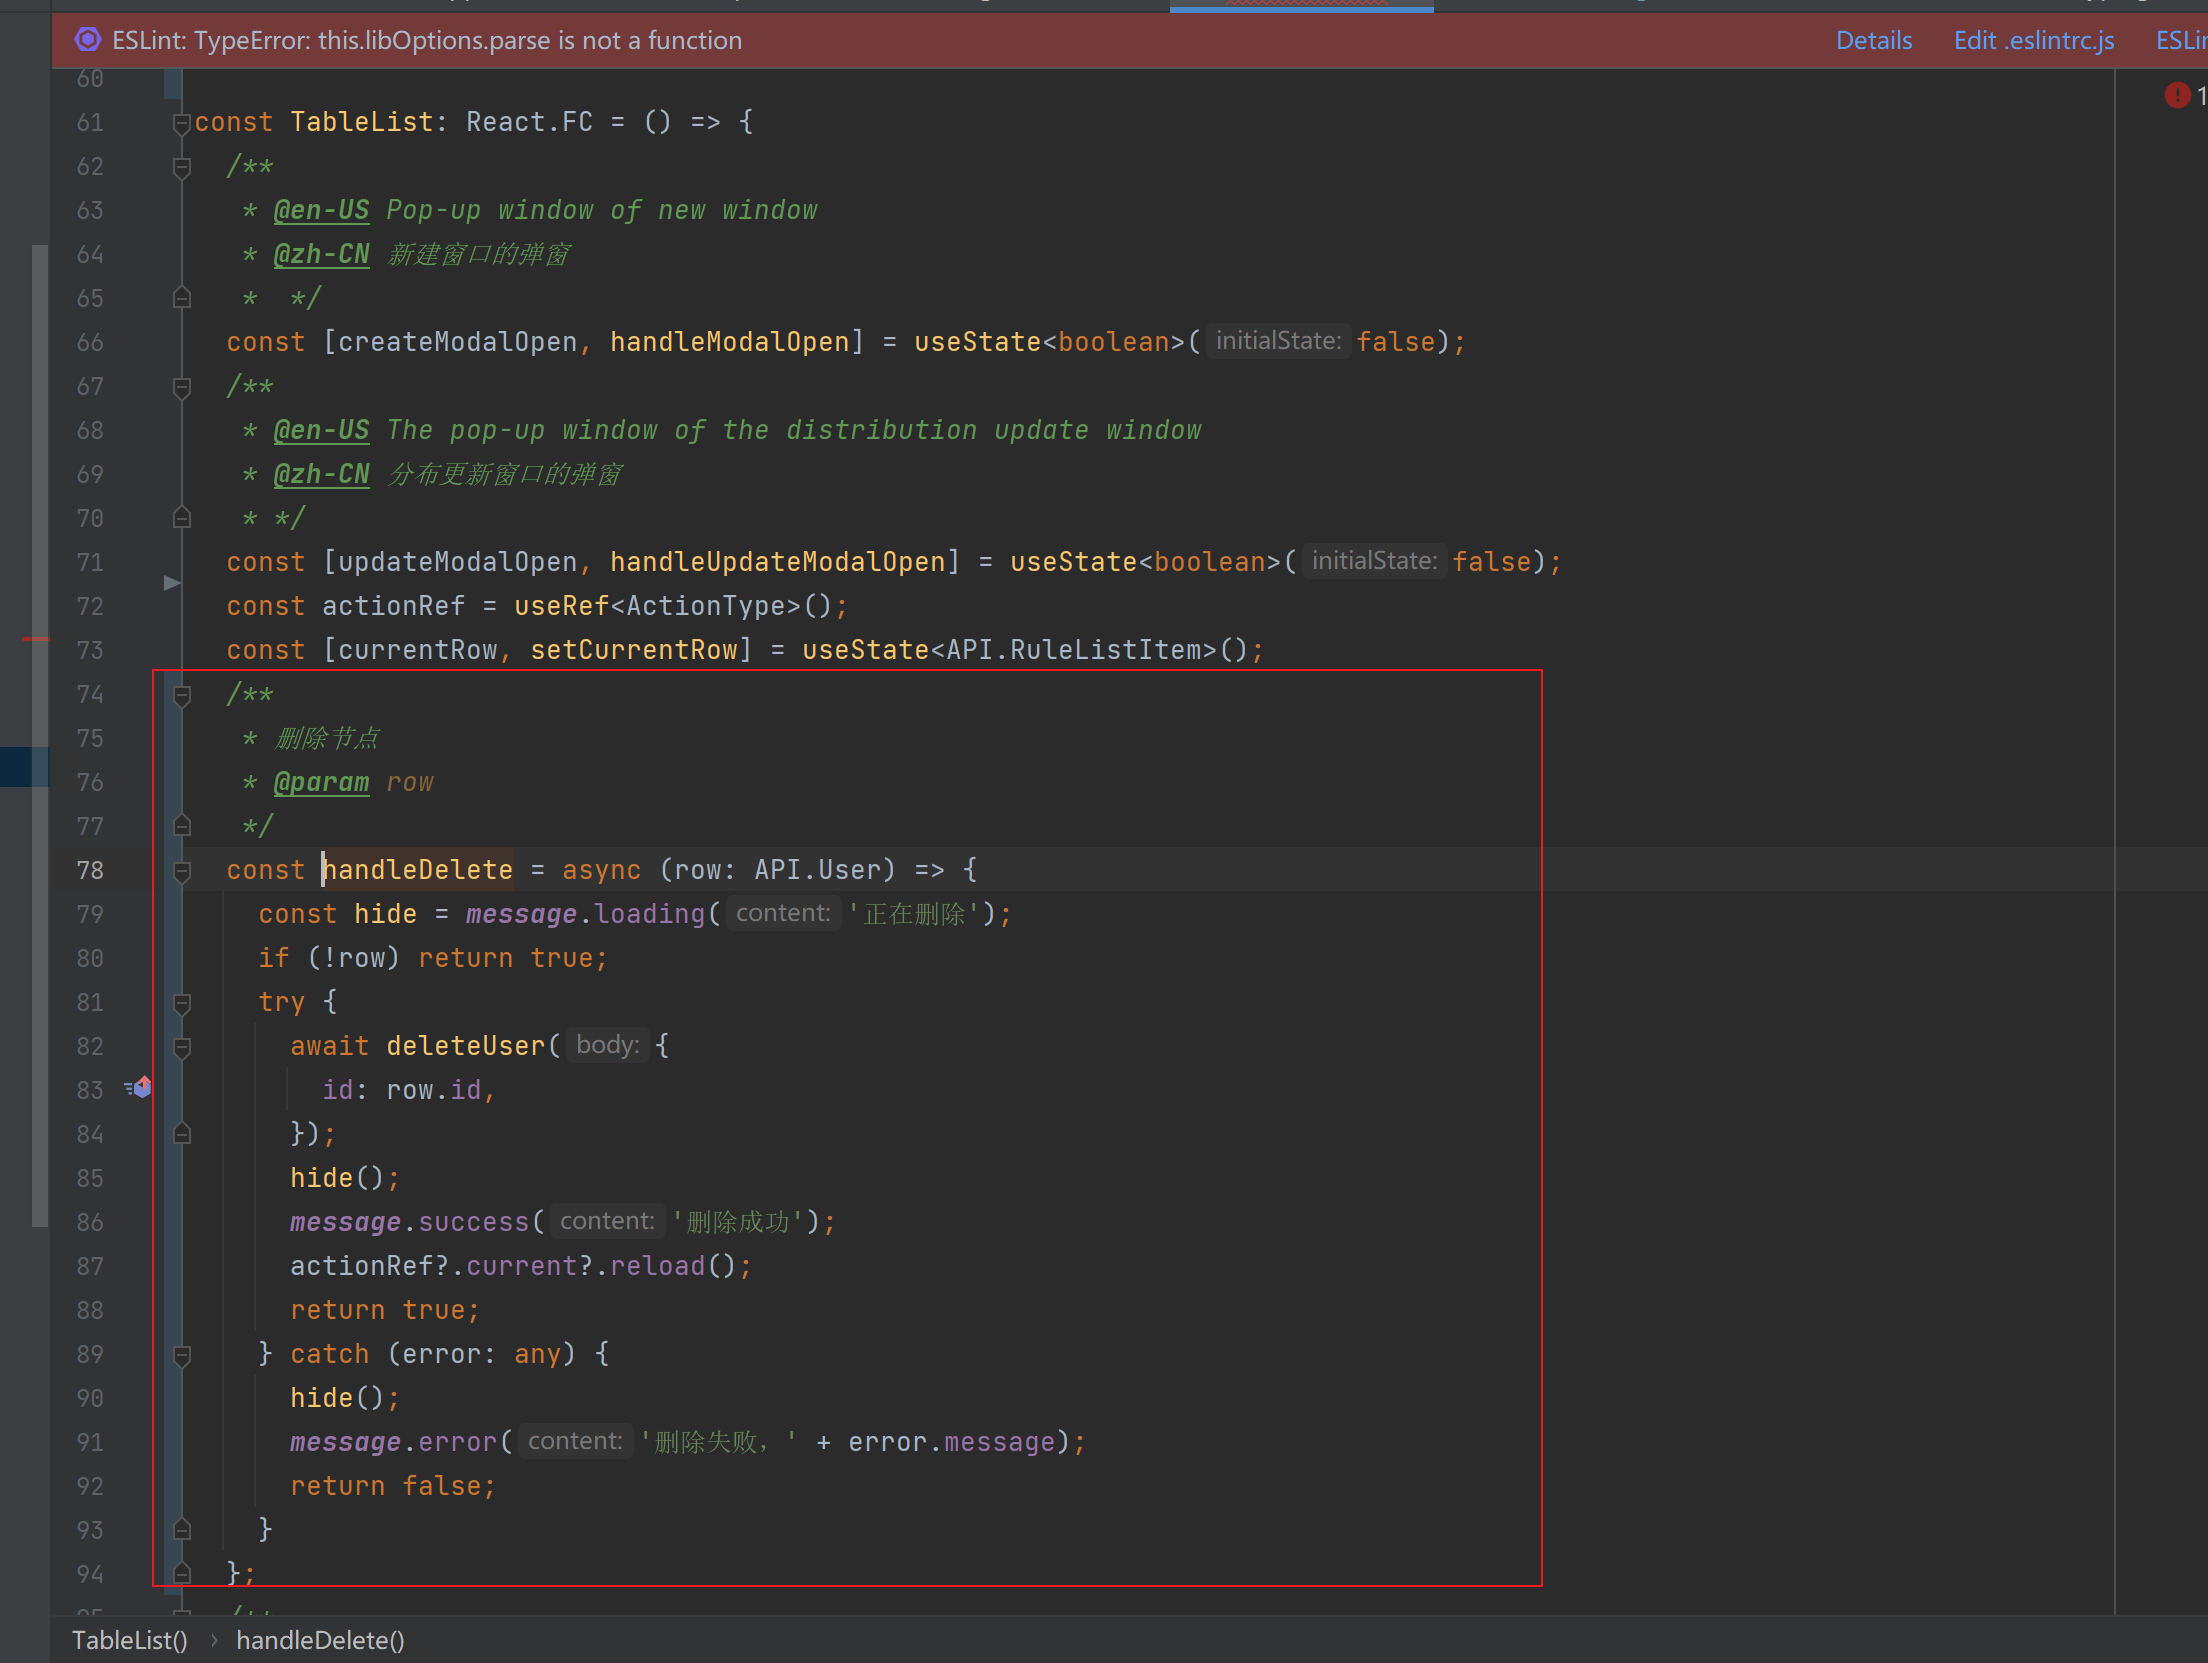
编写对应的删除代码,注意这边 handleDelete 从外面移到了里面,为了使用 actionRef 删除成功后自动页面加载。
const handleDelete = async (row: API.User) => {

  const hide = message.loading('正在删除');

  if (!row) return true;

  try {

    await deleteUser({

      id: row.id,

    });

    hide();

    message.success('删除成功');

    actionRef?.current?.reload();

    return true;

  } catch (error: any) {

    hide();

    message.error('删除失败,' + error.message);

    return false;

  }

};
10)新增添加用户的功能
首先创建一个 createModal.tsx
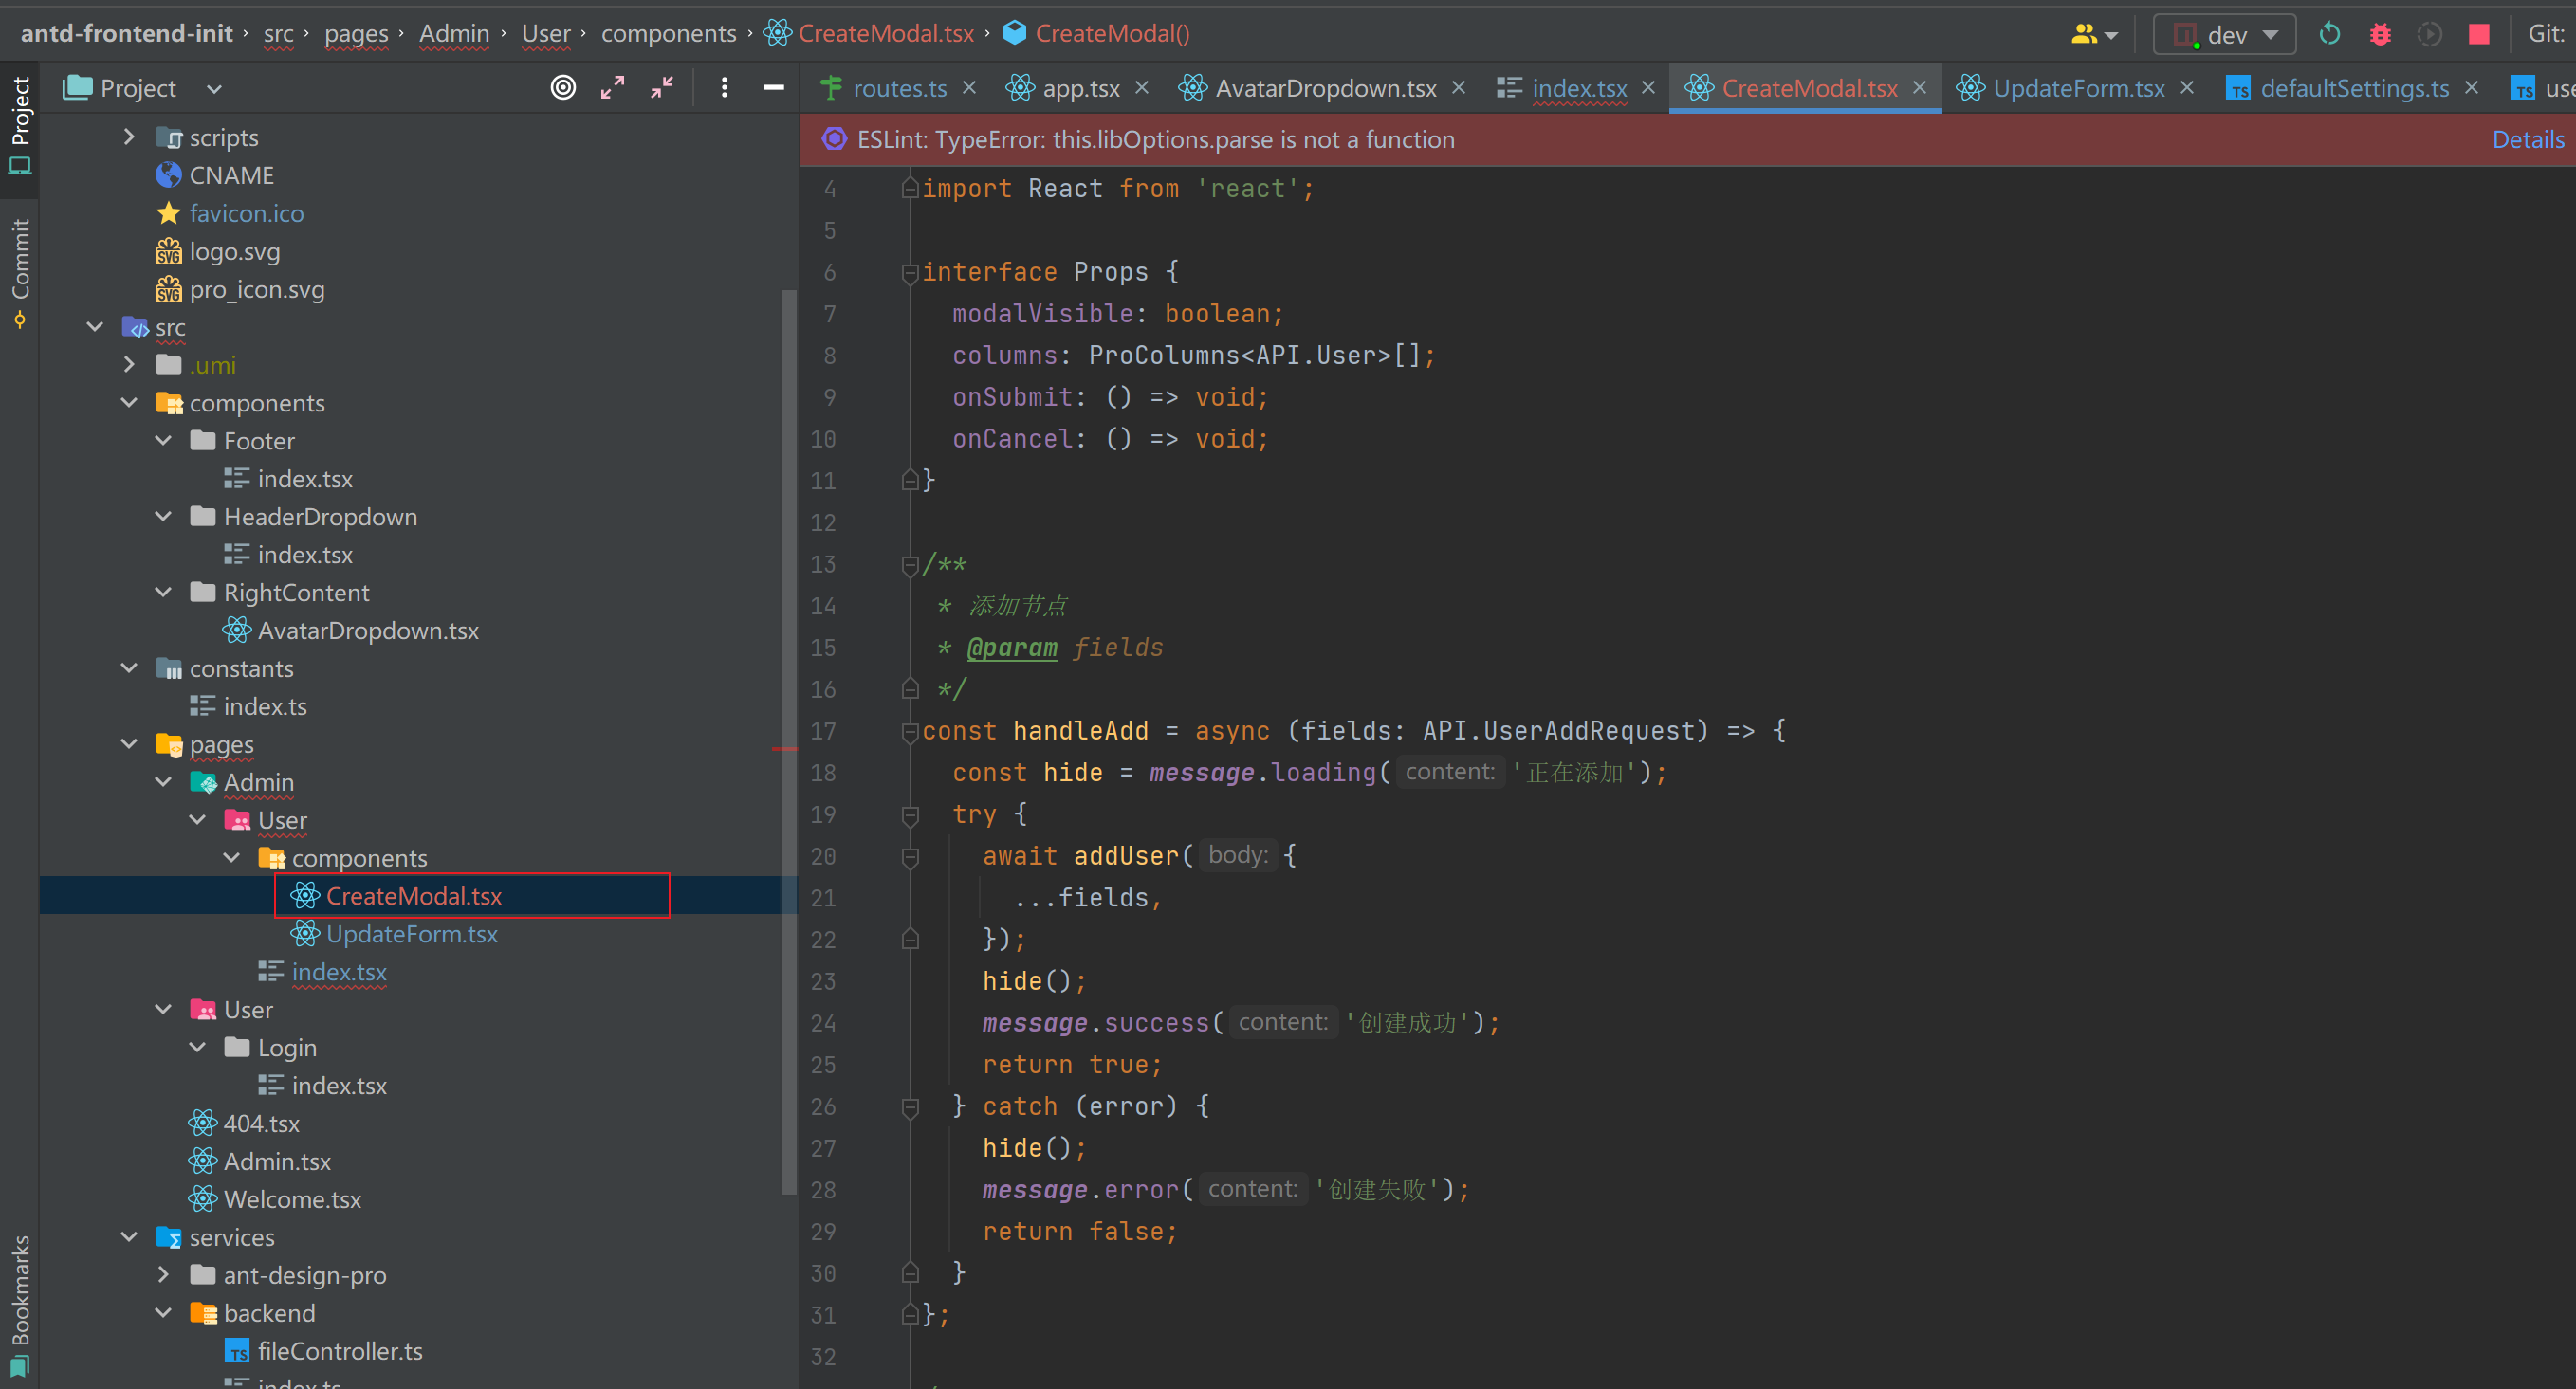
编写代码,把 index.tsx 的 handleAdd 移动到此组件即可。
import { addUser } from '@/services/backend/userController';

import { ProColumns, ProTable } from '@ant-design/pro-components';

import { message, Modal } from 'antd';

import React from 'react';

interface Props {

  modalVisible: boolean;

  columns: ProColumns<API.User>[];

  onSubmit: () => void;

  onCancel: () => void;

}

/**

 * 添加节点

 * @param fields

 */

const handleAdd = async (fields: API.UserAddRequest) => {

  const hide = message.loading('正在添加');

  try {

    await addUser({

      ...fields,

    });

    hide();

    message.success('创建成功');

    return true;

  } catch (error) {

    hide();

    message.error('创建失败');

    return false;

  }

};

/**

 * 创建数据弹窗

 * @param props

 * @constructor

 */

const CreateModal: React.FC<Props> = (props) => {

  const { columns, modalVisible, onCancel, onSubmit } = props;

  return (

    <Modal title={'新建'} open={modalVisible} destroyOnClose footer={null}>

      <ProTable<API.UserAddRequest>

        columns={columns}

        type="form" (value) => {

      const success = await handleAdd(value);

      if (success) {

        onSubmit?.();

      }

    }}

        />

      </Modal>

      );

      };

      export default CreateModal;
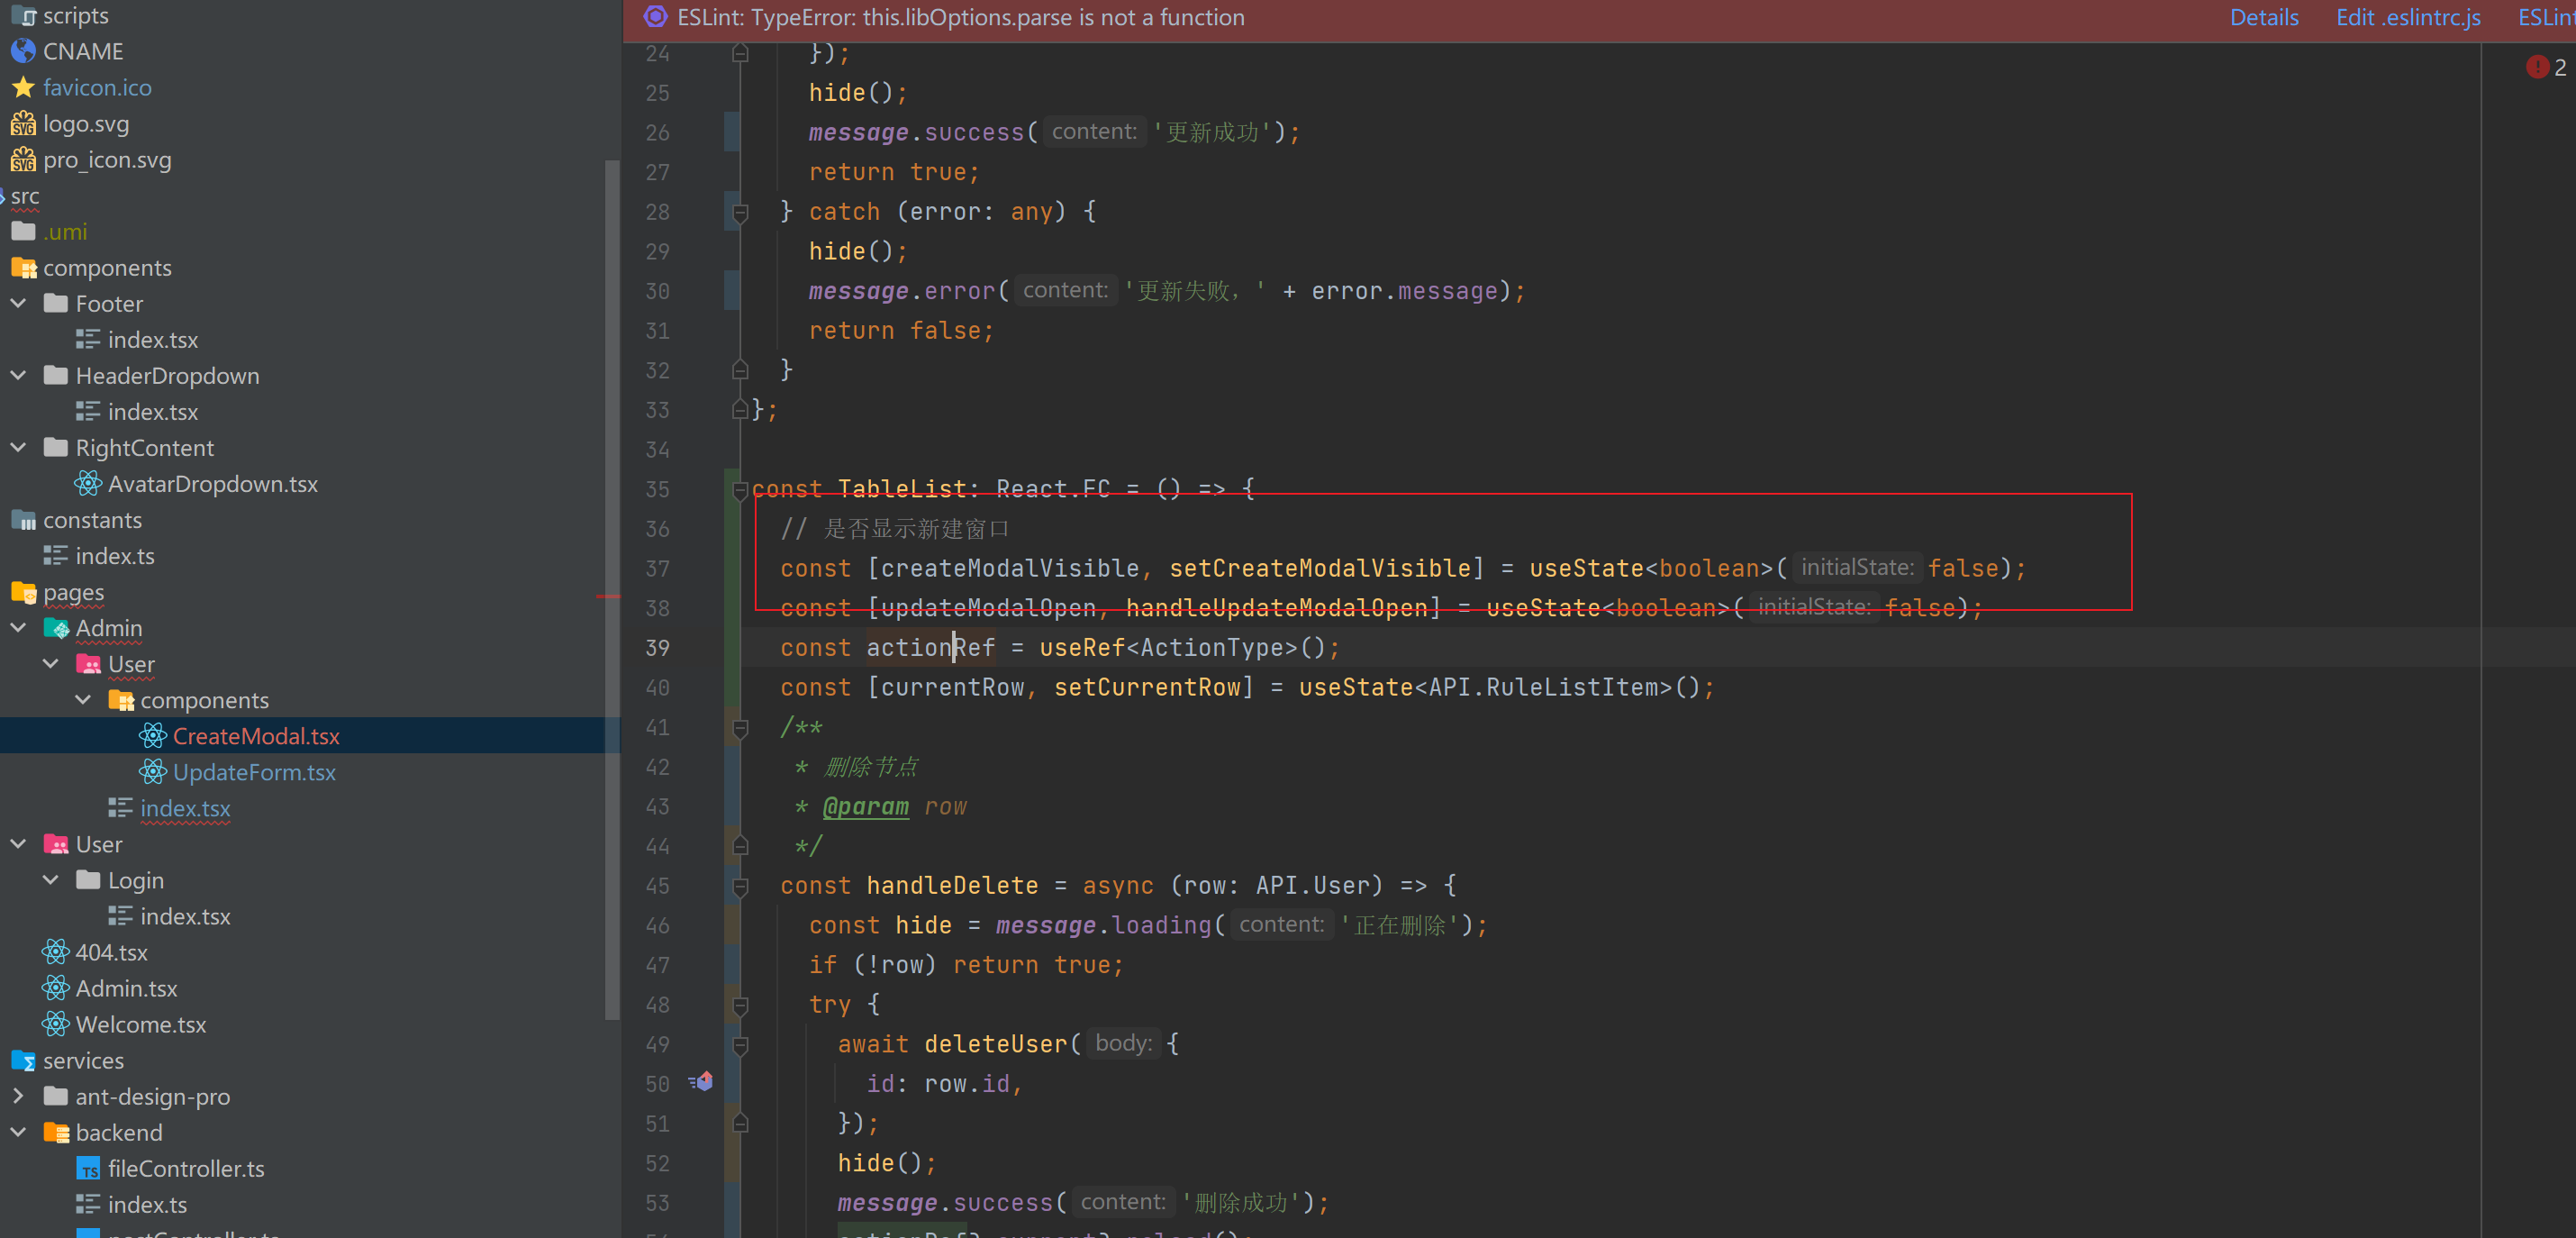
编写是否显示的布尔值
// 是否显示新建窗口

const [createModalVisible, setCreateModalVisible] = useState<boolean>(false);
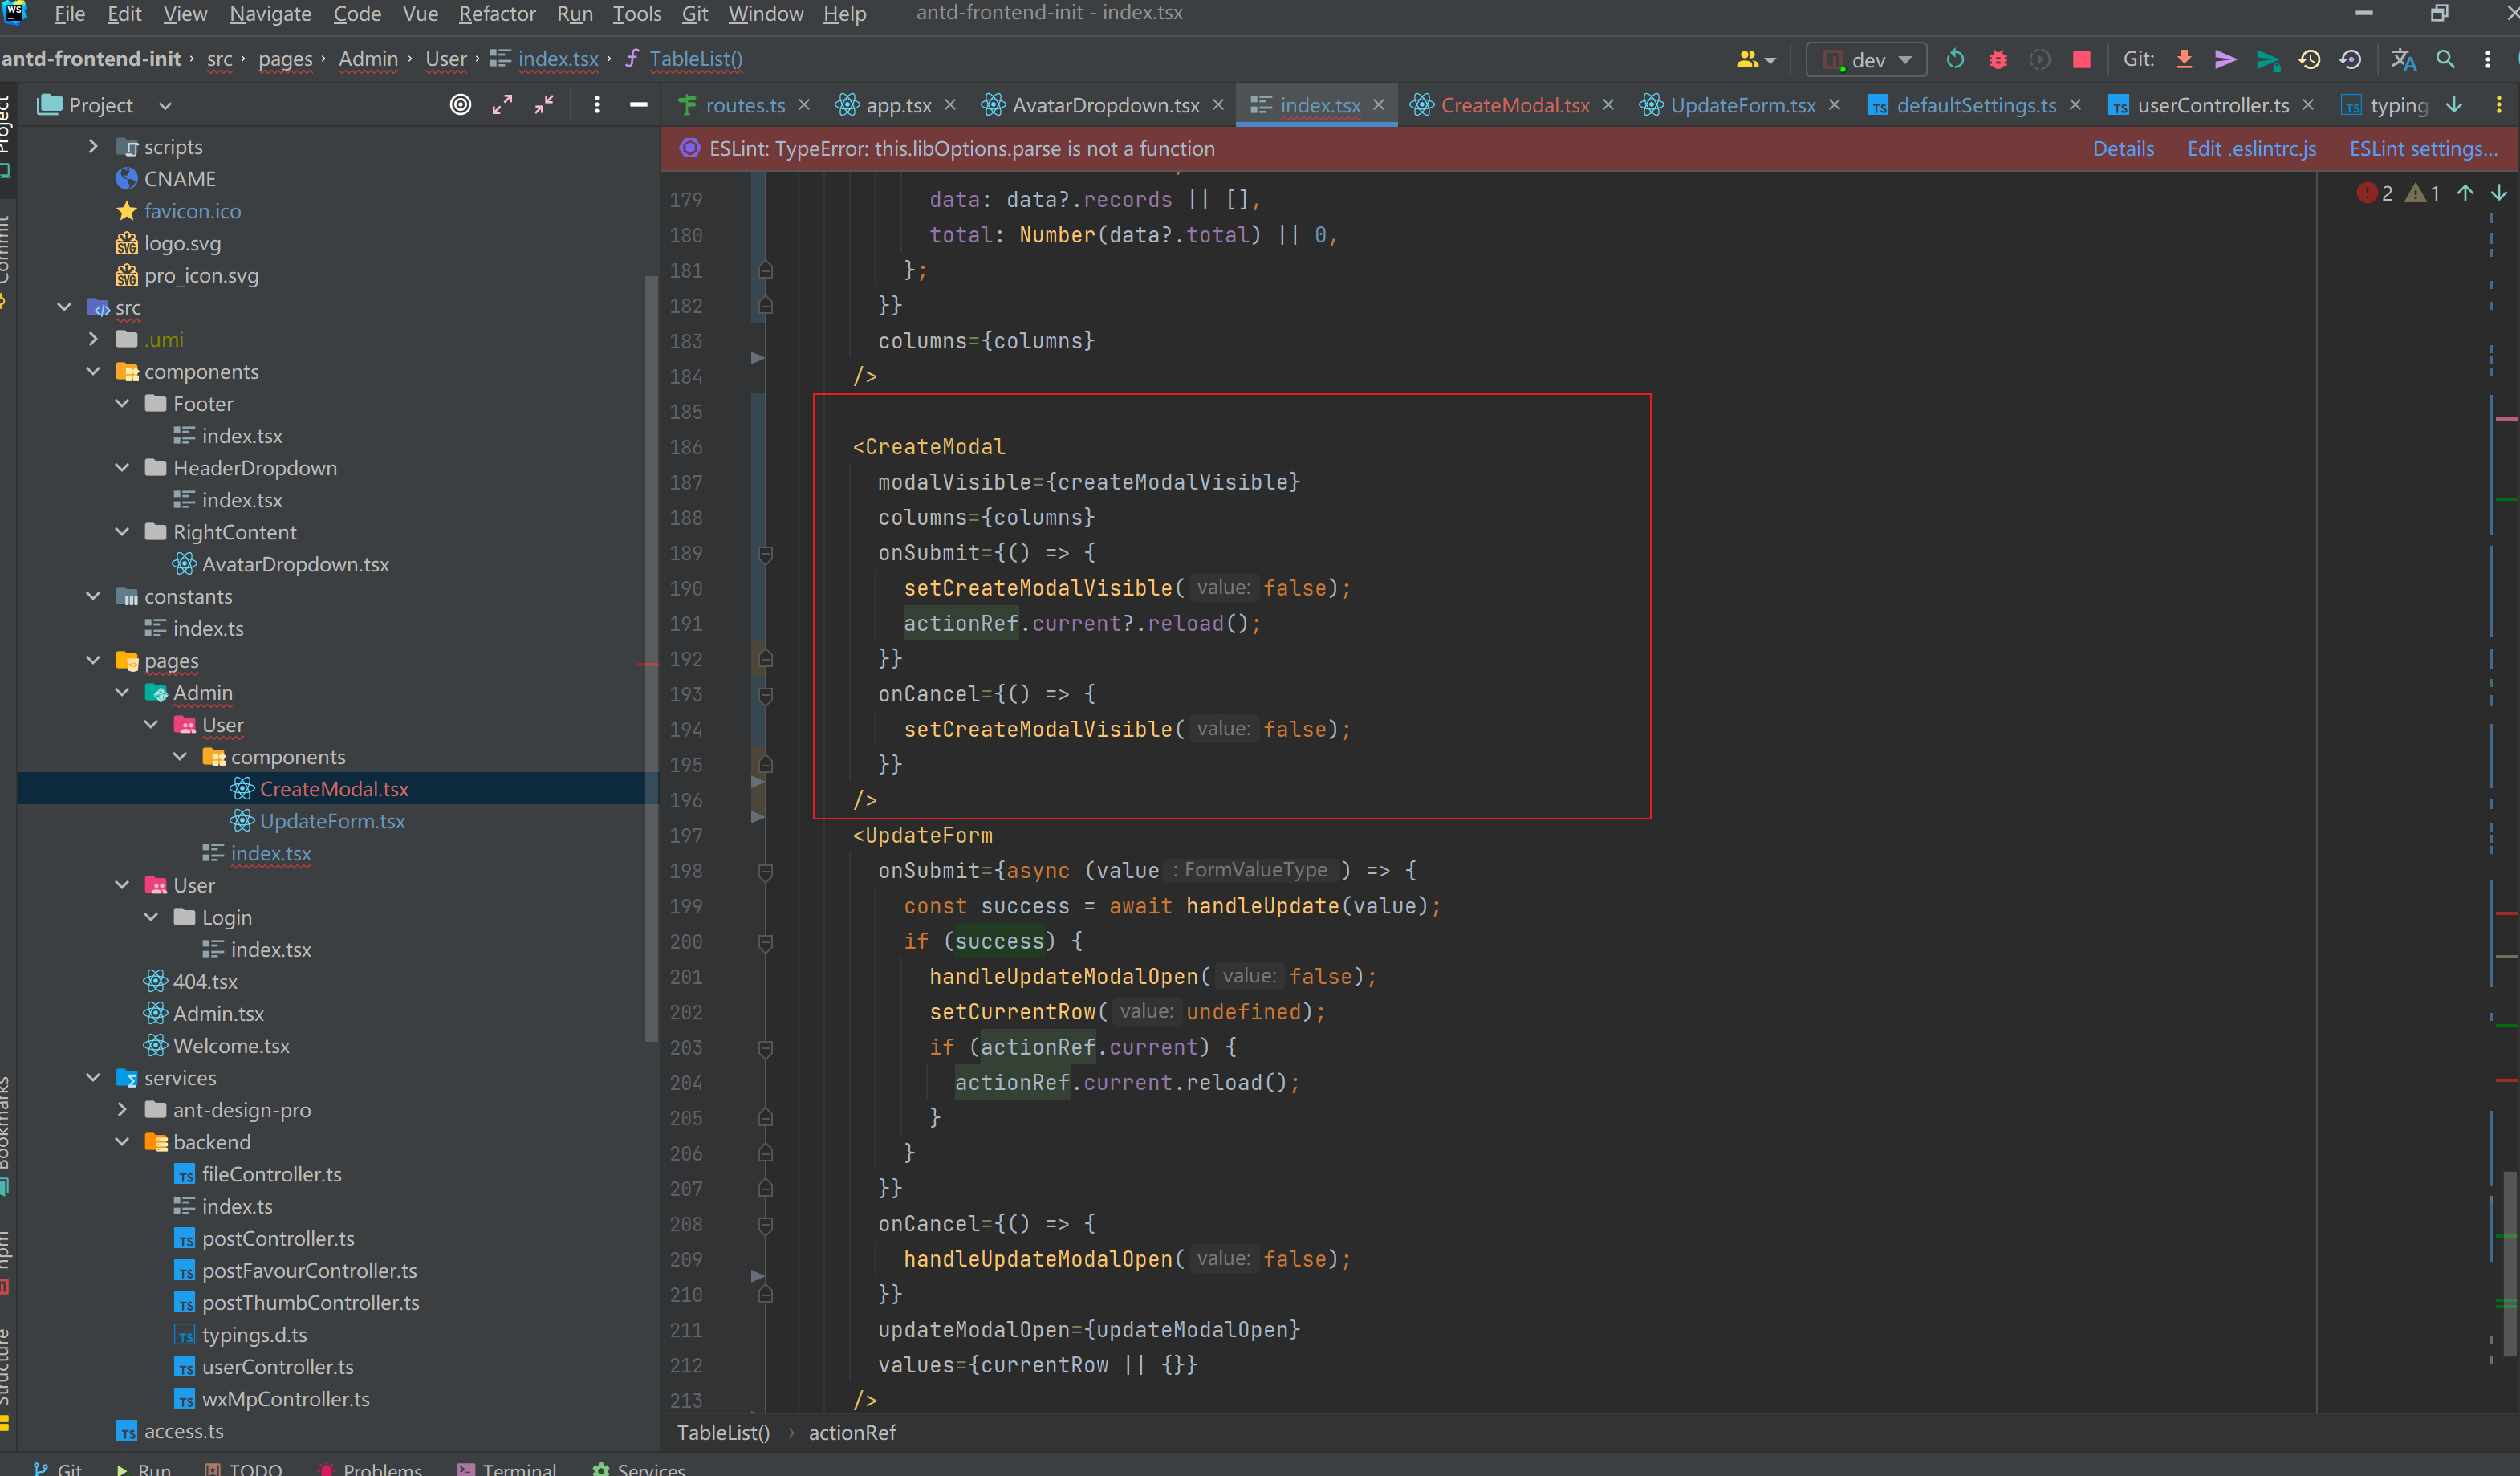
添加 createModal 组件
<CreateModal

  modalVisible={createModalVisible}

  columns={columns} => {

    setCreateModalVisible(false);

    actionRef.current?.reload();

  }} => {

    setCreateModalVisible(false);

  }}

  />
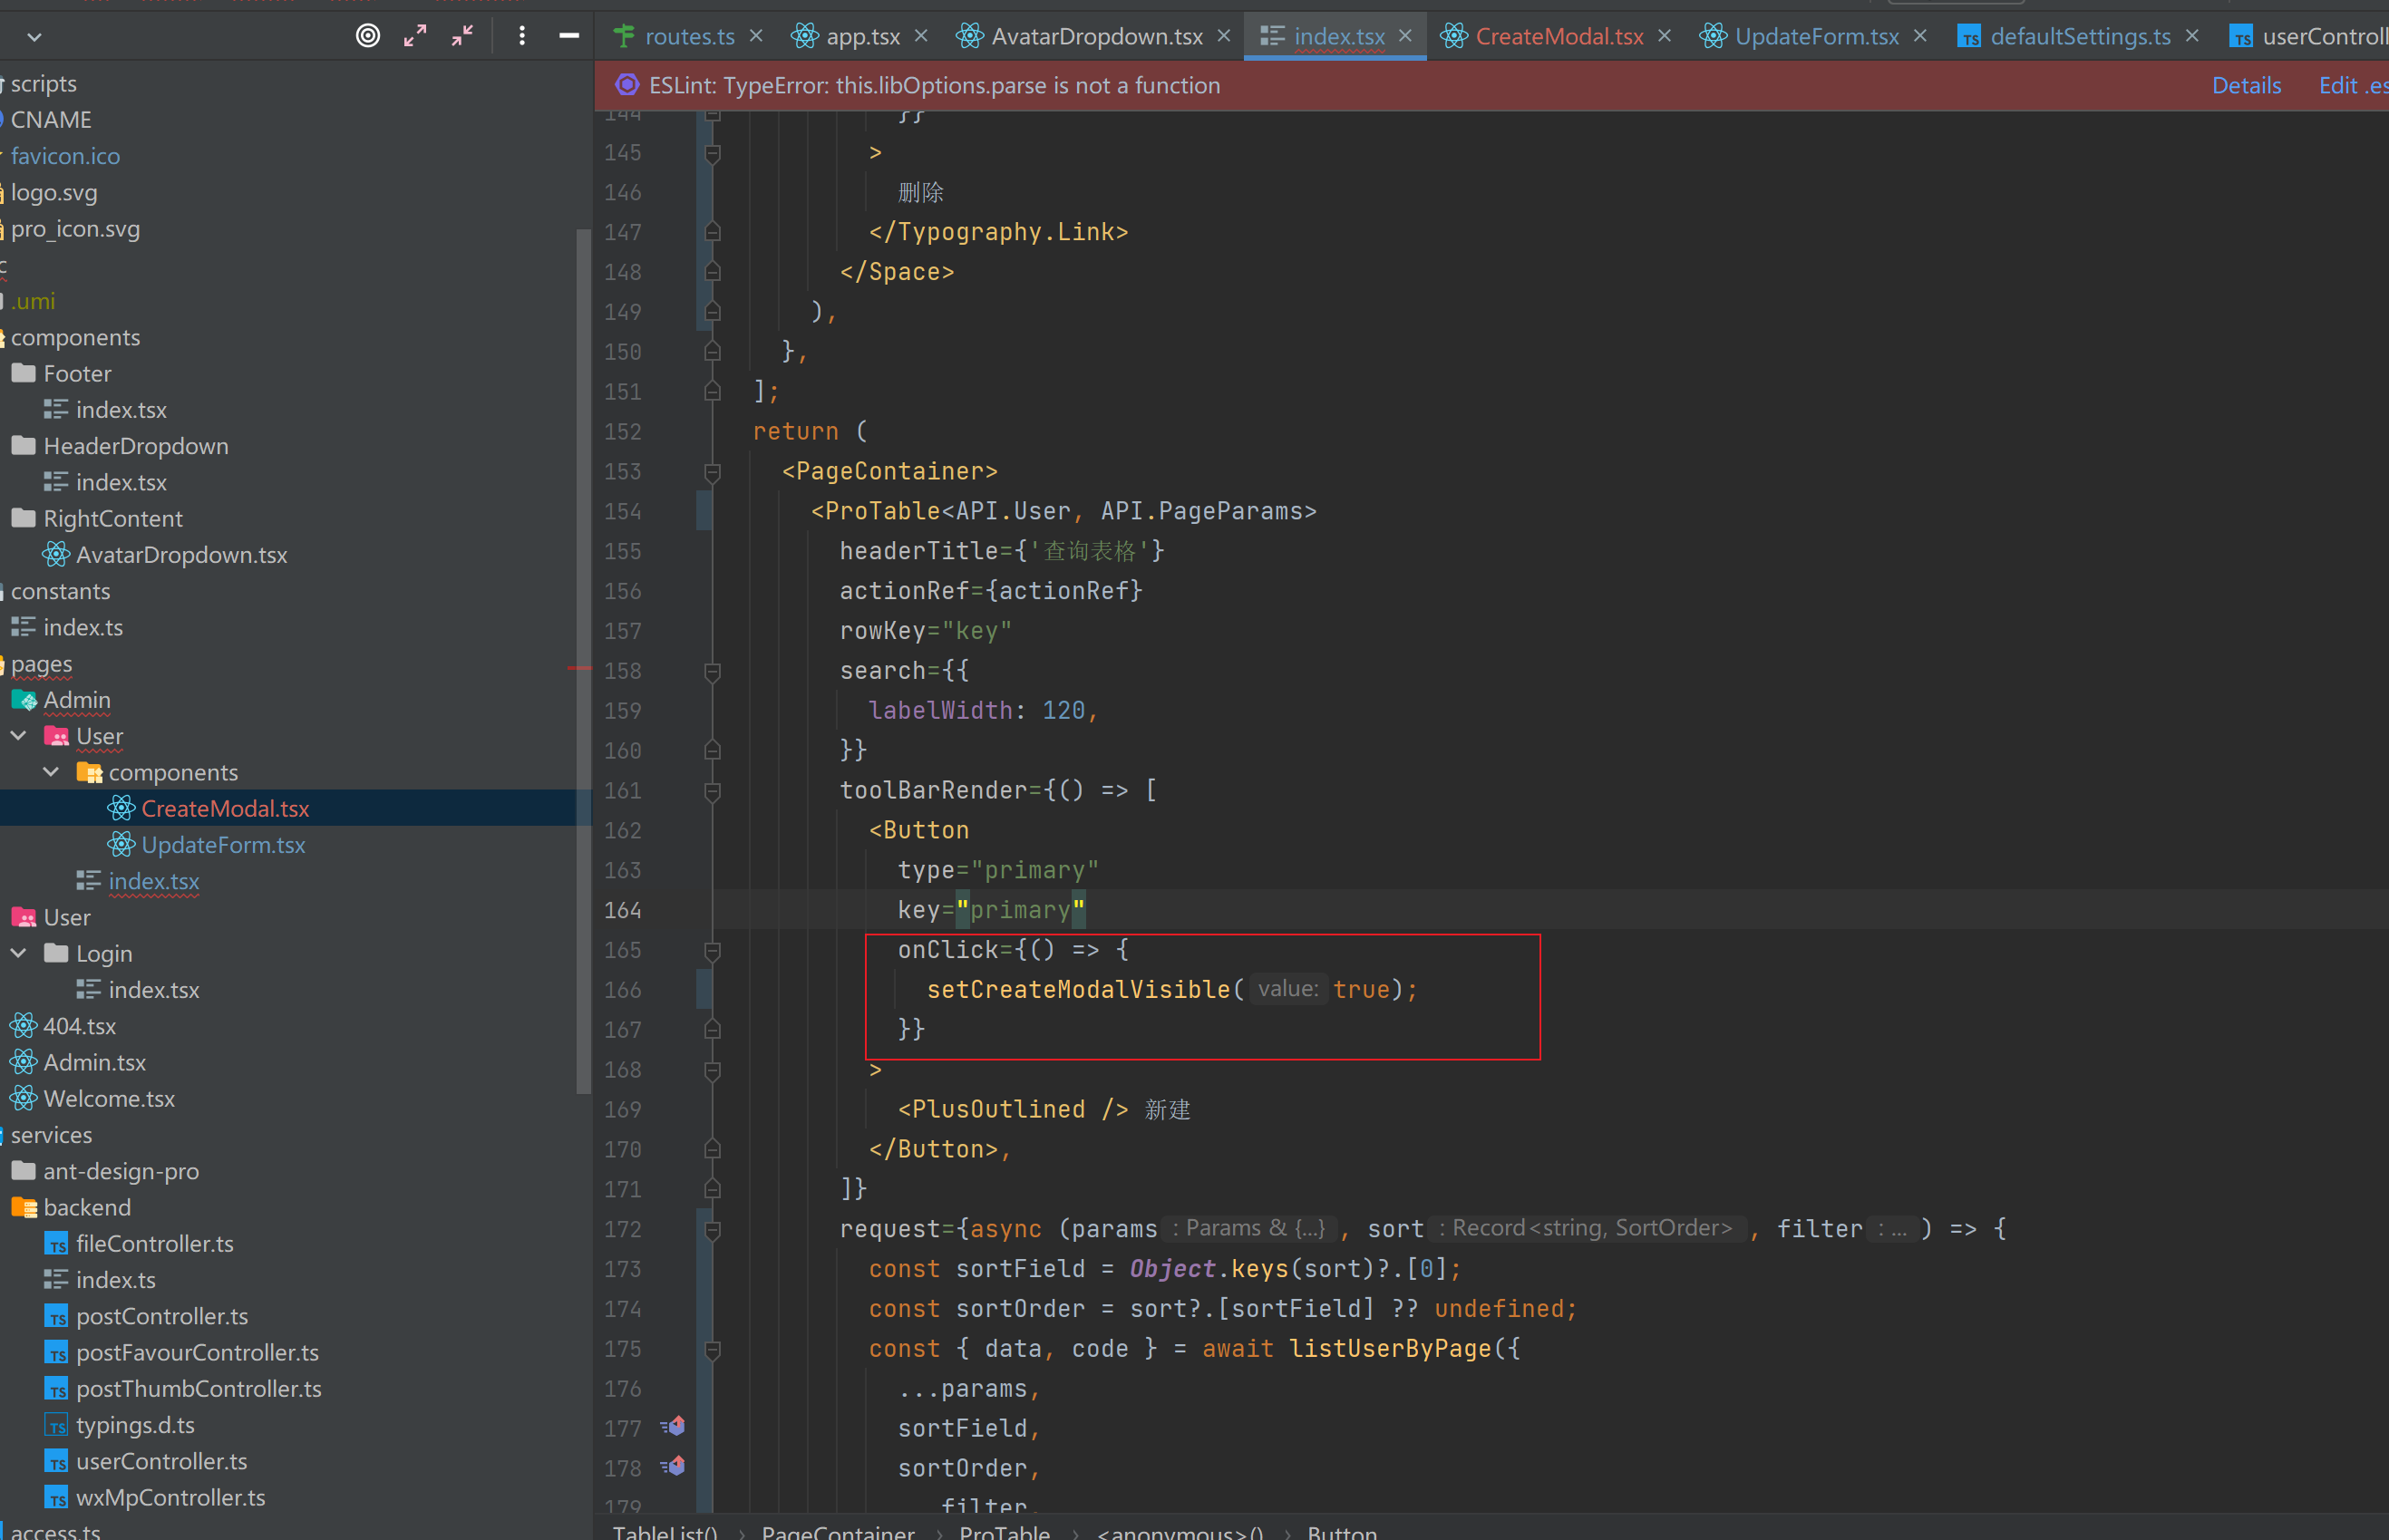
修改点击按钮的事件,让弹窗显示即可
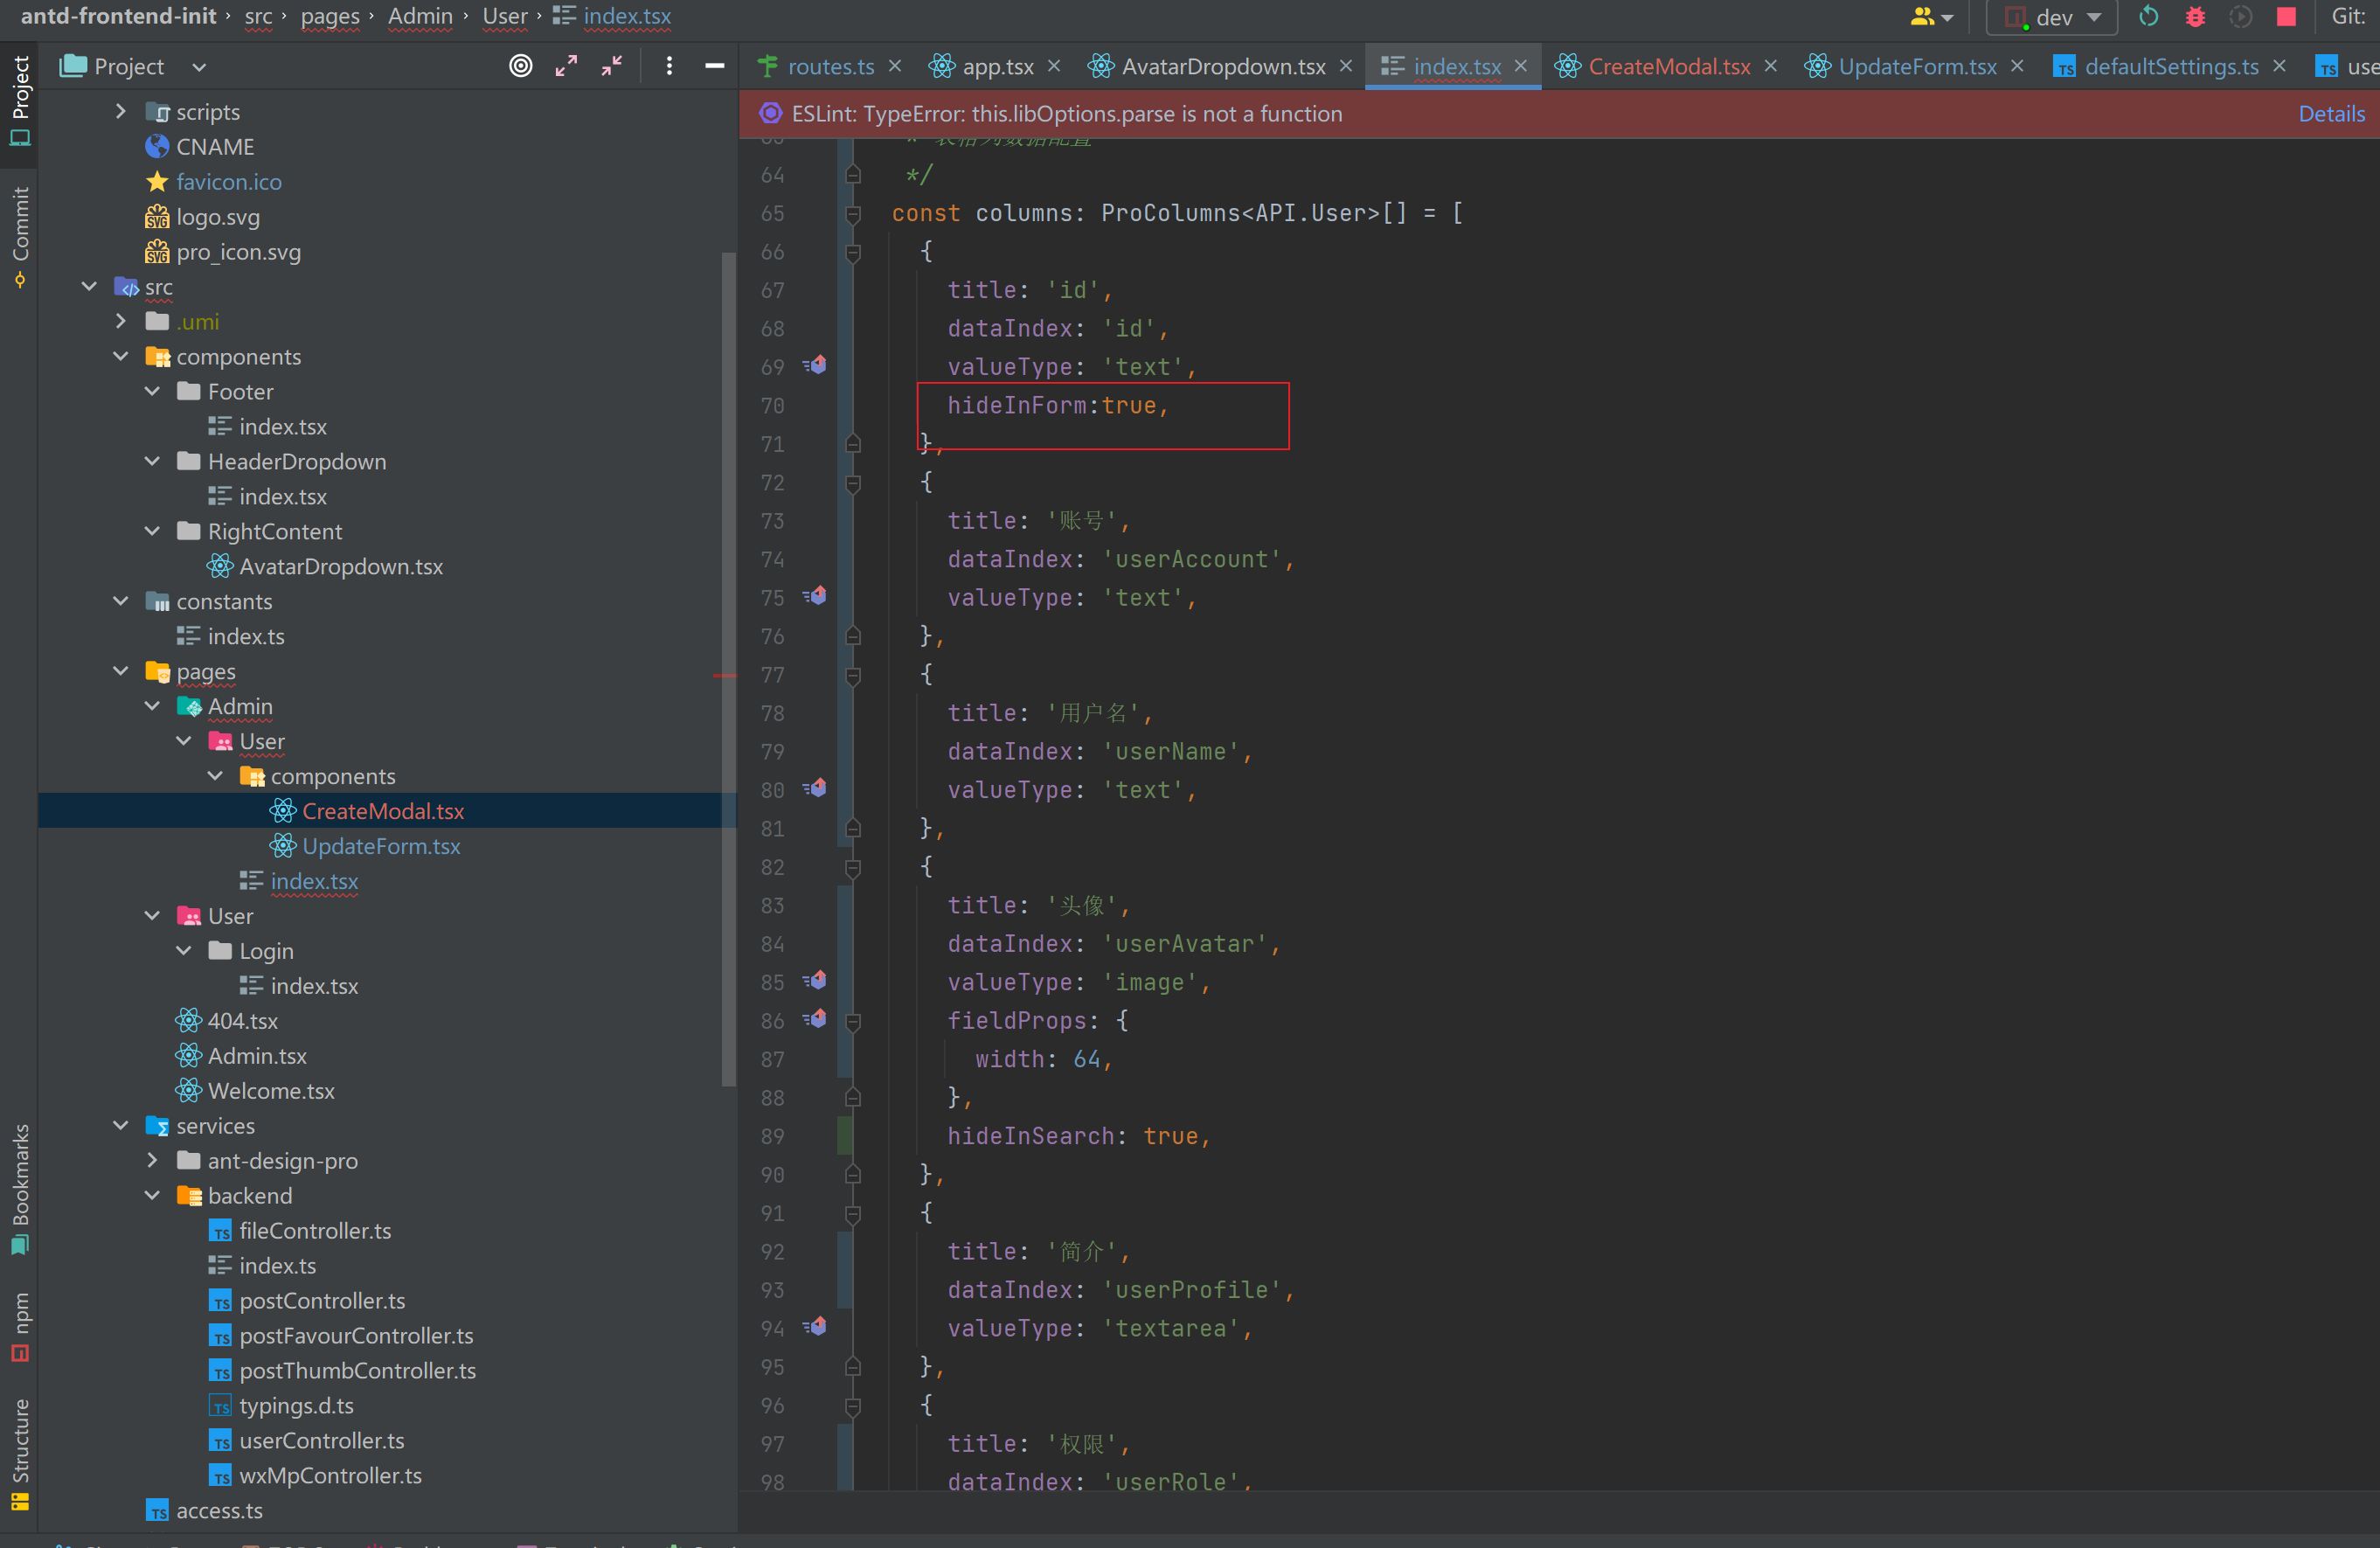
利用 hideInForm 去除不必要显示的属性,比如 id、更新时间、创建时间
新建用户效果图
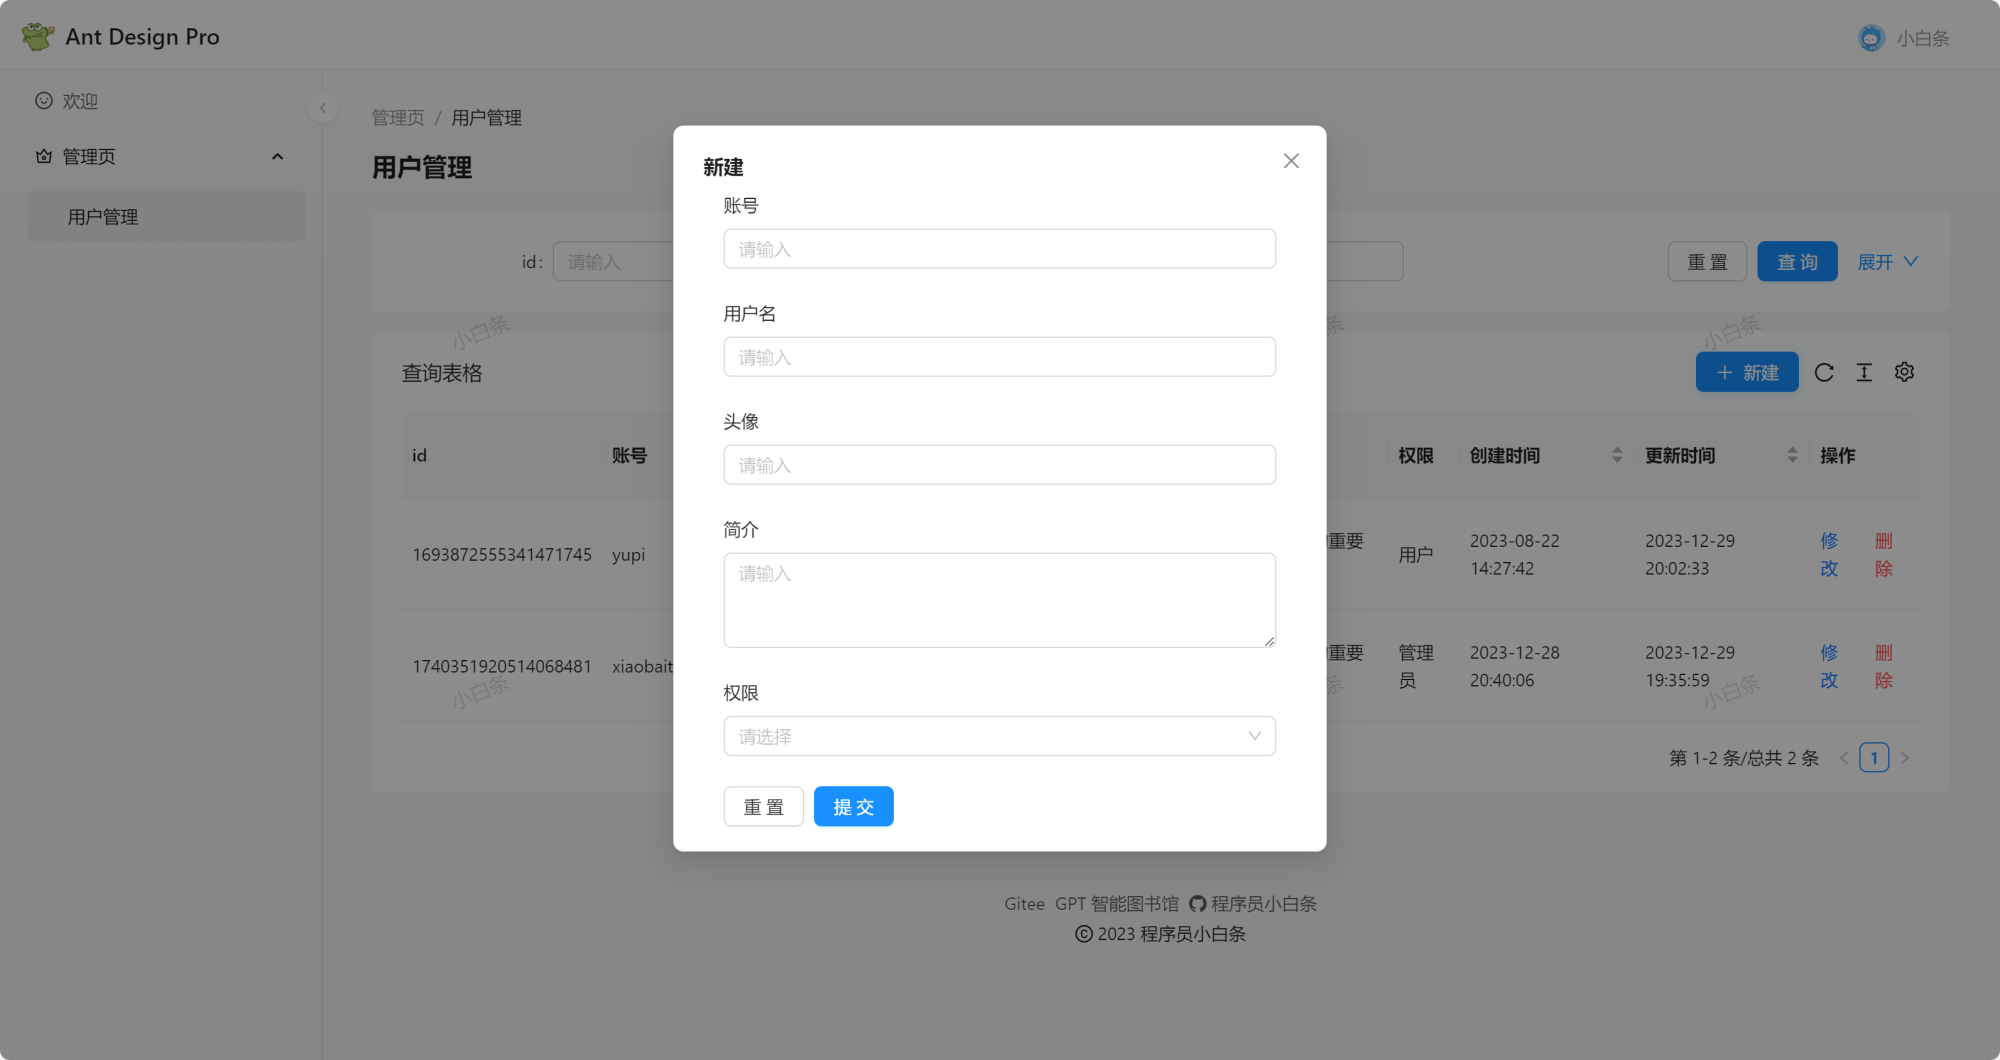
用户简介由于后端的 UserAddRequest 没有 UserProfile 字段,因此不能新增,但用户可以自己修改,管理员不能去改用户简介。
11)新增更新用户的功能,先将 index.tsx 的 handleUpdate 的方法剪切到 UpdateModal.tsx 然后做适当修改即可。
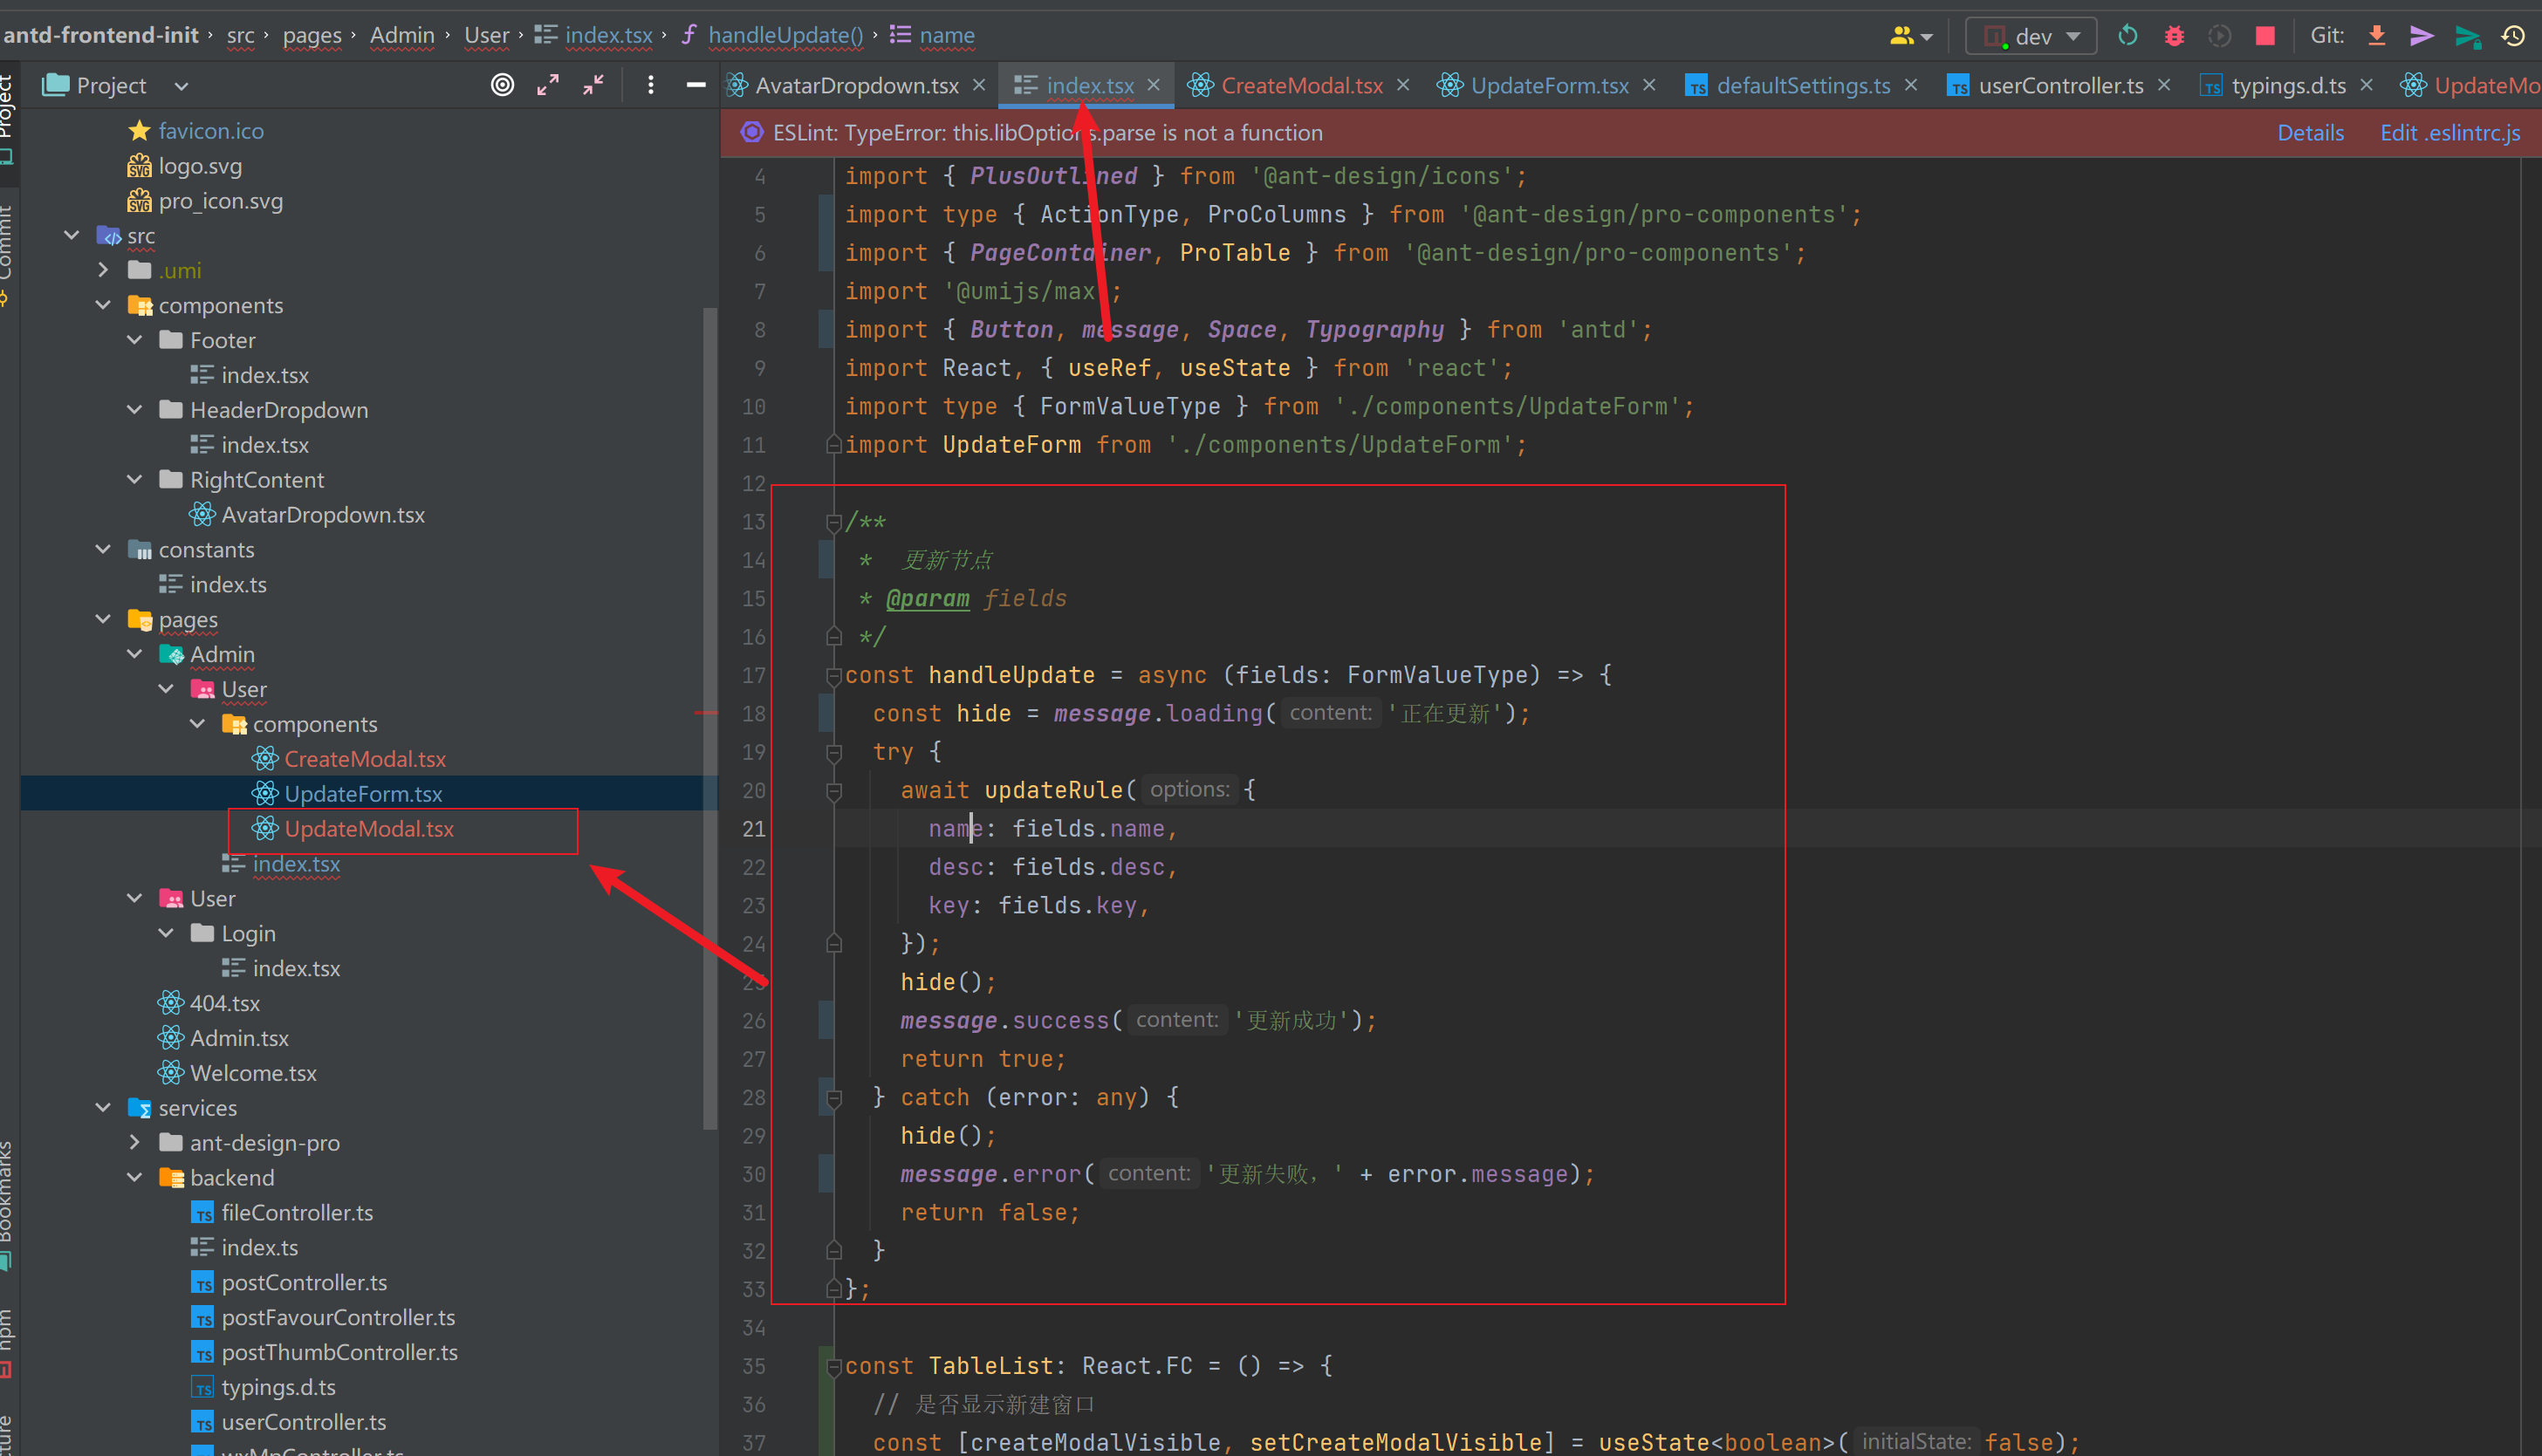 ```tsx import { updateUser } from '@/services/backend/userController';
import { ProColumns, ProTable } from '@ant-design/pro-components'; import
{ message, Modal } from 'antd'; import React from 'react';
```tsx import { updateUser } from '@/services/backend/userController';
import { ProColumns, ProTable } from '@ant-design/pro-components'; import
{ message, Modal } from 'antd'; import React from 'react';
interface Props { oldData?: API.User; modalVisible: boolean; columns: ProColumns<API.User>[]; onSubmit: () => void; onCancel: () => void; }
/**
- 更新节点
- @param fields */ const handleUpdate = async (fields: API.UserUpdateRequest) => { const hide = message.loading('更新中'); try { await updateUser(fields); hide(); message.success('更新成功'); return true; } catch (error: any) { hide(); message.error('更新失败,' + error.message); return false; } };1806613115223461889_0.49314424600640283 1806613115223461889_0.00023240755035747185
/**
- 更新数据弹窗
- @param props
- @constructor */ const UpdateModal: React.FC = (props) => { const { oldData, columns, modalVisible, onCancel, onSubmit } = props;1806613115223461889_0.30931963823631614
if (!oldData) { return <></>; }1806613115223461889_0.11078886104978647
return ( <Modal title={'更新'} open={modalVisible} destroyOnClose footer={null}> <ProTable<API.UserUpdateRequest> columns={columns} form={{ initialValues: oldData, }} type="form" (values) => { const success = await handleUpdate({ ...values, id: oldData.id, }); if (success) { onSubmit?.(); } }} /> ); };
export default UpdateModal;
12)添加显示更新窗口的一个布尔值
// 是否显示更新窗口

const [updateModalVisible, setUpdateModalVisible] = useState<boolean>(false);
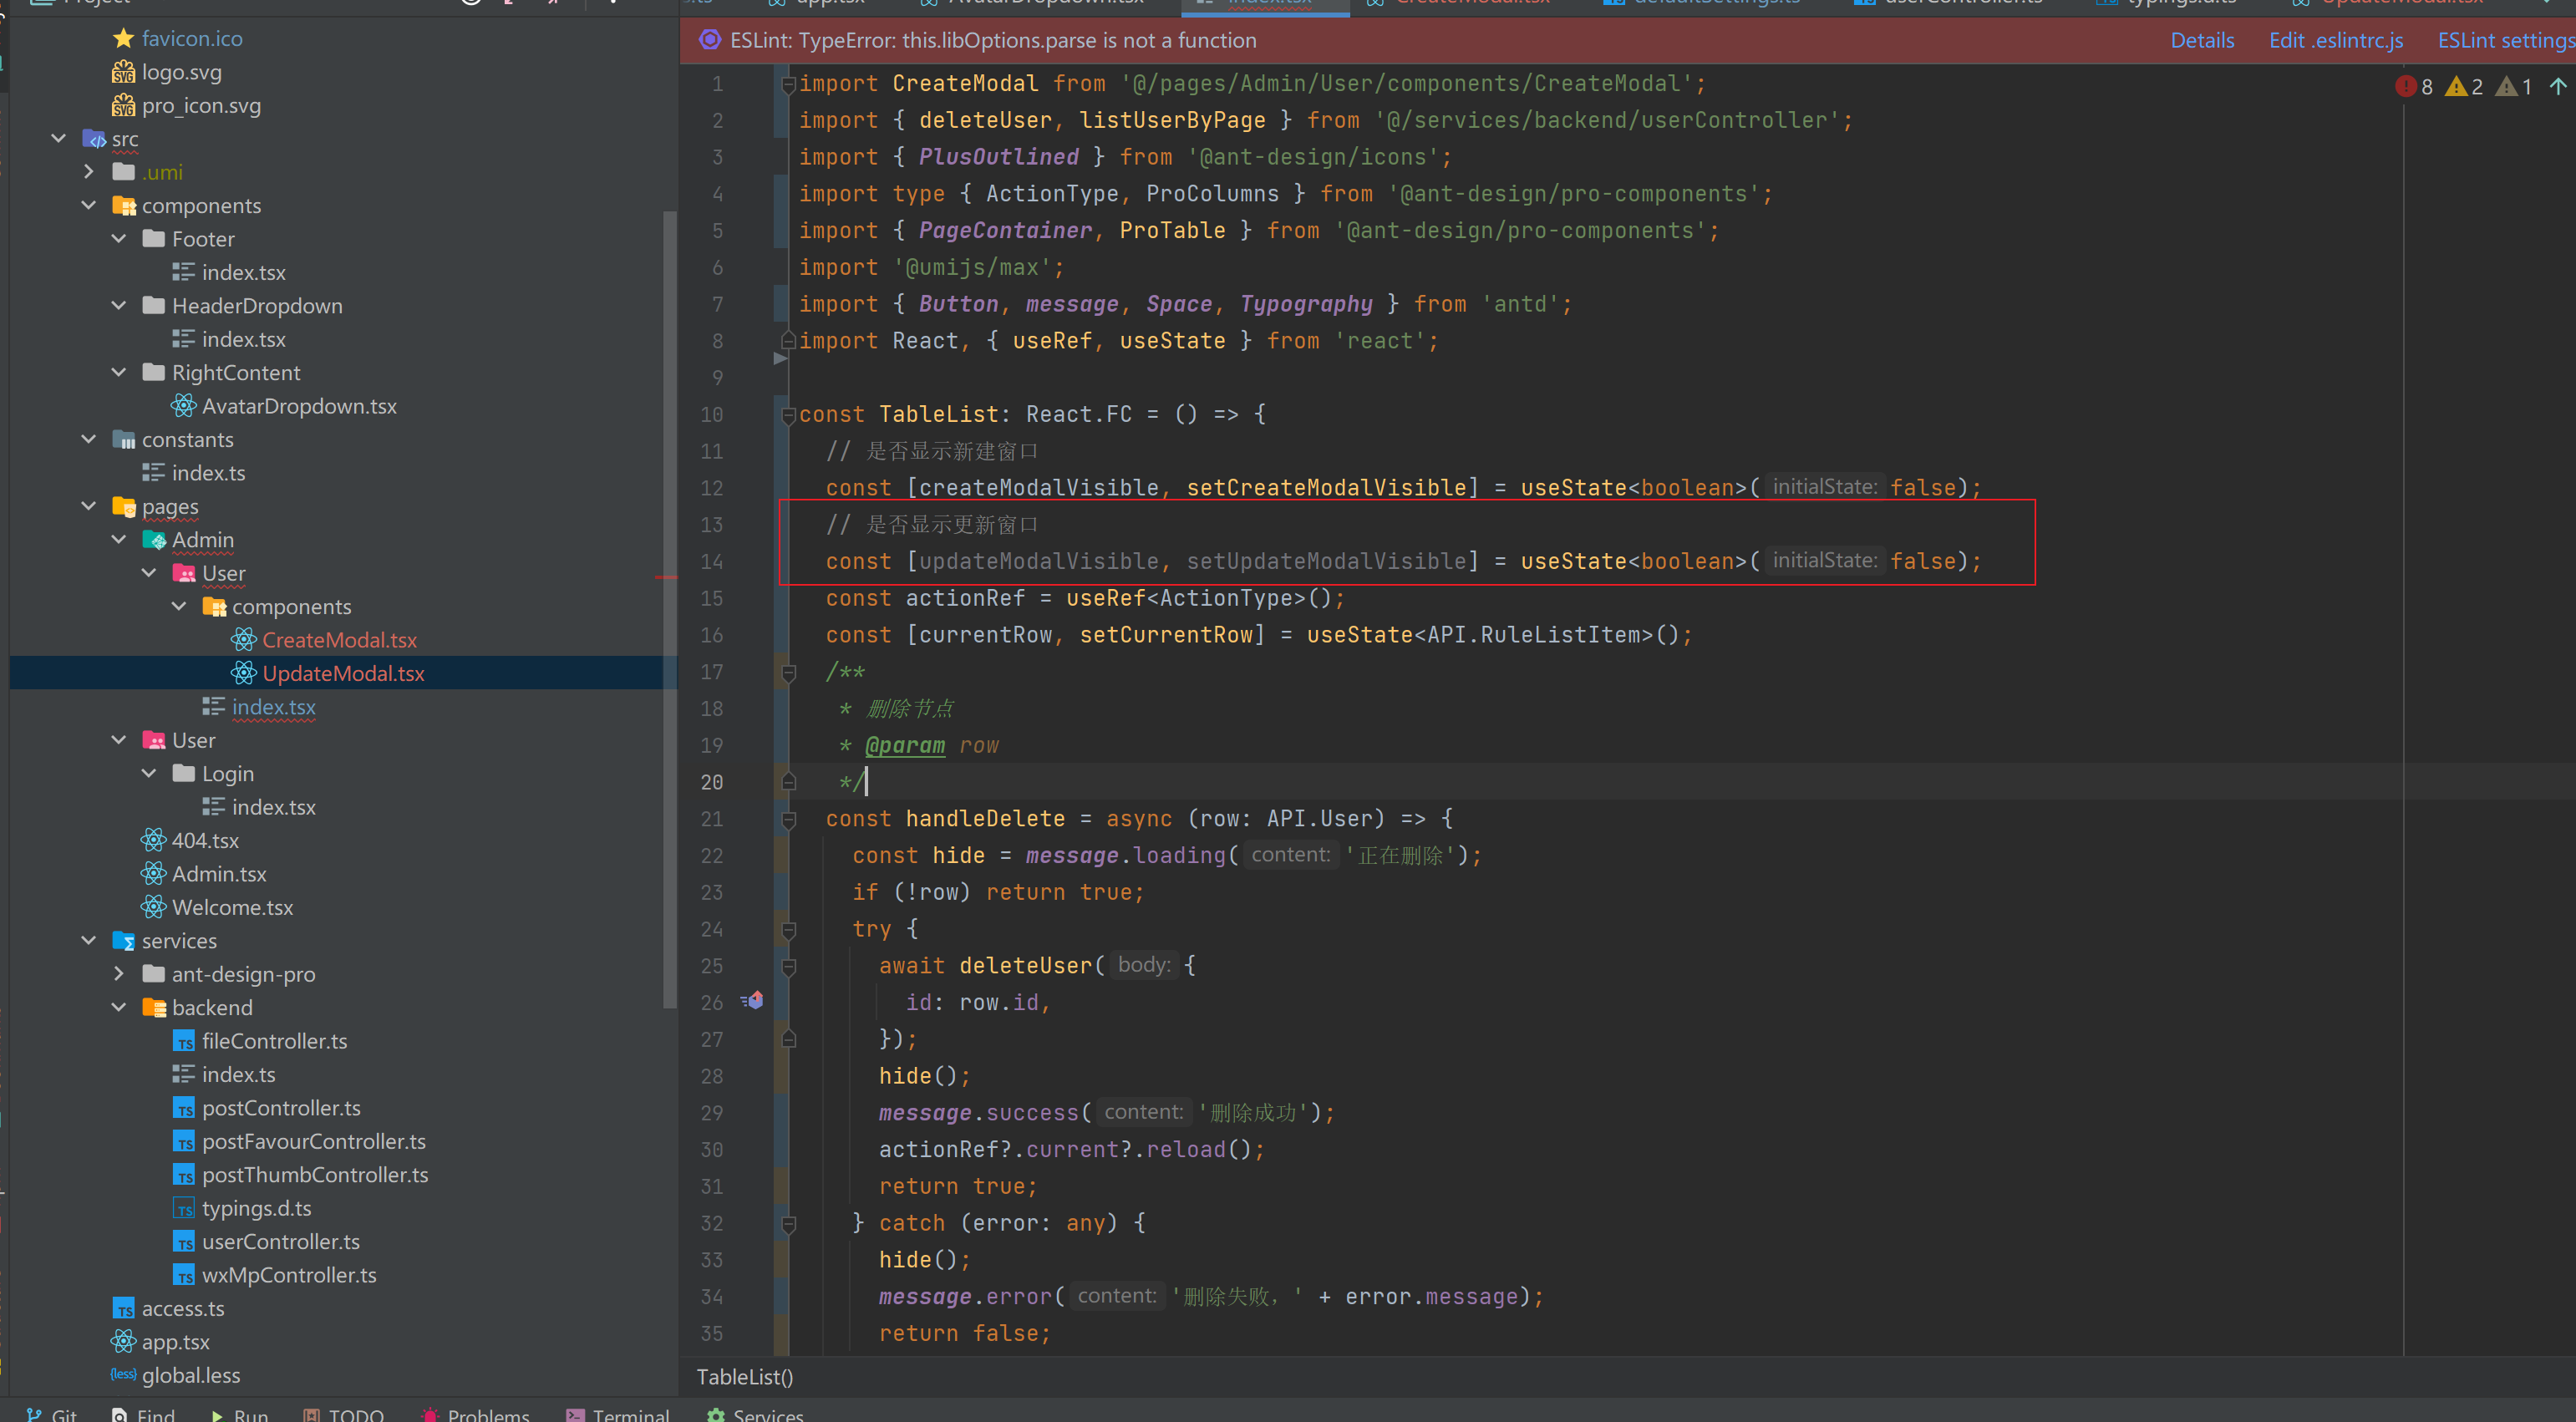
13)更新用户行 TS 类型
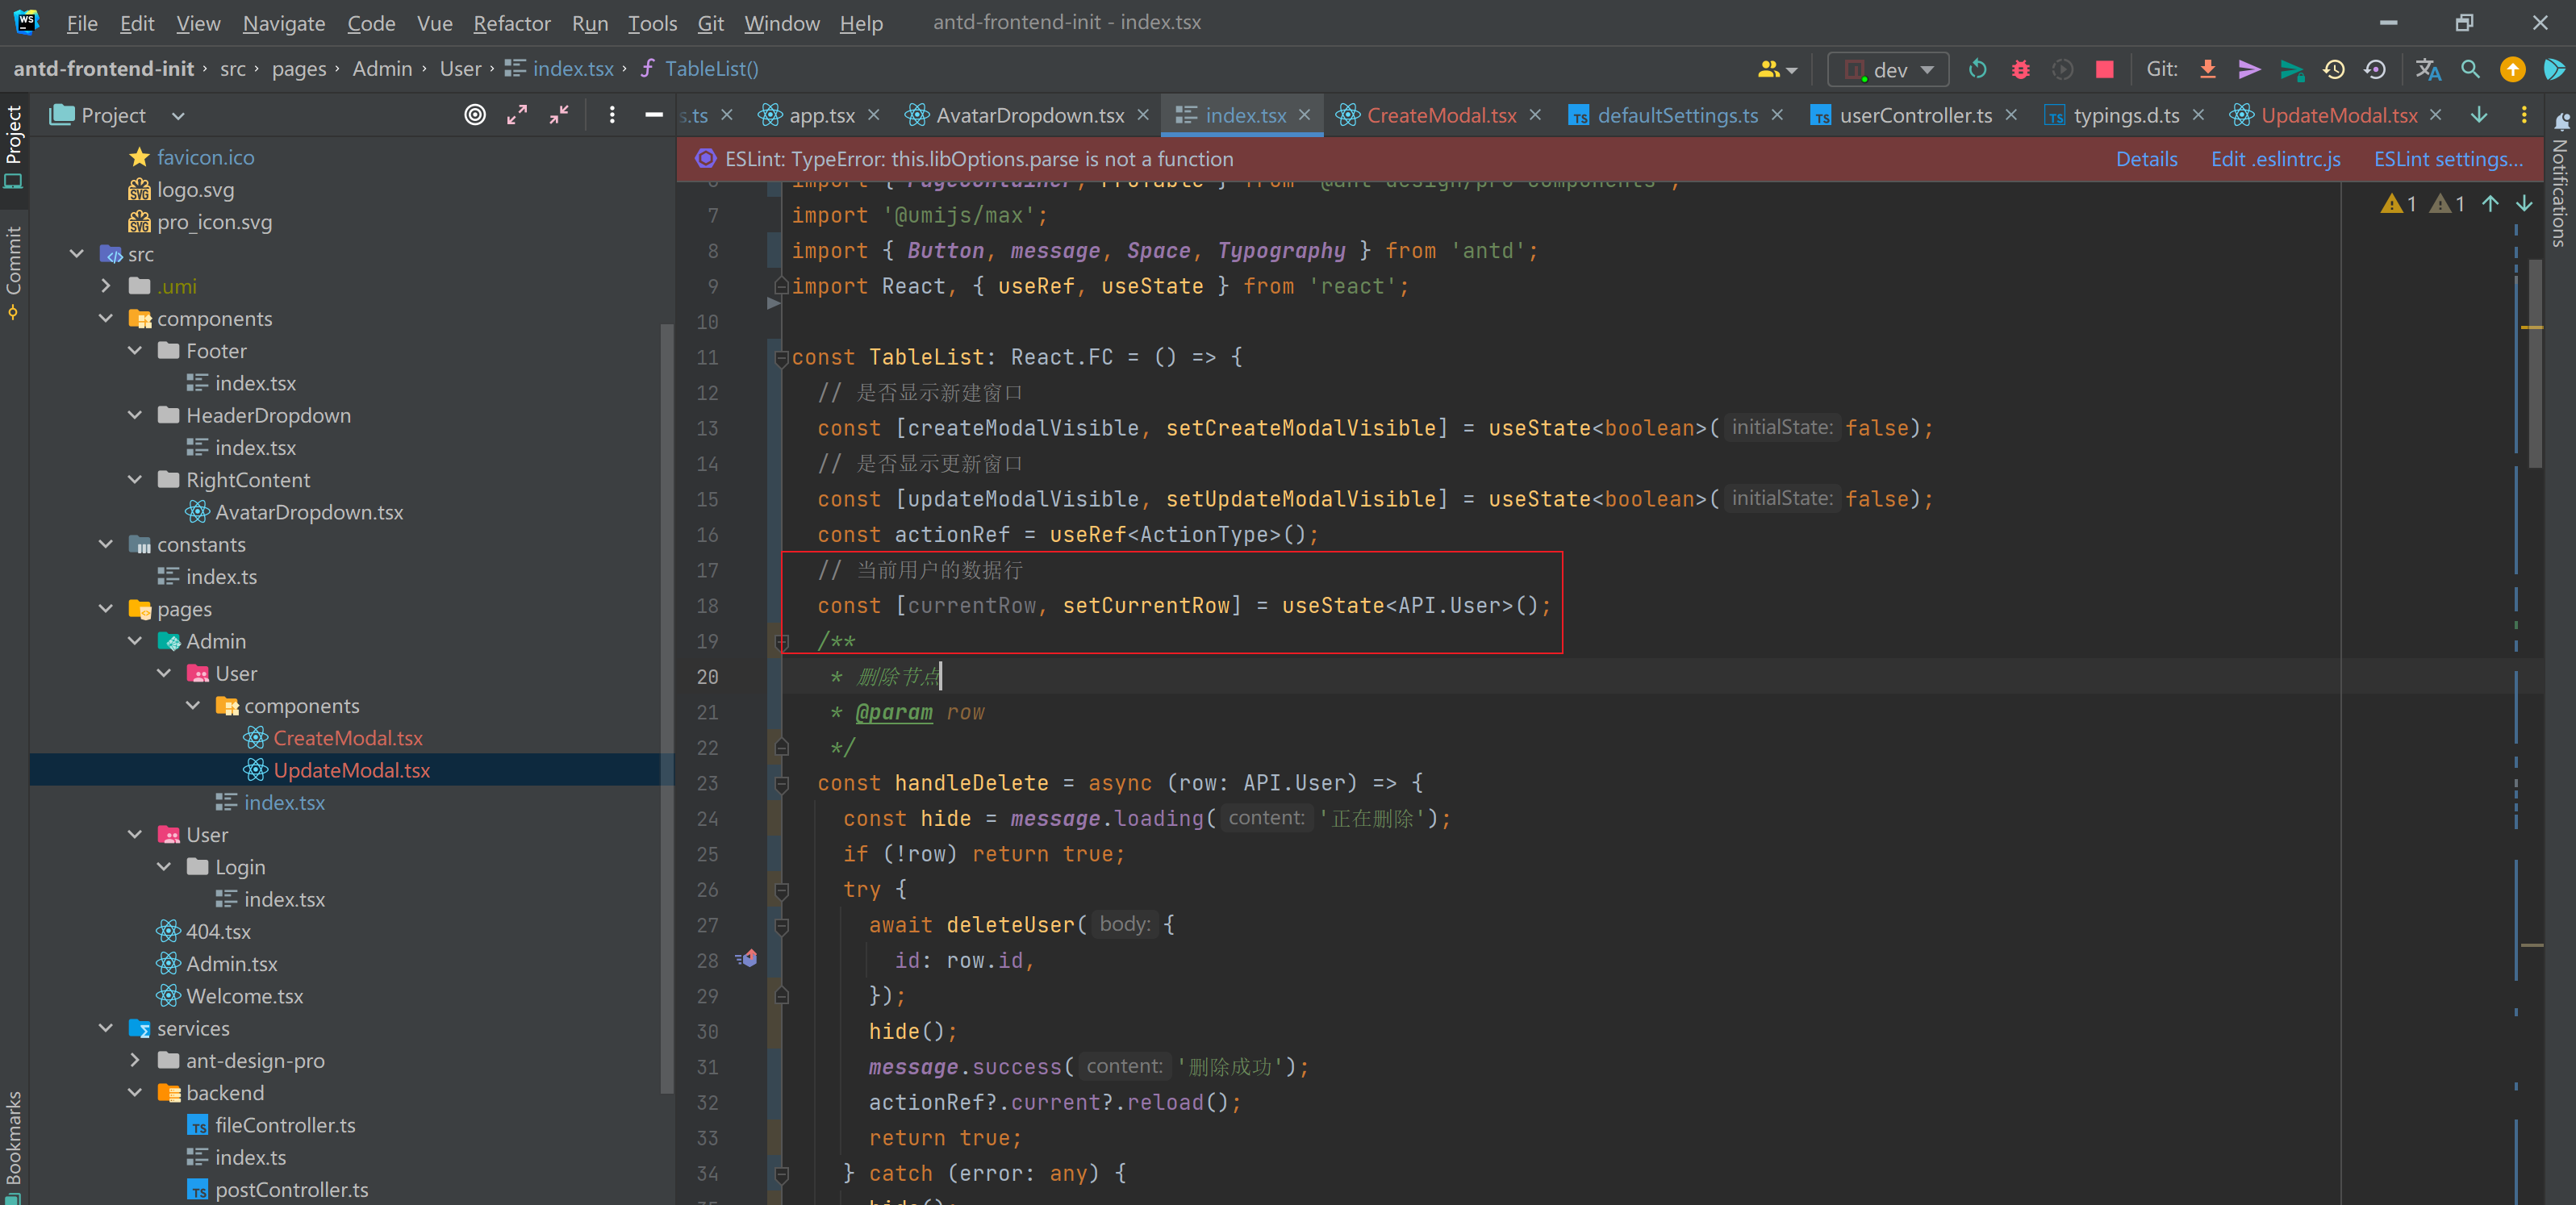
修改对应的 Click 事件
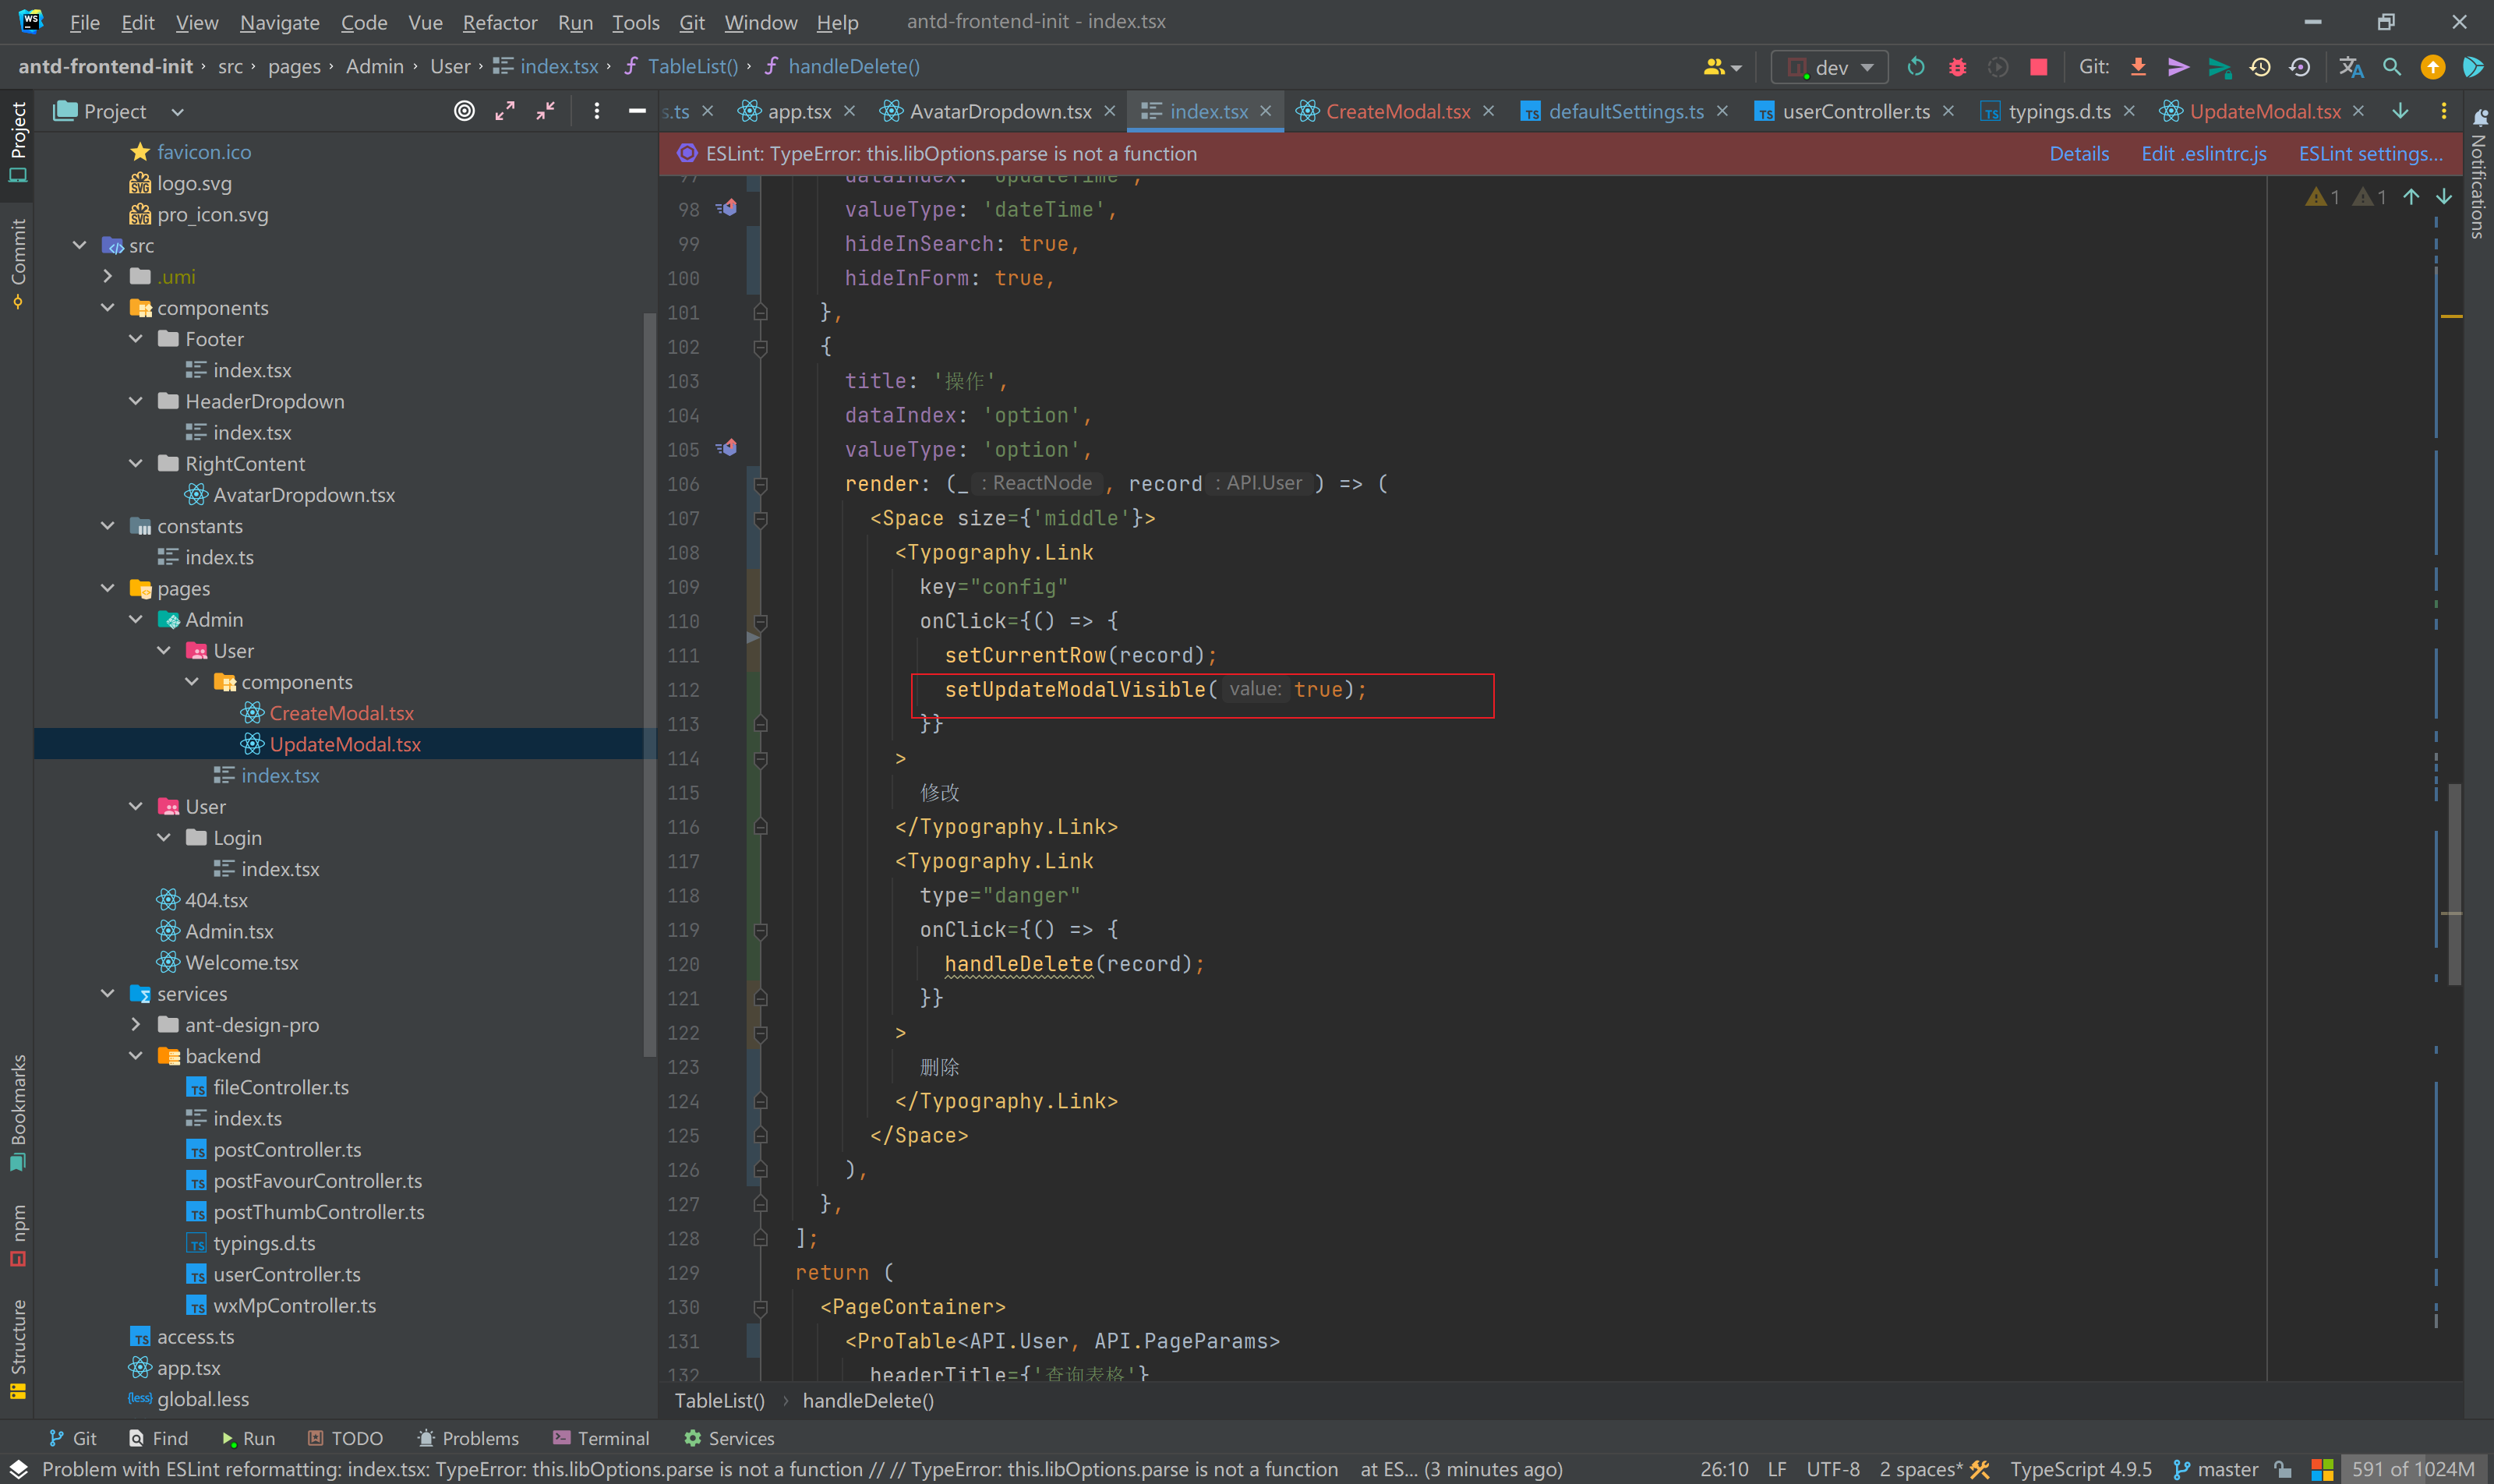
添加组件
    <UpdateModal

        modalVisible={updateModalVisible}

        columns={columns}

        oldData={currentRow} => {

          setUpdateModalVisible(false);

          setCurrentRow(undefined);

          actionRef.current?.reload();

        }} => {

          setUpdateModalVisible(false);

        }}

      />
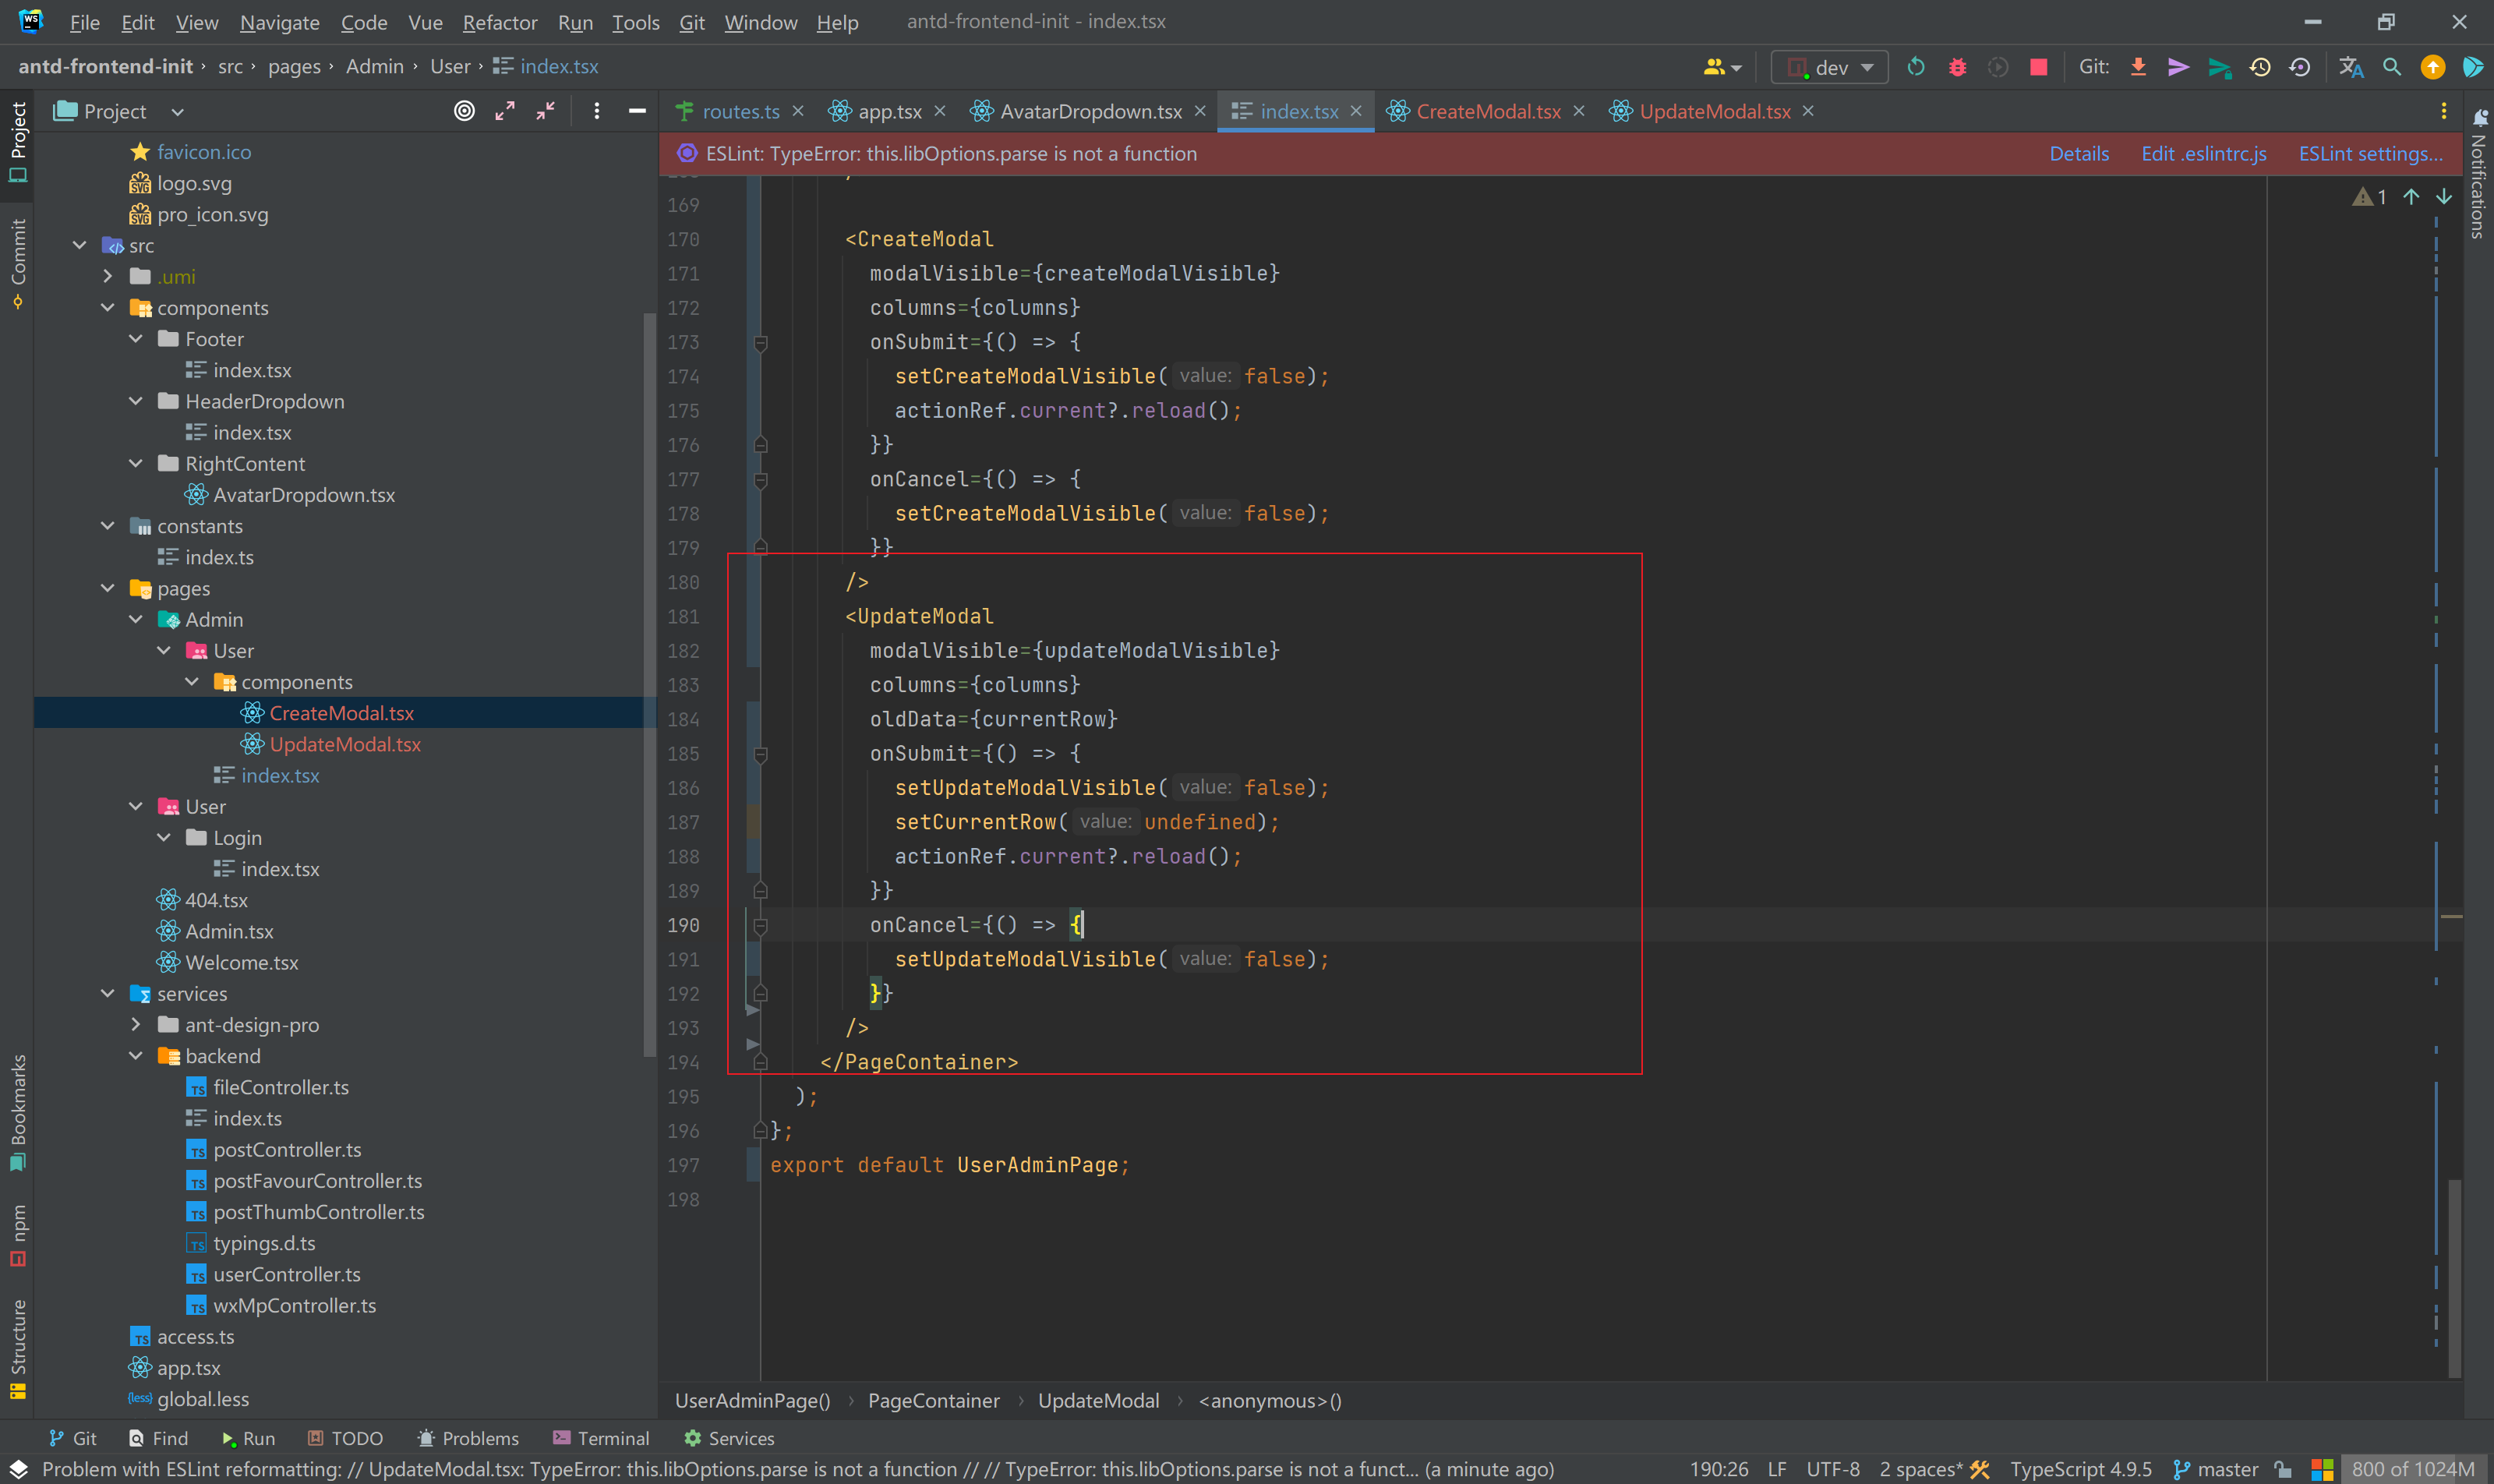
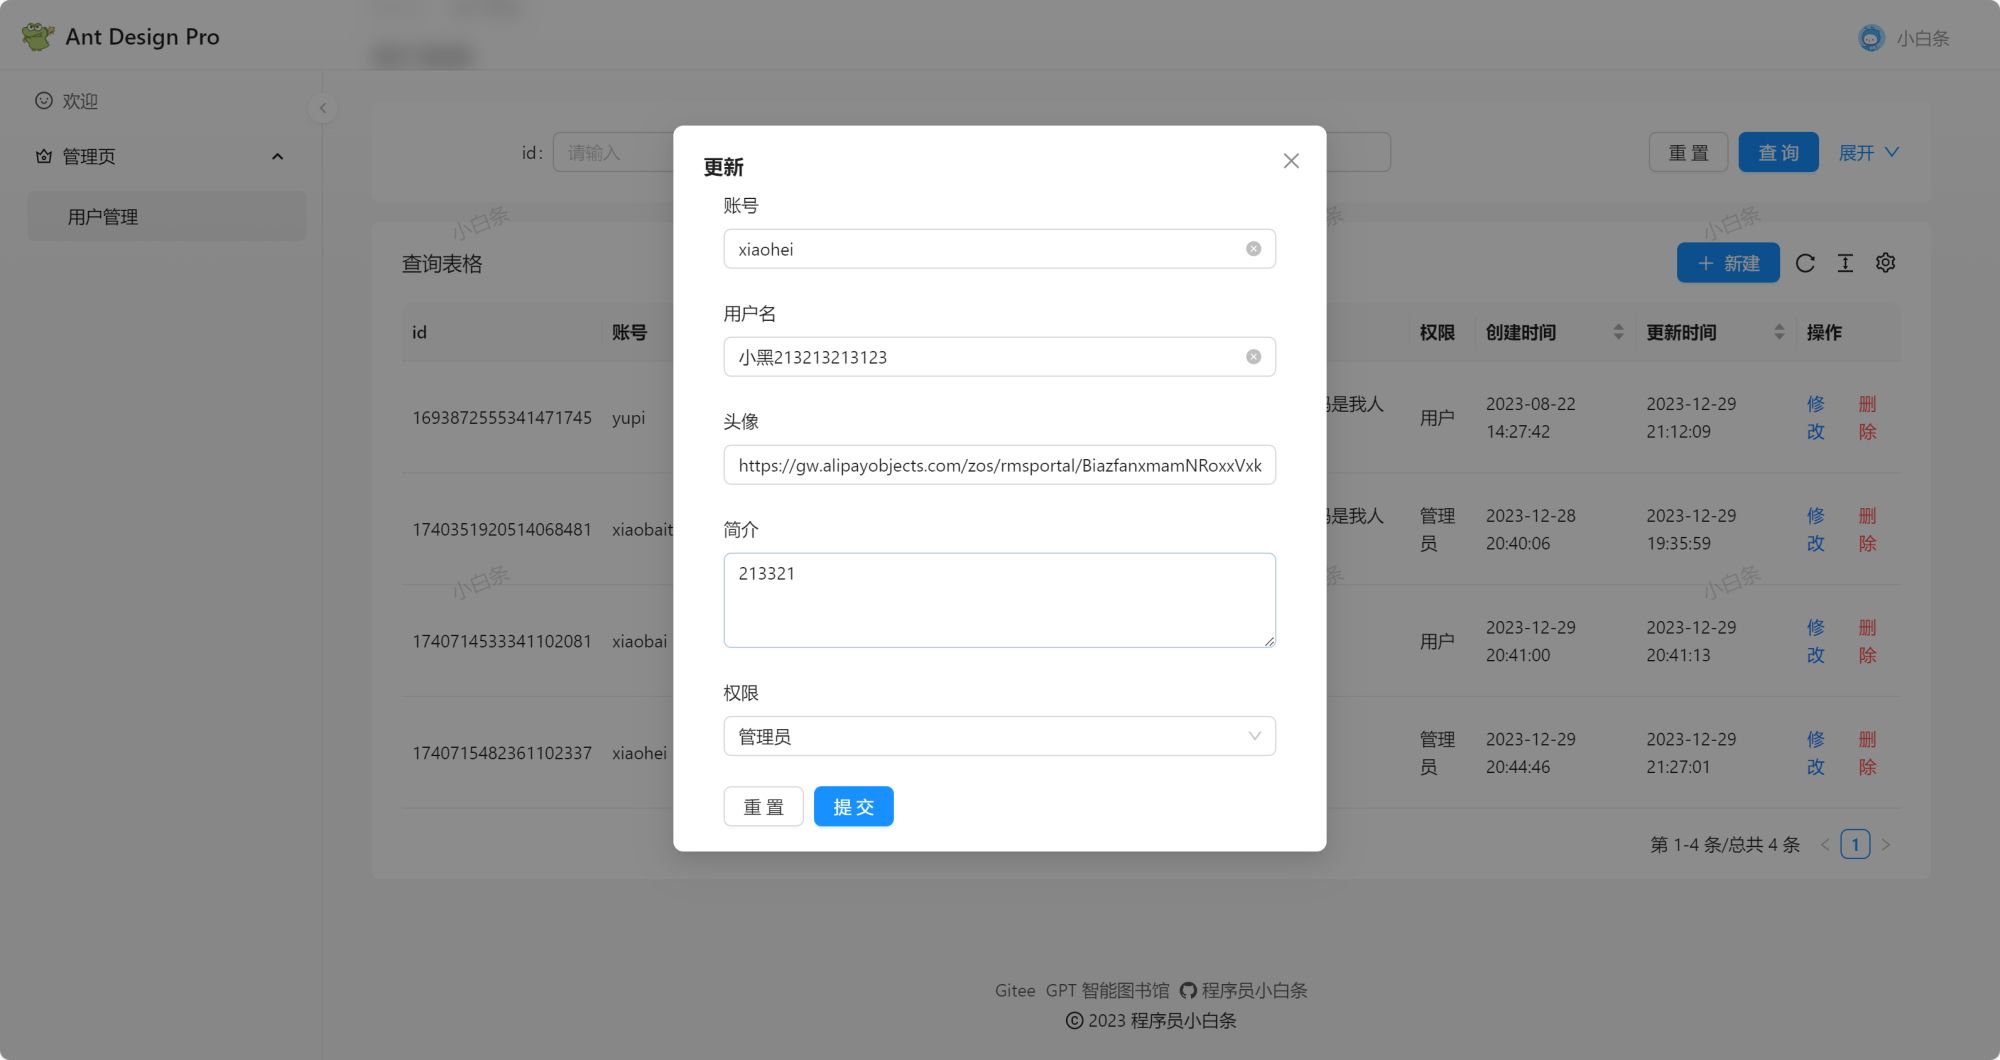
更新效果图:
其他
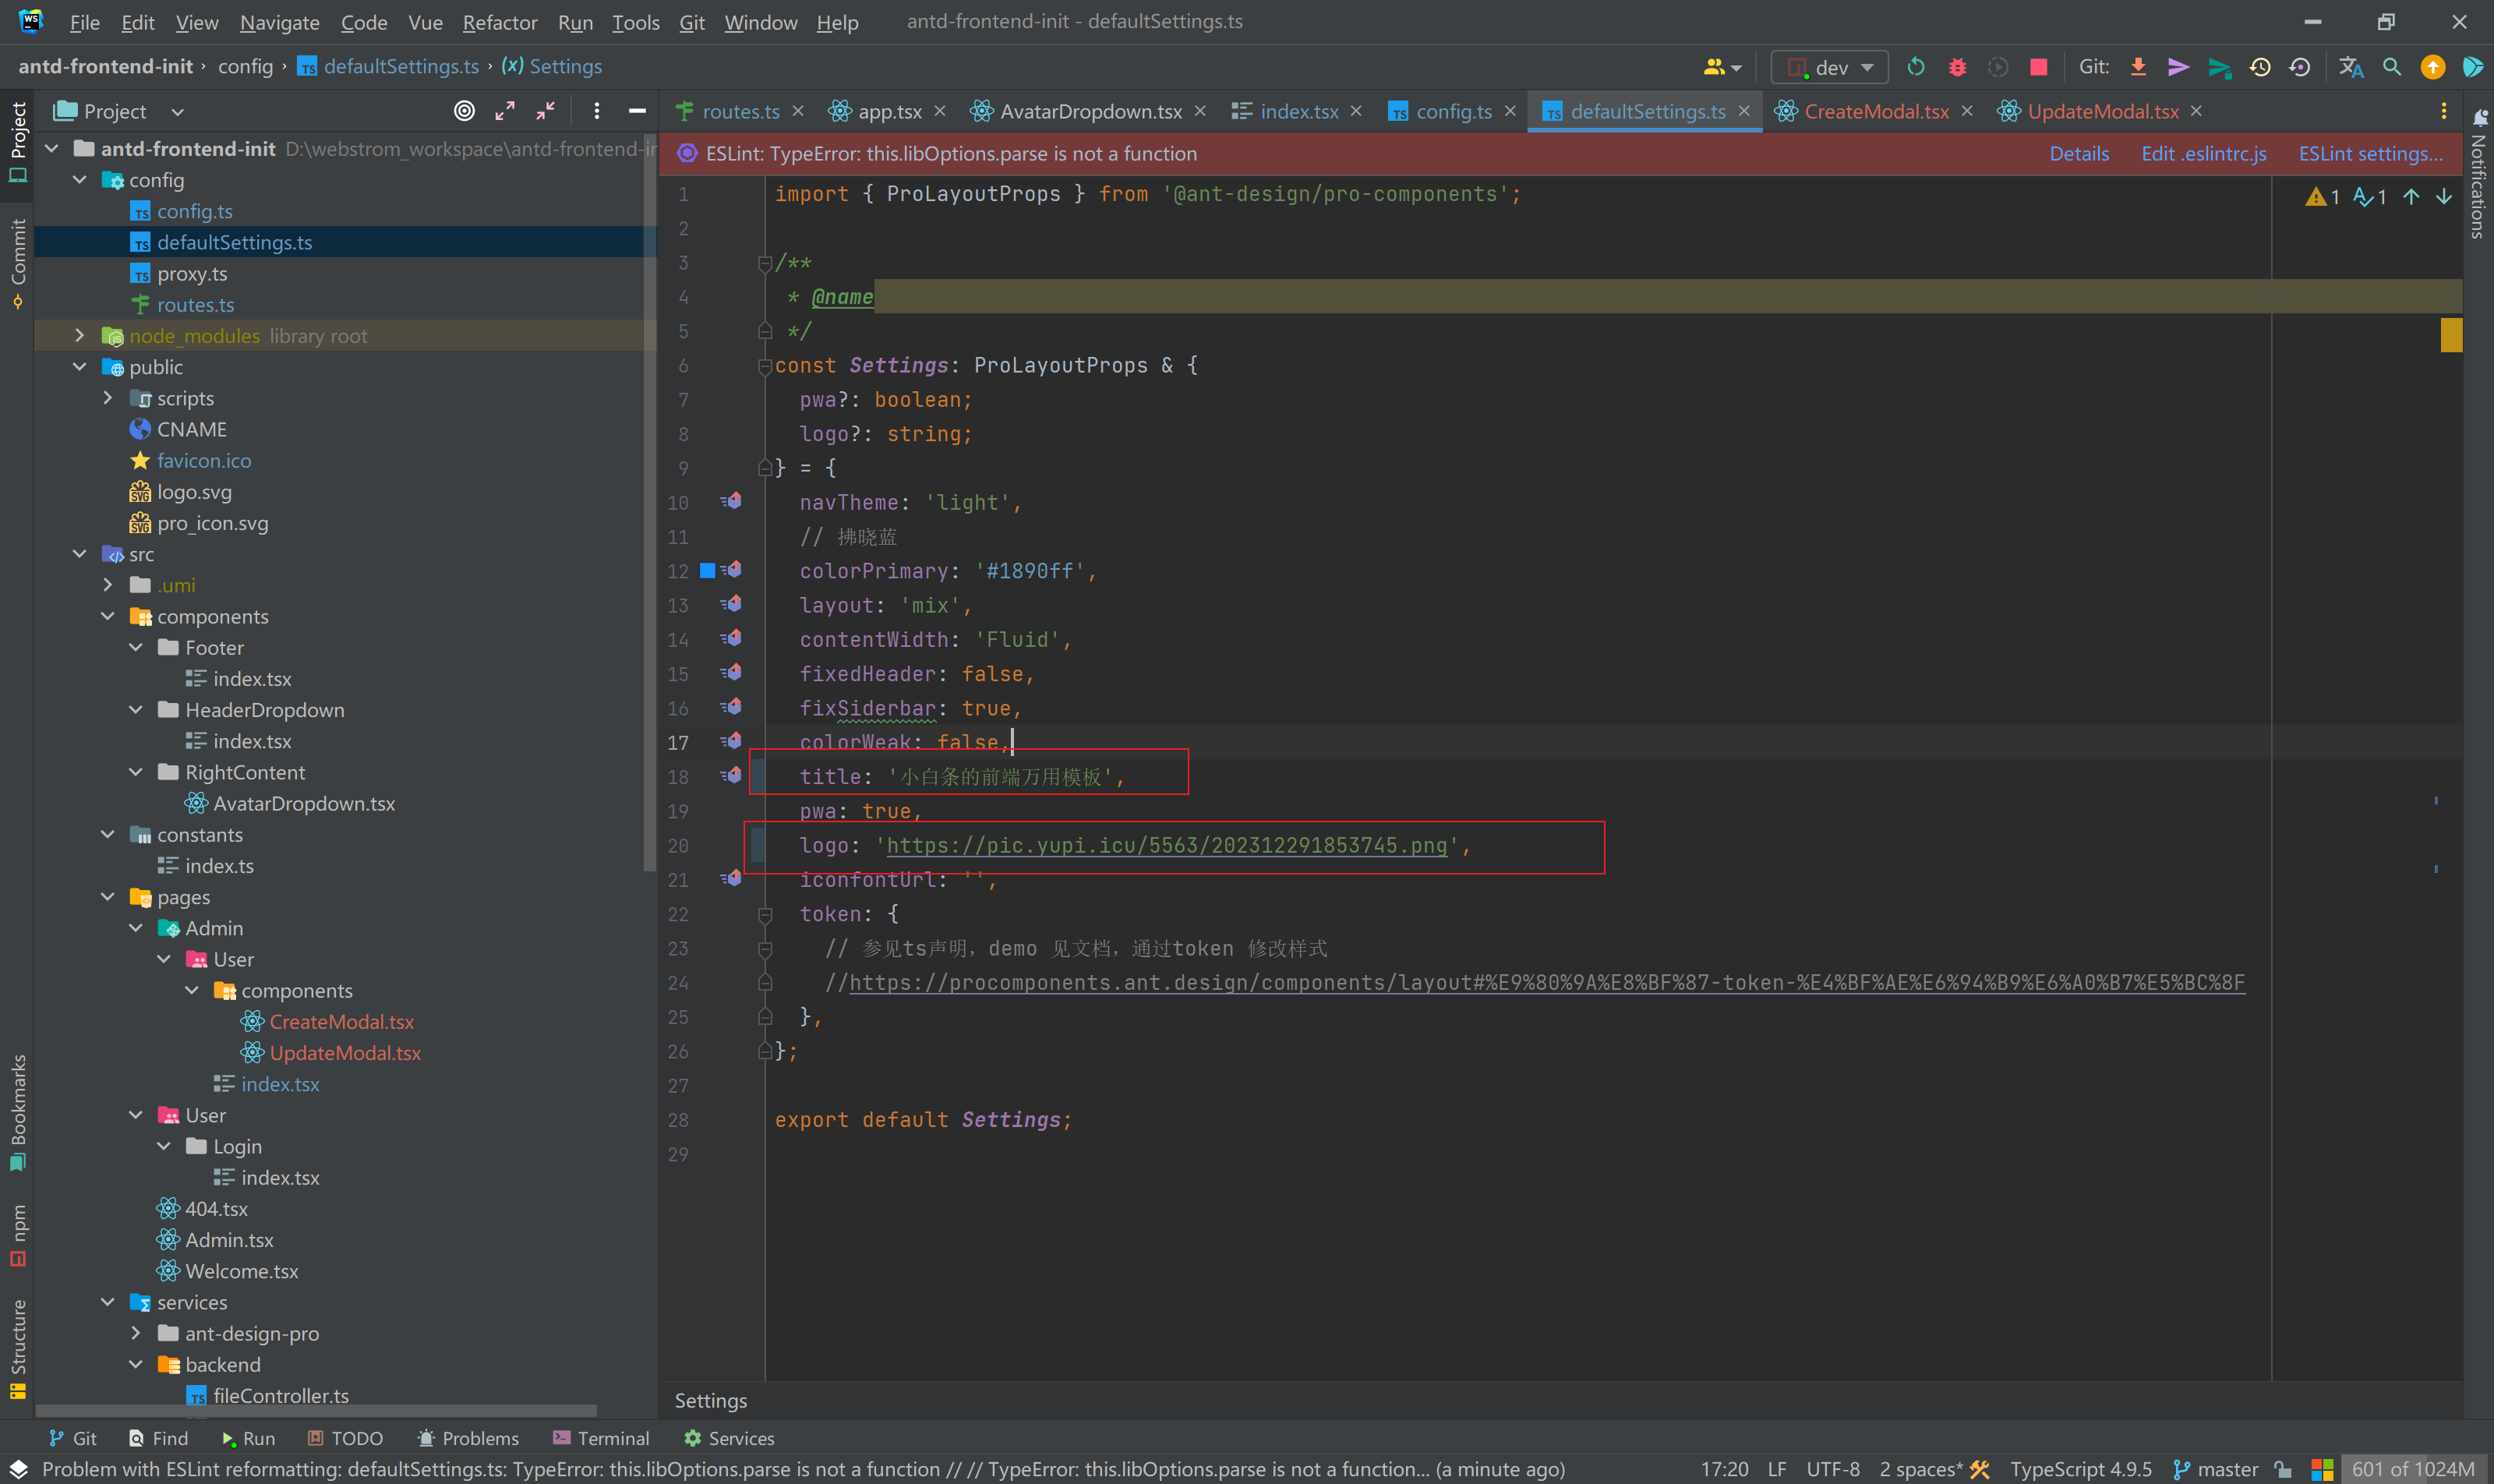
1)修改 title 和 logo
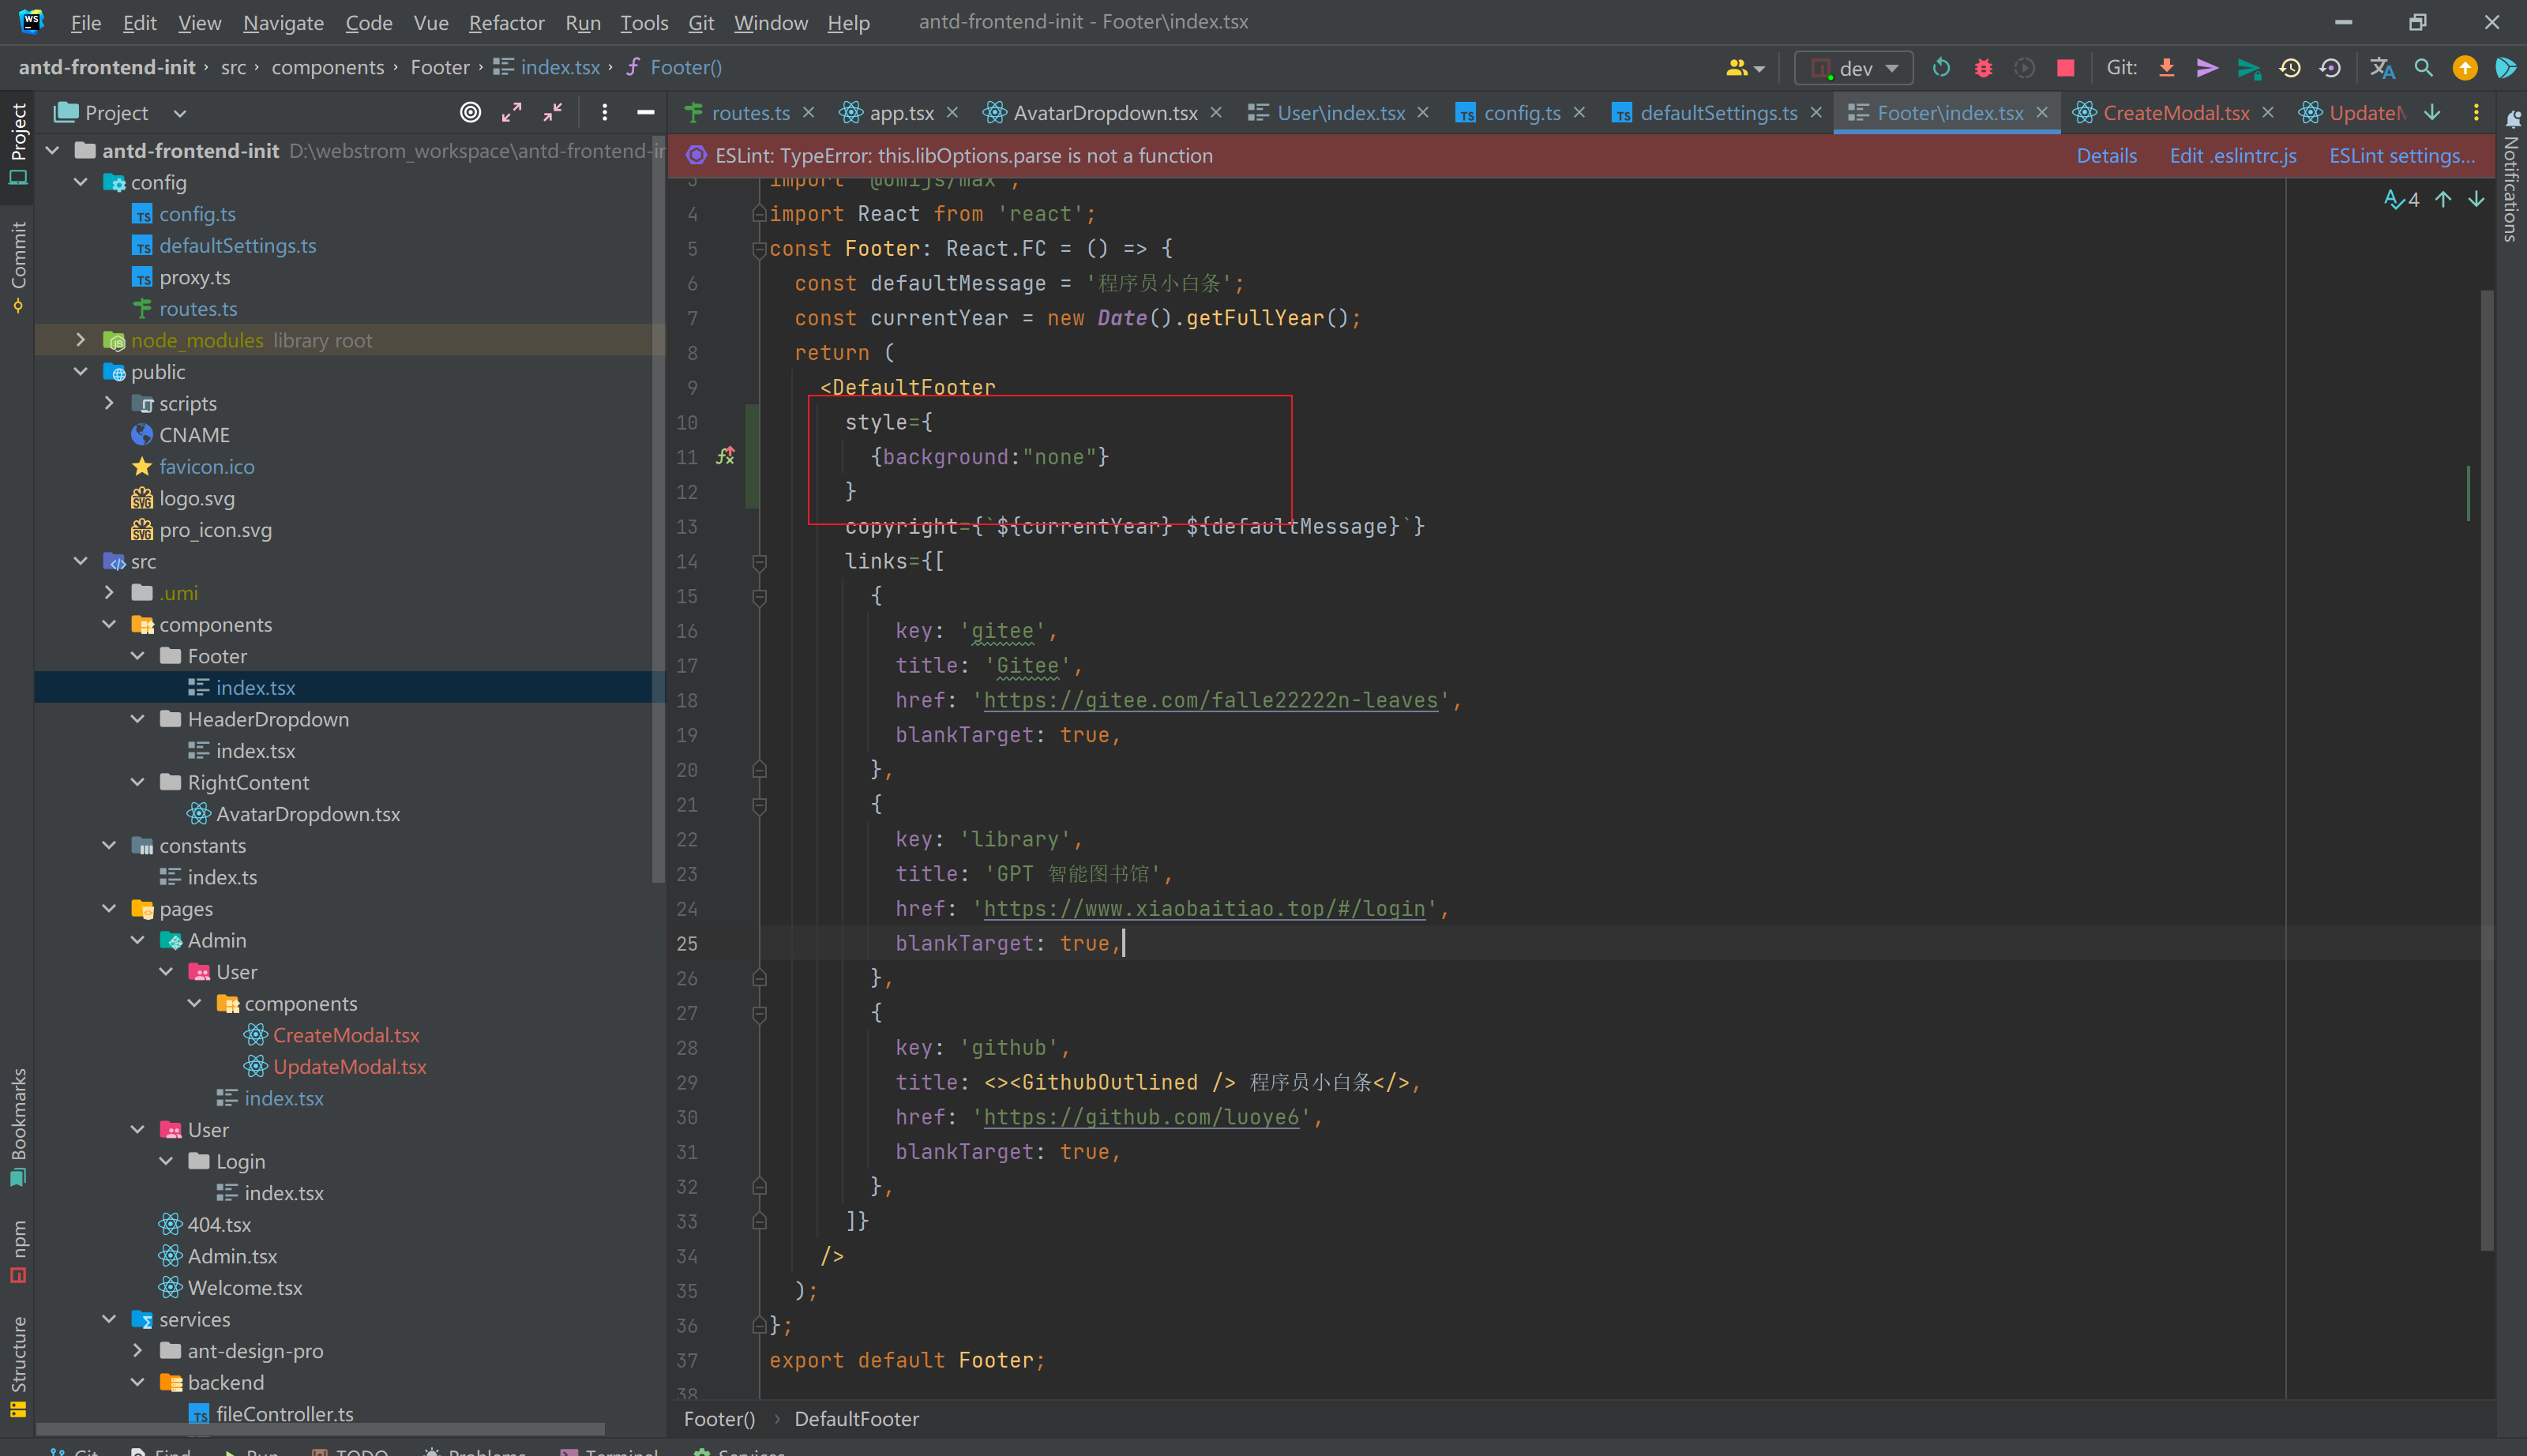
 2)修改 footer 的背景色为 none
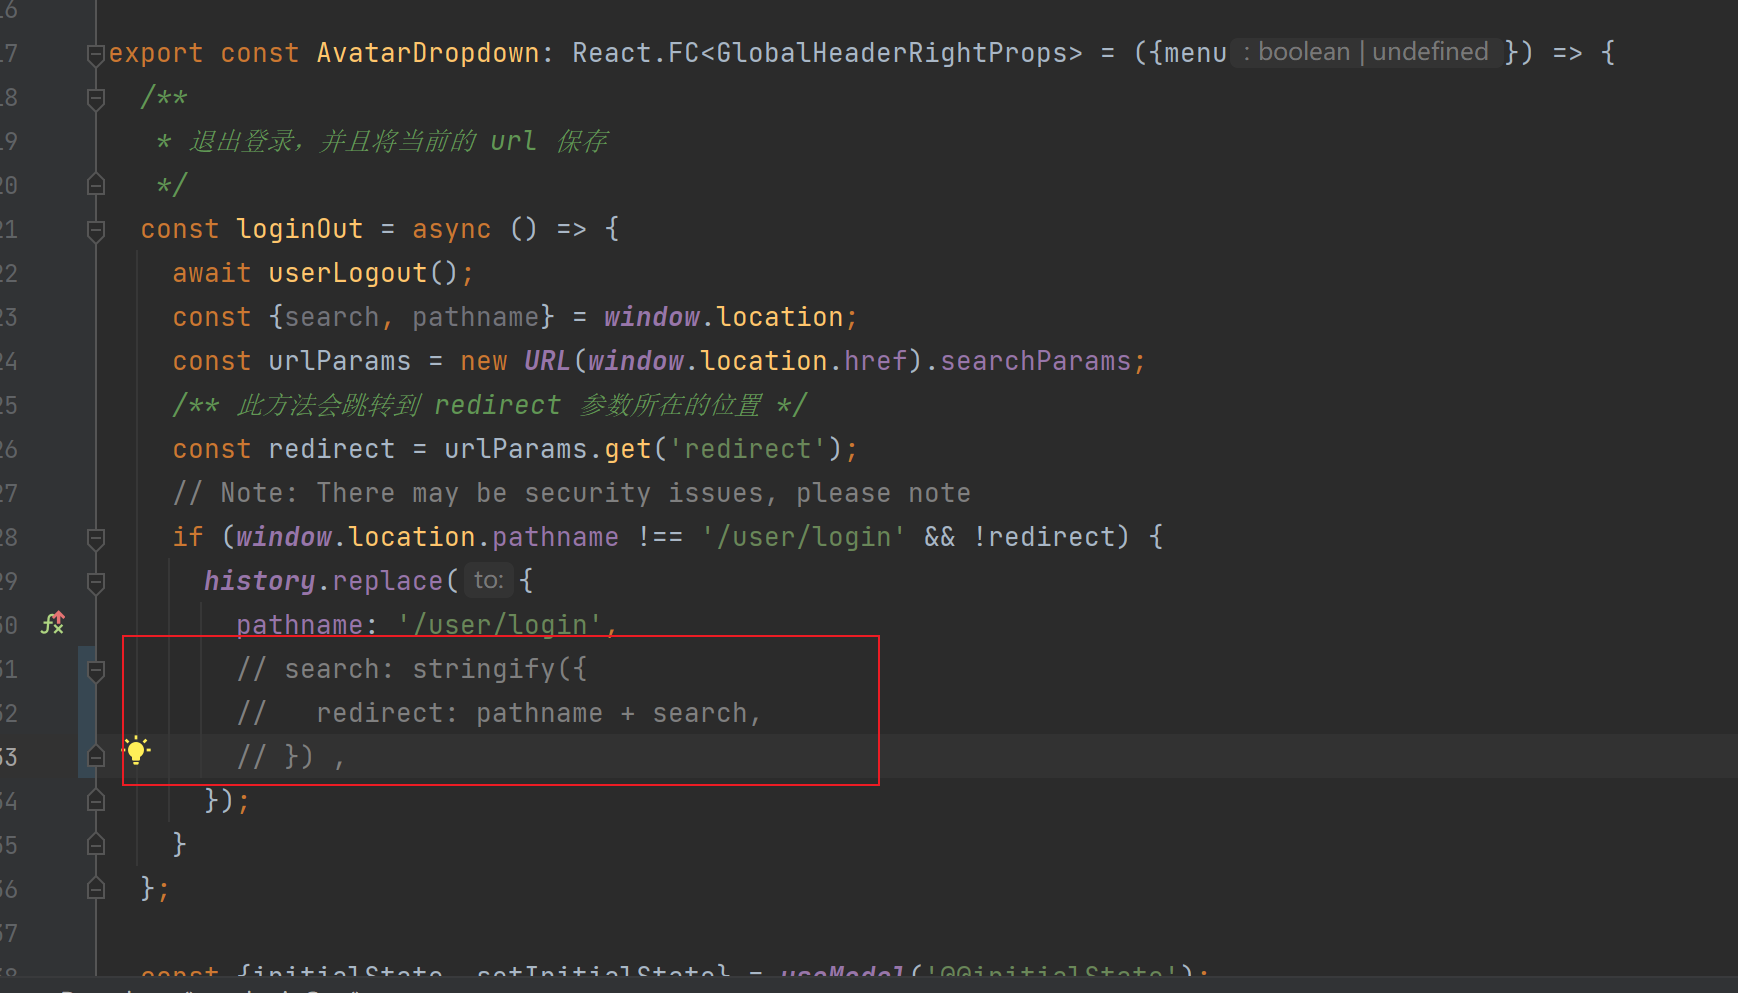
3)BUG 修复:如果当前用户为管理员,路径为 admin/user,注销后再次登录,会发现无权限。将重定向取消后即可修复 BUG,这段代码在 AvatarDropdown.tsx 中。
项目分区导航:⬅️ 19-Java 后端万用项目模板使用教程 | 20-前端万用模板开发教程 | ➡️ 21-前端万用项目模板介绍
💬 评论