项目初始化
git
git init
git config user.name "Zwww"
git config user.email "zv041118@163.com"
git remote add origin git@git.acwing.com:Zwww/yun_picture.git
git status
git add .
git status
git commit -m "项目搭建 后端初始化"
git push -u origin master
一、后端项目初始化
环境准备
1)安装的 JDK 版本必须是 8、11 或 17,不能超过 17!
推荐使用 11 版本,因为后续可能要用到的缓存库 Caffeine 要求使用 11 版本。
可参考视频安装 JDK:https://www.bilibili.com/video/BV14SUNYREv8
2)MySQL 数据库最好安装 8.x 版本,或者 5.7 版本。
新建项目
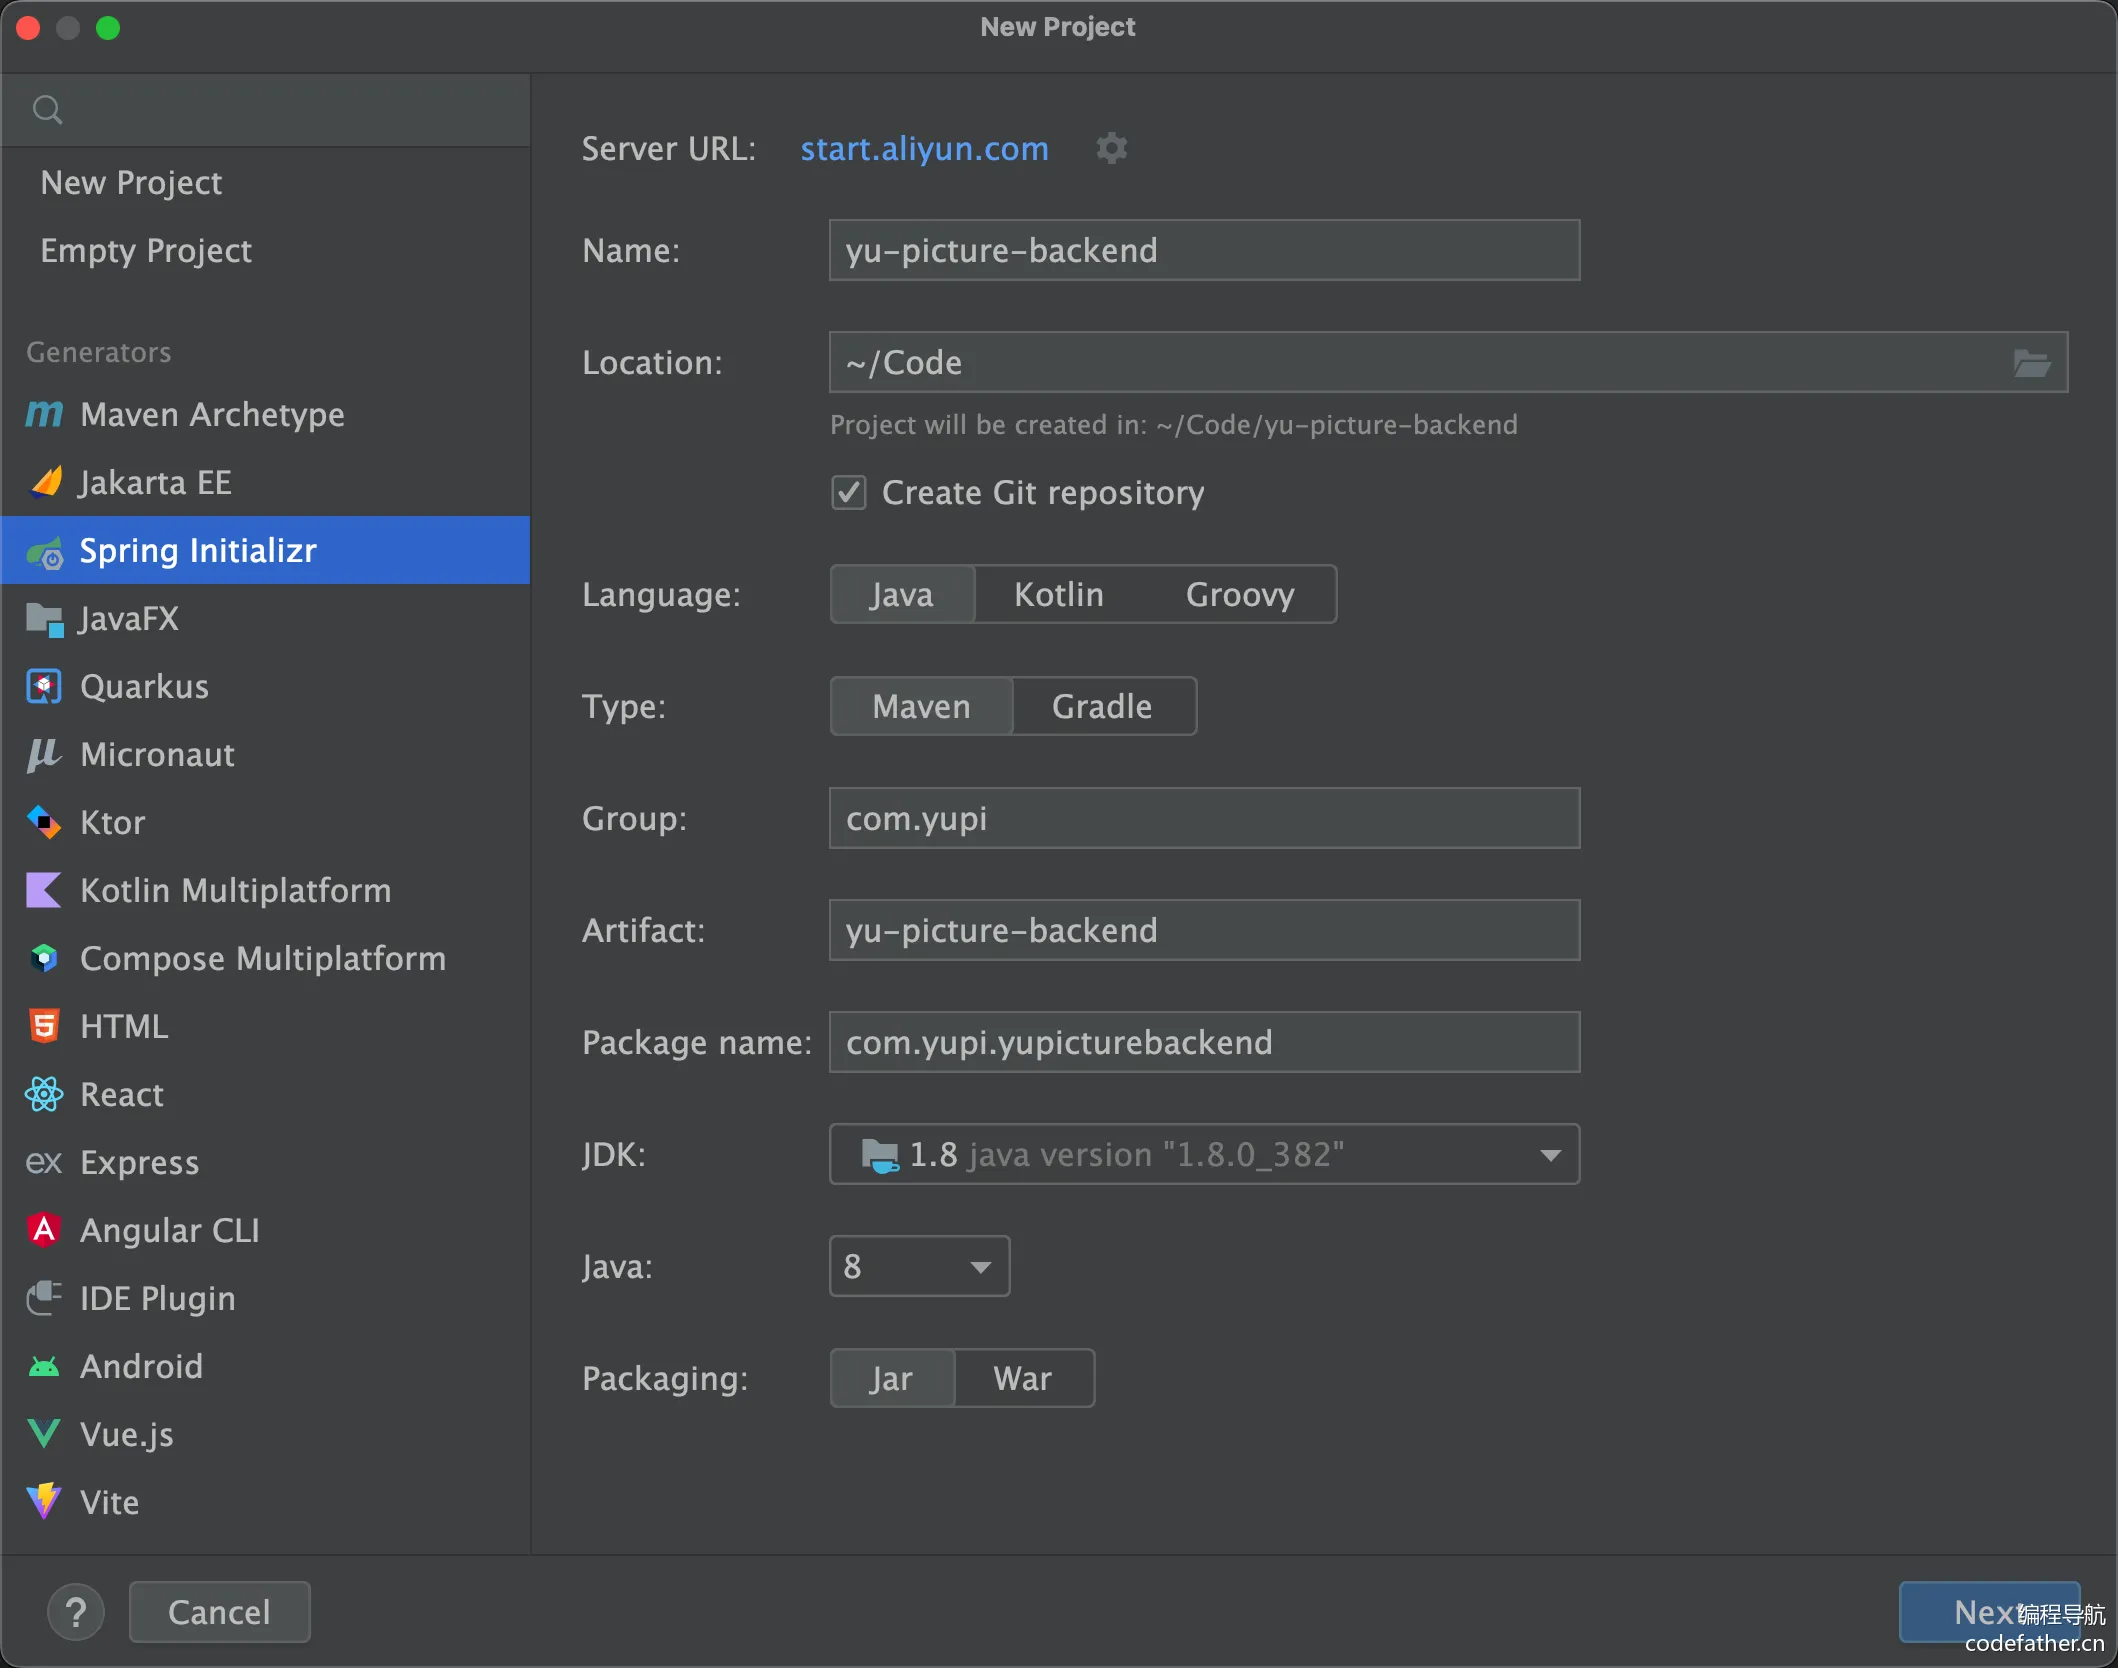
在 IDEA 中新建项目,选择 Spring Initializr 模板,考虑到稳定性,此处选择创建 Java 8 版本的项目。
注意需要替换 Server URL 为 https://start.aliyun.com/,因为官方的 Server URL 不支持选择 Java 8。
配置如图:
选择 Spring Boot 2.7.6 版本,可以根据自己的需要添加一些依赖,比如 Spring Web、MyBatis、MySQL、Lombok:
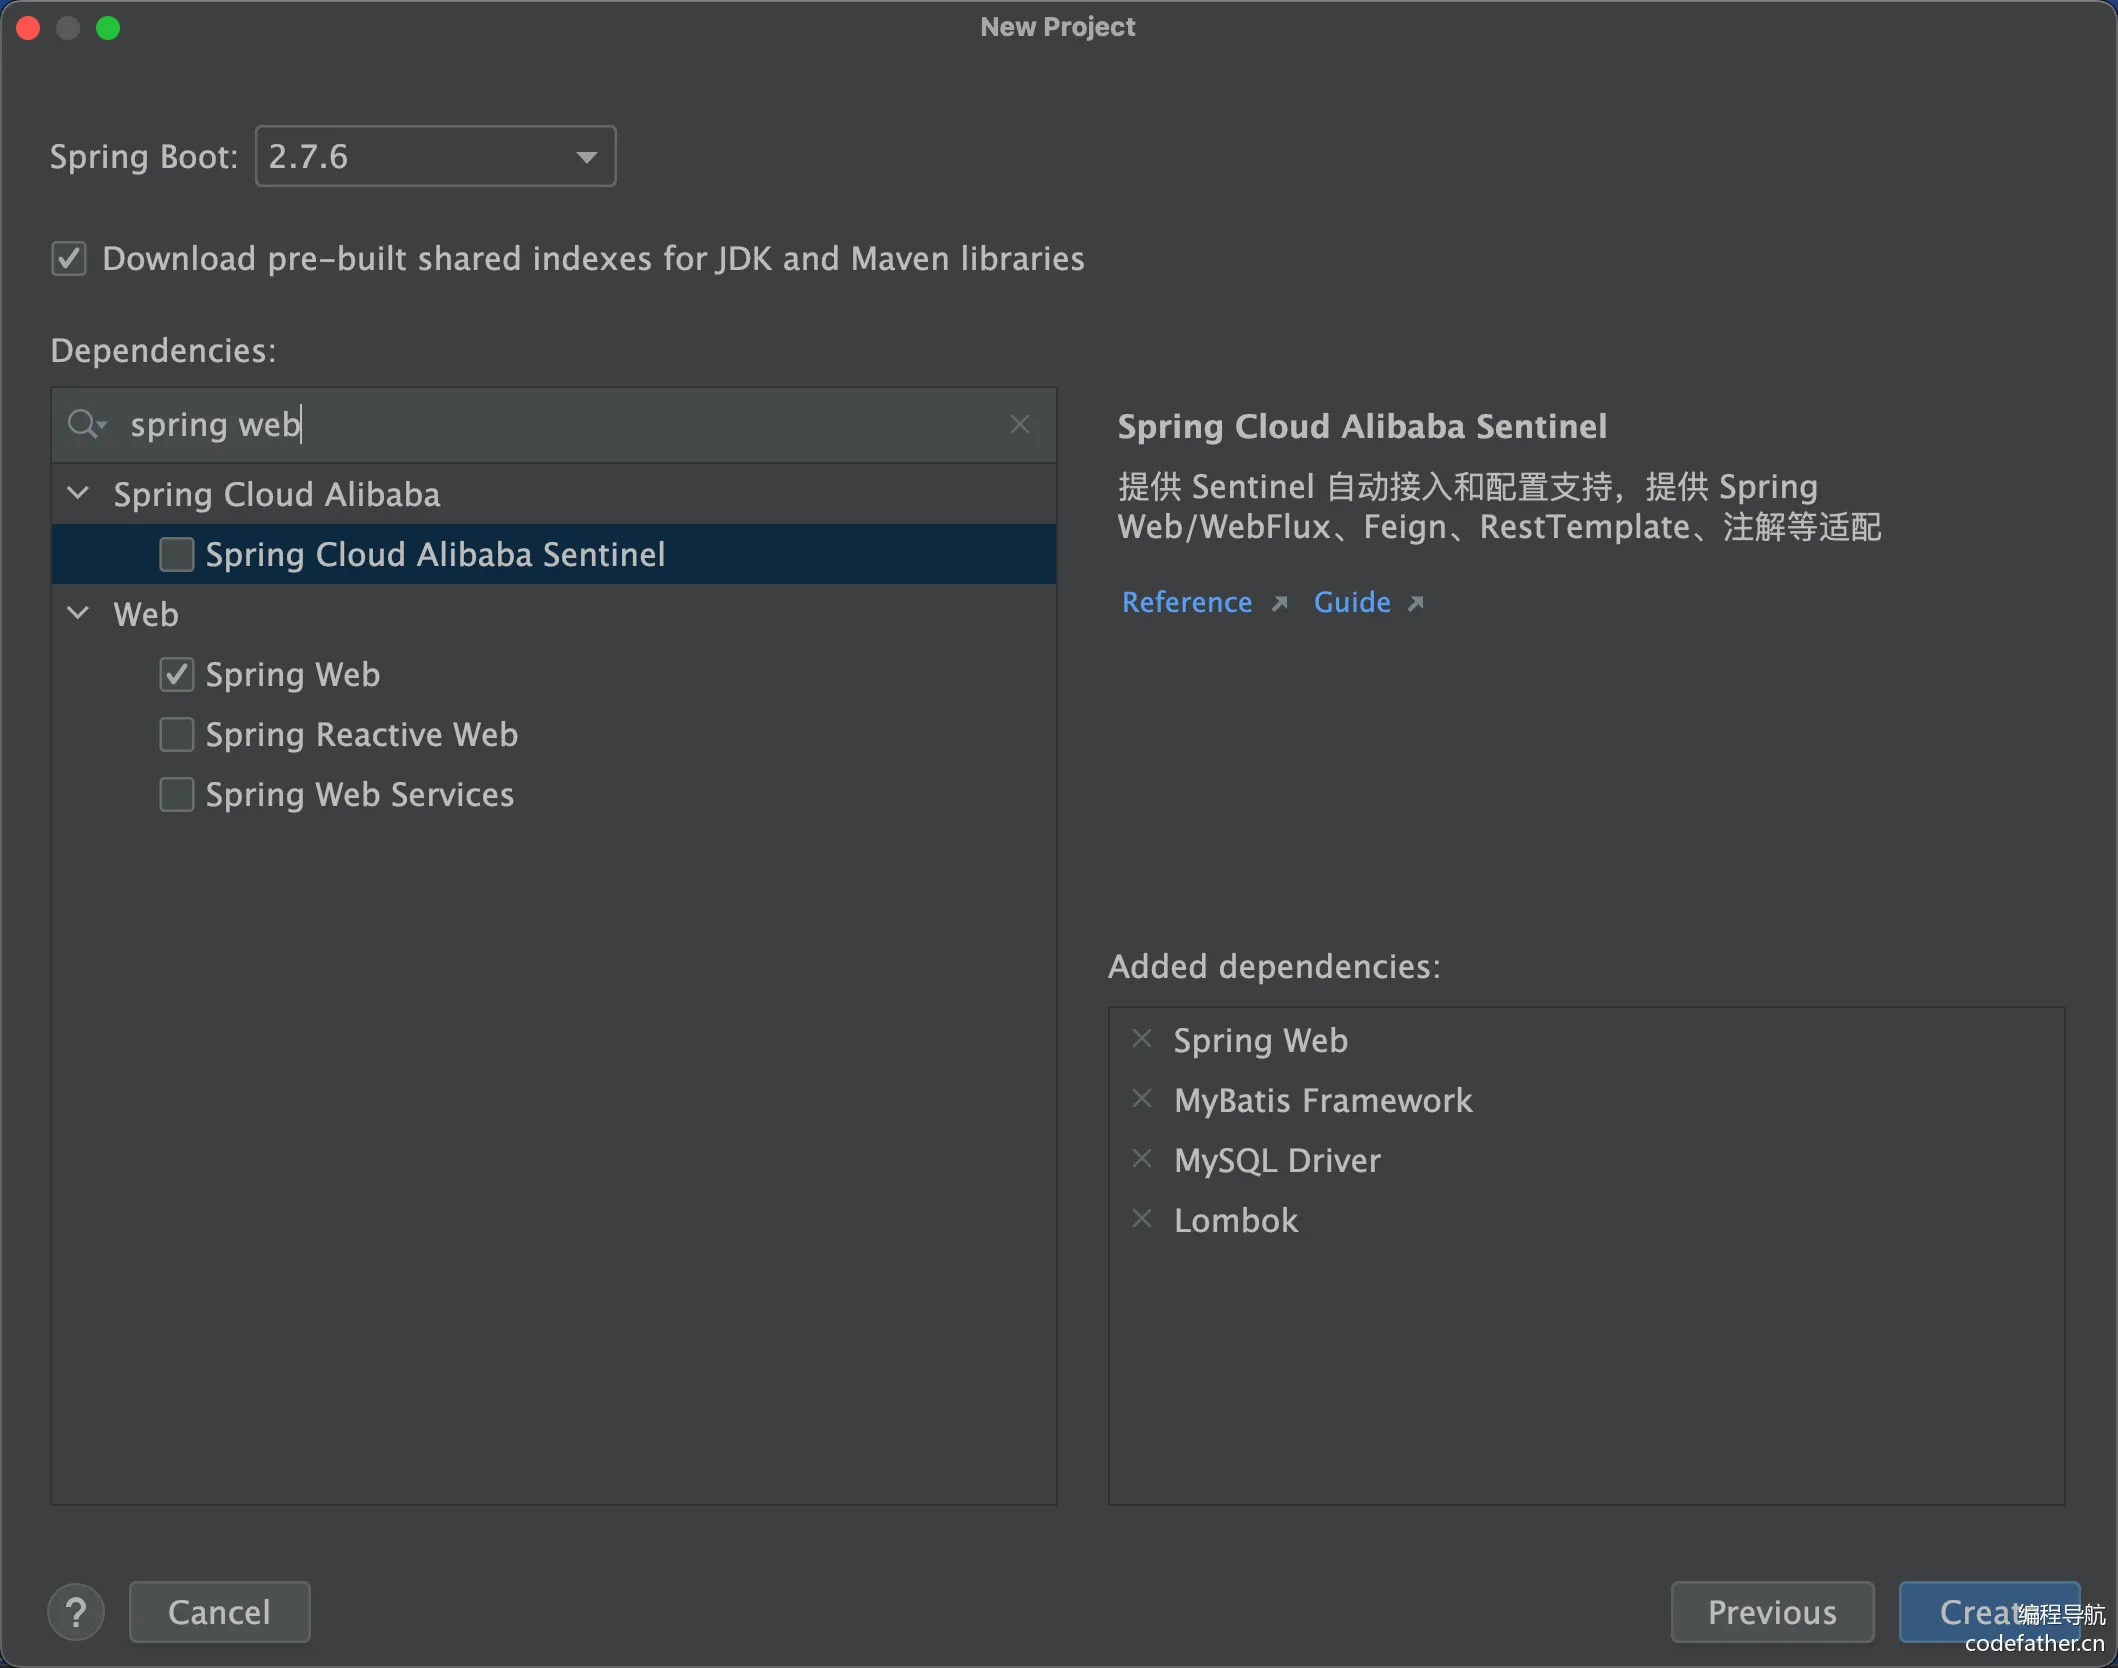
当然,后续通过修改 Maven 配置添加依赖也是可以的。
点击创建,就得到了一个 Spring Boot 项目,需要等待 Maven 为我们安装依赖。
安装完依赖后,先尝试启动一下项目,结果会报错:
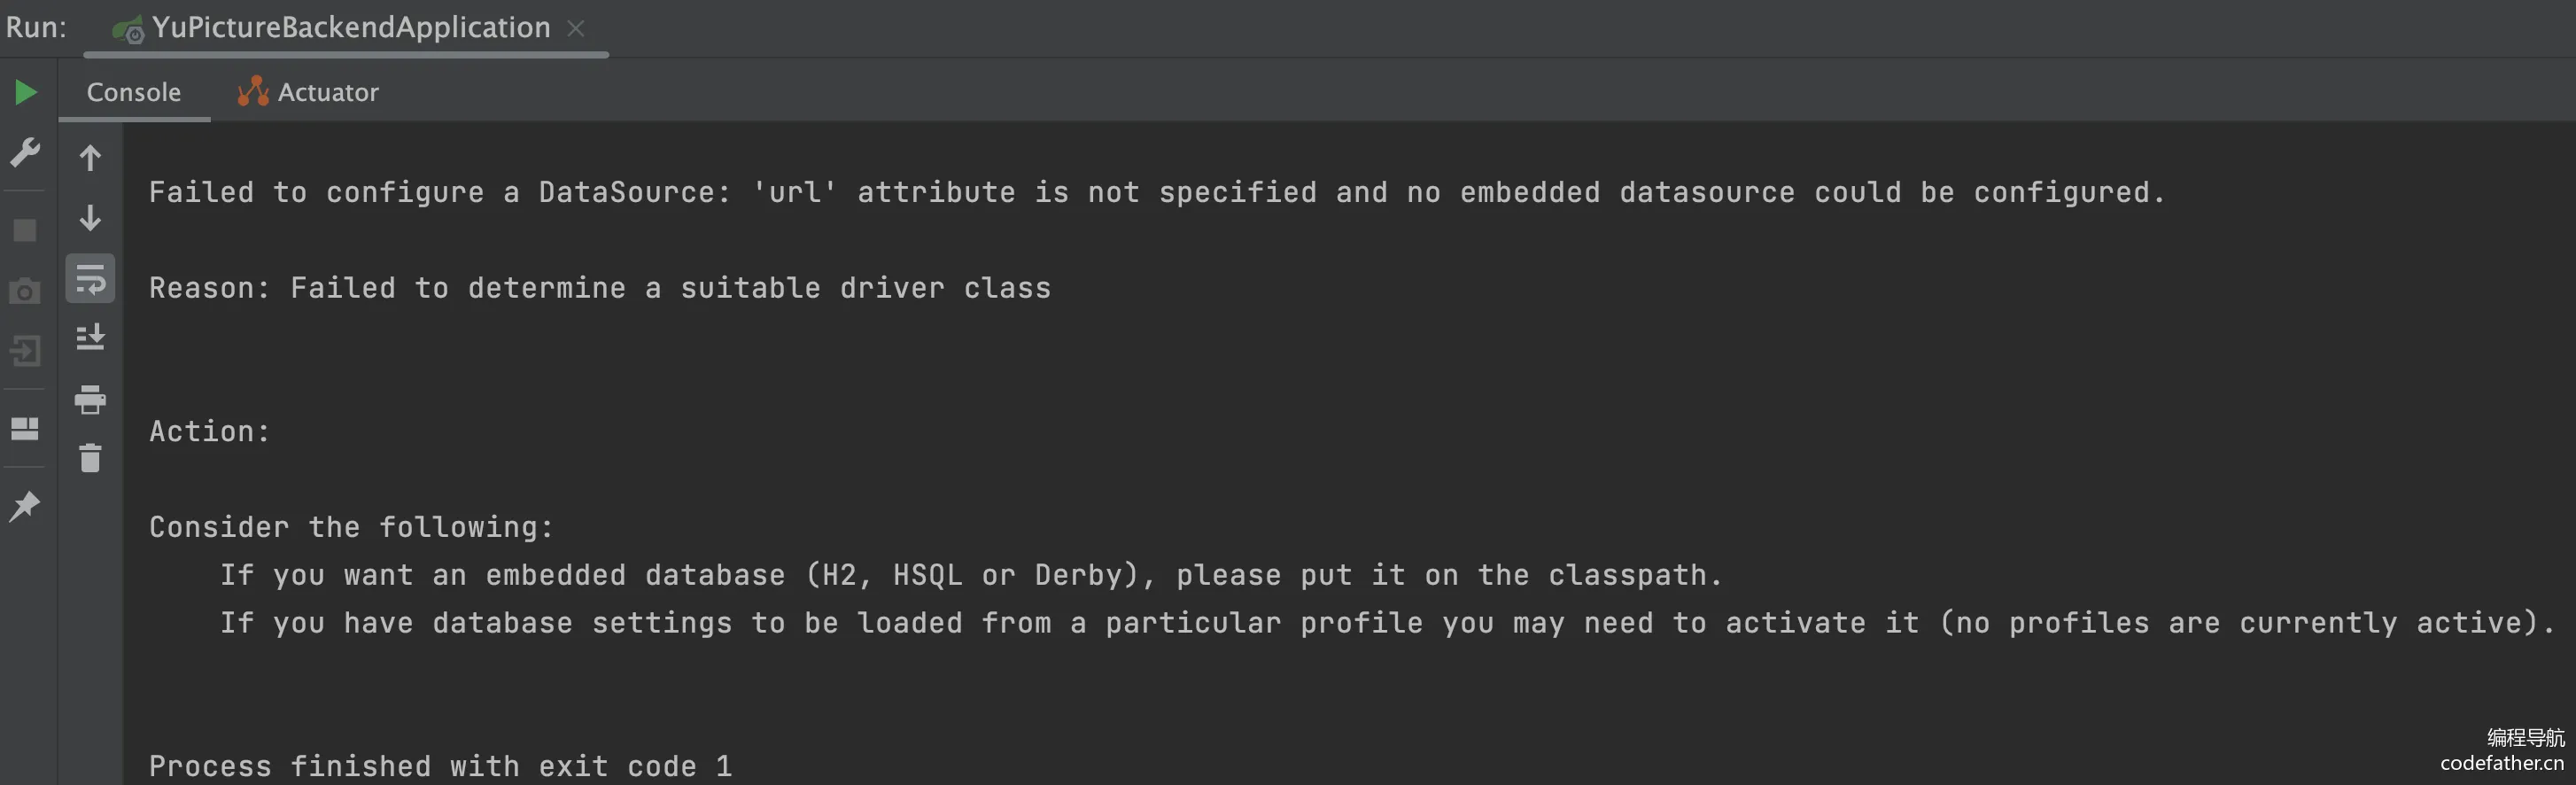
因为我们在 Maven 中引入了 MySQL 依赖,但是项目配置文件中并没有填写 MySQL 的配置。
修改资源目录下的配置文件为 application.yml,指定项目启动的端口号和访问地址前缀、项目名称、数据库配置等。代码如下:
server:
  port: 8123
  servlet:
    context-path: /api

spring:
  application:
    name: yun-picture-backend
  datasource:
    driver-class-name: com.mysql.cj.jdbc.Driver
    url: jdbc:mysql://localhost:3306/yun_picture?useUnicode=true&characterEncoding=utf-8&useSSL=false&serverTimezone=Asia
    username: root
    password: zw200495
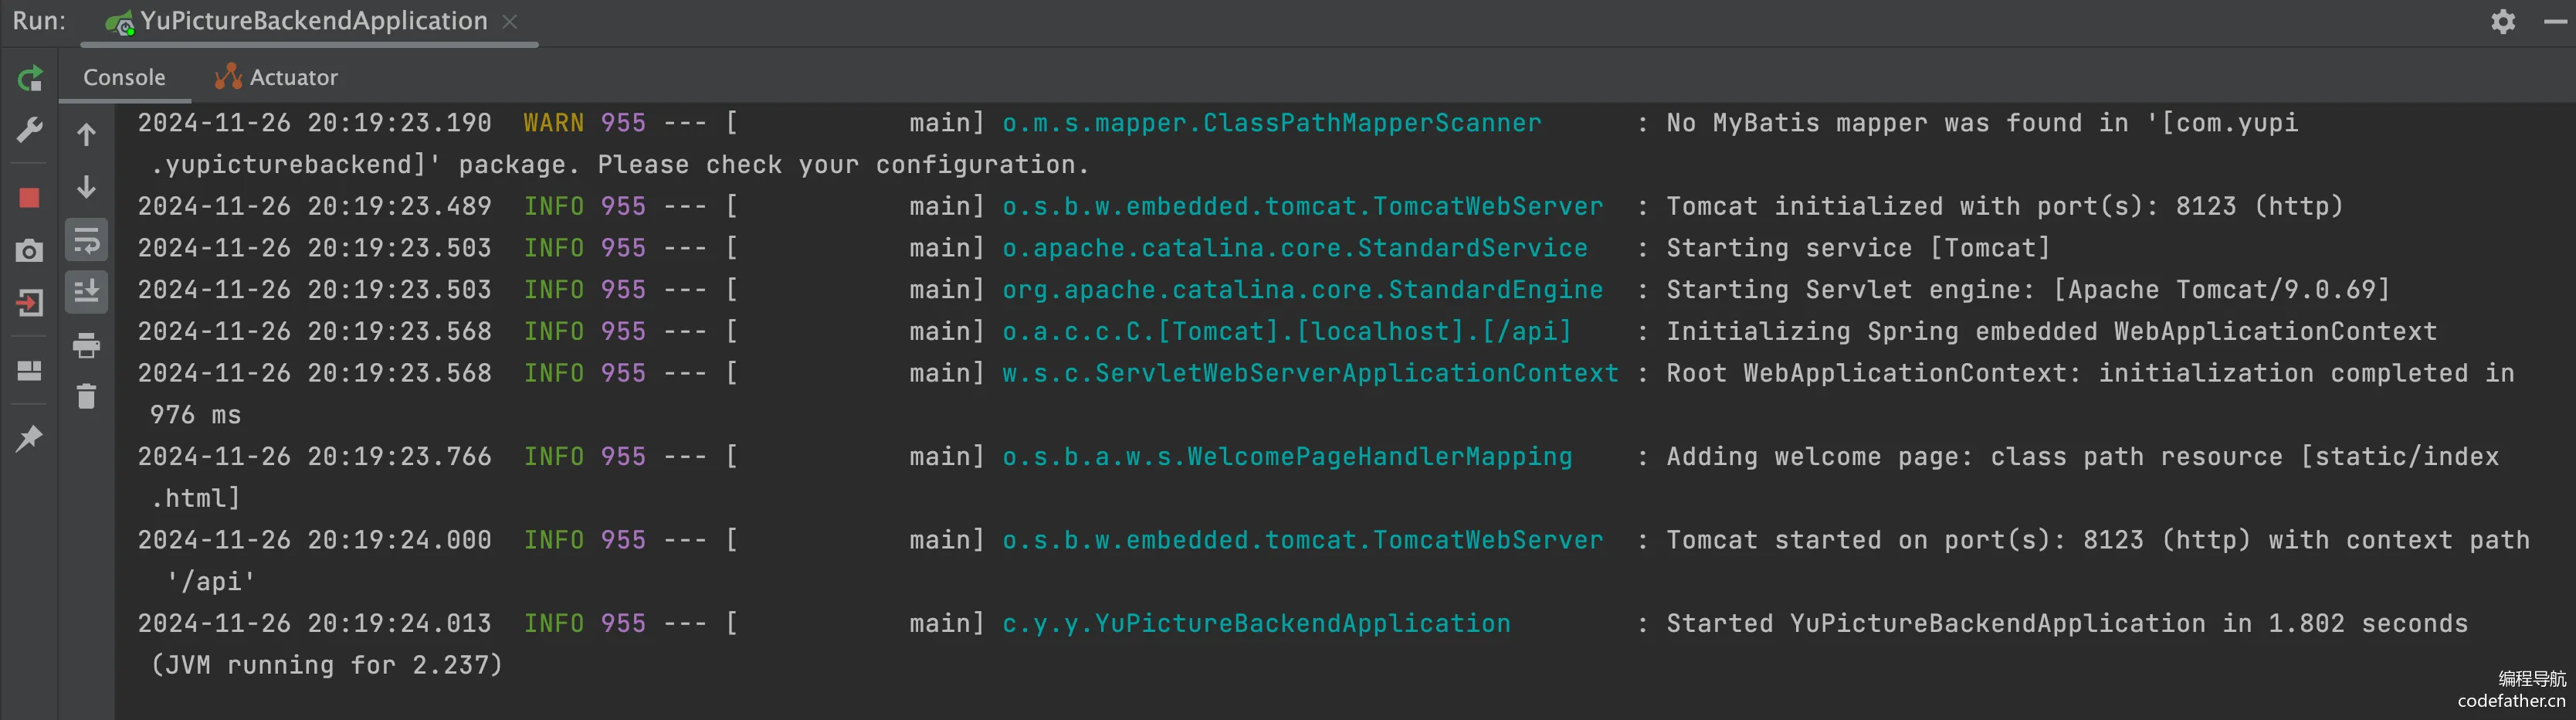
这次项目就可以正常启动了:
整合依赖
接下来我们要整合一些开发项目常用的依赖。
1、MyBatis Plus 数据库操作
MyBatis Plus 是 MyBatis 的增强工具,旨在简化开发流程。它提供了开箱即用的 CRUD 方法、动态查询构造器、分页插件和代码生成器等功能,大幅减少重复代码,同时保持与 MyBatis 原生功能的兼容性。例如,通过调用 baseMapper.selectById(id),可以直接查询数据库中的记录,而无需手动编写 SQL。
参考官方文档引入:https://baomidou.com/getting-started/#spring-boot2
在 Maven 的 pom.xml 中添加依赖:
<dependency>
            <groupId>com.baomidou</groupId>
            <artifactId>mybatis-plus-boot-starter</artifactId>
            <version>3.5.9</version>
</dependency>
注意,添加该依赖后,记得移除 MyBatis 相关的依赖!否则很容易导致版本冲突!!!

在项目中新建 mapper 包,后续用于存放操作数据库的 Mapper 类,然后在项目启动类中添加扫描 Mapper 的 @MapperScan 注解:
package com.zwnsyw.yunpicturebackend;

import org.mybatis.spring.annotation.MapperScan;
import org.springframework.boot.SpringApplication;
import org.springframework.boot.autoconfigure.SpringBootApplication;

@SpringBootApplication
@MapperScan("com.zwnsyw.yunpicturebackend.mapper")
public class YunPictureBackendApplication {

    public static void main(String[] args) {
        SpringApplication.run(YunPictureBackendApplication.class, args);
    }

}
在 application.yml 中追加配置,开启日志和逻辑删除功能:
mybatis-plus:
  configuration:
    map-underscore-to-camel-case: false
    # 仅在开发环境开启日志
    log-impl: org.apache.ibatis.logging.stdout.StdOutImpl
  global-config:
    db-config:
      logic-delete-field: isDelete # 全局逻辑删除的实体字段名
      logic-delete-value: 1 # 逻辑已删除值(默认为 1)
      logic-not-delete-value: 0 # 逻辑未删除值(默认为 0)
2、Hutool 工具库
Hutool 是主流的 Java 工具类库,集合了丰富的工具类,涵盖字符串处理、日期操作、文件处理、加解密、反射、正则匹配等常见功能。它的轻量化和无侵入性让开发者能够专注于业务逻辑而不必编写重复的工具代码。
例如,DateUtil.formatDate(new Date()) 可以快速将当前日期格式化为字符串。
参考官方文档引入:https://doc.hutool.cn/pages/index/#🍊maven
在 Maven 的 pom.xml 中添加依赖:
        <dependency>
            <groupId>cn.hutool</groupId>
            <artifactId>hutool-all</artifactId>
            <version>5.8.26</version>
        </dependency>
3、Knife4j 接口文档
Knife4j 是基于 Swagger 接口文档的增强工具,提供了更加友好的 API 文档界面和功能扩展,例如动态参数调试、分组文档等。它适合用于 Spring Boot 项目中,能够通过简单的配置自动生成接口文档,让开发者和前端快速了解和调试接口,提高写作效率。
参考官方文档引入:https://doc.xiaominfo.com/docs/quick-start#spring-boot-2
由于使用的是 Spring Boot 2.x,注意要选择 OpenAPI 2 的版本。
在 Maven 的 pom.xml 中添加依赖:
       <dependency>
            <groupId>com.github.xiaoymin</groupId>
            <artifactId>knife4j-openapi2-spring-boot-starter</artifactId>
            <version>4.4.0</version>
        </dependency>
新建 controller 包用于存放 API 接口,将模板创建的 demos.web 包下的代码都移动到其中,仅用于测试:
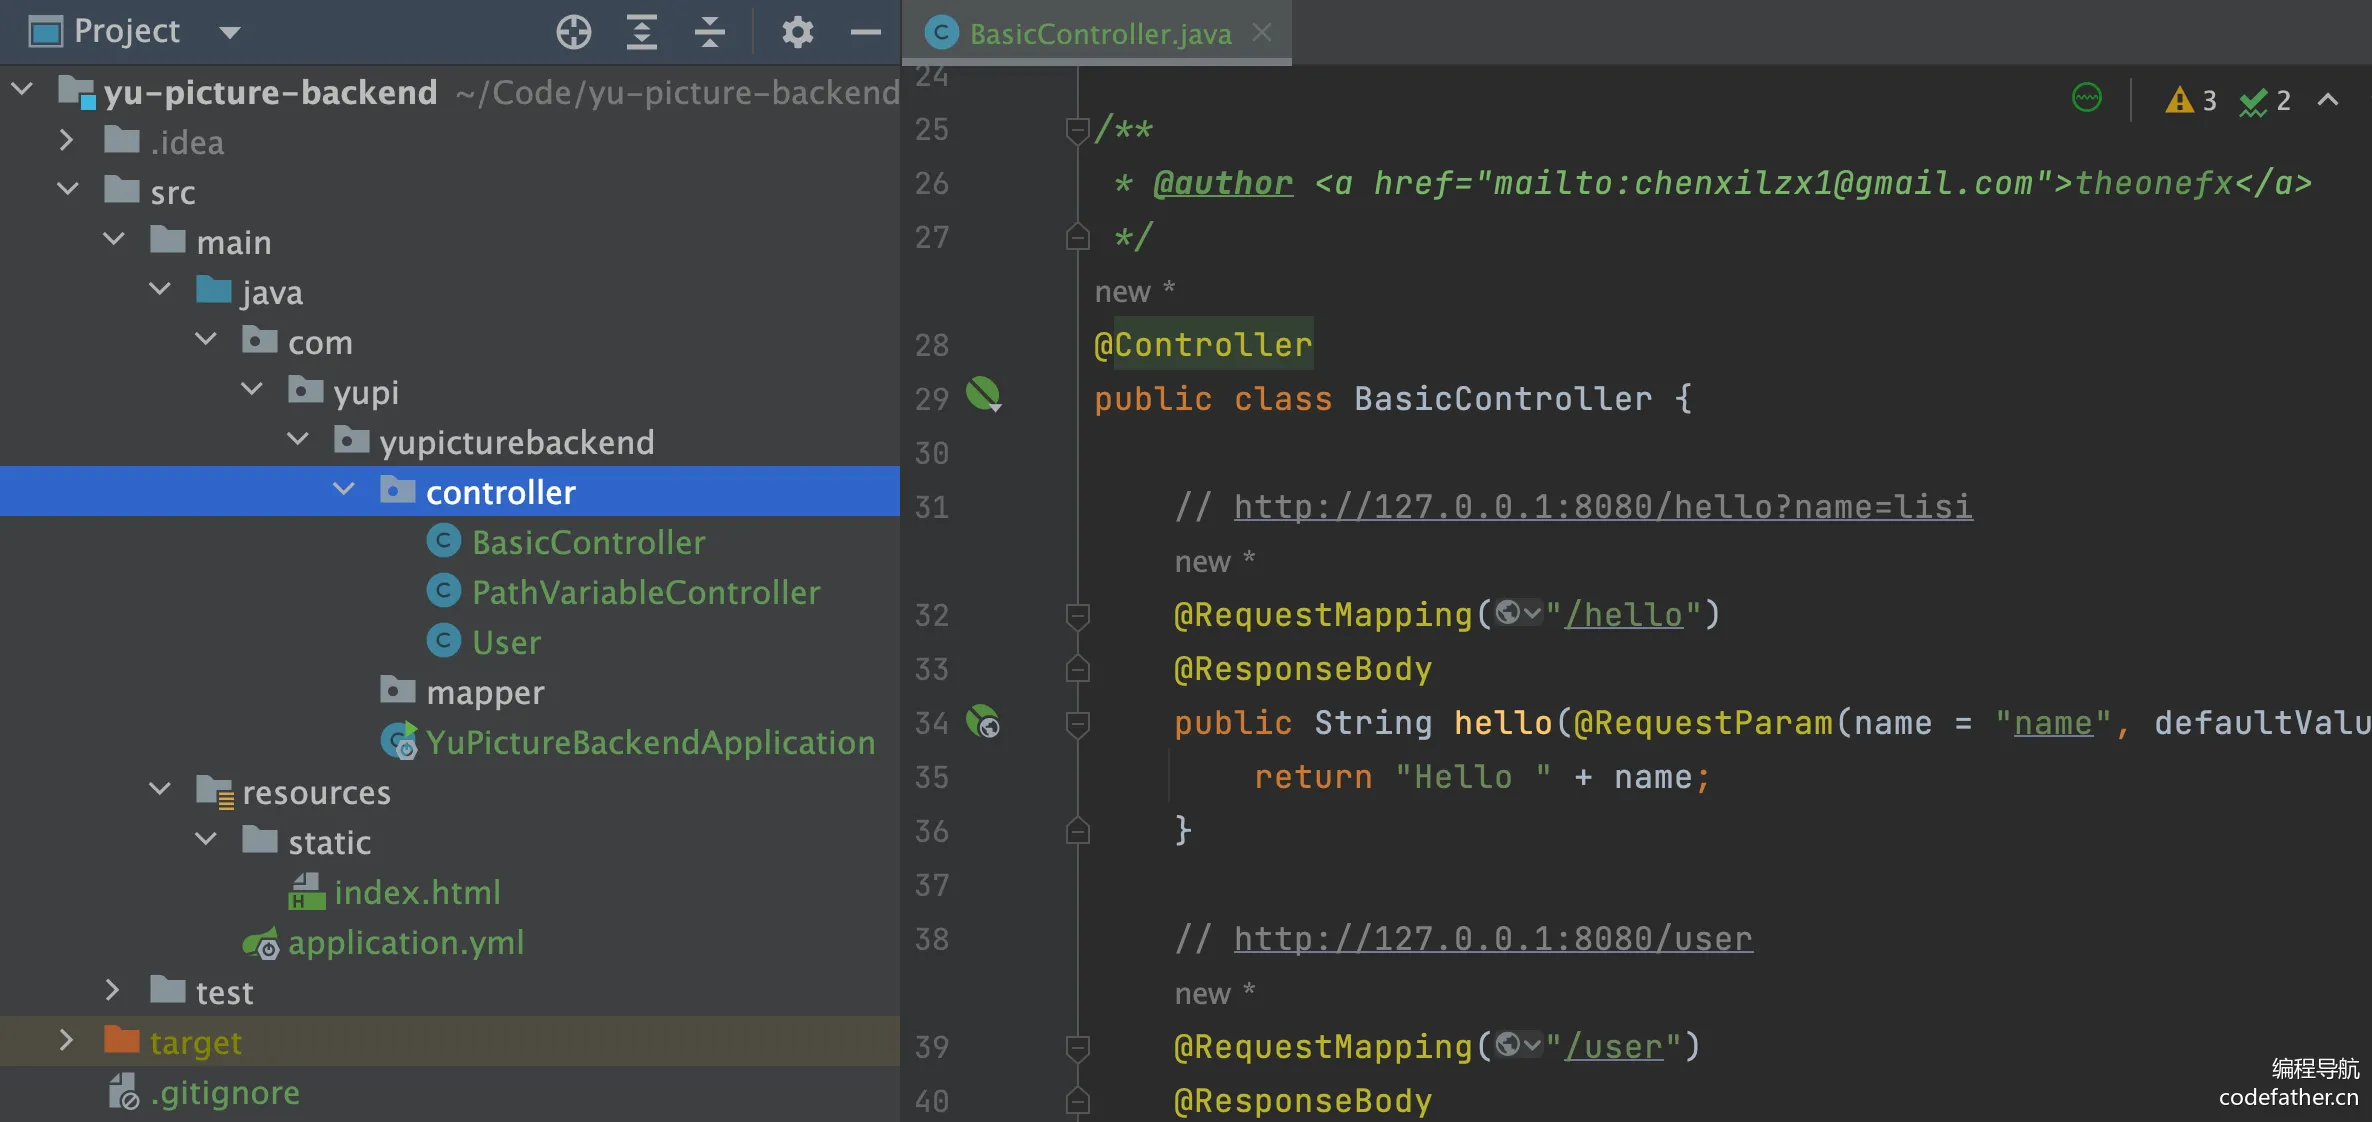
在 application.yml 中追加接口文档配置,扫描 Controller 包:
# 接口文档配置
knife4j:
  enable: true
  openapi:
    title: "接口文档"
    version: 1.0
  group:
    default:
      api-rule: package
      api-rule-resources:
        - com.zwnsyw.yunpicturebackend.controller
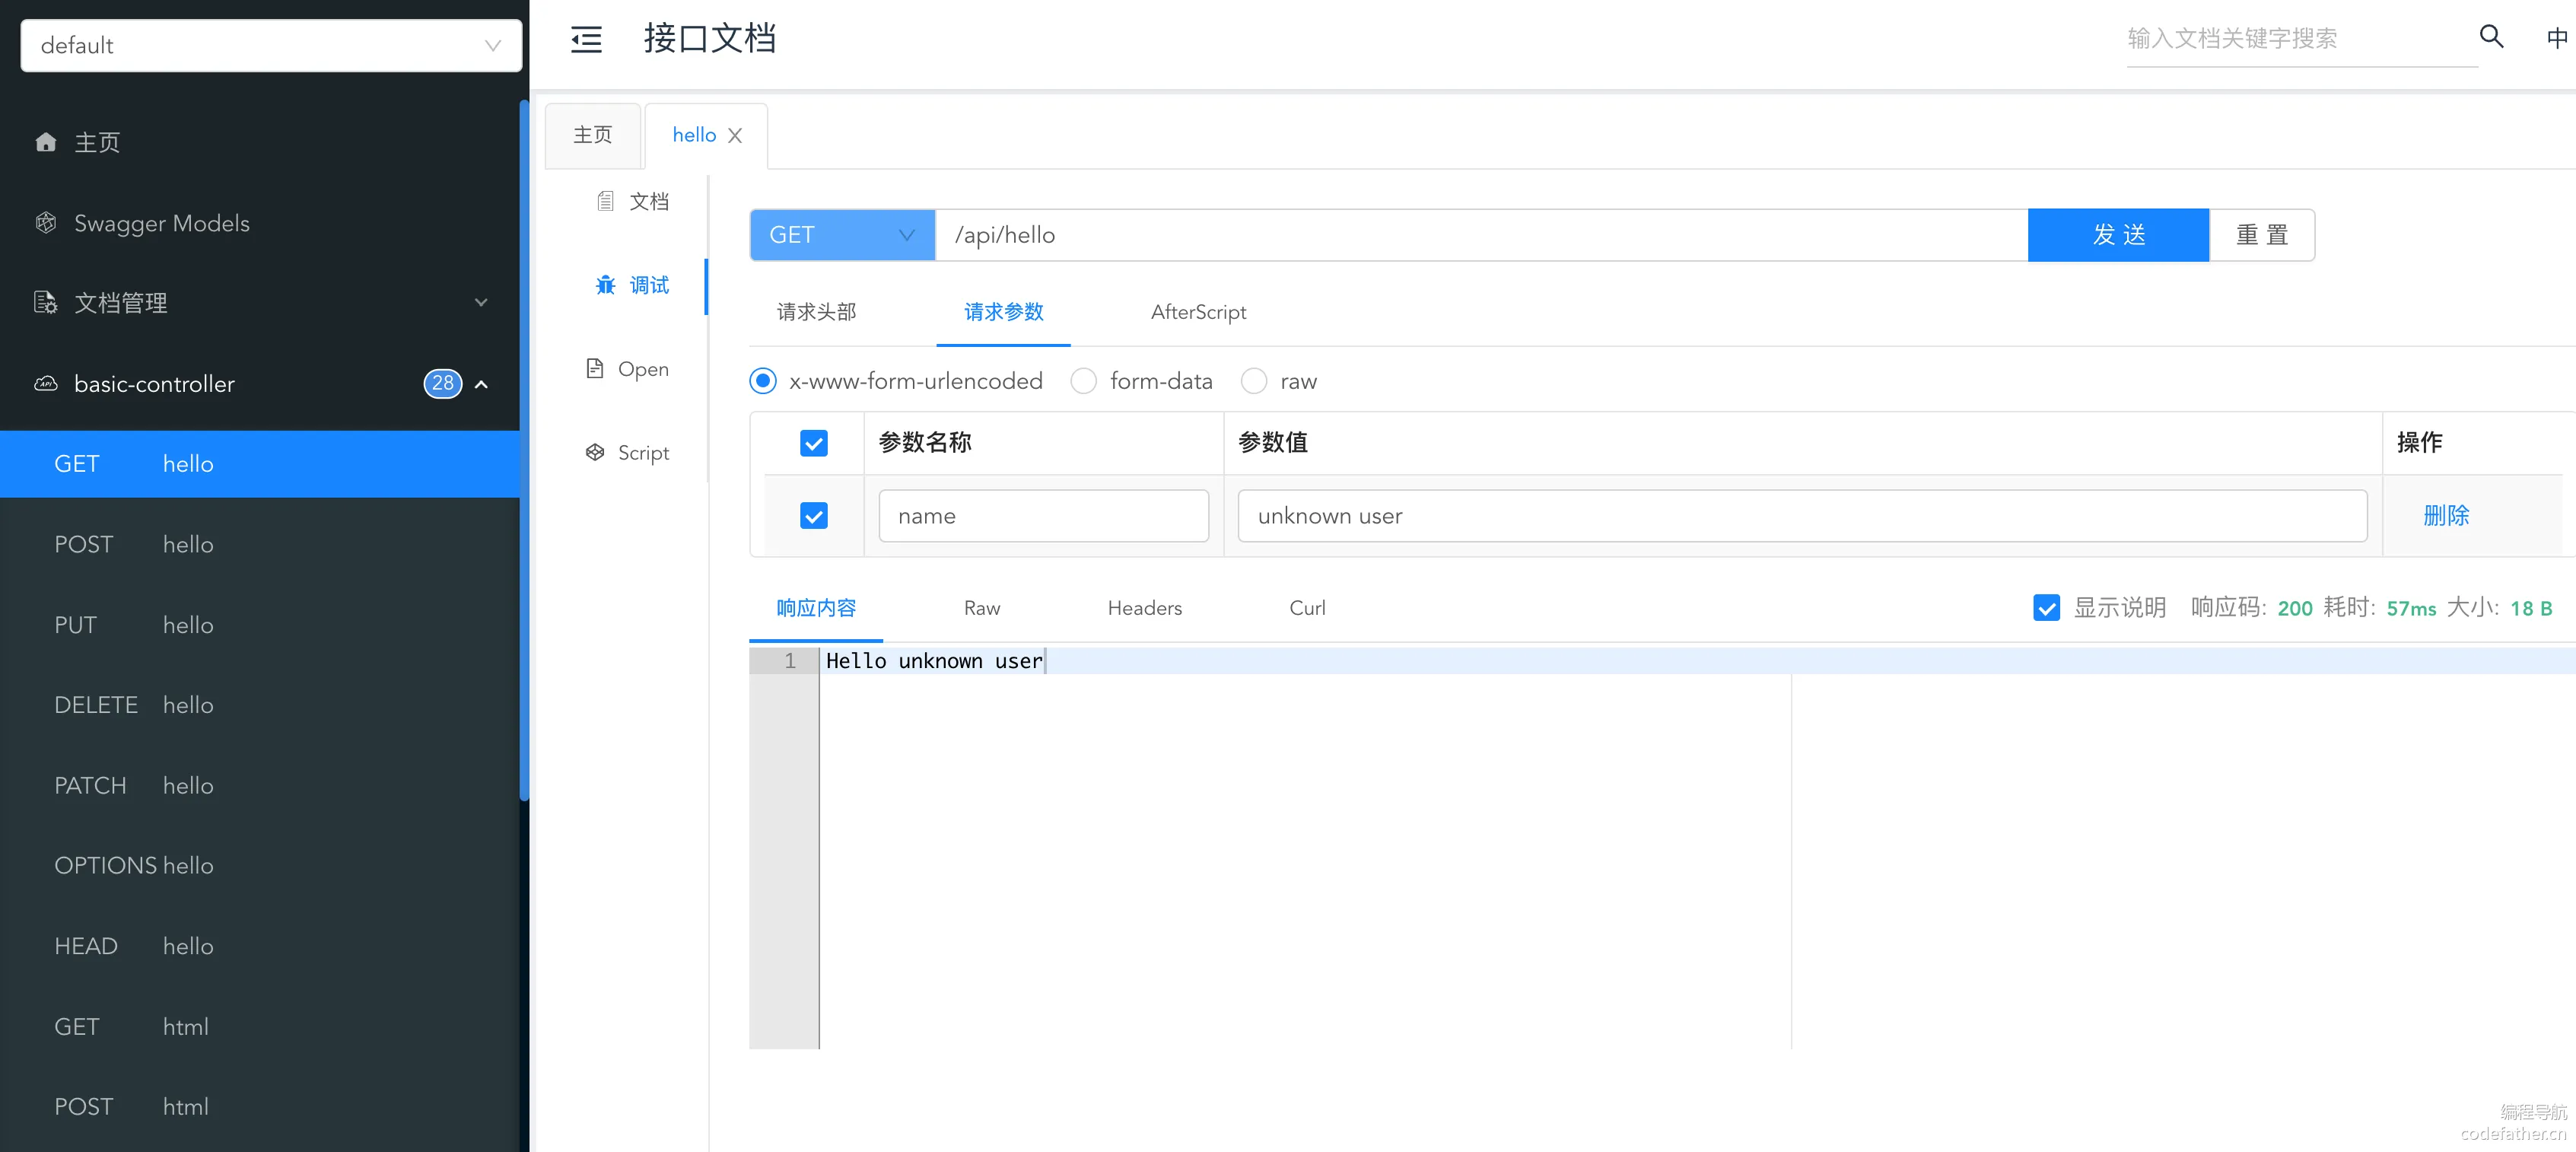
重启项目,访问 http://localhost:8123/api/doc.html 能够看到接口文档,可以测试调用:
4、其他依赖
可以按需引入其他依赖,比如 AOP 切面编程:
        <dependency>
            <groupId>org.springframework.boot</groupId>
            <artifactId>spring-boot-starter-aop</artifactId>
        </dependency>
给启动类添加注解(可选):
@EnableAspectJAutoProxy(exposeProxy = true)
解释一下 exposeProxy = true 的作用:通过 Spring AOP 提供对当前代理对象的访问,使得可以在业务逻辑中访问到当前的代理对象。你可以在方法执行时通过 AopContext.currentProxy() 获取当前的代理对象。
还有更多的依赖,后续我们随用随装。
通用基础代码
通用基础代码是指:无论在任何后端项目中,都可以复用的代码。这种代码一般 “一辈子只用写一次”,了解作用之后复制粘贴即可,无需记忆。
目录结构如下:
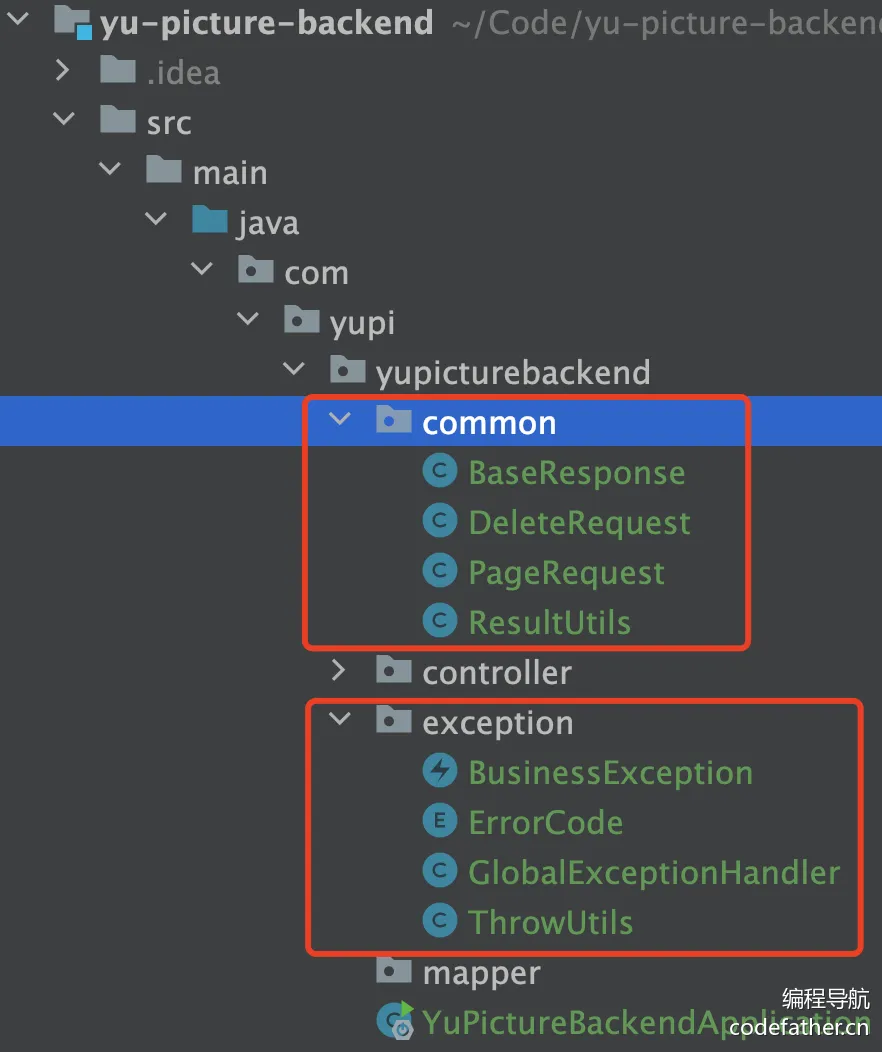
1、自定义异常
自定义错误码,对错误进行收敛,便于前端统一处理。
💡 这里有 2 个小技巧:
- 自定义错误码时,建议跟主流的错误码(比如 HTTP 错误码)的含义保持一致,比如 “未登录” 定义为 40100,和 HTTP 401 错误(用户需要进行身份认证)保持一致,会更容易理解。
- 错误码不要完全连续,预留一些间隔,便于后续扩展。
在 exception 包下新建错误码枚举类:
package com.zwnsyw.yunpicturebackend.exception;

public enum ErrorCode {
    SUCCESS(0, "success", "", ErrorType.SUCCESS),
    PARAMS_ERROR(40000, "请求参数错误", "", ErrorType.CLIENT),
    NULL_ERROR(40001, "请求数据为空", "", ErrorType.CLIENT),
    NOT_LOGIN_ERROR(40100, "未登录", "", ErrorType.CLIENT),
    NO_AUTH_ERROR(40101, "无权限", "", ErrorType.CLIENT),
    FORBIDDEN_ERROR(40300, "禁止访问", "", ErrorType.CLIENT),
    NOT_FOUND_ERROR(40400, "请求数据不存在","",ErrorType.SERVER),
    SYSTEM_ERROR(50000, "系统内部异常", "", ErrorType.SERVER),
    OPERATION_ERROR(50001, "操作失败","",ErrorType.SERVER);

    private final int code;
    private final String message;
    private final String description;
    private final ErrorType type;

    public enum ErrorType {
        CLIENT, SERVER, SUCCESS;
    }

    ErrorCode(int code, String message, String description, ErrorType type) {
        this.code = code;
        this.message = message;
        this.description = description;
        this.type = type;
    }

    public int getCode() { return code; }
    public String getMessage() { return message; }
    public String getDescription() { return description; }
    public ErrorType getType() { return type; }
}
一般不建议直接抛出 Java 内置的 RuntimeException,而是自定义一个业务异常,和内置的异常类区分开,便于定制化输出错误信息:
package com.zwnsyw.yunpicturebackend.exception;

public class BusinessException extends RuntimeException {
    private final int code;
    private final String description;
    private final ErrorCode.ErrorType errorType;

    public BusinessException(String message, int code, String description, ErrorCode.ErrorType errorType) {
        super(message);
        this.code = code;
        this.description = description;
        this.errorType = errorType;
    }

    public BusinessException(ErrorCode errorCode) {
        this(errorCode.getMessage(), errorCode.getCode(), errorCode.getDescription(), errorCode.getType());
    }

    public BusinessException(ErrorCode errorCode, String description) {
        this(errorCode.getMessage(), errorCode.getCode(), description, errorCode.getType());
    }

    public BusinessException(ErrorCode errorCode, String description, ErrorCode.ErrorType errorType) {
        this(errorCode.getMessage(), errorCode.getCode(), description, errorType);
    }

    public int getCode() {
        return code;
    }

    public String getDescription() {
        return description;
    }

    public ErrorCode.ErrorType getErrorType() {
        return errorType;
    }

    @Override
    public String toString() {
        return String.format("BusinessException [code=%d, message=%s, description=%s, type=%s]",
                code, getMessage(), description, errorType);
    }
}
为了更方便地根据情况抛出异常,可以封装一个 ThrowUtils,类似断言类,简化抛异常的代码:
package com.zwnsyw.yunpicturebackend.exception;

public class ThrowUtils {
    /**
     * 条件成立则抛异常
     * @param condition 条件
     * @param runtimeException 异常
     */
    public static void throwIf(boolean condition, RuntimeException runtimeException) {
        if (condition) {
            throw new RuntimeException(runtimeException.getMessage(), runtimeException);
        }

    }

    /**
     * 条件成立则抛异常
     * @param condition 条件
     * @param errorCode 错误码
     */
    public static void throwIf(boolean condition, ErrorCode errorCode) {
        throwIf(condition, new BusinessException(errorCode));
    }

    /**
     * 条件成立则抛异常
     * @param condition 条件
     * @param errorCode 错误码
     * @param message 错误信息
     */
    public static void throwIf(boolean condition, ErrorCode errorCode, String message) {
        throwIf(condition, new BusinessException(errorCode, message));
    }

}
2、响应包装类
一般情况下,每个后端接口都要返回调用码、数据、调用信息等,前端可以根据这些信息进行相应的处理。
我们可以封装统一的响应结果类,便于前端统一获取这些信息。
通用响应类:
package com.zwnsyw.yunpicturebackend.common;

import lombok.Data;
import java.io.Serializable;

@Data
public class BaseResponse<T> implements Serializable {

    /**
     * 状态码
     */
    private int code;

    /**
     * 数据
     */
    private T data;

    /**
     * 消息
     */
    private String message;

    /**
     * 描述
     */
    private String description;

    /**
     * 响应时间戳
     */
    private long timestamp;

    // 使用链式调用来简化重载
    public BaseResponse<T> code(int code) {
        this.code = code;
        return this;
    }

    public BaseResponse<T> data(T data) {
        this.data = data;
        return this;
    }

    public BaseResponse<T> message(String message) {
        this.message = message;
        return this;
    }

    public BaseResponse<T> description(String description) {
        this.description = description;
        return this;
    }

    public BaseResponse<T> timestamp(long timestamp) {
        this.timestamp = timestamp;
        return this;
    }
}
但之后每次接口返回值时,都要手动 new 一个 BaseResponse 对象并传入参数,比较麻烦,我们可以新建一个工具类,提供成功调用和失败调用的方法,支持灵活地传参,简化调用。
package com.zwnsyw.yunpicturebackend.common;

import com.zwnsyw.yunpicturebackend.exception.ErrorCode;

public class ResultUtils {

    /**
     * 成功响应
     *
     * @param data 返回的数据
     * @param <T>  数据类型
     * @return 返回成功响应对象
     */
    public static <T> BaseResponse<T> success(T data) {
        return new BaseResponse<T>()
                .code(ErrorCode.SUCCESS.getCode())
                .data(data)
                .message(ErrorCode.SUCCESS.getMessage())
                .description(ErrorCode.SUCCESS.getDescription())
                .timestamp(System.currentTimeMillis());
    }

    /**
     * 失败响应
     *
     * @param errorCode 错误码
     * @return 返回失败响应对象
     */
    public static BaseResponse error(ErrorCode errorCode) {
        return new BaseResponse<>()
                .code(errorCode.getCode())
                .message(errorCode.getMessage())
                .description(errorCode.getDescription())
                .timestamp(System.currentTimeMillis());
    }

    /**
     * 自定义失败响应
     *
     * @param code        错误码
     * @param message     错误信息
     * @param description 错误描述
     * @return 返回自定义失败响应对象
     */
    public static BaseResponse error(int code, String message, String description) {
        return new BaseResponse<>()
                .code(code)
                .message(message)
                .description(description)
                .timestamp(System.currentTimeMillis());
    }

    /**
     * 自定义失败响应(接收 ErrorCode)
     *
     * @param errorCode 错误码
     * @param description 错误描述
     * @return 返回失败响应对象
     */
    public static BaseResponse error(ErrorCode errorCode, String description) {
        return new BaseResponse<>()
                .code(errorCode.getCode())
                .message(errorCode.getMessage())
                .description(description)
                .timestamp(System.currentTimeMillis());
    }
}
3、全局异常处理器
为了防止意料之外的异常,利用 AOP 切面全局对业务异常和 RuntimeException 进行捕获:
package com.zwnsyw.yunpicturebackend.exception;

import com.zwnsyw.yunpicturebackend.common.BaseResponse;
import com.zwnsyw.yunpicturebackend.common.ResultUtils;
import lombok.extern.slf4j.Slf4j;
import org.springframework.validation.BindingResult;
import org.springframework.web.bind.MethodArgumentNotValidException;
import org.springframework.web.bind.annotation.ExceptionHandler;
import org.springframework.web.bind.annotation.RestControllerAdvice;
import org.springframework.validation.BindException;

import javax.servlet.http.HttpServletRequest;
import java.util.List;
import java.util.UUID;
import java.util.stream.Collectors;

@RestControllerAdvice
@Slf4j
public class GlobalExceptionHandler {

    /**
     * 处理自定义业务异常
     */
    @ExceptionHandler(BusinessException.class)
    public BaseResponse<?> handleBusinessException(BusinessException e, HttpServletRequest request) {
        logDetailedException(e, request);
        return generateErrorResponse(e.getErrorType(), e.getCode(), e.getMessage(), e.getDescription());
    }

    /**
     * 处理运行时异常
     */
    @ExceptionHandler(RuntimeException.class)
    public BaseResponse<?> handleRuntimeException(RuntimeException e, HttpServletRequest request) {
        logDetailedException(e, request);
        // 检查是否是包装的 BusinessExeception
        Throwable cause = e.getCause();
        if (cause != null && cause instanceof BusinessException) {
            return handleBusinessException((BusinessException) cause, request);
        }
        return ResultUtils.error(ErrorCode.SYSTEM_ERROR, "系统异常");
    }

    /**
     * 处理DTO验证失败的异常(MethodArgumentNotValidException)
     */
    @ExceptionHandler(MethodArgumentNotValidException.class)
    public BaseResponse<?> handleValidationException(MethodArgumentNotValidException ex, HttpServletRequest request) {
        BindingResult bindingResult = ex.getBindingResult();
        List<String> fieldErrors = bindingResult.getFieldErrors().stream()
                .map(error -> String.format("%s: %s", error.getField(), error.getDefaultMessage()))
                .collect(Collectors.toList());

        log.error("Validation exception at {}: Error details: {}",
                request.getRequestURI(),
                fieldErrors);

        return ResultUtils.error(ErrorCode.PARAMS_ERROR.getCode(), "请求参数校验失败", String.join(" | ", fieldErrors));
    }

    /**
     * 处理DTO验证失败的异常 (BindException)
     */
    @ExceptionHandler(BindException.class)
    public BaseResponse<?> handleBindException(BindException ex, HttpServletRequest request) {
        BindingResult bindingResult = ex.getBindingResult();
        List<String> fieldErrors = bindingResult.getFieldErrors().stream()
                .map(error -> String.format("%s: %s", error.getField(), error.getDefaultMessage()))
                .collect(Collectors.toList());

        log.error("Validation exception at {}: Error details: {}",
                request.getRequestURI(),
                fieldErrors);

        return ResultUtils.error(ErrorCode.PARAMS_ERROR.getCode(), "请求参数校验失败", String.join(" | ", fieldErrors));
    }

    /**
     * 处理 IllegalArgumentException 异常
     */
    @ExceptionHandler(IllegalArgumentException.class)
    public BaseResponse<?> handleIllegalArgumentException(IllegalArgumentException e, HttpServletRequest request) {
        logDetailedException(e, request);
        return ResultUtils.error(ErrorCode.PARAMS_ERROR.getCode(), "参数错误", e.getMessage());
    }

    /**
     * 处理所有未捕获的异常
     */
    @ExceptionHandler(Exception.class)
    public BaseResponse<?> handleException(Exception e, HttpServletRequest request) {
        logDetailedException(e, request);
        return ResultUtils.error(ErrorCode.SYSTEM_ERROR, "系统异常");
    }

    /**
     * 记录详细的异常日志信息
     */
    private void logDetailedException(Throwable e, HttpServletRequest request) {
        // 检查是否已经记录过该异常
        if (e instanceof BusinessException) {
            return;
        }
        StackTraceElement throwingElement = getThrowingElement(e);
        String clientIp = request.getRemoteAddr();
        String requestMethod = request.getMethod();

        log.error("Exception occurred: [Type={}, Message={}, URI={}, Method={}, IP={}, Class={}, Method={}, Line={}]",
                e.getClass().getSimpleName(),
                e.getMessage(),
                request.getRequestURI(),
                requestMethod,
                clientIp,
                throwingElement.getClassName(),
                throwingElement.getMethodName(),
                throwingElement.getLineNumber());
    }

    /**
     * 获取抛出异常的堆栈信息
     */
    private StackTraceElement getThrowingElement(Throwable e) {
        StackTraceElement[] stackTrace = e.getStackTrace();
        for (StackTraceElement element : stackTrace) {
            // 排除框架内部类和工具类(如ThrowUtils)
            if (!element.getClassName().startsWith("com.zwnsyw.yunpicturebackend.exception.ThrowUtils")) {
                return element;
            }
        }
        return (stackTrace.length > 0) ? stackTrace[0] : new StackTraceElement("UnknownClass", "UnknownMethod", "UnknownFile", -1);
    }

    /**
     * 生成错误响应
     */
    private BaseResponse<?> generateErrorResponse(ErrorCode.ErrorType errorType, int code, String message, String description) {
        switch (errorType) {
            case CLIENT:
                return ResultUtils.error(code, message, description);
            case SERVER:
                // 服务端异常可返回请求标识符,用于问题追踪
                String traceId = UUID.randomUUID().toString(); // 或从上下文获取 TraceId
                return ResultUtils.error(code, "服务器内部错误 (Trace ID: " + traceId + ")", "详情:" + description);
            default:
                return ResultUtils.error(code, "未知错误", description);
        }
    }
}
4、请求包装类
对于 “分页”、“删除某条数据” 这类通用的请求,可以封装统一的请求包装类,用于接受前端传来的参数,之后相同参数的请求就不用专门再新建一个类了。
分页请求包装类,接受页号、页面大小、排序字段、排序顺序参数:
package com.zwnsyw.yunpicturebackend.common;

import lombok.Data;

import javax.servlet.http.HttpServletRequest;
import java.io.Serializable;

@Data
public class PageRequest implements Serializable {

    private static final long serialVersionUID = 1L;

    private Long page = 1L; // 默认第一页

    private Long pageSize = 10L; // 默认每页10条记录

    private String sortField; // 排序字段

    private String sortOrder = "descend"; // 排序方式,默认降序

    public static PageRequest fromRequest(HttpServletRequest request) {
        PageRequest pageRequest = new PageRequest();
        String pageParam = request.getParameter("page");
        String pageSizeParam = request.getParameter("pageSize");

        if (pageParam != null && !pageParam.isEmpty()) {
            pageRequest.setPage(Long.parseLong(pageParam));
        }

        if (pageSizeParam != null && !pageSizeParam.isEmpty()) {
            pageRequest.setPageSize(Long.parseLong(pageSizeParam));
        }

        return pageRequest;
    }

}
删除请求包装类,接受要删除数据的 id 作为参数:
package com.zwnsyw.yunpicturebackend.common;

import lombok.Data;
import java.io.Serializable;

@Data
public class DeleteRequest implements Serializable {
    /**
     * id
     */
    private Long id;
    private static final long serialVersionUID = 1L;
}
5、全局跨域配置
跨域是指浏览器访问的 URL(前端地址)和后端接口地址的域名(或端口号)不一致导致的,浏览器为了安全,默认禁止跨域请求访问。
为了开发调试方便,我们可以通过全局跨域配置,让整个项目所有的接口支持跨域,解决跨域报错。
新建 config 包,用于存放所有的配置相关代码。全局跨域配置代码如下:
package com.zwnsyw.yunpicturebackend.config;

import org.springframework.context.annotation.Configuration;
import org.springframework.web.servlet.config.annotation.CorsRegistry;
import org.springframework.web.servlet.config.annotation.WebMvcConfigurer;

@Configuration
public class CorsConfig implements WebMvcConfigurer {
    @Override
    public void addCorsMappings(CorsRegistry registry) {
        registry.addMapping("/**")
                .allowCredentials(true)
                .allowedOriginPatterns("http://localhost:5173", "http://127.0.0.1:5173")
                .allowedMethods("GET", "POST", "PUT", "DELETE", "OPTIONS")
                .allowedHeaders("Content-Type", "Authorization")
                .exposedHeaders("X-Total-Count")
                .maxAge(3600);
    }
}
编写示例接口
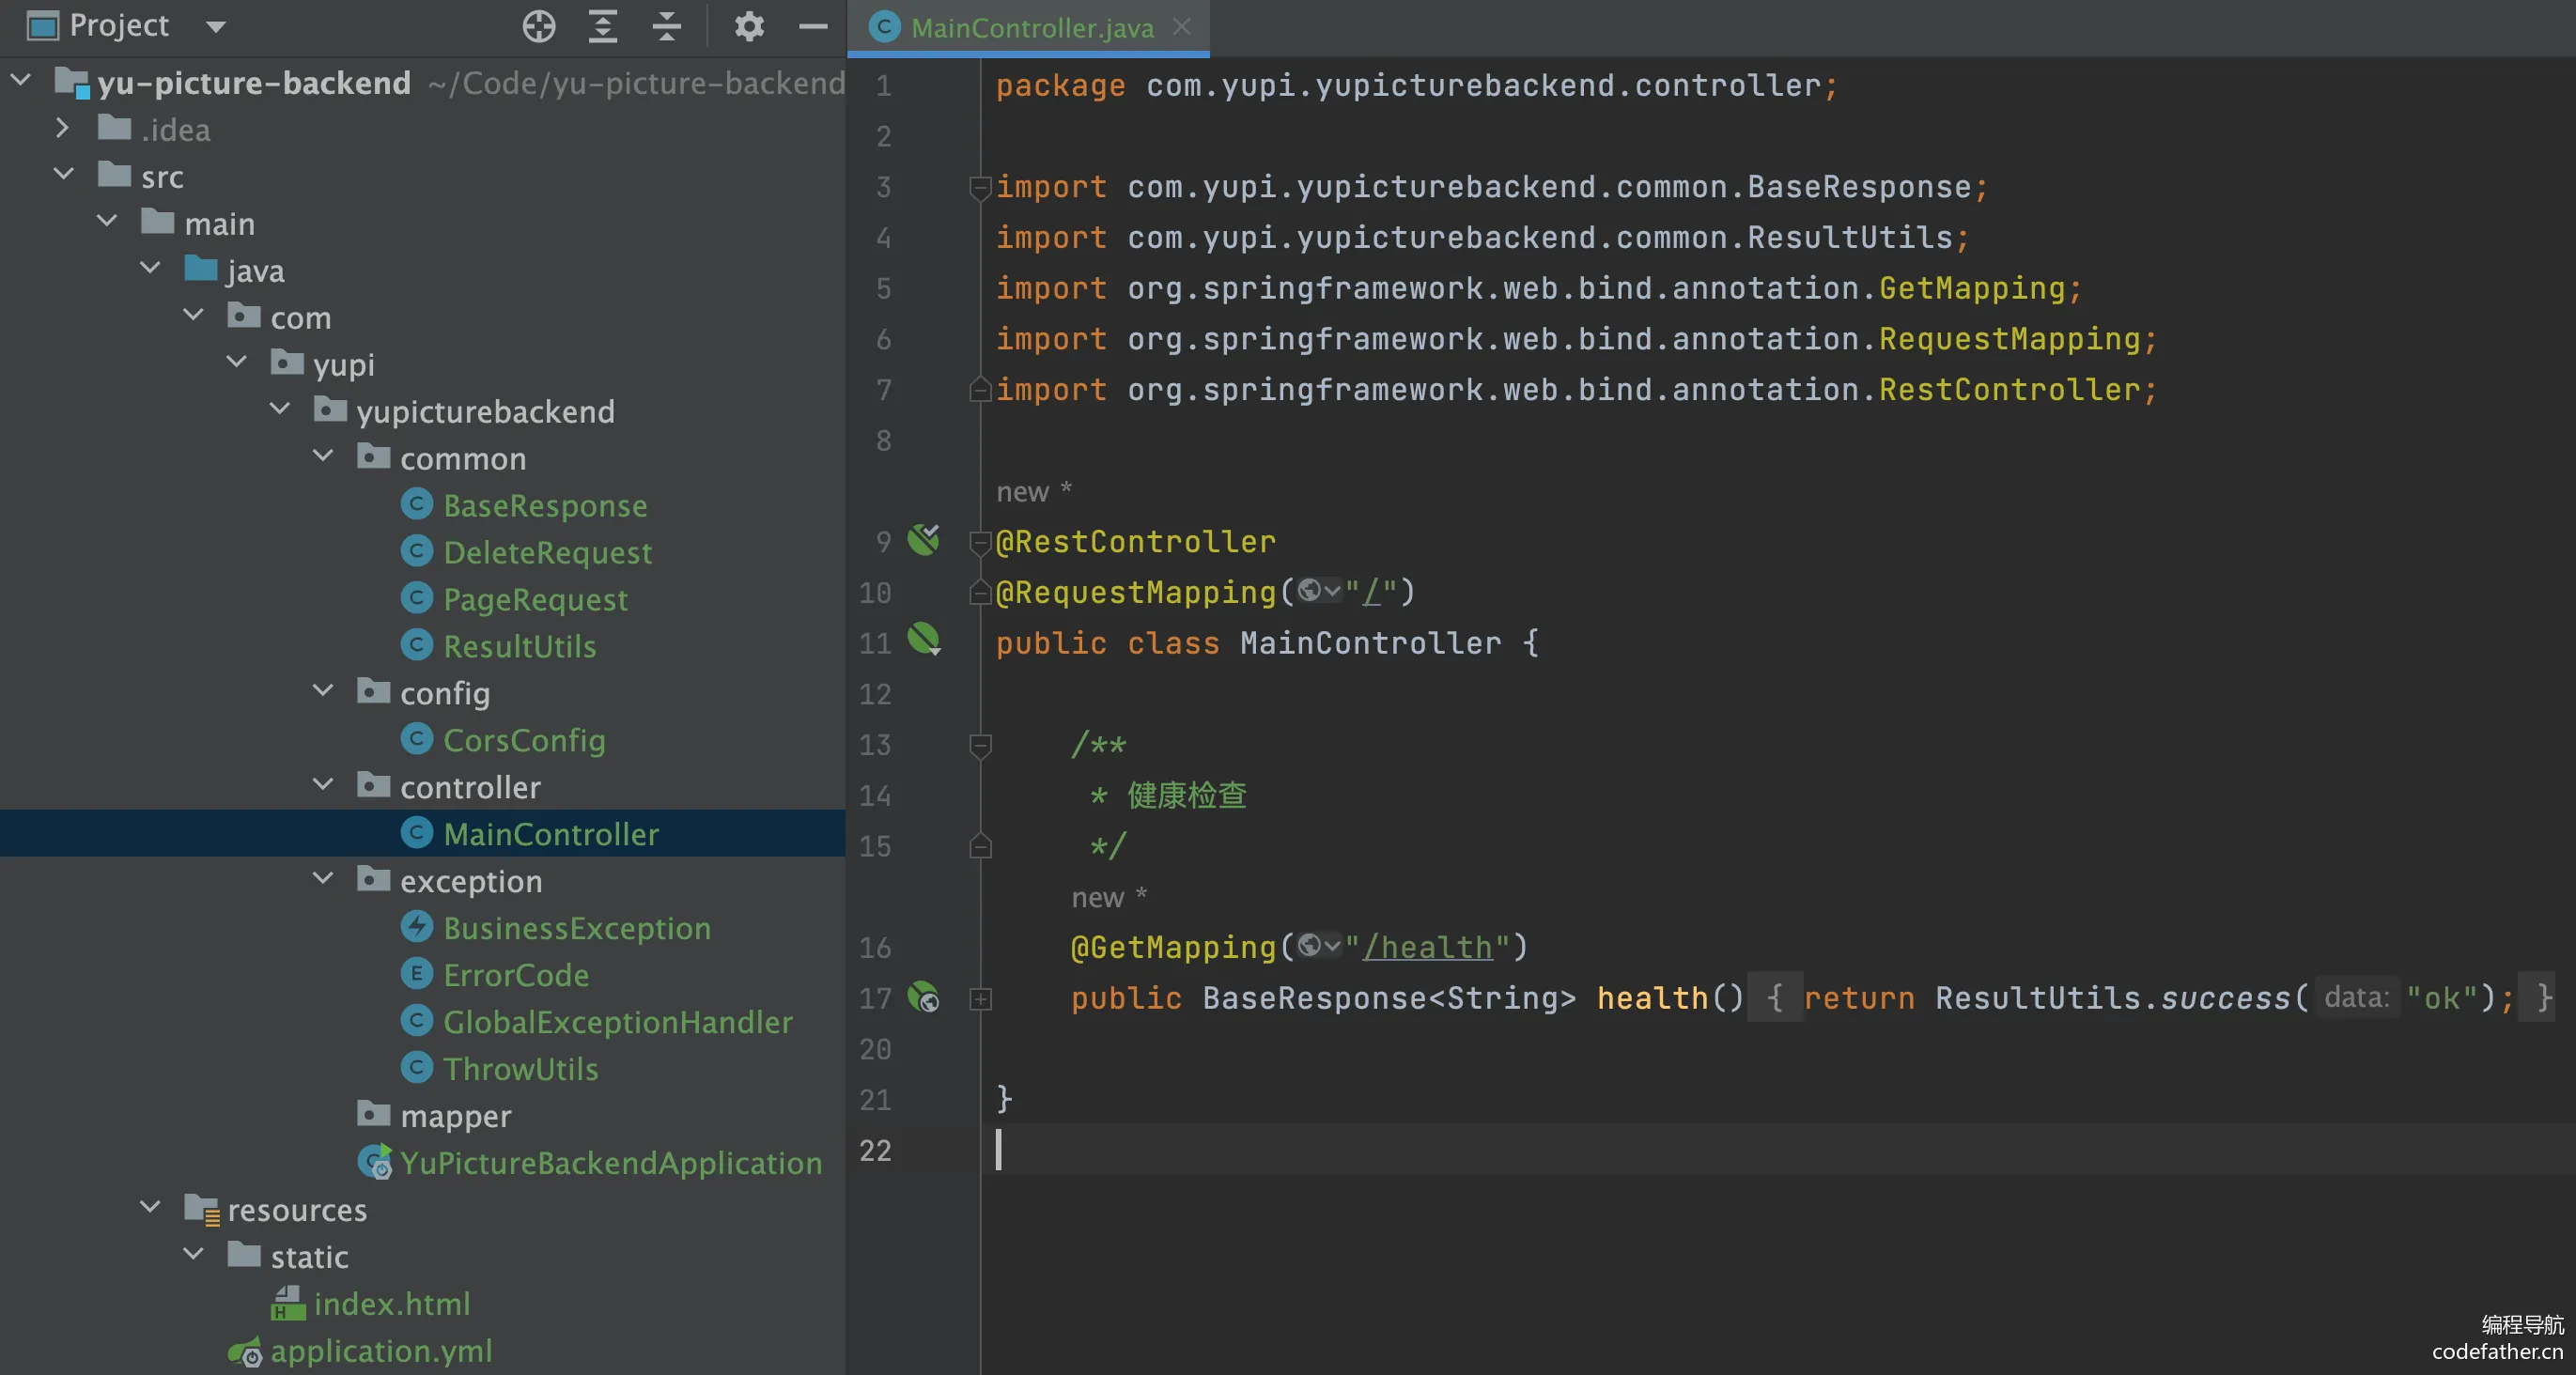
移除 controller 包下的其他代码,让项目干净一些,然后编写一个纯净的 /health 接口用于健康检查:
package com.zwnsyw.yunpicturebackend.controller;

import com.zwnsyw.yunpicturebackend.common.BaseResponse;
import com.zwnsyw.yunpicturebackend.common.ResultUtils;
import org.springframework.web.bind.annotation.GetMapping;
import org.springframework.web.bind.annotation.RequestMapping;
import org.springframework.web.bind.annotation.RestController;

@RestController
@RequestMapping("/")
public class MainController {
    /**
     * 健康检查
     */
    @GetMapping("/health")
    public BaseResponse<String> health() {
        return ResultUtils.success("ok");
    }
}
💡 健康检查是指可以通过访问该接口,来快速验证后端服务是否正常运行,所以该接口的返回值非常简单。
此时的项目结构如图:
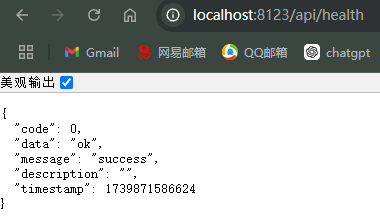
访问 http://localhost:8123/api/health,看到输出结果,表示后端初始化完成:
二、前端项目初始化
环境准备
前端 Node.js 版本必须 >= 18.12,鱼皮教程中使用 20 版本。在官网安装好 Node 后会自动安装 NPM 前端包管理器。
可参考视频安装 Node.js:https://www.bilibili.com/video/BV14SUNYREv8
创建项目
使用 Vue 官方推荐的脚手架 create-vue 快速创建 Vue3 的项目:https://cn.vuejs.org/guide/quick-start.html
💡 Vue 提供了在线编码测试,可以通过 Playground 来学习 Vue:https://play.vuejs.org/
在终端中输入命令:
npm create vue@latest
NPM 会自动安装 create-vue 工具:
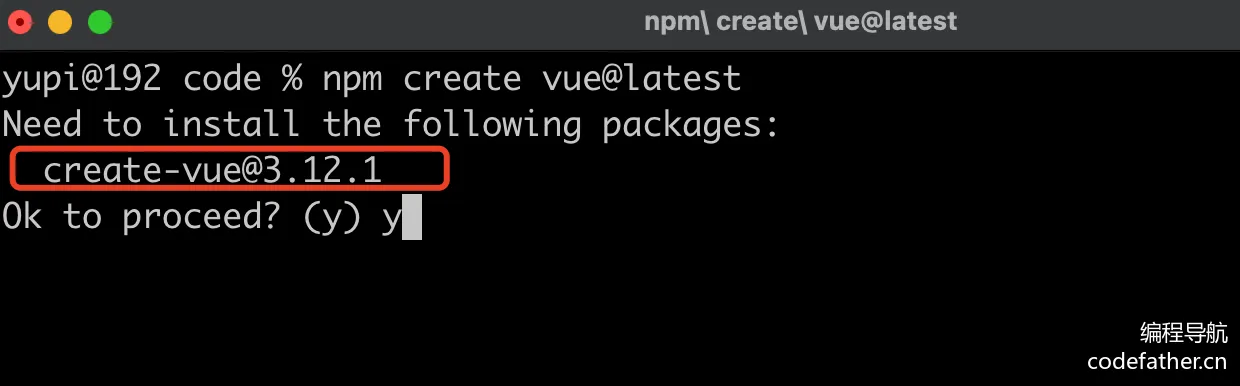
注意本教程使用的版本号是 3.12.1,如果之后版本更新导致跟鱼皮的教程不一致,记得安装特定版本的工具,而不是 latest 最新版!
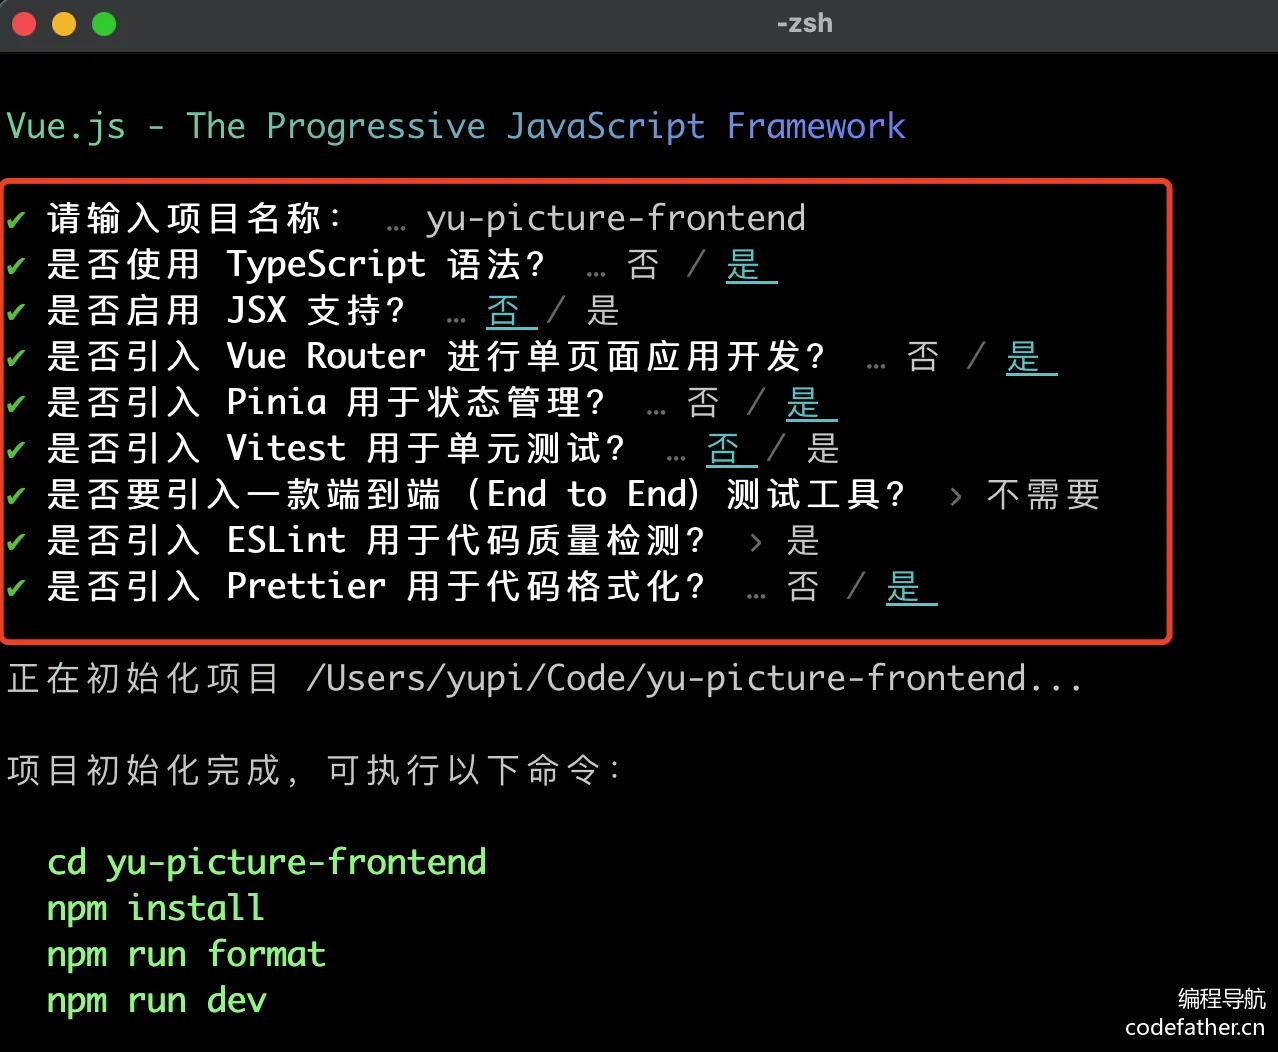
接下来按照如下选项创建项目,脚手架会自动帮我们安装 Vue Router 路由、Pinia 全局状态管理等实用类库:
然后用 WebStorm 打开项目,先在终端执行 npm install 安装依赖,然后执行 npm run dev 能访问网页就成功了。
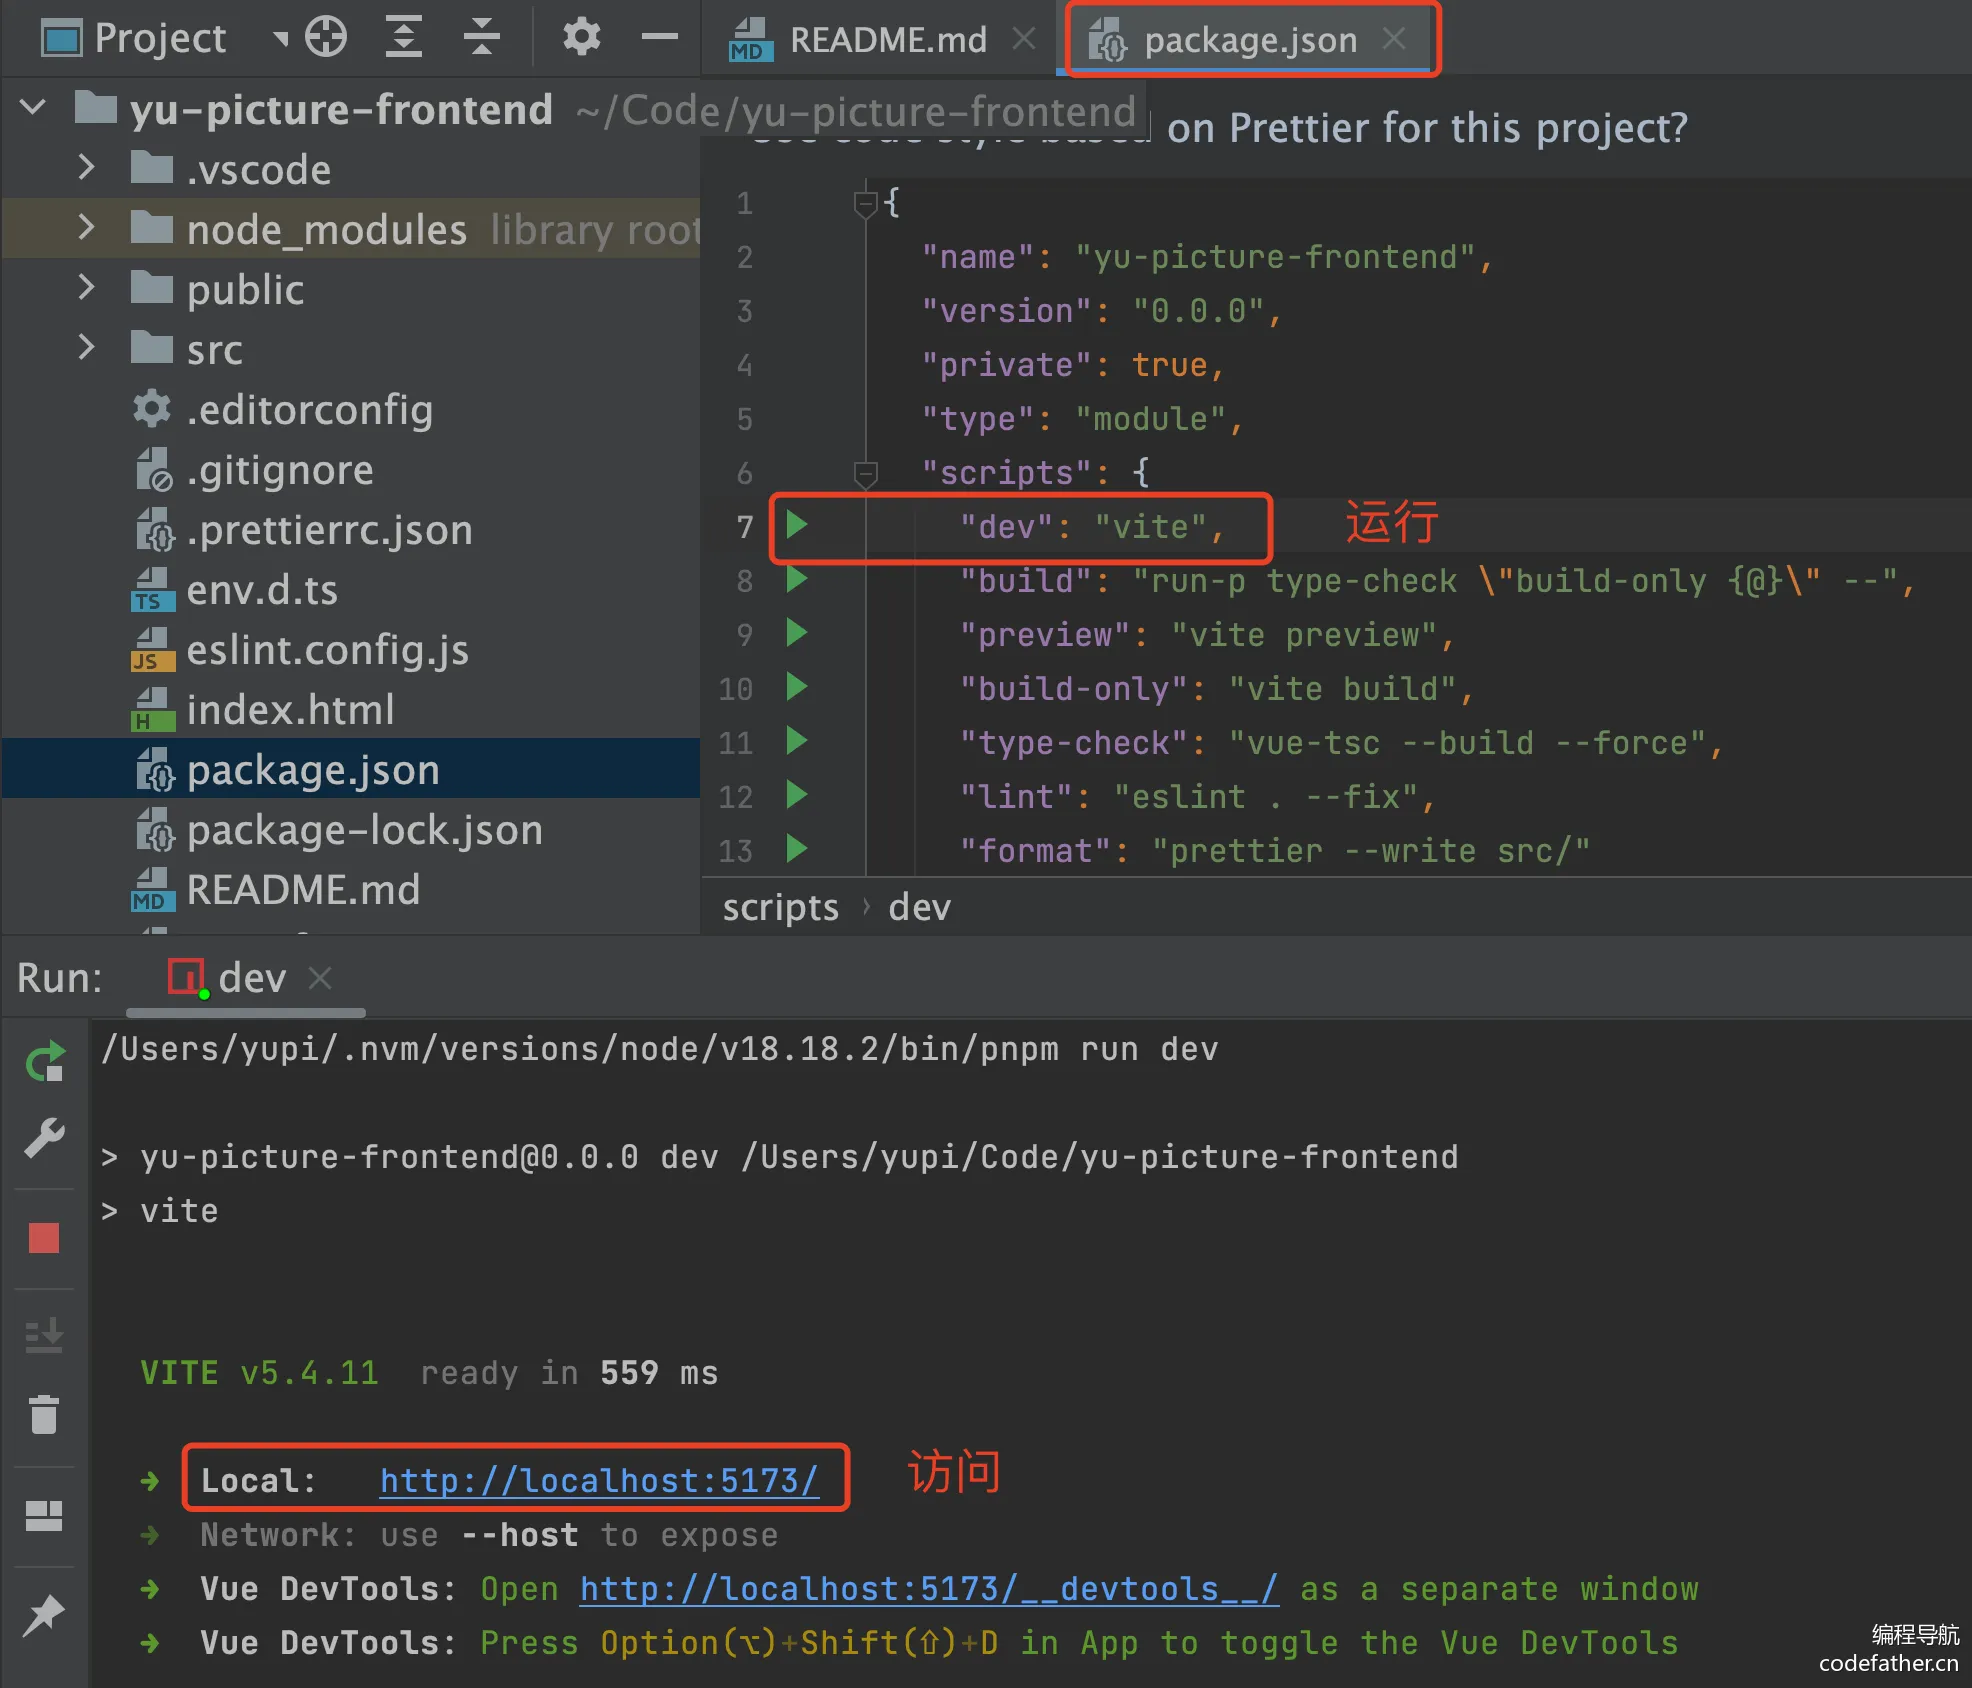
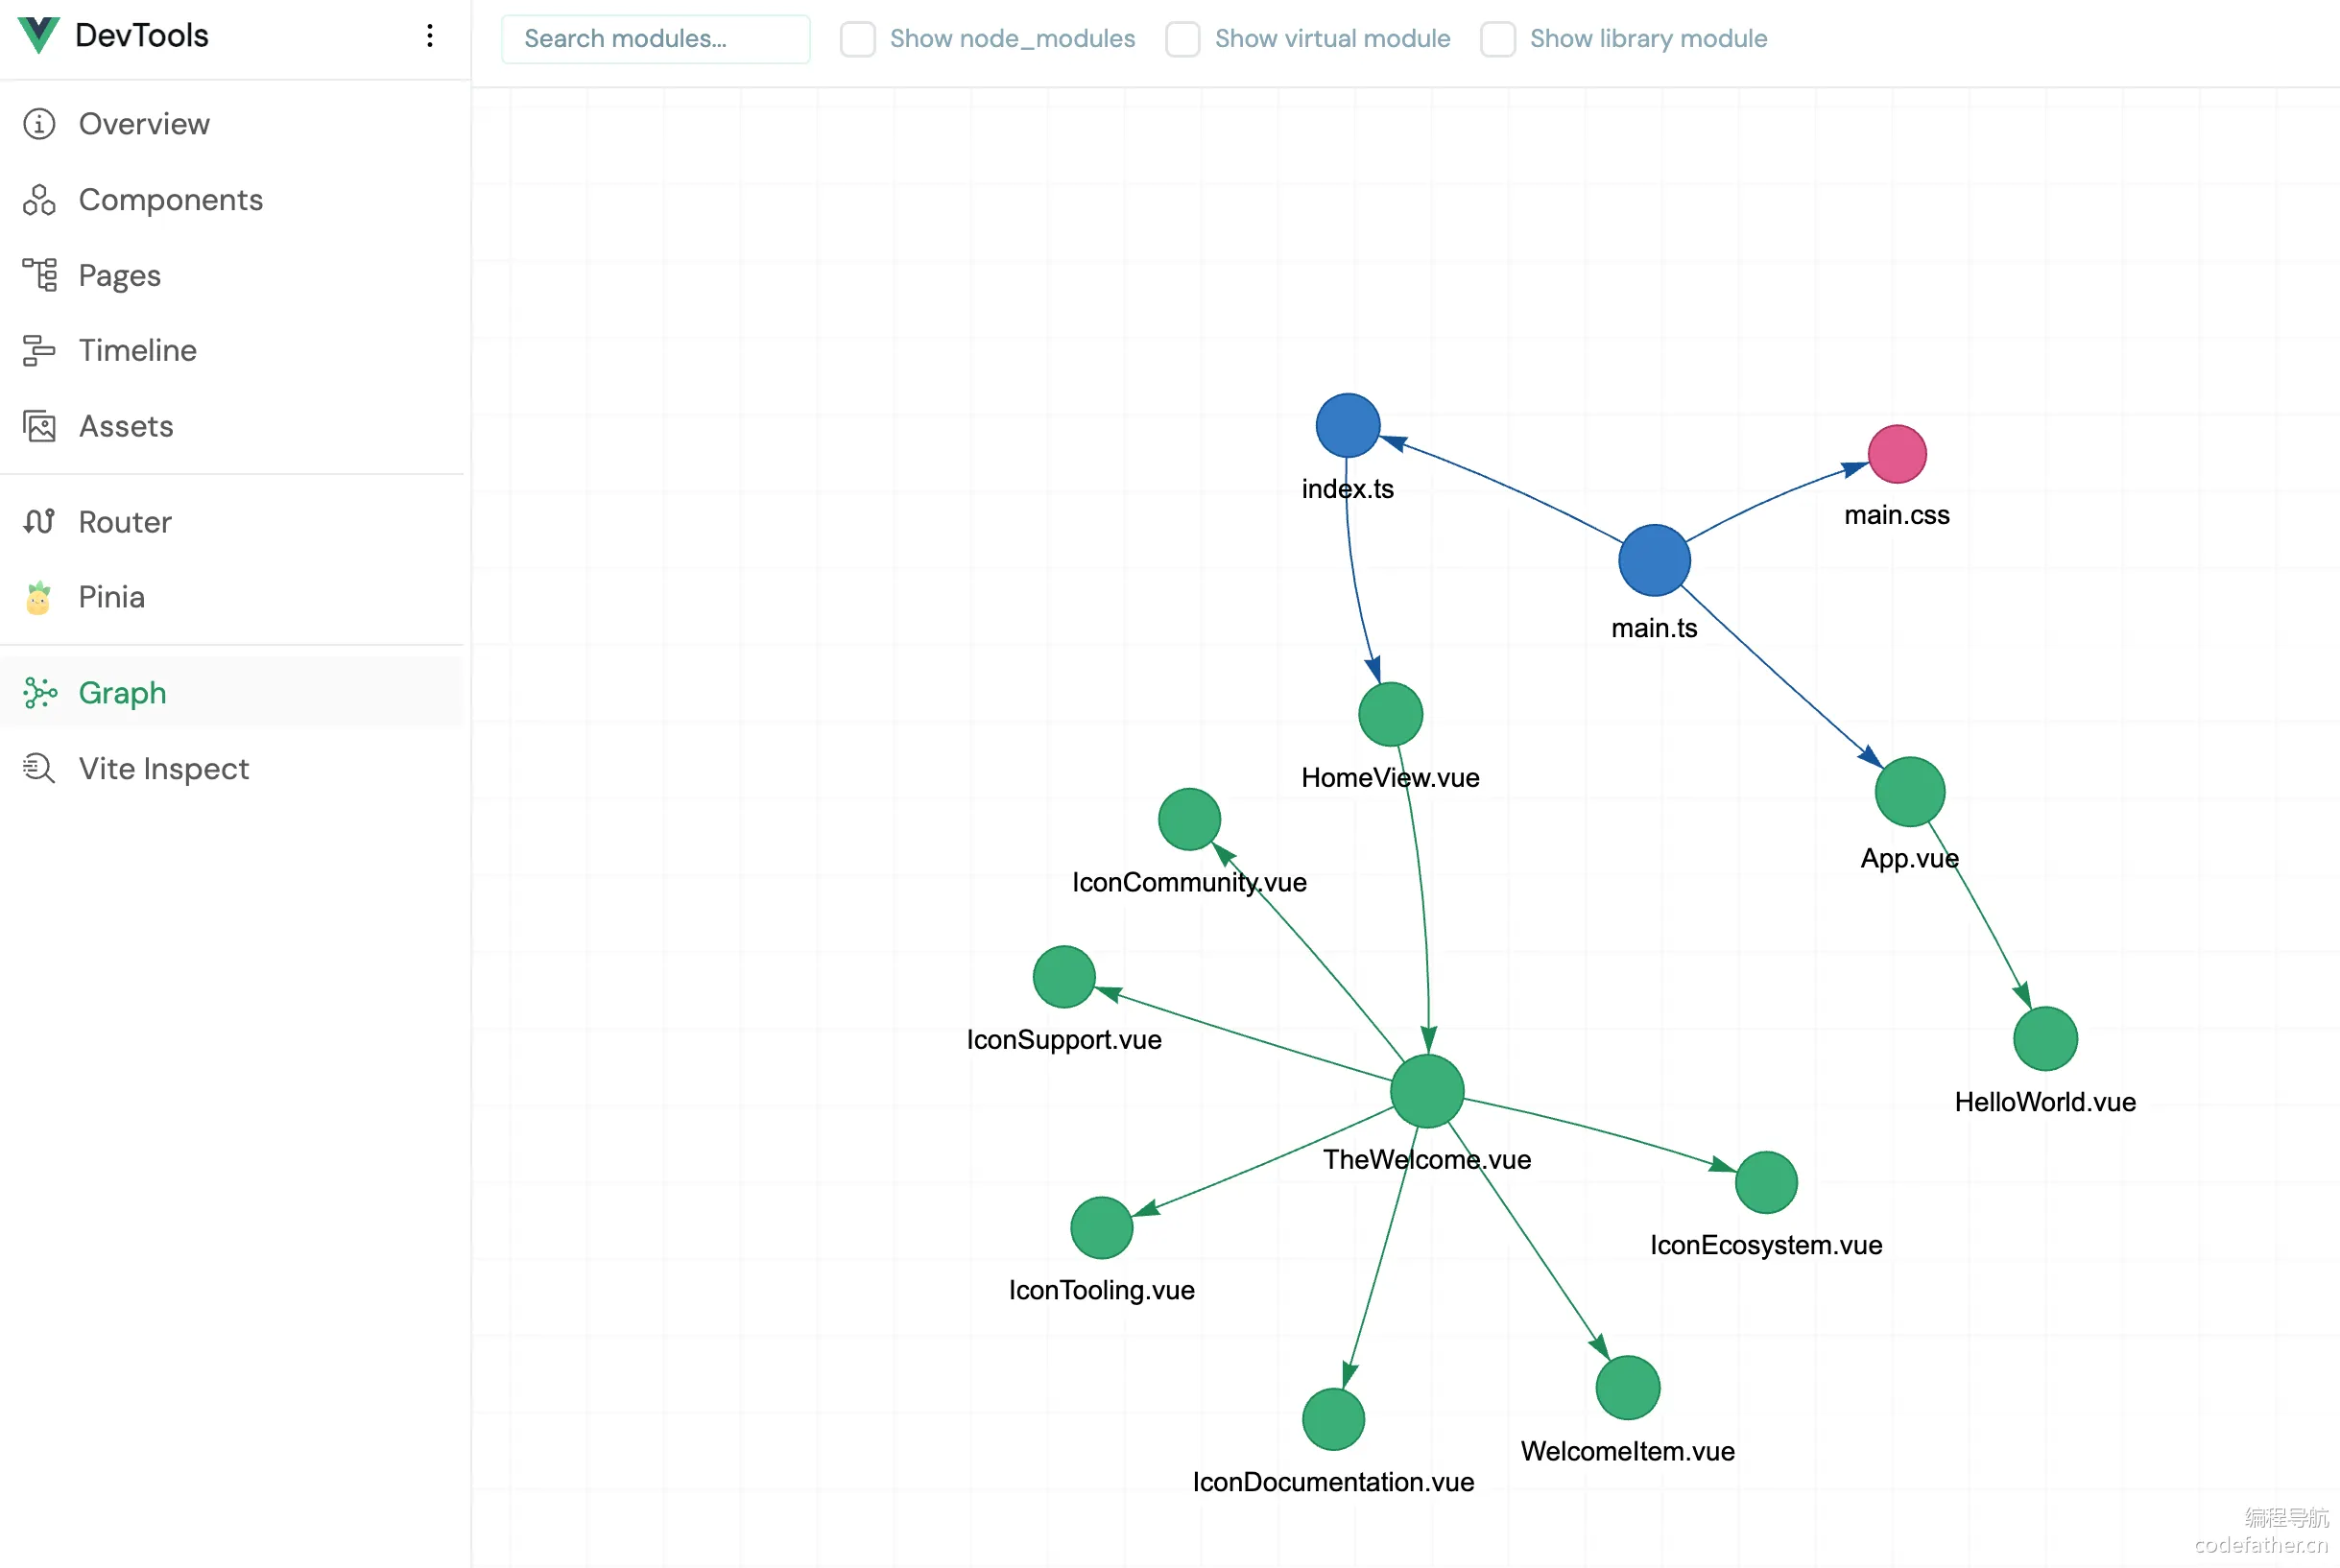
💡 可以看到 Vue 脚手架提供了一个调试工具 devtools(http://localhost:5173/devtools/),你可以使用它来调试分析项目:
前端工程化配置
脚手架已经帮我们整合了 Prettier 代码美化、ESLint 自动校验、TypeScript 类型校验,无需再自行整合。
但是需要在 webstorm 里开启代码美化插件:
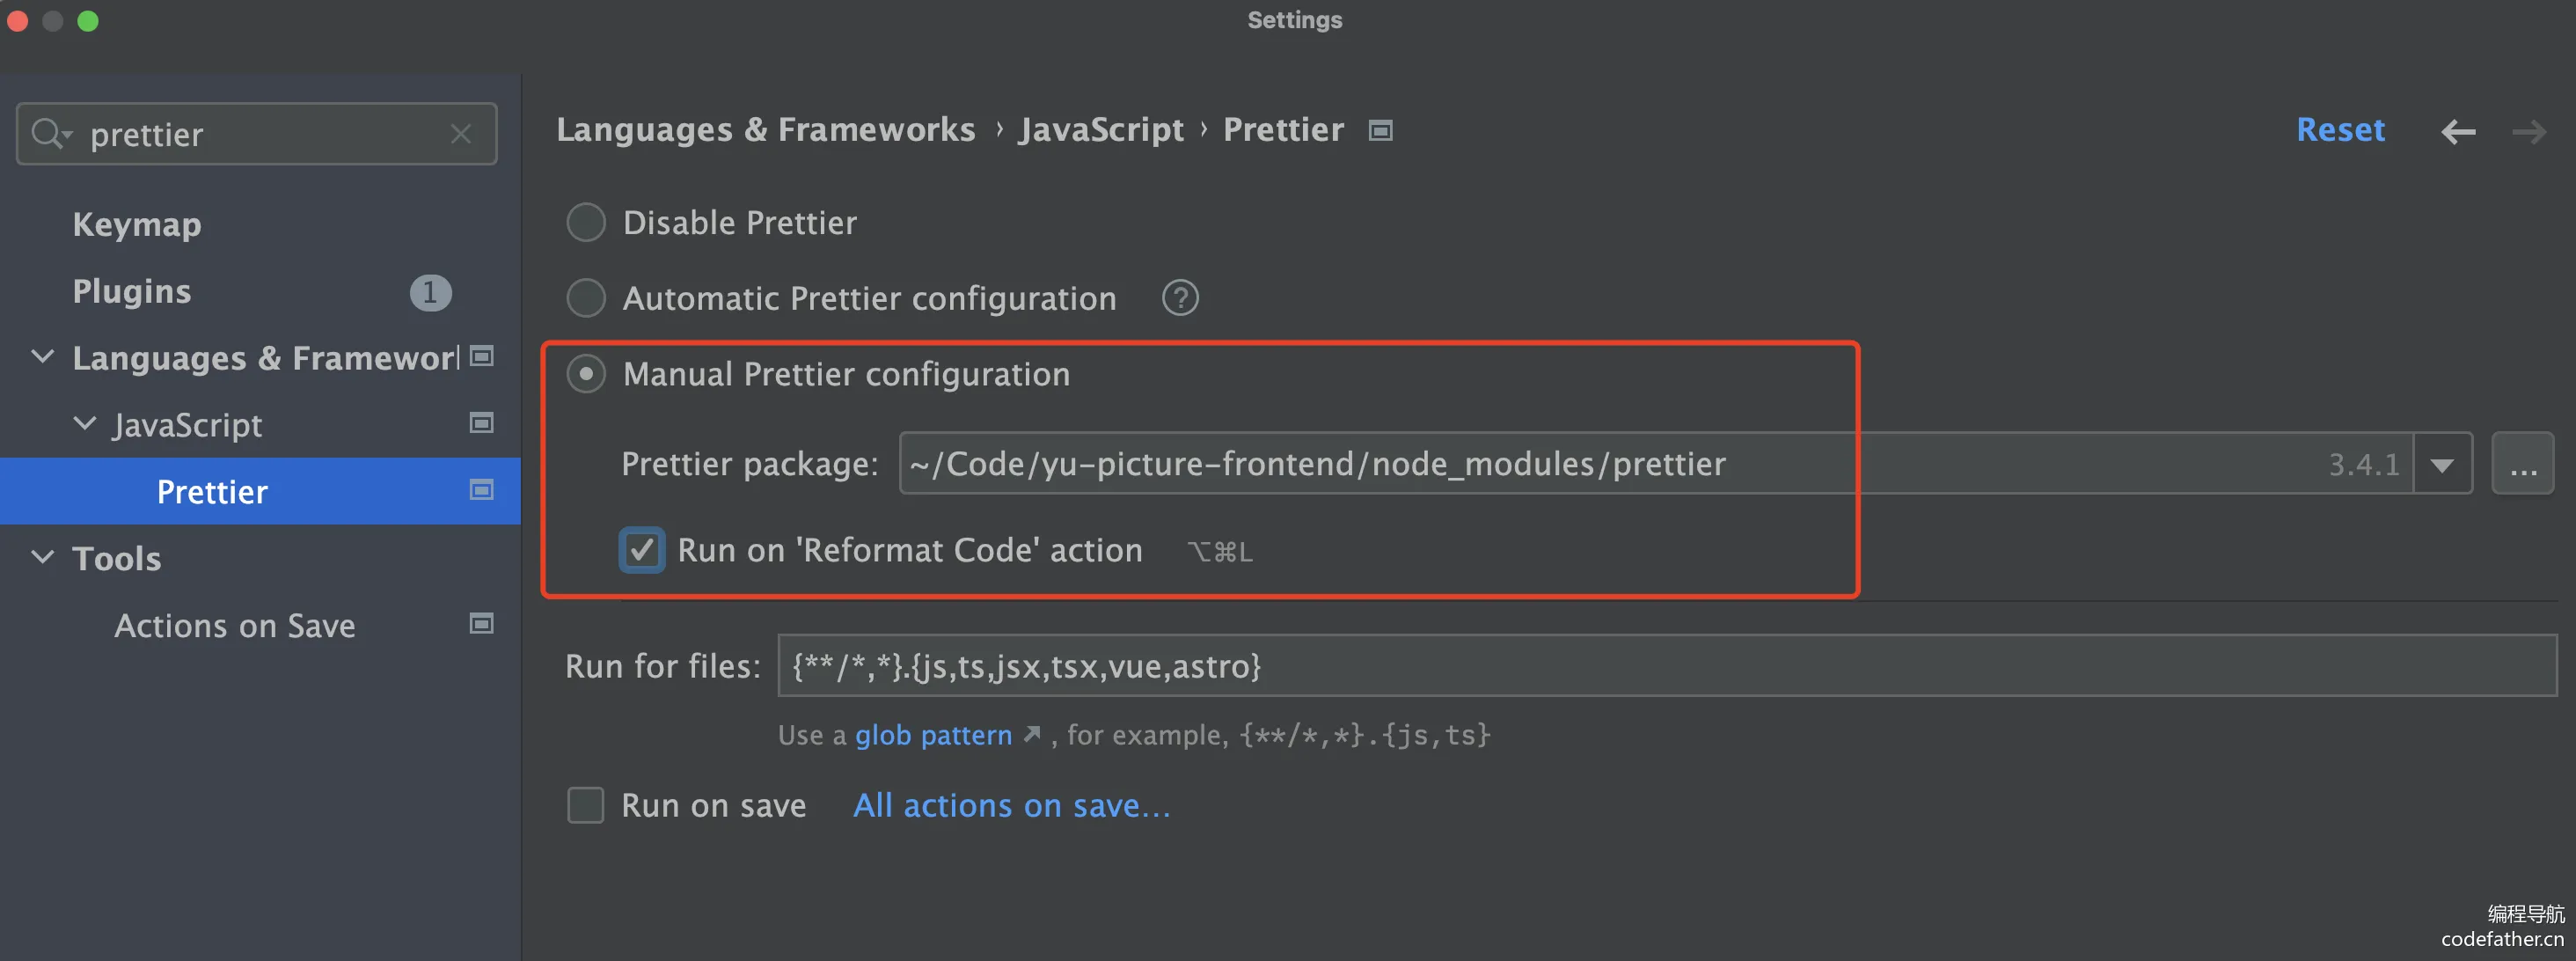
在 vue 文件中执行格式化快捷键,不报错,表示配置工程化成功。
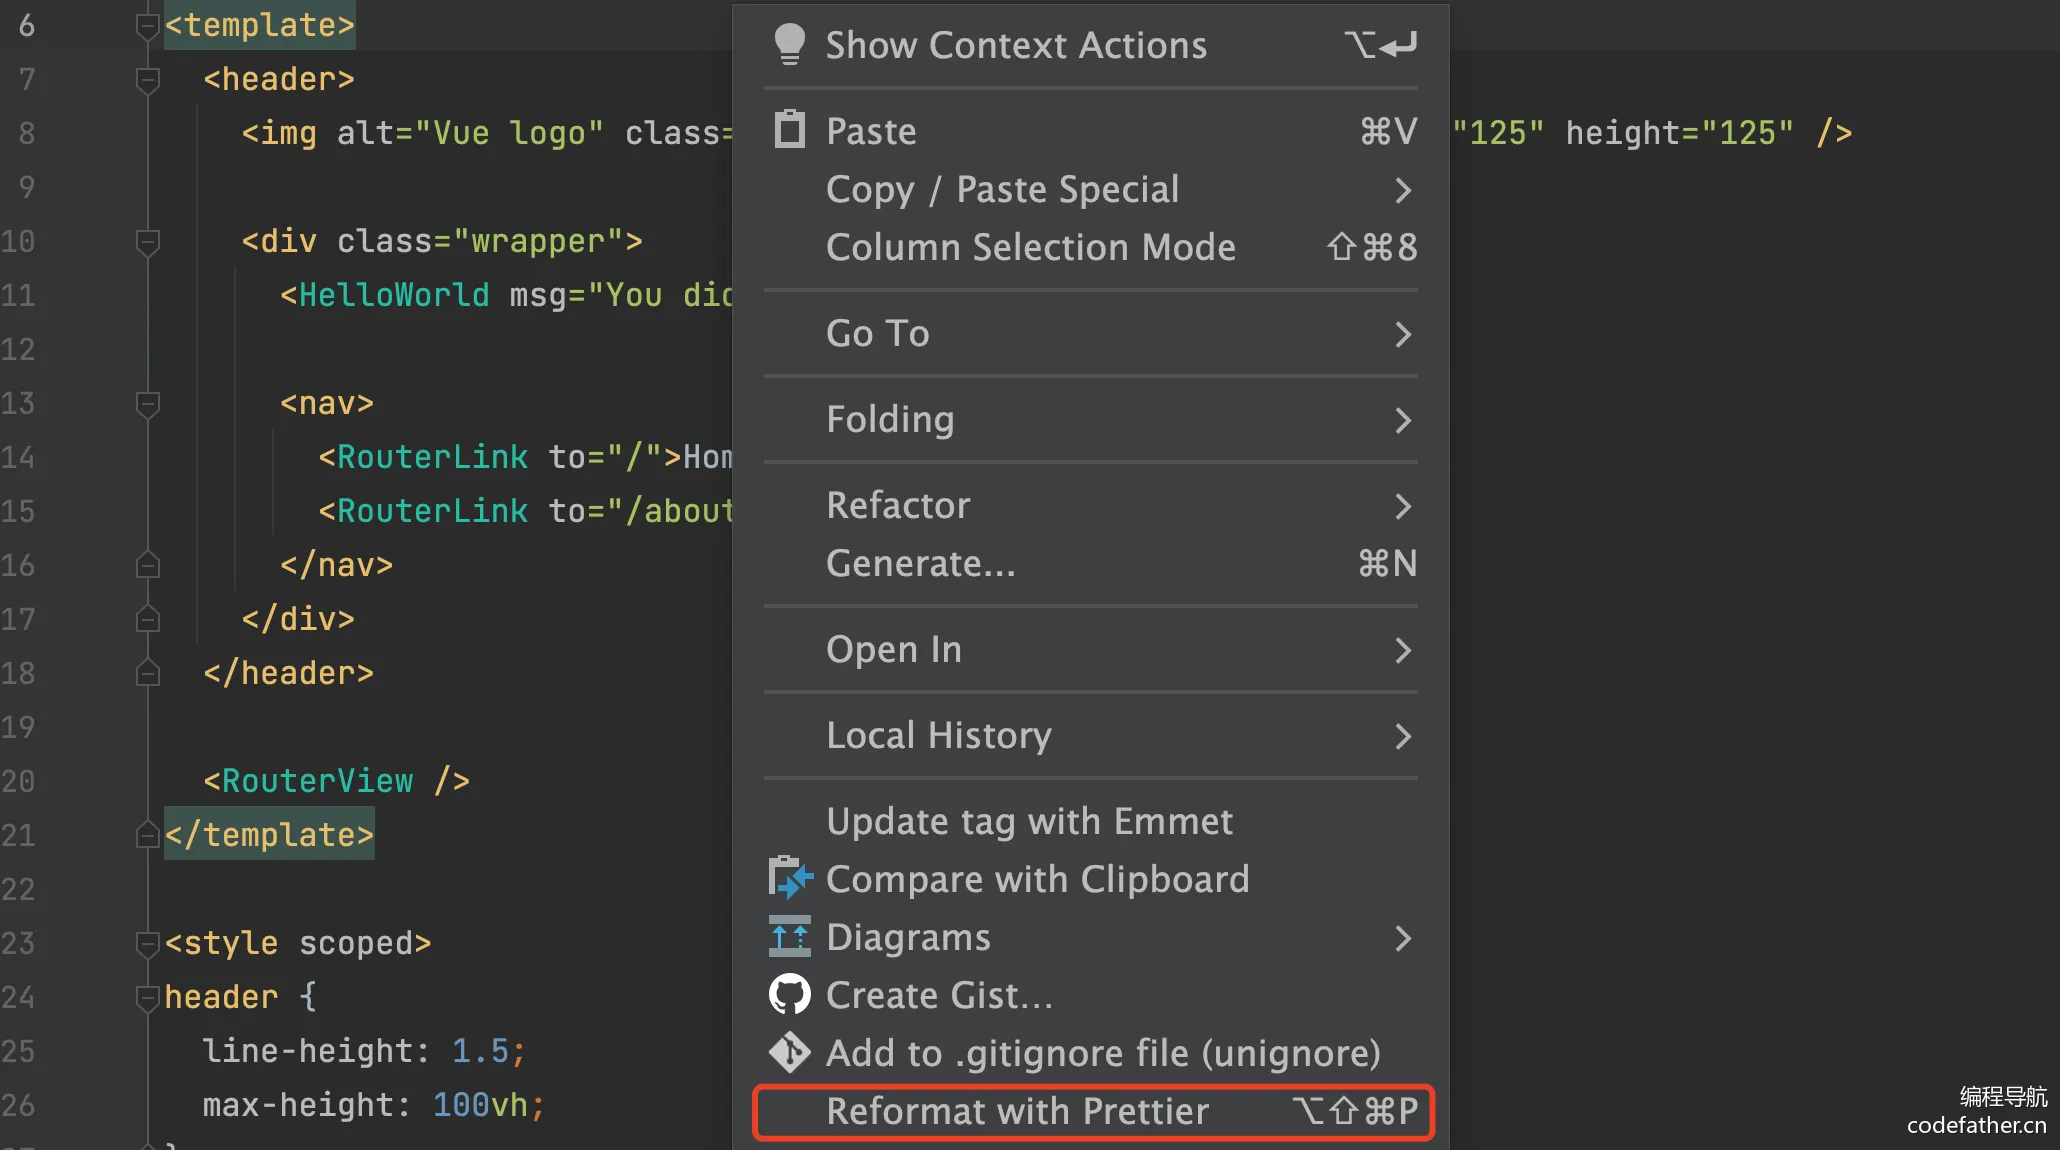
如果发现格式化效果不好,也没关系,之后可以使用另外一种格式化快捷键:
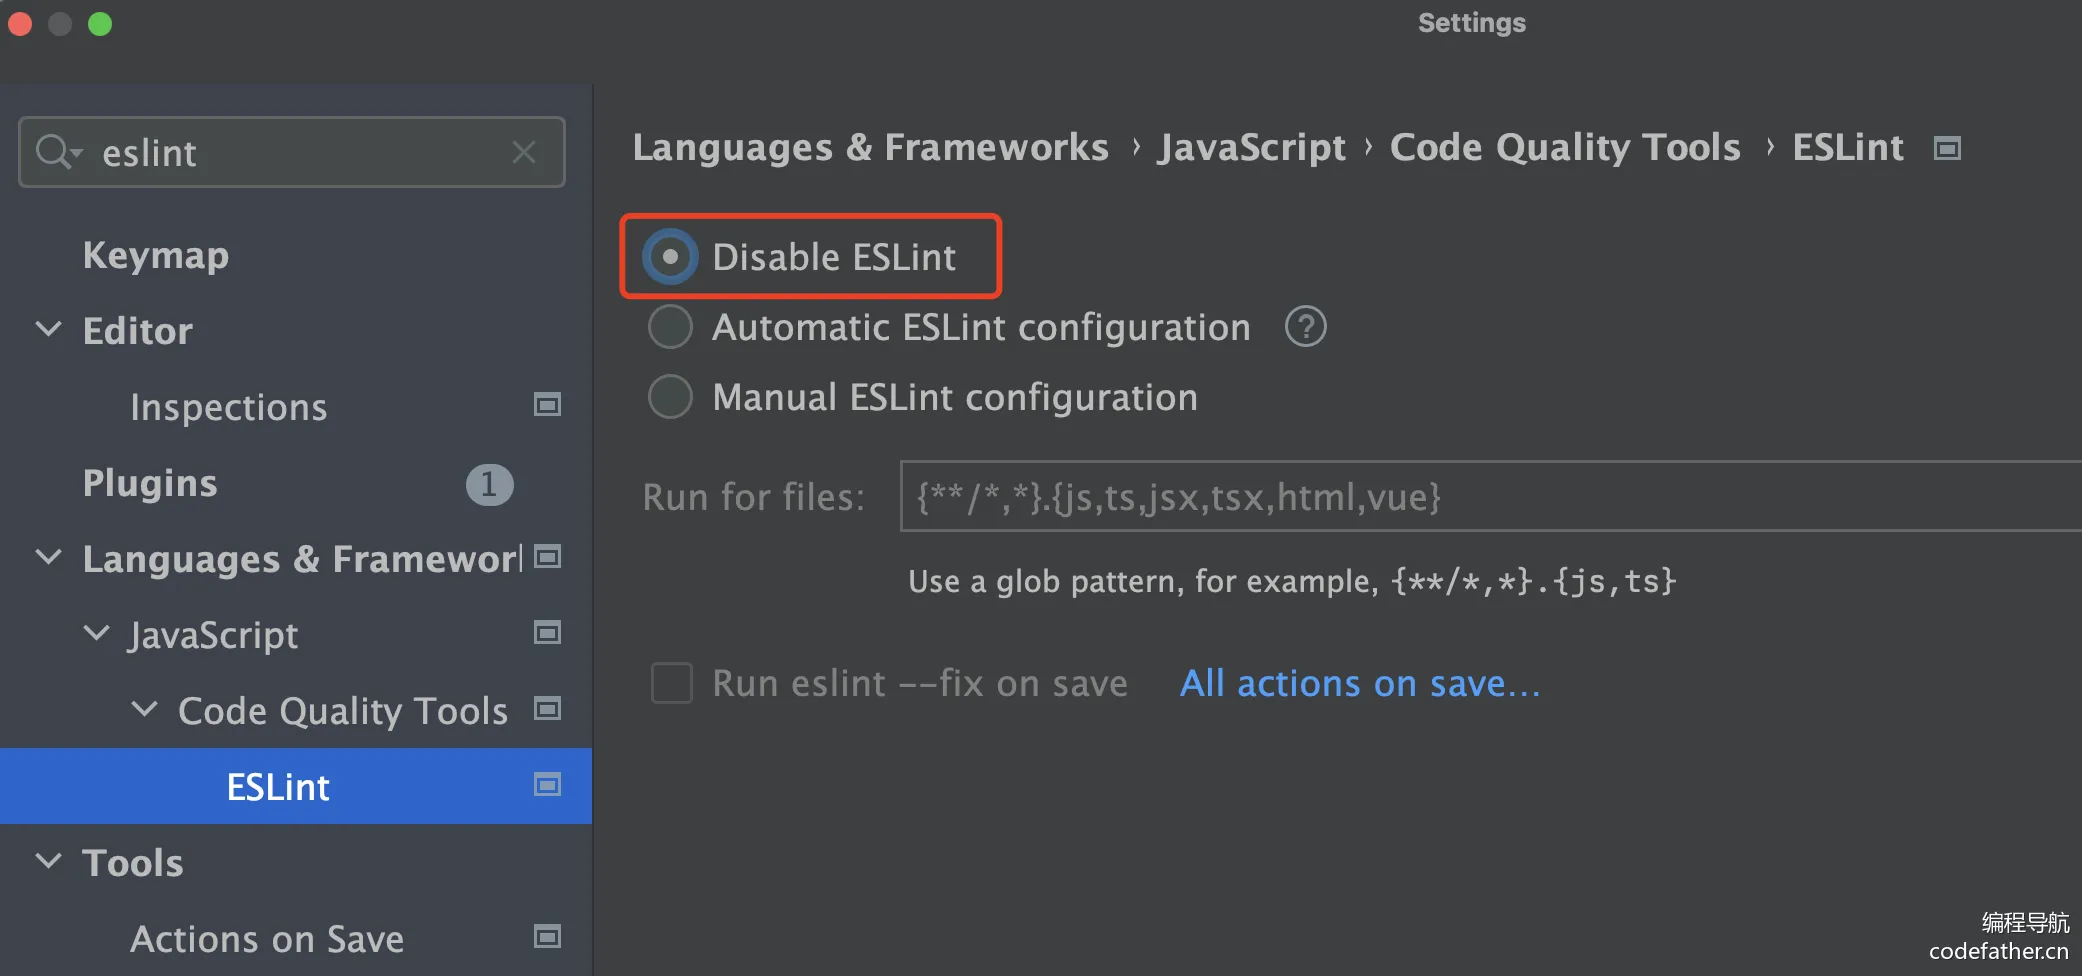
为了开发效率更高,你可能想关闭由于 ESLint 校验导致的编译错误,同样可以在开发工具中禁用 ESLint:
修改 eslint.config.js、.prettierrc.json、tsconfig.json 文件可以改变校验规则。
如果不使用脚手架,就需要自己整合这些工具:
- 代码规范:https://eslint.org/docs/latest/use/getting-started
- 代码美化:https://prettier.io/docs/en/install.html
- 直接整合:https://github.com/prettier/eslint-plugin-prettier#recommended-configuration(包括了 https://github.com/prettier/eslint-config-prettier#installation)
对于前端新手来说,你不需要深入了解这些,纯当工具去使用即可,应该尽快上手项目。
引入组件库
引入 Ant Design Vue 组件库,参考 官方文档 快速上手。
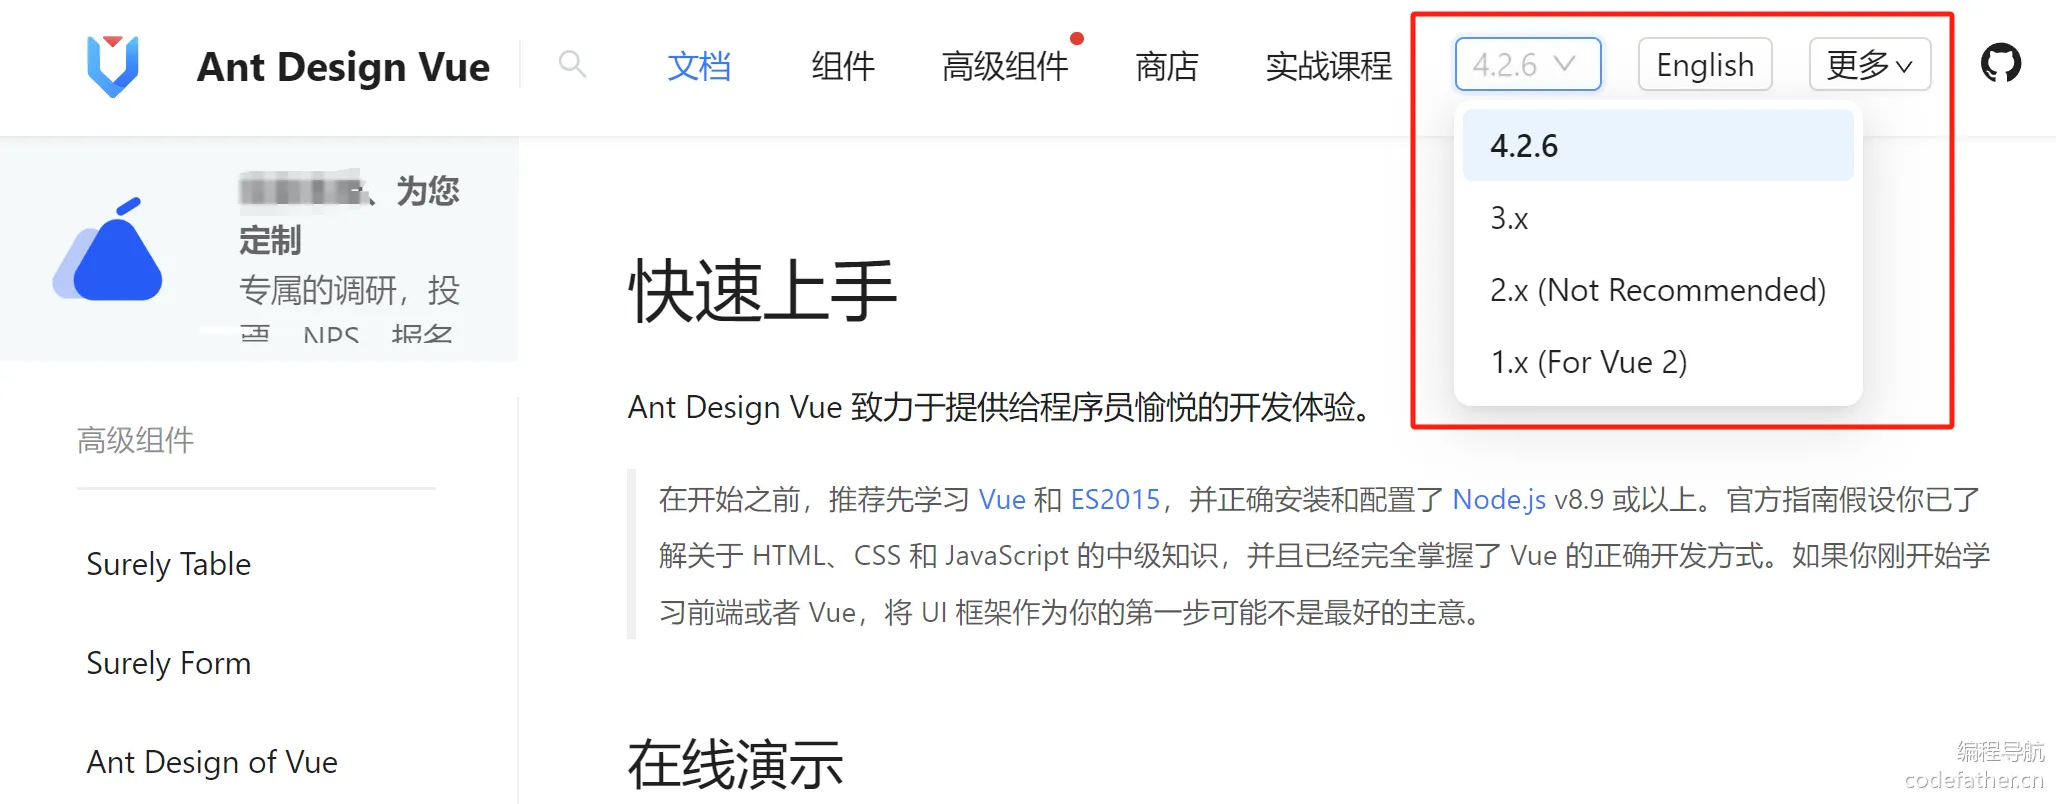
注意,本教程使用的是 v4.2.6 的组件库版本,如果后续阅读本教程中发现有组件或语法不一致,以官方文档为主,或者在网站右上角切换对应版本的文档即可:
执行安装:
npm i --save ant-design-vue@4.x
改变主入口文件 main.ts,全局注册组件(为了方便):
import './assets/main.css'

import { createApp } from 'vue'
import { createPinia } from 'pinia'

import App from './App.vue'
import router from './router'
import Antd from 'ant-design-vue';
import 'ant-design-vue/dist/reset.css';

const app = createApp(App)

app.use(createPinia())
app.use(router)
app.use(Antd)

app.mount('#app')
随便引入一个组件,如果显示出来,就表示引入成功。
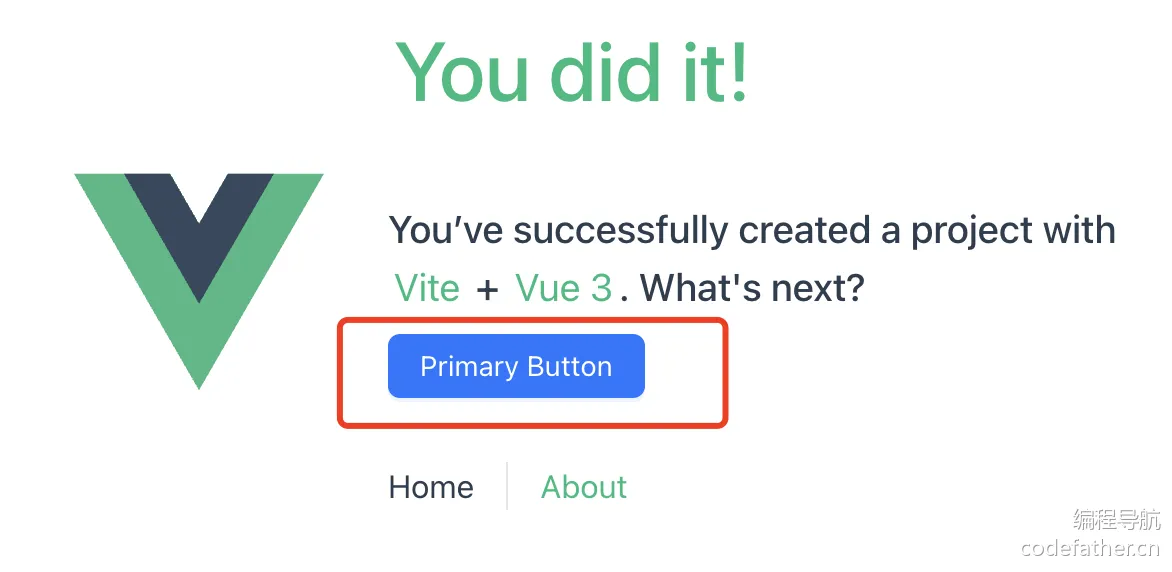
比如引入按钮:
<a-button type="primary">Primary Button</a-button>
效果如图:
开发规范
建议遵循 Vue3 的组合式 API (Composition API),而不是 选项式 API,开发更自由高效一些。
示例代码:
<template>
 	<div id="xxPage">
	</div>
</template>


	#xxPage { }
页面基本信息
可以修改项目根目录下的 index.html 文件,来定义页面的元信息,比如修改标题:
<!doctype html>
<html lang="">
  <head>


    <title>yun-图库</title>

  </head>
  <body>
    <div id="app"></div>

  </body>
</html>
还可以替换 public 目录下默认的 ico 图标为自己的,有很多 现成的网站 可以制作 ico 图标。
效果如图:

全局通用布局
1、基础布局结构
在 layouts 目录下新建一个布局 BasicLayout.vue, 在 App.vue 全局页面入口文件中引入。
App.vue 代码如下:
<template>
	<div id="app">
		<BasicLayout />
	</div>
</template>


	import BasicLayout from "@/layouts/BasicLayout.vue";
可以移除页面内的默认样式、并且移除 main.ts 中默认引入的 main.css,防止样式污染:
#app { }
选用 Ant Design 组件库的 Layout 组件 ,先把【上中下】布局编排好,然后再填充内容:
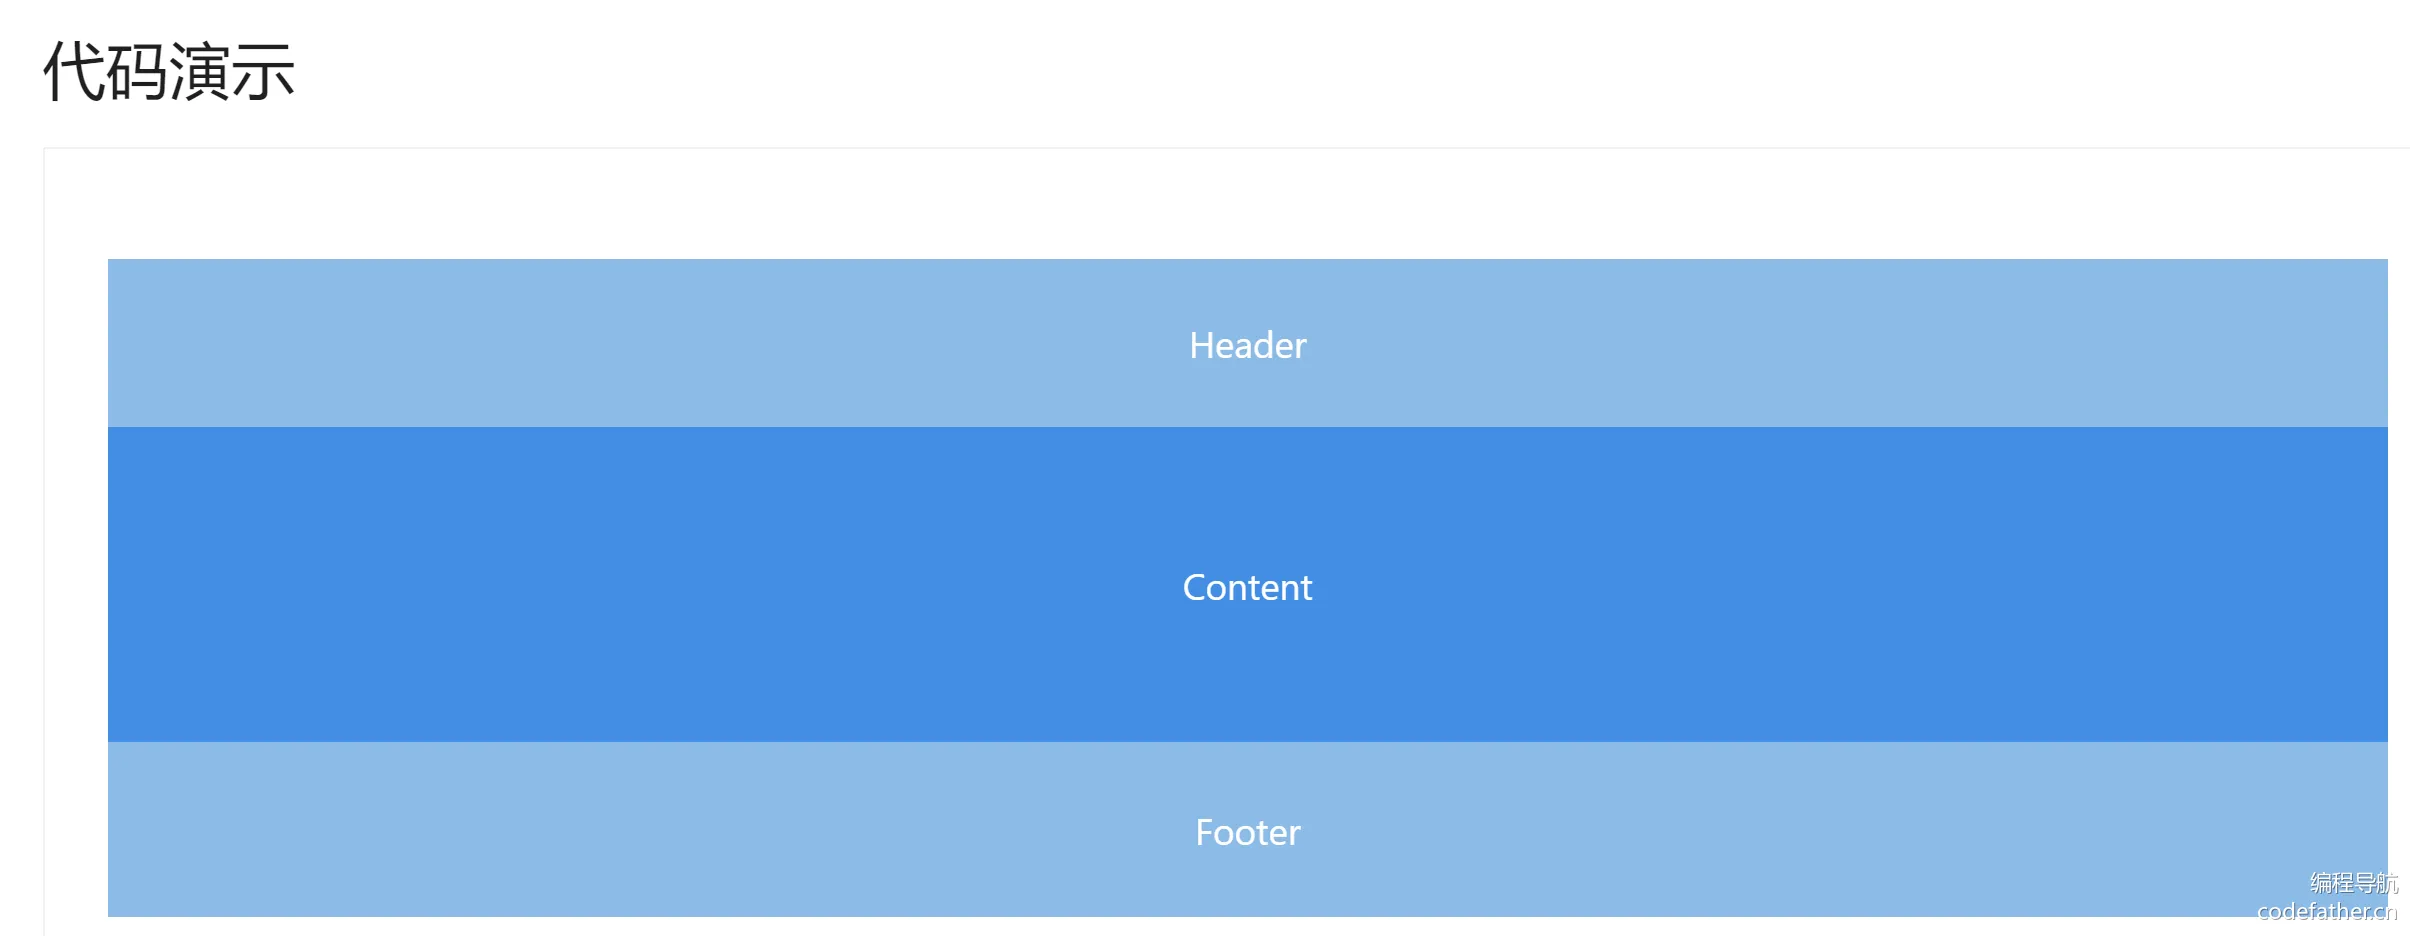
代码如下:
<template>
  <div id="basicLayout">
    <a-layout style="min-height: 100vh">
      <a-layout-header>Header</a-layout-header>
      <a-layout-content>Content</a-layout-content>
      <a-layout-footer>Footer</a-layout-footer>
    </a-layout>
  </div>
</template>
样式:
#basicLayout { }
2、全局底部栏
通常用于展示版权信息:
	  <a-layout-footer class="footer">
        	<a href="http://www.zwnsyw.top" target="_blank"> by Zwww </a>
      </a-layout-footer>
样式:
#basicLayout .footer {
  background: #efefef;
  padding: 16px;
  position: fixed;
  bottom: 0;
  left: 0;
  right: 0;
  text-align: center;
}
3、动态替换内容
项目使用了 Vue Router 路由库,可以在 router/index.ts 配置路由,能够根据访问的页面地址找到不同的文件并加载渲染。
修改 BasicLayout 内容部分的代码如下:
<a-layout-content class="content">
        <router-view />
</a-layout-content>
修改样式,要和底部栏保持一定的外边距,否则内容会被遮住:
#basicLayout .content {
  background: linear-gradient(to right, #fefefe, #fff);
  margin-bottom: 28px;
  padding: 20px;
}
4、全局顶部栏
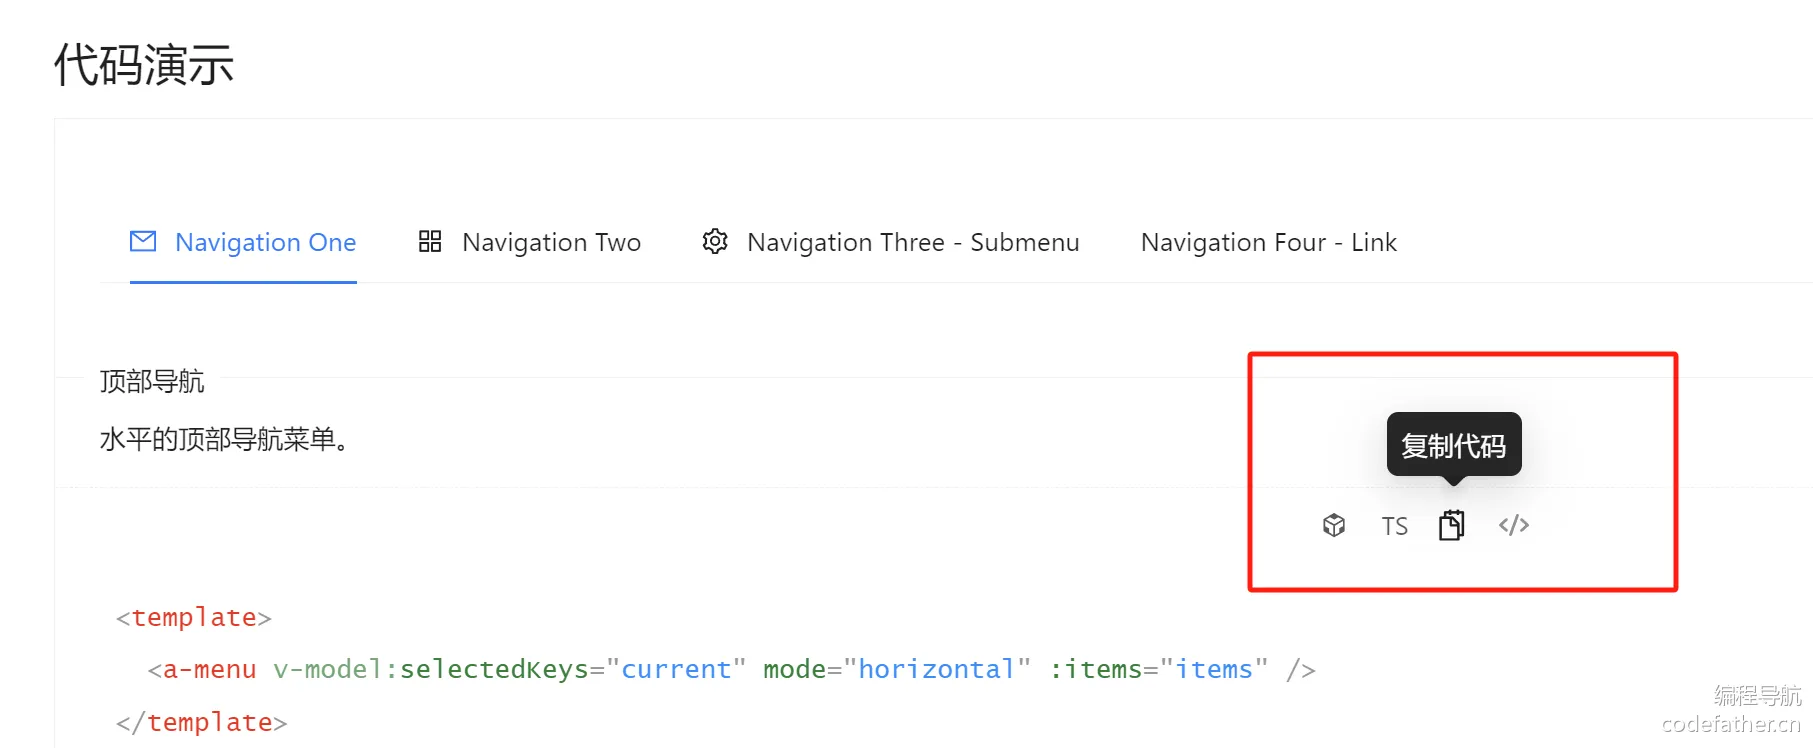
由于顶部栏的开发相对复杂,可以基于 Ant Design 的菜单组件 来创建 GlobalHeader 全局顶部栏组件,**组件统一放在 components 目录中 **。
先直接复制现成的组件示例代码到 GlobalHeader 中即可。
在基础布局中引入顶部栏组件:
<a-layout-header class="header">
	<GlobalHeader />
</a-layout-header>
引入代码如下:
import GlobalHeader from '@/components/GlobalHeader.vue'
效果如下:
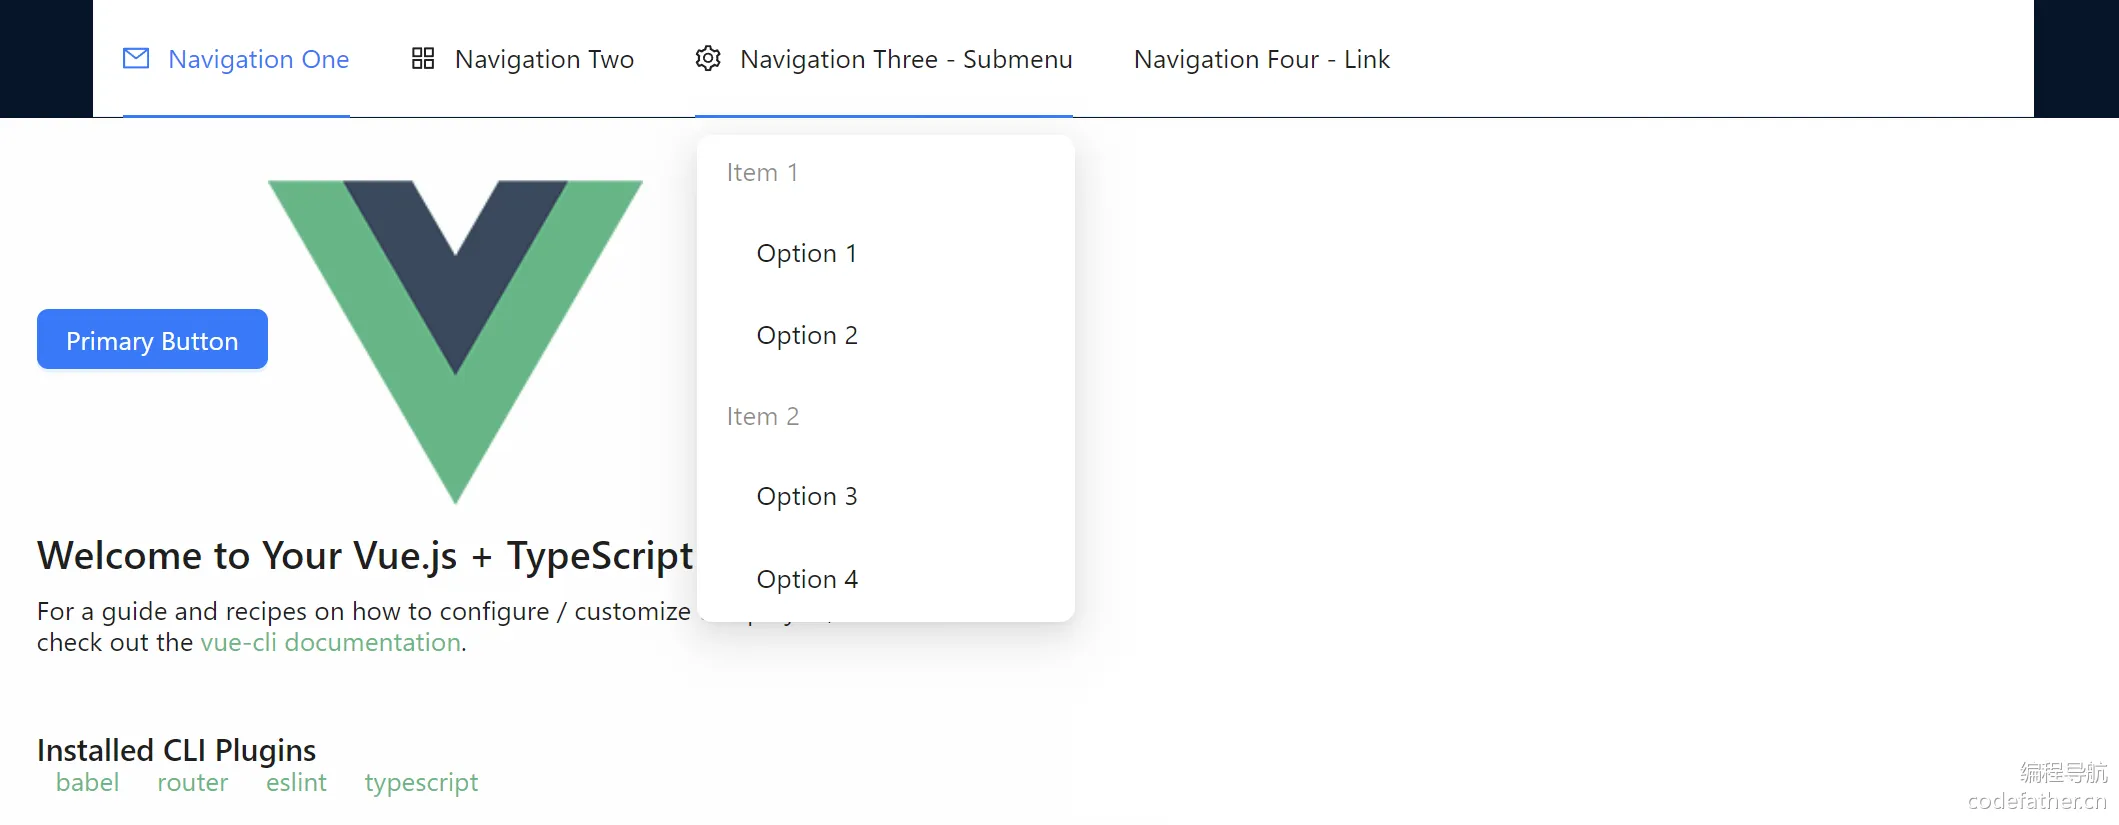
可以修改下全局 Header 的样式,清除一些默认样式(比如背景色等),样式代码如下:
#basicLayout .header {
  padding-inline: 20px;
  margin-bottom: 16px;
  color: unset;
  background: white;
}
接下来要修改 GlobalHeader 组件,完善更多内容。
1)给菜单外套一层元素,用于整体控制样式:
 <div id="globalHeader">
    <a-menu v-model:selectedKeys="current" mode="horizontal" :items="items" />
  </div>
2)根据我们的需求修改菜单配置,key 为要跳转的 URL 路径:
import { h, ref } from 'vue'
import { HomeOutlined } from '@ant-design/icons-vue'
import { MenuProps } from 'ant-design-vue'

const current = ref<string[]>(['home'])
const items = ref<MenuProps['items']>([
  {
    key: '/',
    icon: () => h(HomeOutlined),
    label: '主页',
    title: '主页',
  },
  { key: '/about', label: '关于', title: '关于' },
  {
    key: 'others',
    label: h('a', { href: 'https://www.zwnsyw.top', target: '_blank' }, '听凭风引'),
    title: '听凭风引',
  },
])
效果如图:
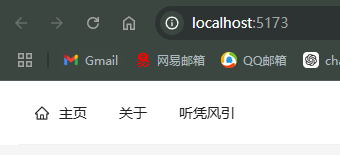
3)完善全局顶部栏,左侧补充网站图标和标题。
先把 logo.png 放到 src/assets 目录下,替换掉原本的默认 Logo:

修改 GlobalHeader 代码,补充 HTML:
   <RouterLink to="/">
      <div class="title-bar">
        <img class="logo" src="api/images/5b7MdgRHcRPX/logo.svg" alt="logo" />
        <div class="title">云图库</div>
      </div>
    </RouterLink>
其中,RouterLink 组件的作用是支持超链接跳转(不刷新页面)。
补充 CSS 样式:
.title-bar {
  display: flex;
  align-items: center;
}

.title {
  color: black;
  font-size: 18px;
  margin-left: 16px;
}

.logo {
  height: 48px;
}
4)完善顶部导航栏,右侧展示当前用户的登录状态(暂时用登录按钮代替):
    <div class="user-login-status">
      <a-button type="primary" href="#root/QzGBY7Py1iOo">登录</a-button>
    </div>
5)优化导航栏的布局,采用 栅格组件的自适应布局(左中右结构,左侧右侧宽度固定,中间菜单栏自适应)
<template>
  <div id="globalHeader">
    <a-row :wrap="false">
      <a-col flex="200px">
        <RouterLink to="/">
          <div class="title-bar">
            <img class="logo" src="api/images/5b7MdgRHcRPX/logo.svg" alt="logo" />
            <div class="title">云图库</div>
          </div>
        </RouterLink>
      </a-col>
      <a-col flex="auto">
        <a-menu v-model:selectedKeys="current" mode="horizontal" :items="items" />
      </a-col>
      <a-col flex="120px">
        <div class="user-login-status">
          <a-button type="primary" href="#root/QzGBY7Py1iOo">登录</a-button>
        </div>
      </a-col>
    </a-row>
  </div>
</template>
效果如图,可以尝试缩小浏览器窗口观察导航条的变化:
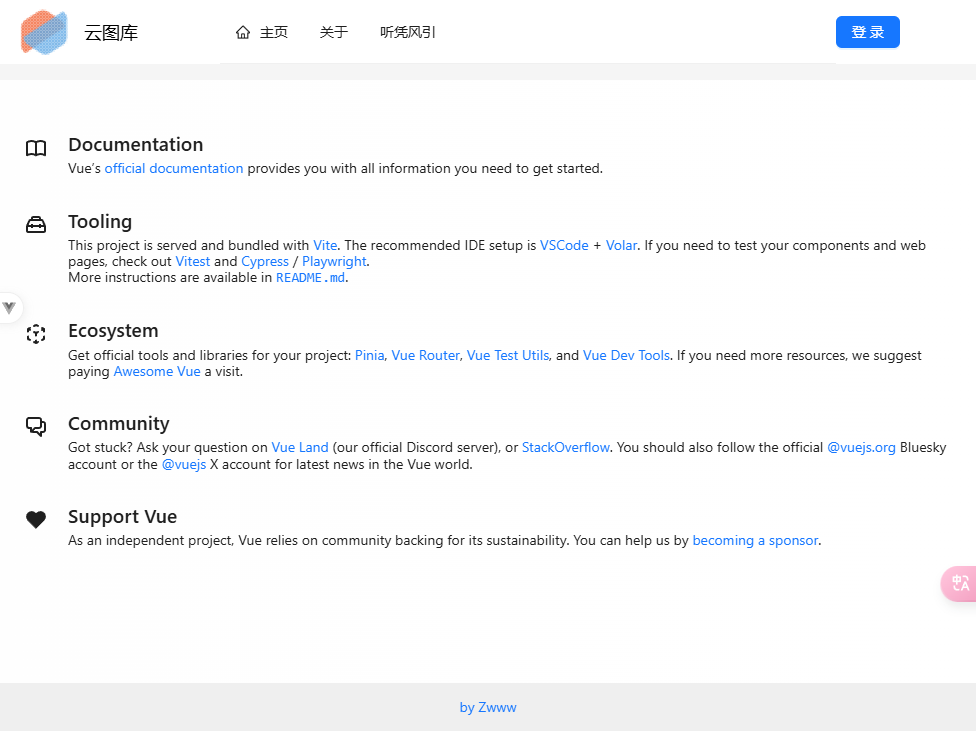
路由
目标:点击菜单项后,可以跳转到对应的页面;并且刷新页面后,对应的菜单自动高亮。
1、修改路由配置
按需修改 router/index.ts 文件的 routes 配置,定义我们需要的页面路由,每个 path 对应一个 component(要加载的组件):
  routes: [
    {
      path: '/',
      name: 'home',
      component: HomeView
    },
    {
      path: '/about',
      name: 'about',
      // route level code-splitting
      // this generates a separate chunk (About.[hash].js) for this route
      // which is lazy-loaded when the route is visited.
      component: () => import('../views/AboutView.vue')
    }
  ]
})
观察上述代码,会发现 component 支持直接传入组件、或者使用 import 按需懒加载组件,按需加载是一种优化首次打开站点性能的方式。
2、路由跳转
给 GlobalHeader 的菜单组件绑定跳转事件:
import { useRouter } from 'vue-router'
const router = useRouter()
// 路由跳转事件
const doMenuClick = ({ key }: { key: string }) => {
  router.push({ path: key })
}
修改 HTML 模板,绑定事件:
<a-menu v-model:selectedKeys="current" mode="horizontal" :items="items" @click="doMenuClick" />
3、高亮同步
刷新页面后,你会发现当前菜单项并没有高亮,所以需要同步路由的更新到菜单项高亮。
同步高亮原理:
- 点击菜单时,Ant Design 组件已经通过 v-model 绑定 current 变量实现了高亮。
- 刷新页面时,需要获取到当前 URL 路径,然后修改 current 变量的值,从而实现同步。
使用 Vue Router 的 afterEach 路由钩子实现,每次改变路由或刷新页面时都会自动更新 current 的值,从而实现高亮:
const router = useRouter();
// 当前选中菜单
const current = ref<string[]>([]);
// 监听路由变化,更新当前选中菜单高亮
router.afterEach((to, from, next) => {
  current.value = [to.path]
})
💡思考:大家有没有发现,路由和菜单配置中,有一些是重复的呢?有没有更好地方式来配置路由和菜单项,不用每次修改时都要改两边的代码呢?答案就是将路由配置数组传递给菜单组件,大家可以尝试自行实现。(鱼皮的 OJ 判题系统项目、鱼答答 AI 答题应用平台项目 中有讲过)
请求
引入 Axios 请求库
一般情况下,前端只负责界面展示和动效交互,尽量避免写复杂的逻辑;当需要获取数据时,通常是向后端提供的接口发送请求,由后端执行操作(比如保存数据)并响应数据给前端。
前端如何向后端发送请求呢?最传统的方式是使用 AJAX 技术。但其代码有些复杂,我们可以使用第三方的封装库,来简化发送请求的代码,比如主流的请求工具库 Axios。
1、请求工具库
安装请求工具类 Axios,参考官方文档:https://axios-http.com/docs/intro
代码:
npm install axios
2、全局自定义请求
需要自定义全局请求地址等,参考 Axios 官方文档,编写请求配置文件 request.ts。包括全局接口请求地址、超时时间、自定义请求响应拦截器等。
响应拦截器的应用场景:我们需要对接口的 通用响应 进行统一处理,比如从 response 中取出 data;或者根据 code 去集中处理错误。这样不用在每个接口请求中都去写相同的逻辑。
比如可以在全局响应拦截器中,读取出结果中的 data,并校验 code 是否合法,如果是未登录状态,则自动登录。
示例代码如下,其中 withCredentials: true 一定要写,否则无法在发请求时携带 Cookie,就无法完成登录。
代码如下:
import axios from 'axios'
import { message } from 'ant-design-vue'

// 创建 Axios 实例
const myAxios = axios.create({
  baseURL: 'http://localhost:8123',
  timeout: 60000,
  withCredentials: true,
})

// 全局请求拦截器
myAxios.interceptors.request.use(
  function (config) {
    // Do something before request is sent
    return config
  },
  function (error) {
    // Do something with request error
    return Promise.reject(error)
  },
)

// 全局响应拦截器
myAxios.interceptors.response.use(
  function (response) {
    const { data } = response
    // 未登录
    if (data.code === 40100) {
      // 不是获取用户信息的请求,并且用户目前不是已经在用户登录页面,则跳转到登录页面
      if (
        !response.request.responseURL.includes('user/get/login') &&
        !window.location.pathname.includes('/user/login')
      ) {
        message.warning('请先登录')
        window.location.href = `/user/login?redirect=${window.location.href}`
      }
    }
    return response
  },
  function (error) {
    // Any status codes that falls outside the range of 2xx cause this function to trigger
    // Do something with response error
    return Promise.reject(error)
  },
)

export default myAxios
3、自动生成请求代码
如果采用传统开发方式,针对每个请求都要单独编写代码,很麻烦。
推荐使用 OpenAPI 工具,直接自动生成即可:https://www.npmjs.com/package/@umijs/openapi
按照官方文档的步骤,先安装:
npm i --save-dev @umijs/openapi
在 **项目根目录 **新建 openapi.config.js,根据自己的需要定制生成的代码:
import { generateService } from '@umijs/openapi'

generateService({
  requestLibPath: "import request from '@/request'",
  schemaPath: 'http://localhost:8123/api/v2/api-docs',
  serversPath: './src',
})
注意,要将 schemaPath 改为自己后端服务提供的 Swagger 接口文档的地址。
在 package.json 的 script 中添加 "openapi": "node openapi.config.js"
执行即可生成请求代码,还包括 TypeScript 类型:
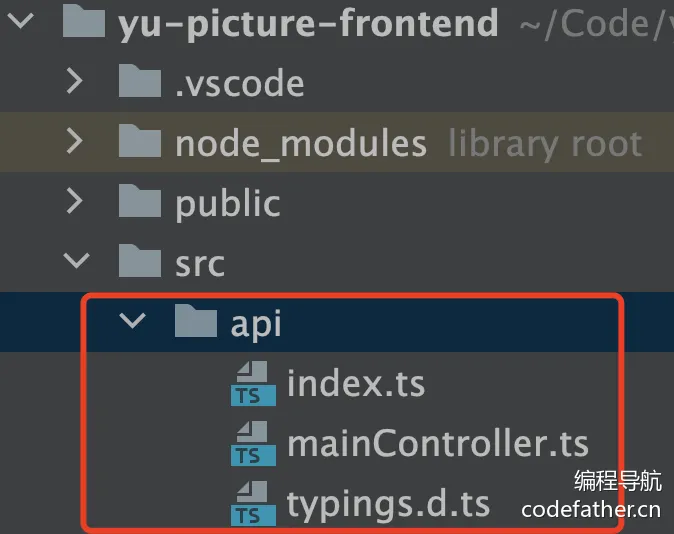
以后每次后端接口变更时,只需要重新生成一遍就好,非常方便~
4、测试请求
可以尝试在任意页面代码中调用 API:
import { healthUsingGet } from '@/api/mainController.ts'
healthUsingGet().then((res) => {
  console.log(res)
})
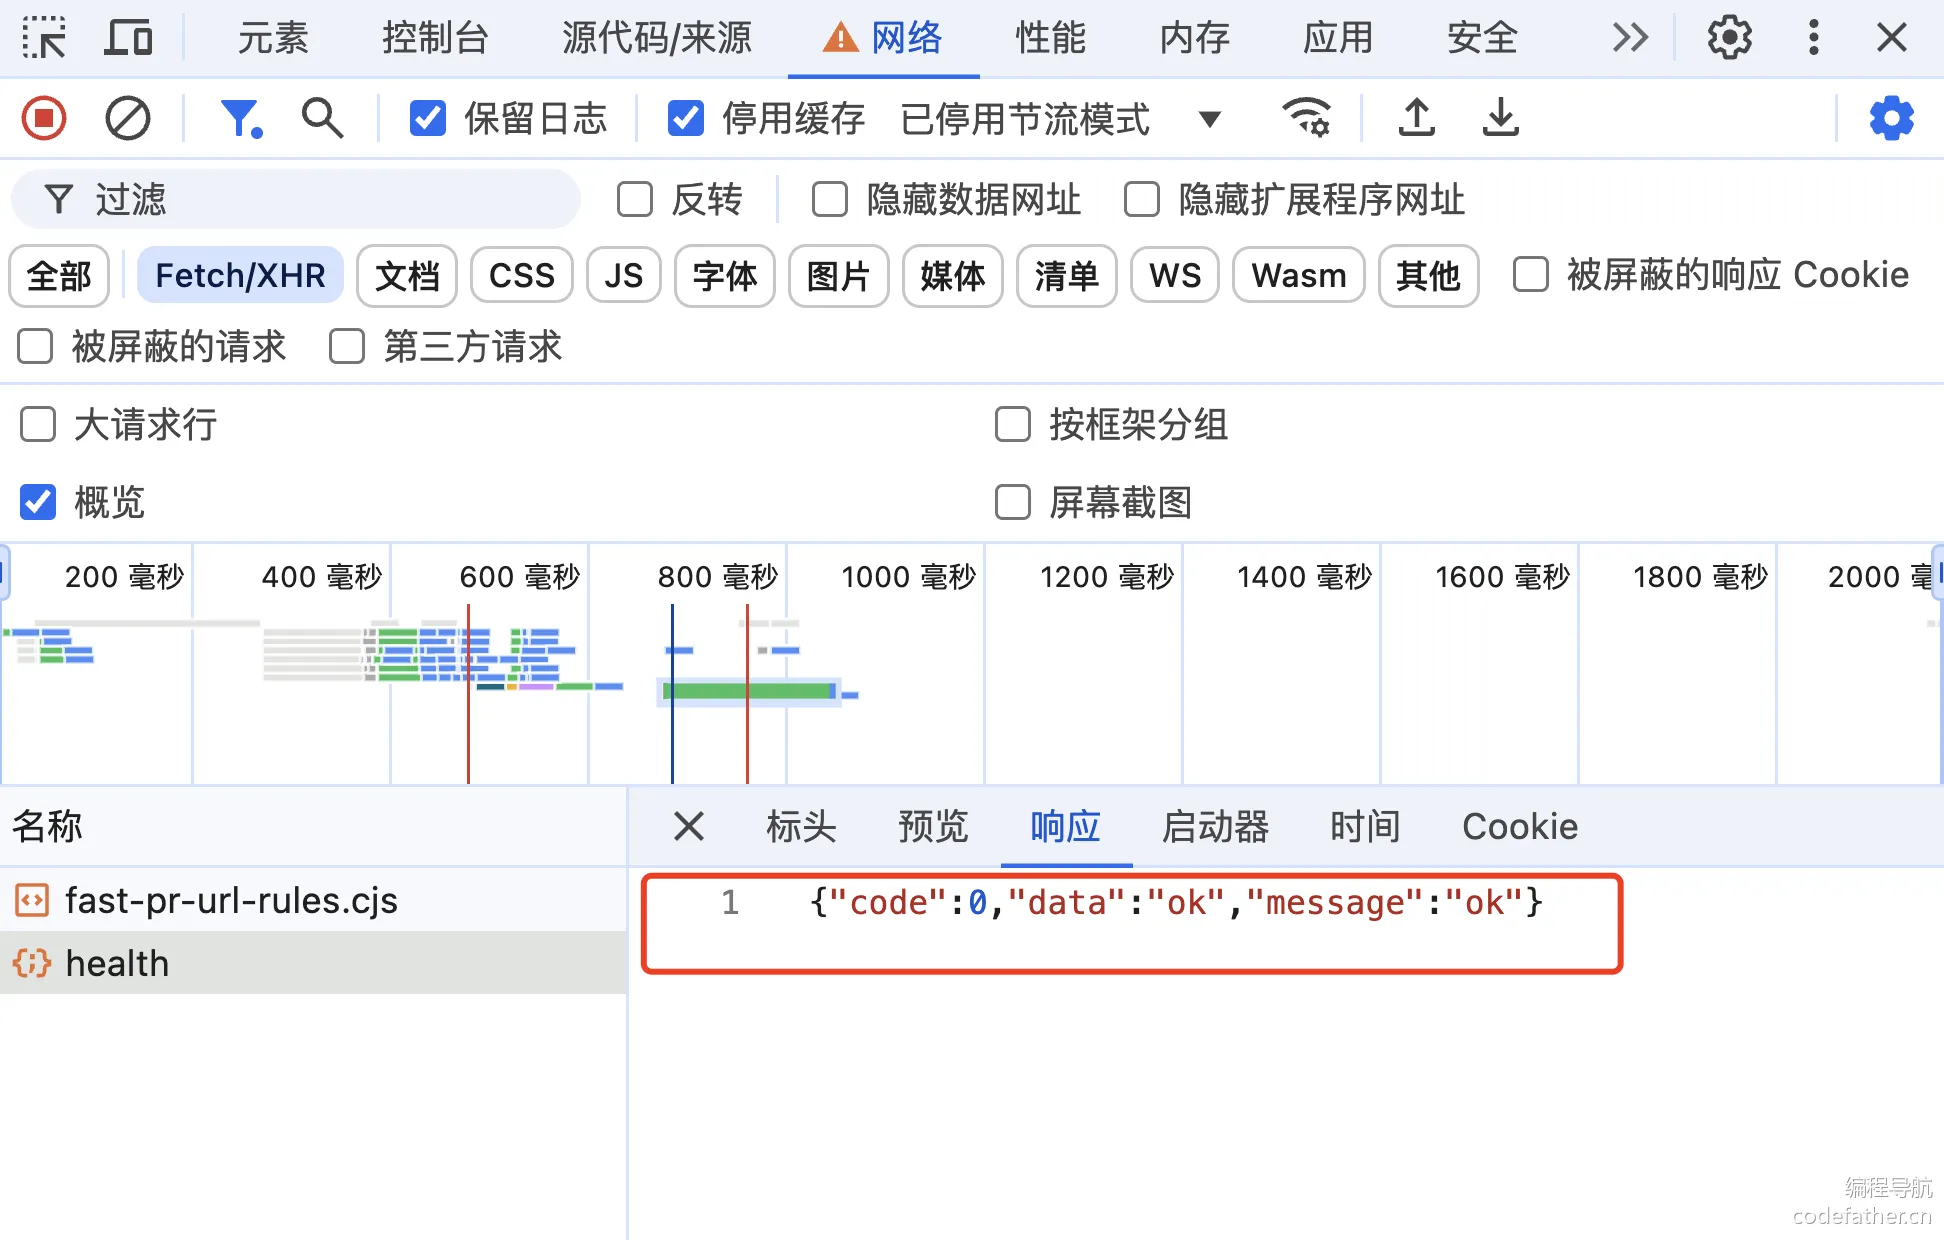
按 F12 打开开发者工具查看请求,由于我们后端已经添加了全局跨域配置,正常情况下应该能看到如下响应:
5、解决跨域(可选)
如果发现请求错误,要查看错误信息具体分析。比如遇到 跨域问题,这是由于前端网页地址和后端请求接口地址不同导致的:
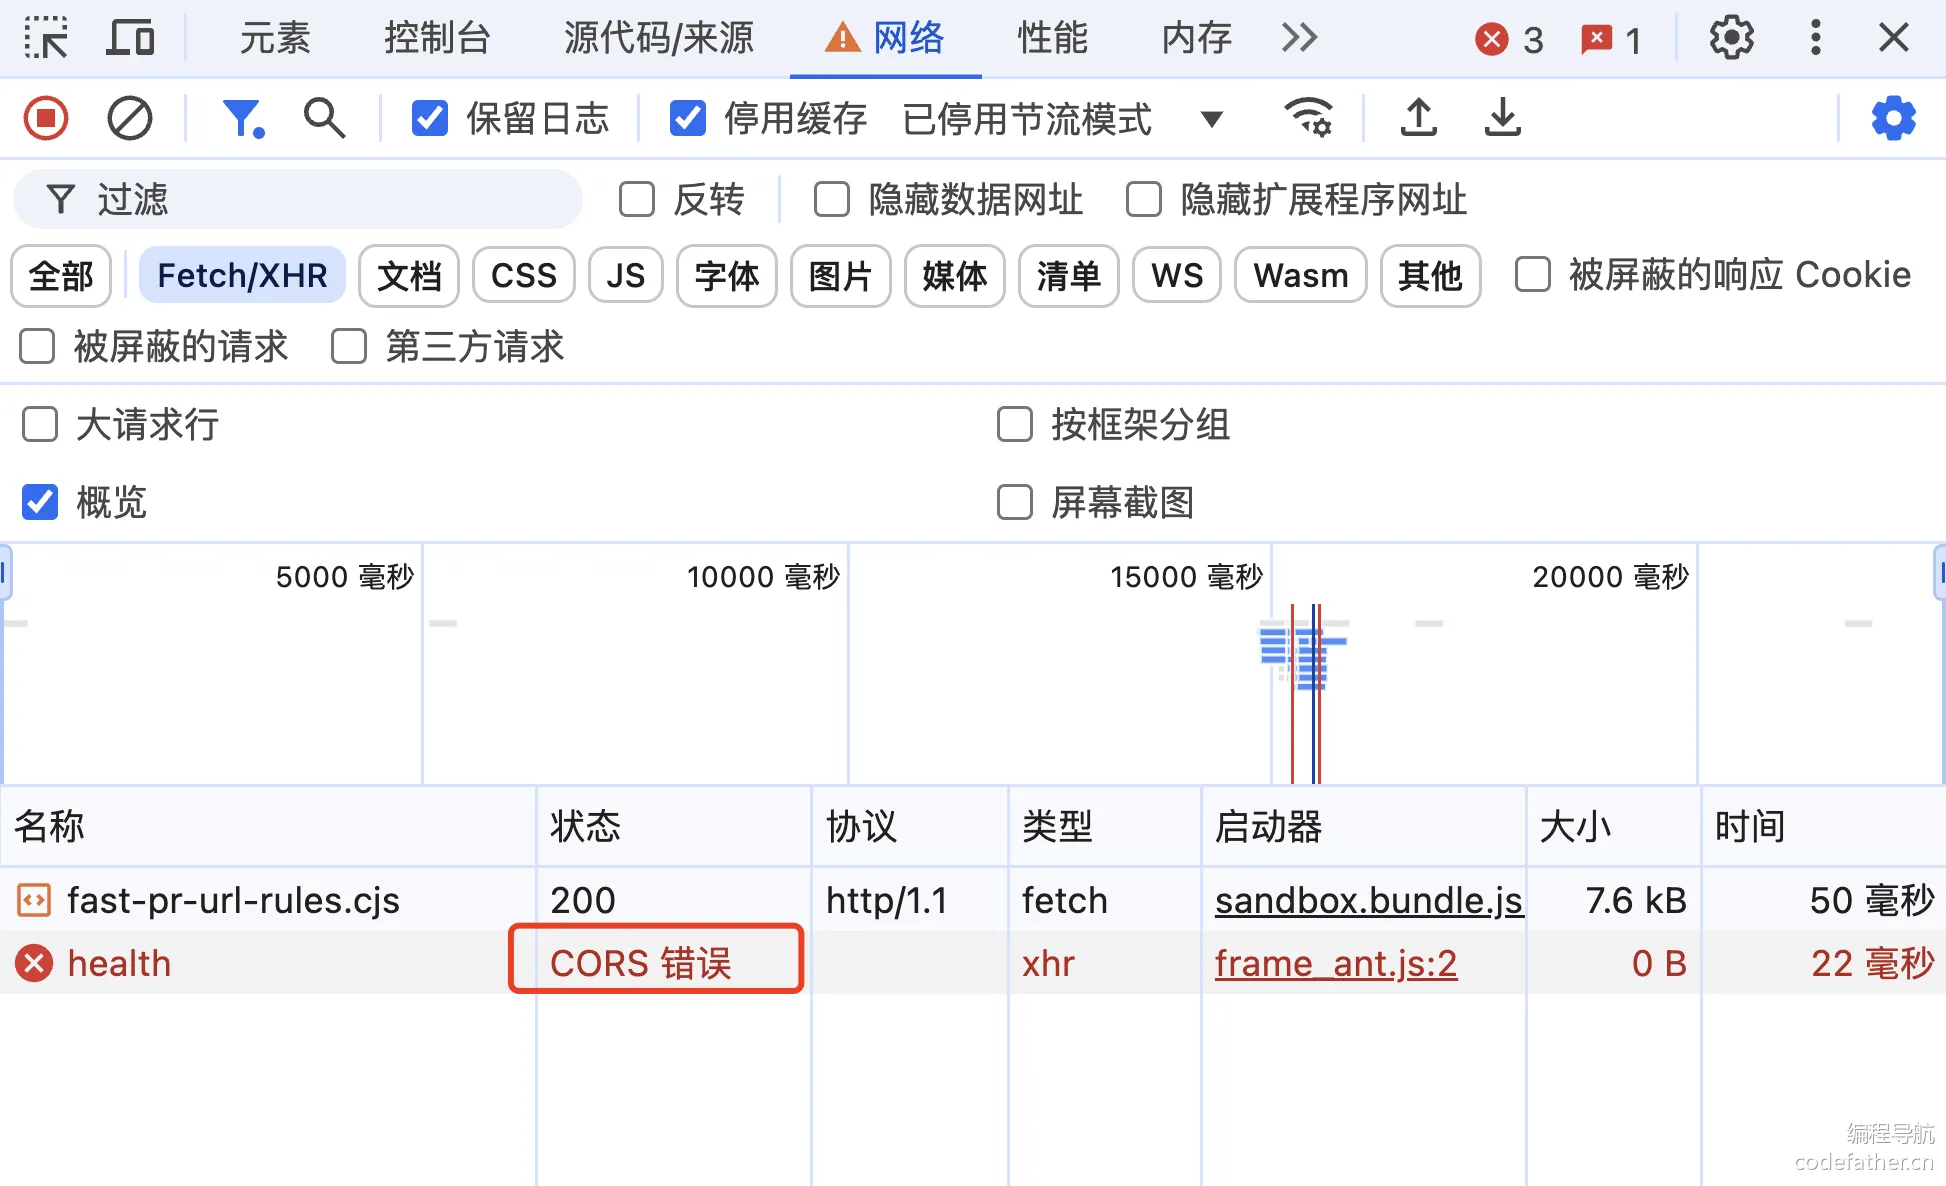
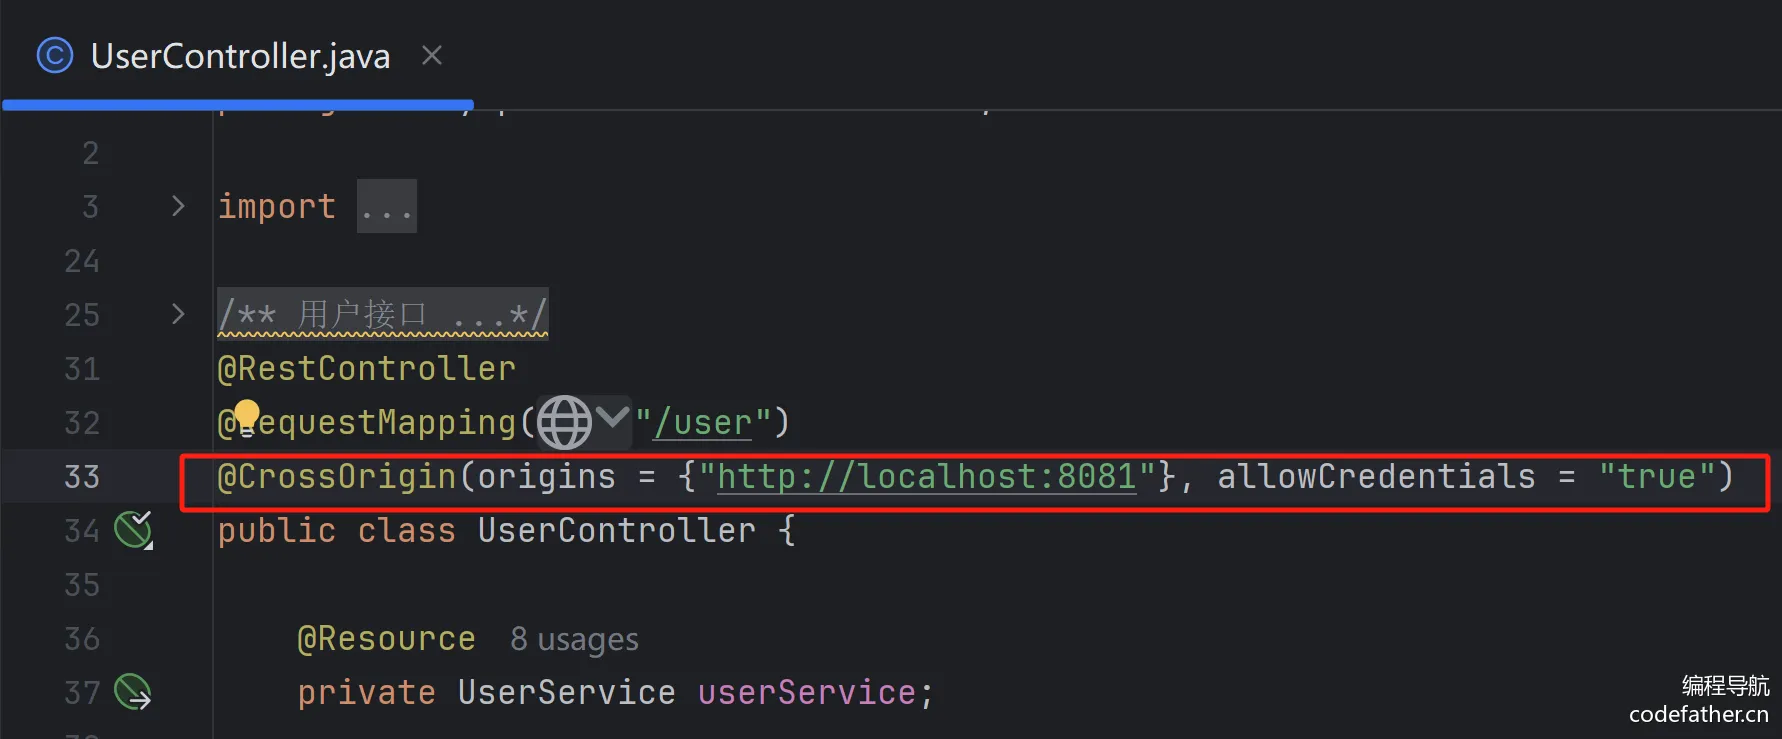
这种情况下,可以通过修改后端代码,增加全局跨域配置或者跨域注解来解决:
如果后端代码无法修改,还可以通过前端代理服务器来解决,如果项目使用 Vite,内置了代理服务器。可以修改 vite.config.ts 文件,增加代理配置:
export default defineConfig({ server: { proxy: { '/api': 'http://localhost:8123', } }, })
同时修改 request.ts,移除请求前缀:QFU7mhNWUEojH1P/mbZkTNJwHPK/zMECeOY+OMwV/3U=
// 创建 Axios 实例 const myAxios = axios.create({ baseURL: '', timeout: 60000, withCredentials: true, })
这样一来,前端发送的请求域名就等同于当前 URL 的域名,就不会出现跨域。但是访问到 /api 开头的接口时,会被代理到请求 8123 端口的后端服务器,从而完成请求。
💡 还有很多前端代理工具,比如 Whistle,前端方向的同学可以去了解下。
全局状态管理
什么是全局状态管理?
答:所有页面全局共享的变量,而不是局限在某一个页面中。
适合作为全局状态的数据:已登录用户信息(每个页面几乎都要用)
Pinia 是一个主流的状态管理库,相比于 Vuex 来说使用更简单,可参考 入门文档 进行引入。
1、引入 Pinia
此处由于 create-vue 脚手架已经帮我们整合了 Pinia,无需手动引入,直接使用即可。
2、定义状态
在 src/stores 目录下定义 user 模块,定义了用户的存储、远程获取、修改逻辑:
import { defineStore } from 'pinia'
import { ref } from 'vue'

export const useLoginUserStore = defineStore('loginUser', () => {
  const loginUser = ref<any>({
    userName: '未登录',
  })

  async function fetchLoginUser() {
    // todo 由于后端还没提供接口,暂时注释
    // const res = await getCurrentUser()
    // if (res.data.code === 0 && res.data.data) {
    //   loginUser.value = res.data.data
    // }
  }

  function setLoginUser(newLoginUser: any) {
    loginUser.value = newLoginUser
  }

  return { loginUser, setLoginUser, fetchLoginUser }
})
3、使用状态
可以直接使用 store 中导出的状态变量和函数。
在首次进入到页面时,一般我们会尝试获取登录用户信息。修改 App.vue,编写远程获取数据代码:
const loginUserStore = useLoginUserStore() loginUserStore.fetchLoginUser()
在任何页面中都可以使用数据,比如 GlobalHeader 全局顶部栏组件中直接展示:
{{ JSON.stringify(loginUserStore.loginUser) }}
修改全局顶部栏组件,在右侧展示登录状态:
		<div class="user-login-status">
          <div v-if="loginUserStore.loginUser.id">
            {{ loginUserStore.loginUser.userName ?? '无名' }}
          </div>
          <div v-else>
            <a-button type="primary" href="#root/QzGBY7Py1iOo">登录</a-button>
          </div>
        </div>
4、测试全局状态管理
在 userStore 中编写测试代码,测试用户状态的更新:
async function fetchLoginUser() {
    // todo 由于后端还没提供接口,暂时注释
    // const res = await getCurrentUser()
    // if (res.data.code === 0 && res.data.data) {
    //   loginUser.value = res.data.data
    // }

    //test全局登入态 后续移除
    setTimeout(()=>{
      loginUser.value = {
        userName: 'admin',
        id: 1
      }
    },3000)

  }
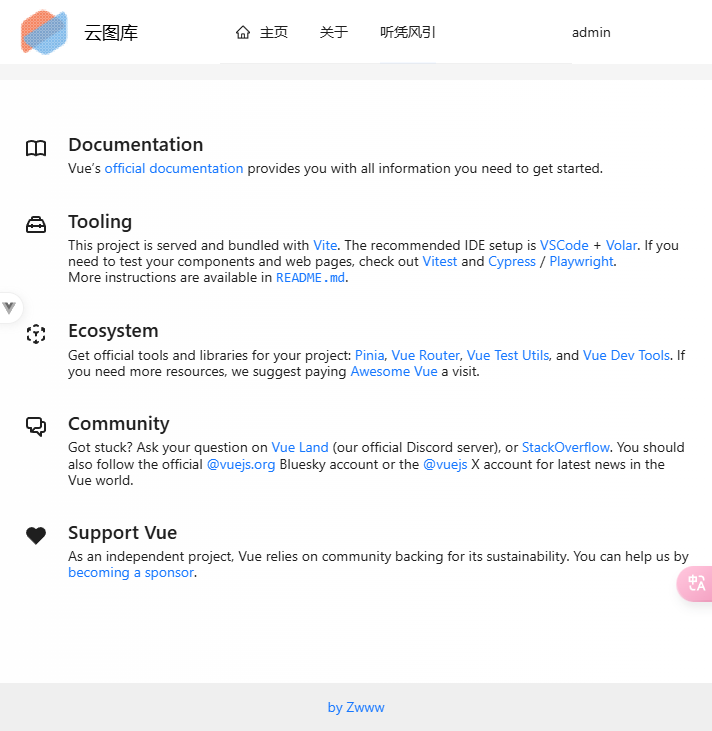
查看效果,等待 3 秒后网站右上方会展示出登录用户信息:
至此,一个入门级的前端项目就初始化好了,接下来我们就可以进行页面开发。
页面开发流程
我们通过开发一个简易的示例页面,来了解页面开发的流程。
1)新建 src/pages 目录,用于存放所有的页面文件。
然后在 pages 目录下新建页面文件,将所有页面按照 url 层级进行创建,并且页面名称尽量做到“见名知意”。
举个例子:
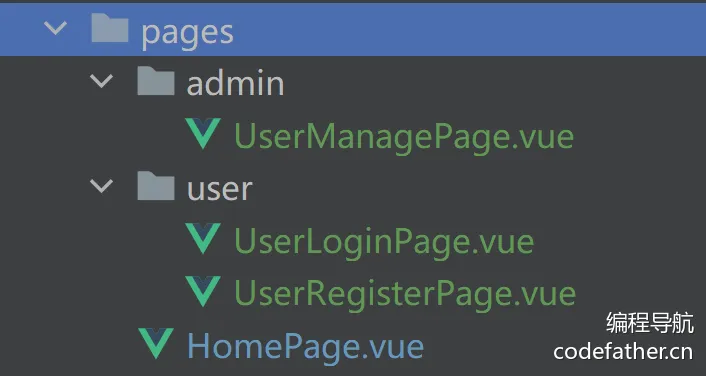
其中,/user/login 地址就对应了 UserLoginPage。
此处我们新建 HomePage.vue 即可。
2)每次新建页面时,需要在 router/index.ts 中配置路由,比如欢迎页的路由为:
const routes: Array<RouteRecordRaw> = [ { path: "/", name: "home", component: HomeView, }, ... ]
然后在路由文件中,引入页面 HomePage:
import HomePage from "@/pages/HomePage.vue"; const routes: Array<RouteRecordRaw> = [ { path: "/", name: "home", component: HomePage, }, ... ]
任意修改页面代码:
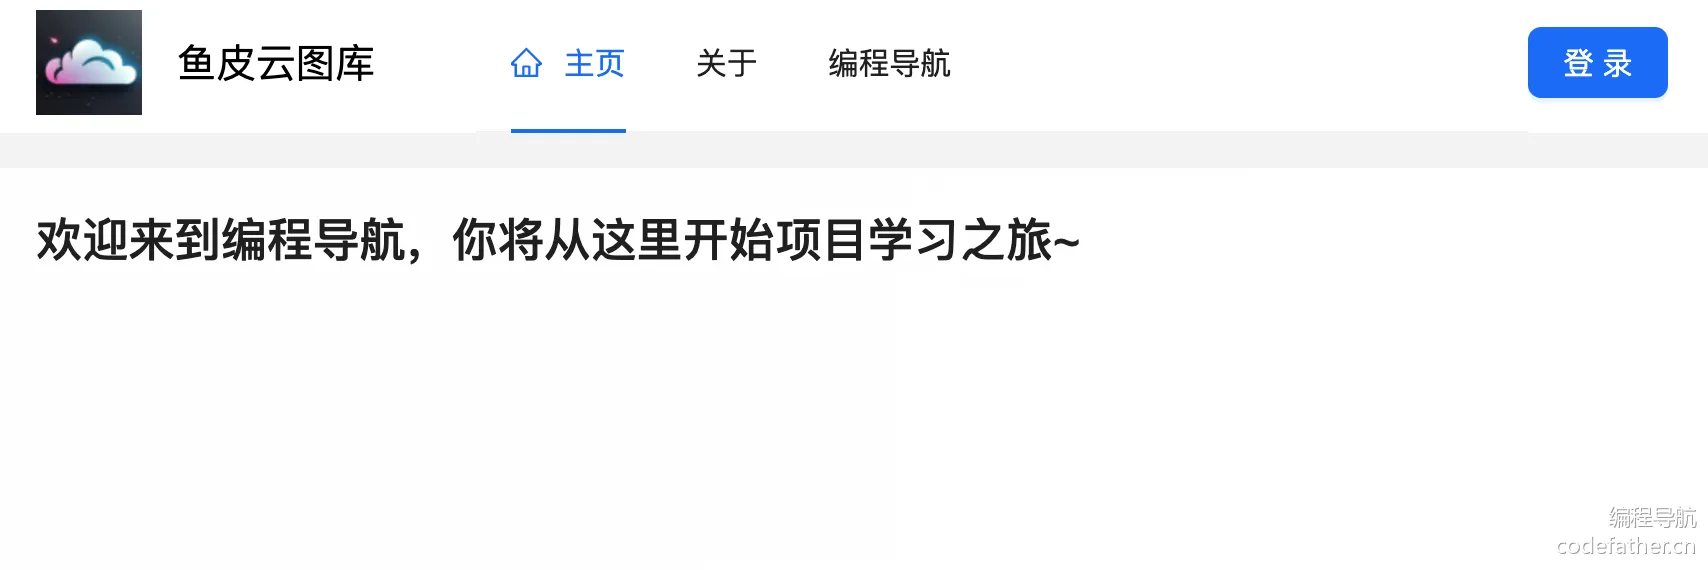
<template> <div id="homePage"> <h1>{{ msg }}</h1> </div> </template> const msg = "欢迎来到编程导航,你将从这里开始项目学习之旅~"; #homePage { }
页面效果如图:
扩展
在后续开发中你会发现,Ant Design Vue 默认使用的是英文文案,如果需要替换为中文,可以参考 国际化文档,只需给整个应用包裹一层组件即可完成。
本节教程到这里就结束了,建议大家从 0 实操下项目初始化,以后自己搭建一个新项目,也不会觉得困难啦~
项目分区导航:⬅️ 01-项目总览 | 02-项目初始化 | ➡️ 03-AI 图片编辑
💬 评论